為期30天的IT鐵人賽終於到了最後幾天了
接下來幾天我會用來完成一個app
我的設定裡
這個app是一個類似記事本的app
介面的部分是
上面有一個EditText可以將需要記事的內容輸入
按下按鈕後會利用RecyclerView將資料顯示到下方
當不需要此記事時也可以長按將它從RecyclerView中刪除
功能
將要輸入的內容輸入到EditText裡並按下Button送出資料
按下Button後將資料存進SharedPrefences
接著再將SharedPrefences裡的資料存成ArrayList並傳給RecyclerView顯示
這是它呈現的樣子
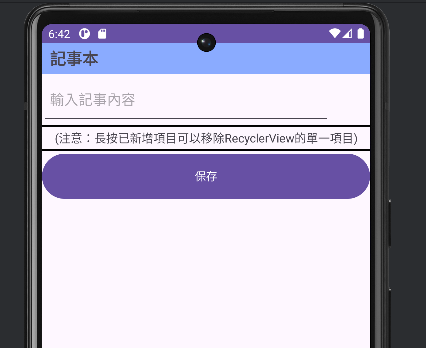
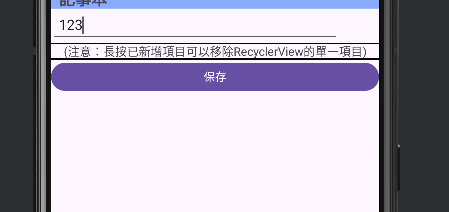
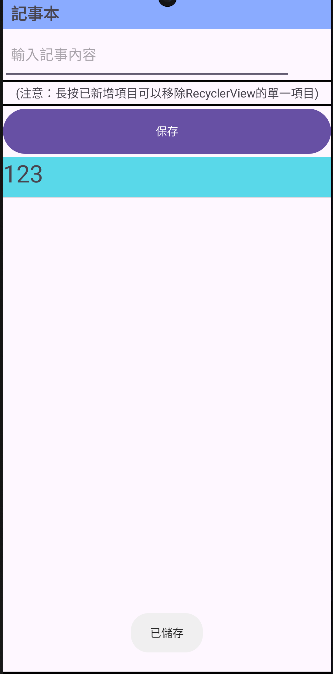
首先先來做個最基本的介面
xml(activity_main)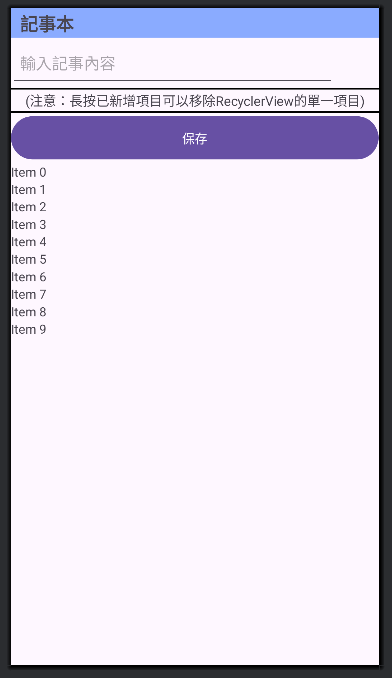
recyclerview的Item也只用這樣而已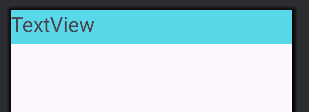
它們的程式碼我會放在最下面
介面拉好後就先從新增功能開始吧
要能夠使用RecyclerView的話還需要新增一個Adapter就先從這裡開始
與上次(Day20)不同的是這一次我把Adapter放在跟MainActivity不同的Activity裡
開好Activity後我將它命名為ListAdapter並加上extends RecyclerView.Adapter<ListAdapter.ViewHolder>
這時會出現紅線底線
選第一個按Enter
可以看到它還是有紅色的地方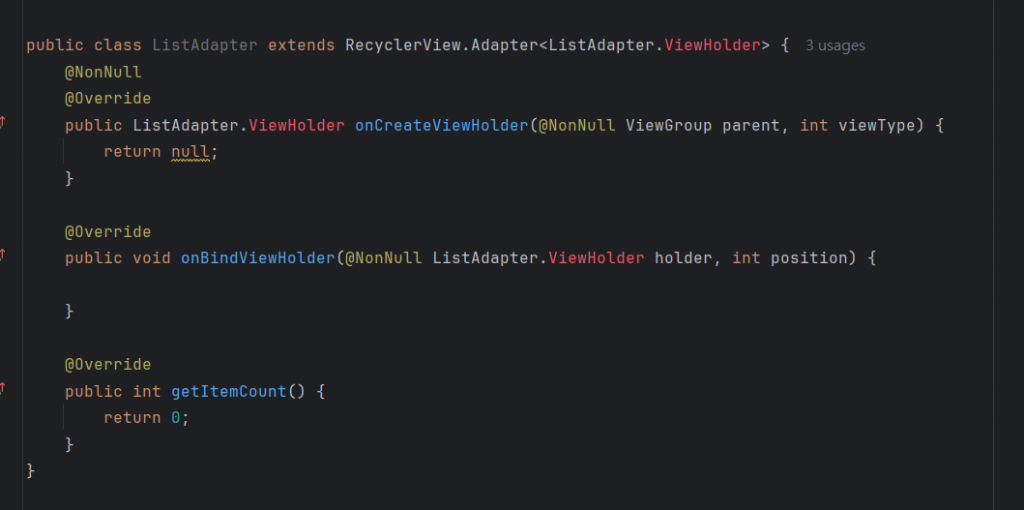
接著就對每一個有紅色的地方一直按Alt+Enter然後選第一個,直到全部的紅色都消失就好了
這就是沒有紅色地方的樣子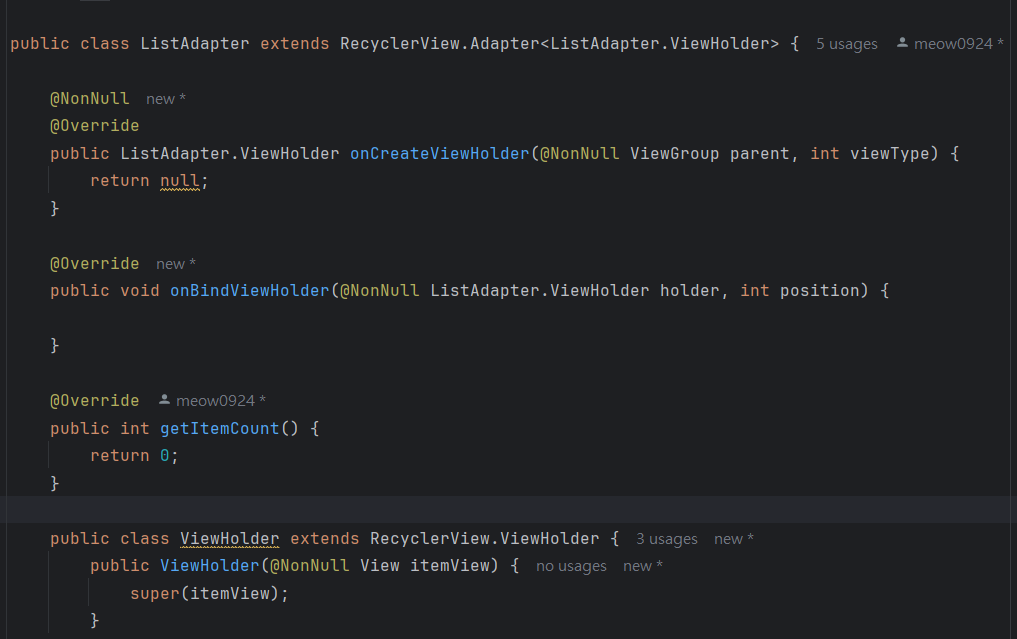
public ListAdapter(ArrayList<HashMap<String, String>> arrayList) {
    this.arrayList = arrayList;
}
初始化ListAdapter
這裡會傳入一個我存入的筆記資料的ArrayList
onBindViewHolder這個方法可以透過position來從ArrayList中獲取指定資料並設定到noteTv
getItemCount這裡是用來返回RecyclerView子項目總數量的地方ViewHolder這裡是個用來綁定並保存每個子項目的方法public class ListAdapter extends RecyclerView.Adapter<ListAdapter.ViewHolder> {
private ArrayList<HashMap<String, String>> arrayList;
public ListAdapter(ArrayList<HashMap<String, String>> arrayList) {
this.arrayList = arrayList;
}
@NonNull
@Override
public ViewHolder onCreateViewHolder(@NonNull ViewGroup parent, int viewType) {
View view = LayoutInflater.from(parent.getContext()).inflate(R.layout.recyclerview_item, parent, false);
return new ViewHolder(view);
}
@Override
public void onBindViewHolder(@NonNull ViewHolder holder, int position) {
holder.noteTv.setText(arrayList.get(position).get("note"));
}
@Override
public int getItemCount() {
return arrayList.size();
}
public class ViewHolder extends RecyclerView.ViewHolder {
private TextView noteTv;
public ViewHolder(@NonNull View itemView) {
super(itemView);
noteTv = itemView.findViewById(R.id.item_note_tv);
}
}
}
接著看到SharedPrefences
public class Shpf {
    private String Note = "notebook";
    private String Notes = "notes";
    //SharedPreferences的key
    private SharedPreferences sharedPreferences;

    public Shpf(@NonNull Context context) {
        sharedPreferences = context.getSharedPreferences(Note, Context.MODE_PRIVATE);
    }//初始化SharedPreferences

    public void setName(String note) {
        ArrayList<String> notes = getAllNotes();
        //先獲取當前所有筆記
        notes.add(note);
        //添加新筆記
        saveNotes(notes);
        //保存更新後的筆記
    }//保存新的筆記

    public ArrayList<String> getAllNotes() {
        String notesString = sharedPreferences.getString(Notes, "");
        //從SharedPreferences獲取以逗號分隔的字符串
        if (notesString.isEmpty()) {
            return new ArrayList<>();
            //如果沒有數據就返回空的ArrayList
        } else {
            return new ArrayList<>(Arrays.asList(notesString.split(",")));
            //利用","來分割並轉換成ArrayList
        }
    }//獲取所有的筆記


    private void saveNotes(ArrayList<String> notes) {

        StringBuilder notesString = new StringBuilder();
        for (String note : notes) {
            notesString.append(note).append(",");
        }//將ArrayList轉換成以逗號分隔的字符串
        if (notesString.length() > 0) {
            notesString.deleteCharAt(notesString.length() - 1);
            //移除最後一個的逗號
        }
        SharedPreferences.Editor editor = sharedPreferences.edit();
        editor.putString(Notes, notesString.toString());
        editor.apply();
        //保存到SharedPreferences
    }//保存筆記
}
這邊我使用ArrayList來儲存資料,詳細的註解都在程式裡了
這樣這個SharedPrefences就可以一次儲存多一點的資料了
接著再回到MainActivity
public class MainActivity extends AppCompatActivity {
    private EditText inputnoteEt;
    private Button saveBtn;
    private RecyclerView notelistRv;
    private ListAdapter listAdapter;
    private Shpf shpf;
    ArrayList<HashMap<String, String>> arrayList = new ArrayList<>();
    //用來存放多筆資料

    @Override
    protected void onCreate(Bundle savedInstanceState) {
        super.onCreate(savedInstanceState);
        setContentView(R.layout.activity_main);

        inputnoteEt = findViewById(R.id.main_input_et);
        saveBtn = findViewById(R.id.main_save_btn);
        notelistRv = findViewById(R.id.main_notelist_rv);

        notelistRv.setLayoutManager(new LinearLayoutManager(this));
        notelistRv.addItemDecoration(new DividerItemDecoration(this, DividerItemDecoration.VERTICAL));

        shpf = new Shpf(this);
        //初始化SharedPreferences

        listAdapter = new ListAdapter(arrayList);
        notelistRv.setAdapter(listAdapter);
        //初始化ListAdapter並傳入資料

        loadData();
        //讀取SharedPreferences中的資料並顯示到RecyclerView

        saveBtn.setOnClickListener(new View.OnClickListener() {
            @Override
            public void onClick(View v) {
                saveNote();
                loadData();
                //每次新增資料後都要再重新加載一下數據並刷新RecyclerView
            }
        });
    }//設置按鈕的點擊事件

    public void saveNote() {
        String note = inputnoteEt.getText().toString();
        if (!note.isEmpty()) {
            shpf.setName(note);
            //保存新的資料
            Toast.makeText(this, "已儲存", Toast.LENGTH_SHORT).show();
            inputnoteEt.setText("");
            //清空輸入框
        } else {
            Toast.makeText(this, "請輸入內容", Toast.LENGTH_SHORT).show();
        }
    }//儲存筆記到SharedPreferences

    private void loadData() {
        arrayList.clear();
        //清空當前列表
        ArrayList<String> notes = shpf.getAllNotes();
        //從SharedPreferences讀取所有資料
        for (String note : notes) {
            HashMap<String, String> hashMap = new HashMap<>();
            hashMap.put("note", note);
            arrayList.add(hashMap);
            //將每筆資料添加到列表中
        }
        listAdapter.notifyDataSetChanged();
        //通知適配器數據已變更
    }//從SharedPreferences中加載資料並更新RecyclerView
}
MainActivity這邊是在設定程式執行時的動作
像是一開始時會先載入上次關掉的程式時留下的資料、點下保存後會先儲存資料到SharedPrefences裡再刷新ListAdapter等
詳細的註解都在程式中就不額外說了
<?xml version="1.0" encoding="utf-8"?>
<LinearLayout xmlns:android="http://schemas.android.com/apk/res/android"
    android:layout_width="match_parent"
    android:layout_height="match_parent"
    android:orientation="vertical">

    <TextView
        android:id="@+id/main_title_tv"
        android:layout_width="match_parent"
        android:layout_height="0dp"
        android:textSize="20dp"
        android:gravity="center_vertical"
        android:textStyle="bold"
        android:background="#8AABFF"
        android:layout_weight="0.06"
        android:text="記事本"
        android:paddingLeft="10dp"/>

    <EditText
        android:id="@+id/main_input_et"
        android:layout_width="match_parent"
        android:layout_height="0dp"
        android:hint="輸入記事內容"
        android:layout_weight="0.1"
        android:inputType="text"
        android:lines="3"
        android:paddingLeft="10dp"
        android:layout_marginRight="50dp"/>

    <TextView
        android:id="@+id/main_note_tv"
        android:layout_width="match_parent"
        android:layout_height="0dp"
        android:layout_weight="0.05"
        android:textSize="15dp"
        android:background="@drawable/frame"
        android:gravity="center"
        android:text="(注意:長按已新增項目可以移除RecyclerView的單一項目)" />

    <Button
        android:id="@+id/main_save_btn"
        android:layout_width="match_parent"
        android:layout_height="0dp"
        android:layout_weight="0.1"
        android:text="保存" />

    <androidx.recyclerview.widget.RecyclerView
        android:id="@+id/main_notelist_rv"
        android:layout_width="match_parent"
        android:layout_height="0dp"
        android:layout_weight="1" />

</LinearLayout>
<?xml version="1.0" encoding="utf-8"?>
<androidx.constraintlayout.widget.ConstraintLayout xmlns:android="http://schemas.android.com/apk/res/android"
    xmlns:tools="http://schemas.android.com/tools"
    android:layout_width="match_parent"
    android:layout_height="50dp"
    android:background="#59D8E9">

    <LinearLayout
        android:layout_width="match_parent"
        android:layout_height="match_parent"
        android:orientation="vertical">

        <LinearLayout
            android:layout_width="match_parent"
            android:layout_height="match_parent"
            android:orientation="horizontal">

            <TextView
                android:id="@+id/item_note_tv"
                android:layout_width="0dp"
                android:layout_height="match_parent"
                android:layout_weight="1"
                android:textSize="30dp"
                android:text="TextView" />

        </LinearLayout>
    </LinearLayout>
</androidx.constraintlayout.widget.ConstraintLayout>
這樣就可以完成記事本app的添加功能了
下篇會再加上刪除功能
