在前面幾天完成「門」物件的建置後,今天我將以相同的圖說資料集,挑戰「柱」物件的自動化建模,看看相同流程能否在不同元素類別下依然穩定運作。
我試著在本機上重複標註資料集、訓練及預測的步驟後,得到以下結果: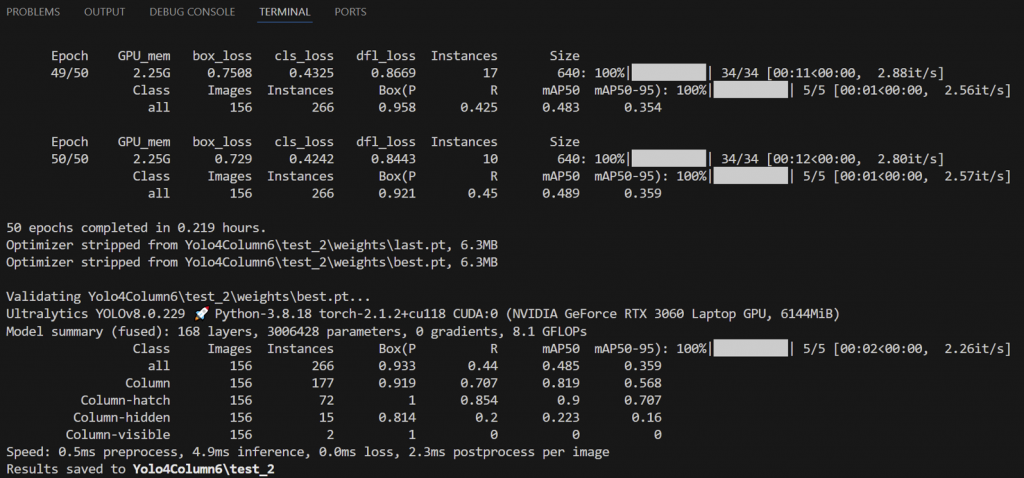
圖22.1 柱物件偵測本機訓練結果(YOLO)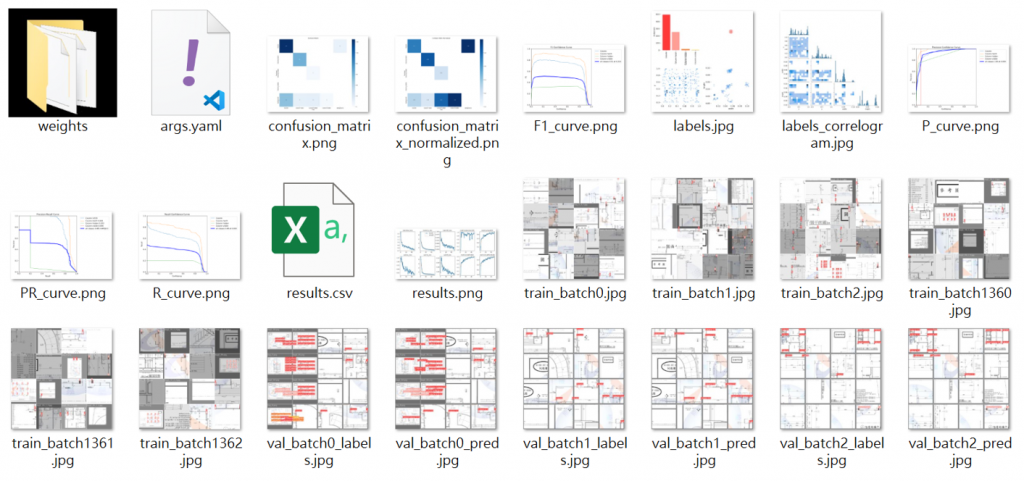
圖22.2 柱物件偵測訓練指標圖(YOLO)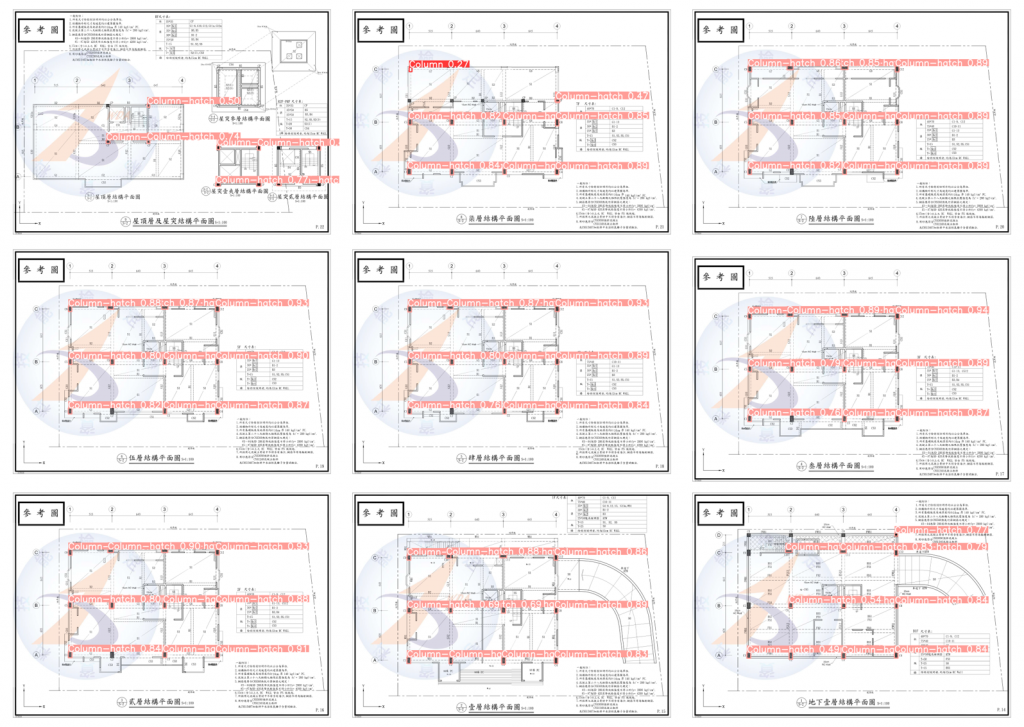
圖22.3 柱物件偵測預測成果示例
由於先前是搜尋以D為起始的門編號,現在則改為以C為始的柱編號,這樣做的原因是,BIM 建模流程中的元素識別必須依據圖面標註邏輯來對應,如果規則不調整,就會出現錯配或漏檢的情況。:
# 5. 語意分類及圖紙空間還原
import re
# 篩選「柱編號」Cxx(自動容錯全形C、小寫、空白、全轉大寫)
def normalize_text(t):
    t = str(t).replace('C', 'C').replace('c', 'C').strip().upper()
    t = re.sub(r"\s+", "", t)
    return t

regex = re.compile(r'^C\d+$')
df['正規化文字'] = df['文字'].apply(normalize_text)
door_df = df[df['正規化文字'].apply(lambda x: bool(regex.match(x)))].copy()
接下來,將柱類別按圖元特徵分類(如矩形框或填滿色塊),並將預設尺寸表改為柱結構尺寸表,這些做法是為了能根據不同繪製方式套用對應的建模參數與尺寸來源。
# 參數設定

# 簡化示範預設類別
# ================================================
# 在真實應用中,這裡會讀取 YOLO 的標註檔案
# 並設定欲偵測物件的尺寸表/ 特徵參數
# ================================================
#CLASS_DIM = {
#    0: ("單開門", 90, 210),
#    1: ("雙開門", 180, 210),
#}
#demo_detections = [
#    (0, 1000, 2000),  # 單開門
#    (1, 2500, 3000),  # 雙開門
#    (0, 4000, 1500)   # 單開門
#]

# 柱特徵類別
CLASS_DIM_DEMO = {
    0: "Column",
    1: "Column-hatch",
    2: "Column-hidden",
    3: "Column-visible",
}

# 標準柱尺寸表(單位:cm)
SIZE_TABLE_CM = [
    (40, 40),
    (40, 70),
    (75, 40),
]
開始建置IFC專案時,依序按Day19的流程:「專案架構→單位及幾何設定→建立(柱)元素→加入關聯與屬性→輸出IFC模型檔」的方式來建置。
# 使用ifcopenshell.api高階語法建置
col = ifcopenshell.api.run("root.create_entity", ifc, ifc_class="IfcColumn", name=name)

# 使用傳統語法建置
def _manual_box_representation(ifc, body_ctx, width, depth, height):
    cart0 = ifc.create_entity("IfcCartesianPoint", Coordinates=(0.0, 0.0, 0.0))
    zdir  = ifc.create_entity("IfcDirection",       DirectionRatios=(0.0, 0.0, 1.0))
    xdir  = ifc.create_entity("IfcDirection",       DirectionRatios=(1.0, 0.0, 0.0))

    prof2d = ifc.create_entity(
        "IfcRectangleProfileDef",
        ProfileType="AREA",
        XDim=float(width),
        YDim=float(depth),
        Position=ifc.create_entity(
            "IfcAxis2Placement2D",
            Location=ifc.create_entity("IfcCartesianPoint", Coordinates=(0.0, 0.0))
        )
    )
    solid = ifc.create_entity(
        "IfcExtrudedAreaSolid",
        SweptArea=prof2d,
        Depth=float(height),
        ExtrudedDirection=zdir,
        Position=ifc.create_entity("IfcAxis2Placement3D", Location=cart0, Axis=zdir, RefDirection=xdir)
    )
    body = ifc.create_entity(
        "IfcShapeRepresentation",
        ContextOfItems=body_ctx,
        RepresentationIdentifier="Body",
        RepresentationType="SweptSolid",
        Items=[solid]
    )
    return ifc.create_entity("IfcProductDefinitionShape", Representations=[body])
# 添加關聯樓層與屬性
    ifcopenshell.api.run("spatial.assign_container", ifc, relating_structure=storey, products=[col])
    pset = ifcopenshell.api.run("pset.add_pset", ifc, product=col, name="ColumnDimensions")
    ifcopenshell.api.run("pset.edit_pset", ifc, pset=pset, properties={
        "Width":  int(round(width)),
        "Depth":  int(round(depth)),
        "Height": int(round(height)),
        "LocX_demo": int(round(ox)),
        "LocY_demo": int(round(oy)),
    })
其實上述主要流程架構不外乎都是這樣的順序,只差別在個別特徵元素的不同,例如門元件需要尺寸、位置與開啟方向的資訊;柱元件需要尺寸、位置、樓層高度等資訊,每一個不同物件按著繪圖建置的邏輯來轉換成程式碼,便能轉化為自動化建置了。
由於目前AI識別出的圖像主要為各層平面圖,所以自動化建置出來的模型也是各層樓的,但如果結合商業軟體匯入整併,也可以得出以下的成果。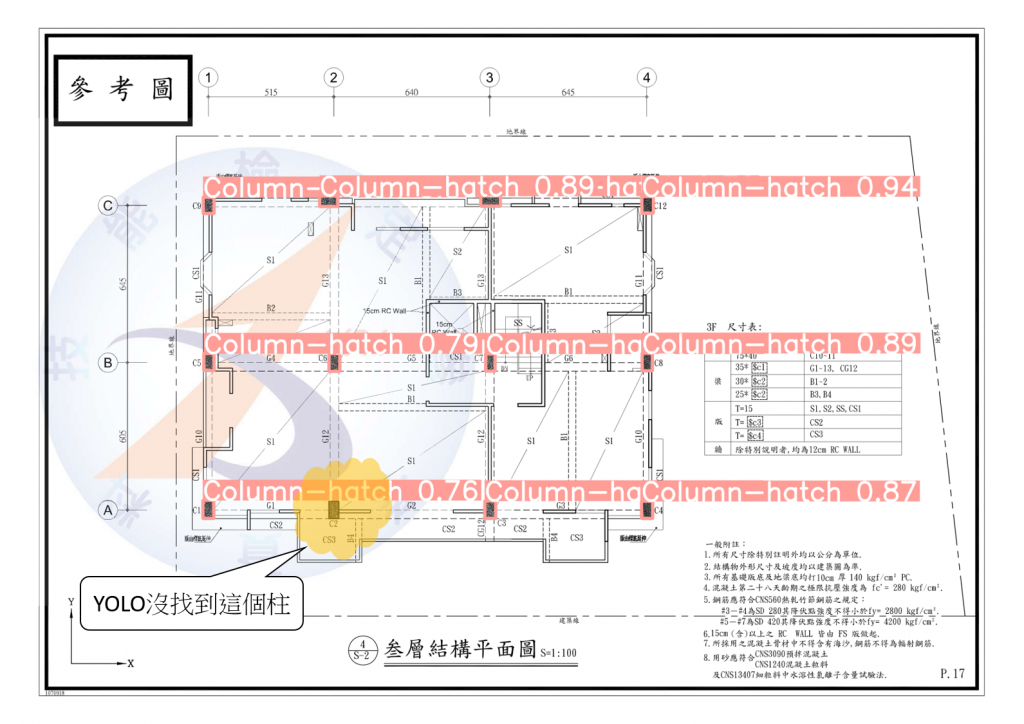
圖22.4 柱物件偵測預測成果3F示例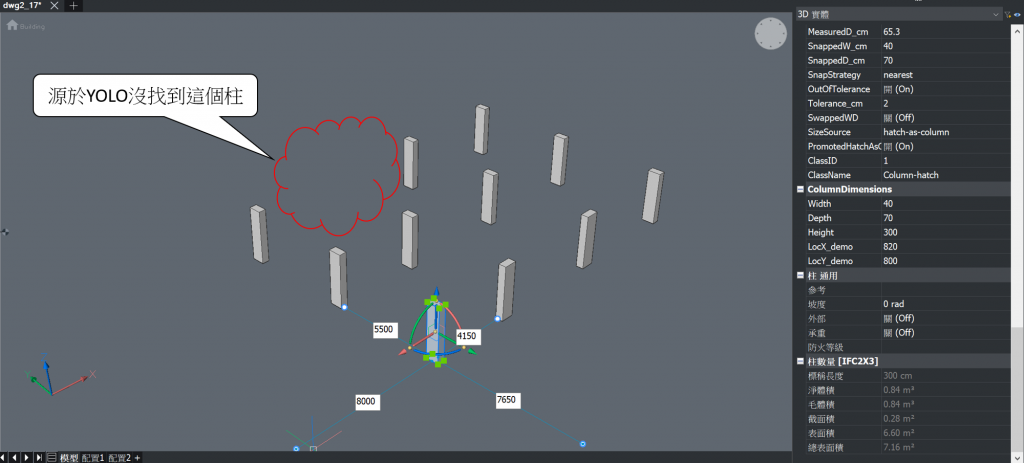
圖22.5 柱物件偵測預測成果3D示例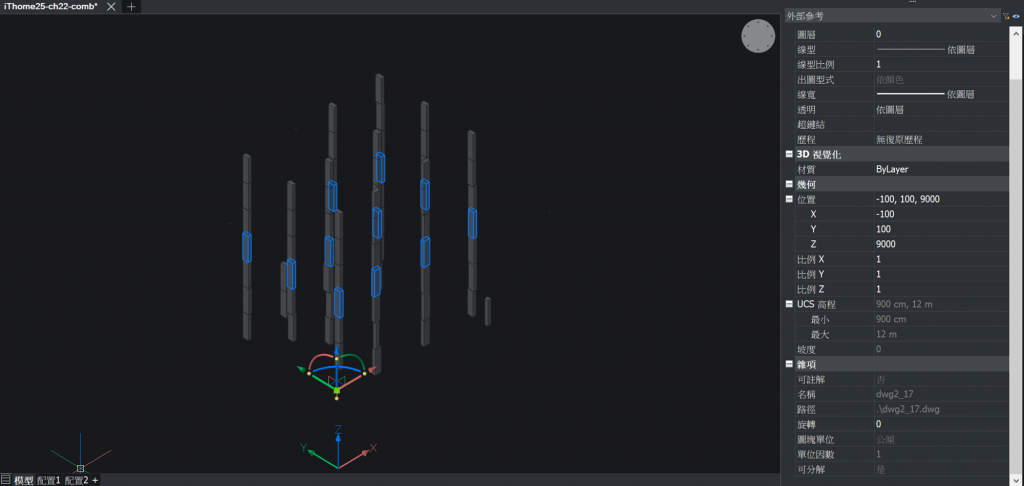
圖22.6 柱物件多層模型整併
今天透過不同物件元素的模型建置可以發現,Ifcopenshell.api已經將大多數幾何建置的程式碼包裝成類似python套件,只要能正確設定特徵參數與使用,自動化建模看似離我們不遠了!
不過,單一元素的建置也的確遇到許多挑戰,例如當召回率太低以致圖面漏檢,或者api處理失敗、版本class名不同而造成錯誤時,就難以自動生成模型了,而且後期的人工校正也會較為麻煩。
明天,我們再來測試多元件建模時,是否也會遇到相同問題呢?

