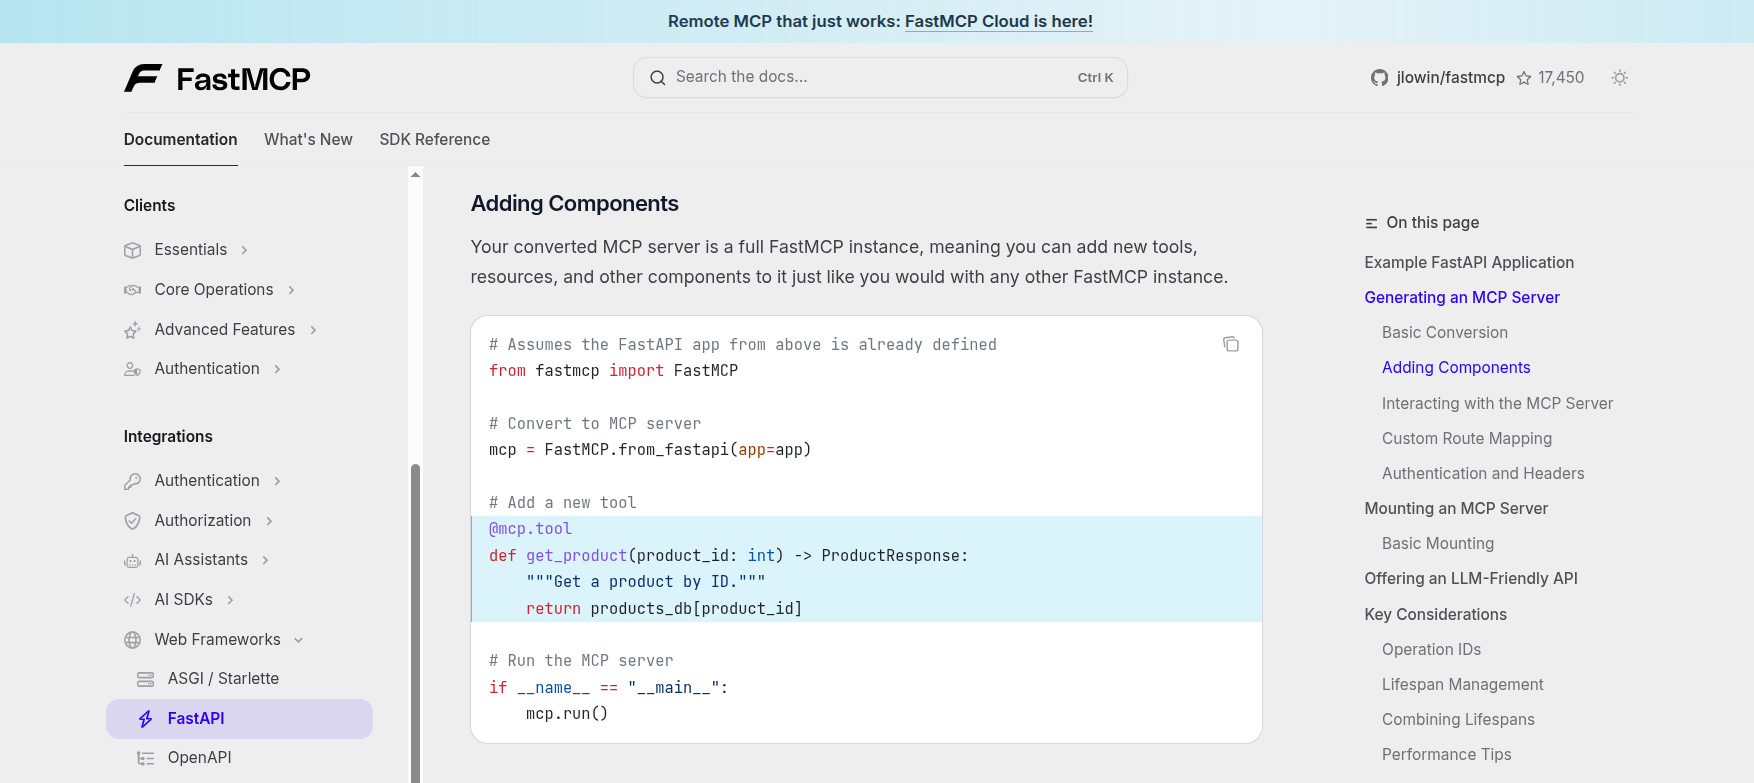
昨天已經實際操作過 MCP Server,今天不免俗的要來實做一下,網路上有很多 MCP Library 可以協助開發人員快速的開發 MCP 工具,像是 Antropic 的 modelcontextprotocol/python-sdk,但是對於開發者來說,爲了 LLM 還要額外去開發 MCP 相關的程式碼其實跟當初 MCP 出現的初衷背道而馳(目的就是要統一不同 LLM 的 Function Calling 機制),所以今天要介紹一個更簡單的工具 fastmcp,這個工具可以直接把原本的 OpenAPI(或是 FastAPI)轉換成 MCP 的介面,讓開發者可以只需要專注在 API 的開發上。
詳細程式碼請參考 hsiangjenli/python-mcp-template,裡面包含了如何從 FastAPI 轉換成 MCP 以及將 MCP 容器化成 Docker Image。
git clone https://github.com/hsiangjenli/python-mcp-template
cd python-mcp-template
uv sync
# main.py
from fastapi import FastAPI
from fastmcp import FastMCP
from mcp_tools.schemas import NewEndpointRequest, NewEndpointResponse
app = FastAPI(
title="Python MCP Template",
description="A template for creating MCP-compliant FastAPI services.",
version="0.1.0",
)
@app.post(
"/new/endpoint/", operation_id="new_endpoint", response_model=NewEndpointResponse
)
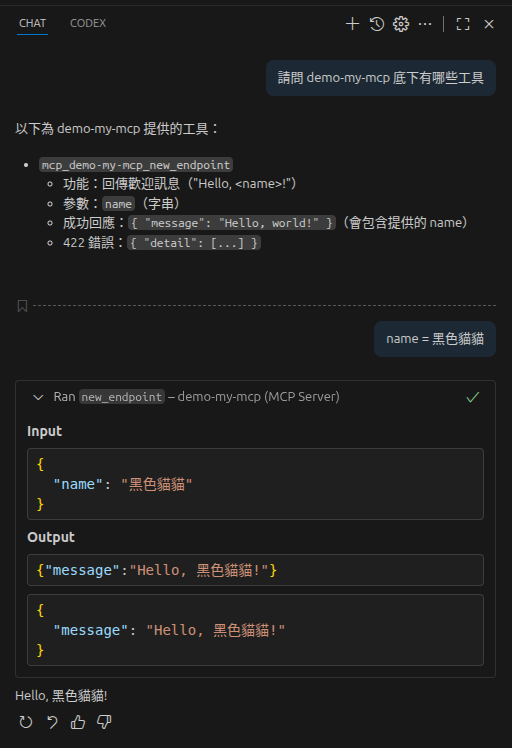
async def new_endpoint(request: NewEndpointRequest):
return {"message": f"Hello, {request.name}!"}
mcp = FastMCP.from_fastapi(app=app)
if __name__ == "__main__":
mcp.run()
# schemas.py
from pydantic import BaseModel, Field


class NewEndpointResponse(BaseModel):
    message: str = Field(..., description="A welcome message.", example="Hello, world!")


class NewEndpointRequest(BaseModel):
    name: str = Field(
        ..., description="The name to include in the message.", example="developer"
    )
uv run --with fastmcp fastmcp run mcp_tools/main.py
看到下面的畫面代表成功運行~

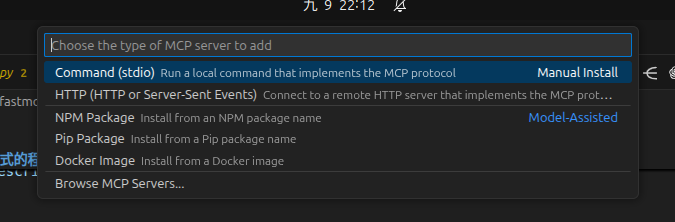
因爲我們設定是使用 STDIO,所以設定 MCP Server 的 json 檔案會長像下面這樣:
run 是 uv 底下的指令,意思是讓程式在 uv 的虛擬環境中執行--with fastmcp 是 uv 的參數,意思是讓 uv 在執行程式前額外載入 fastmcpfastmcp run mcp_tools/main.py 是實際啓動 MCP 的指令{
"servers": {
"demo-my-mcp": {
"type": "stdio",
"command": "uv",
"args": [
"run",
"--with", "fastapi",
"fastmcp", "run",
"mcp_tools/main.py"
],
"cwd": "${workspaceFolder}/python-mcp-template"
}
},
"inputs": []
}
fastmcp 可以快速的將 FastAPI 轉換成 MCP 的介面

 iThome鐵人賽