前兩篇介紹了斷言的基本應用以及進階技巧,Playwright 斷言的設計與特性,結合各式各樣的 matcher,已經足以應付大部分的測試場景,然而,當我們發現測試中的斷言時常重複、變得複雜,或是具有高度商業邏輯時,這就是考慮 custom matcher 的最佳時機。
那麼,該如何在 Playwright 中擴展自己的 matcher 呢?
【步驟一】新增一個設定檔,並自訂專屬你的 custom matcher
這個設定檔通常會放在 fixtures 資料夾底下,將 custom matcher 加到 expect 當中:
// fixtures/customMatchers.ts

// import Playwright 提供的 expect 斷言函式與頁面元素定位器型別
import { expect as baseExpect } from '@playwright/test';
import type { Locator } from '@playwright/test';

export { expect };
// 建立一個 extend 的 expect(把 test 從原本模組 re-export)
export { test } from '@playwright/test';

// 使用 baseExpect.extend() 來擴充自訂 matcher
export const expect = baseExpect.extend({
    // 第 1 組 custom matcher
    async toCustomMatcher(
        received: Locator | string | number, // 斷言收到的值
        expected: any, // 預期的值
        options?: { timeout?: number } // 可選參數
    ) {
        // 判斷收到的值與預期的值是否相等,結果為 true 或 false
        const pass = received === expected;

        // 回傳一個物件,包含 pass 與 message
        return {
            pass, // 通過或失敗
            message: () => // message 是一個函式,playwright 在失敗時會呼叫
                pass
                ? `預期 ${received} 不是 ${expected}` // 通過時不會呼叫,所以這個訊息是為 .not (反向斷言) 測試失敗時準備
                : `預期是 ${expected},但收到 ${received}`, // (正向斷言) 測試失敗時顯示內容
        }
    },

    // 第 2 組 custom matcher
    async toCustomMatcher() {
        // 自定義內容
    }
});
依照取值 → 處理值 → 判斷結果 → 回傳錯誤訊息的步驟,就能撰寫出一組完整的 custom matcher 了!
如果我想要判斷收到的字串是否為 "cat" 並忽略大小寫,以 Playwright 的內建斷言會這樣表示:
await expect(locator).toHaveText(/^cat$/i);
試著將這個斷言改寫成 custom matcher:
async toBeCat(received: string) {
        const pass = received.toLowerCase() === "cat";

        return {
            pass,
            message: () =>
                pass
                    ? `預期不是 'cat'(忽略大小寫),但收到 ${received}`
                    : `預期是 'cat'(忽略大小寫),但收到 ${received}`,
        };
    },
以上,我們就完成了一組簡易的 matcher。
【步驟二】在測試案例中引入剛剛擴展的 expect
import { test, expect } from './fixtures/customMatchers.ts';
💡Tips:
不需要重複引入內建的expect,我們在設定檔中已經產生了一個「加了新的 matcher」的expect,並且把這個expectexport 出去,也順手 re-export 一份test,因此,只需要從自訂設定檔 import,就可以同時使用內建與擴充過的expect囉!
【步驟三】在測試案例中使用 custom matcher
我們來試用看看剛剛寫好的 matcher 吧!
首先觀察以下這個目標網頁,我們想要驗證這個網頁的標題是否含有「cat (忽略大小寫)」字串: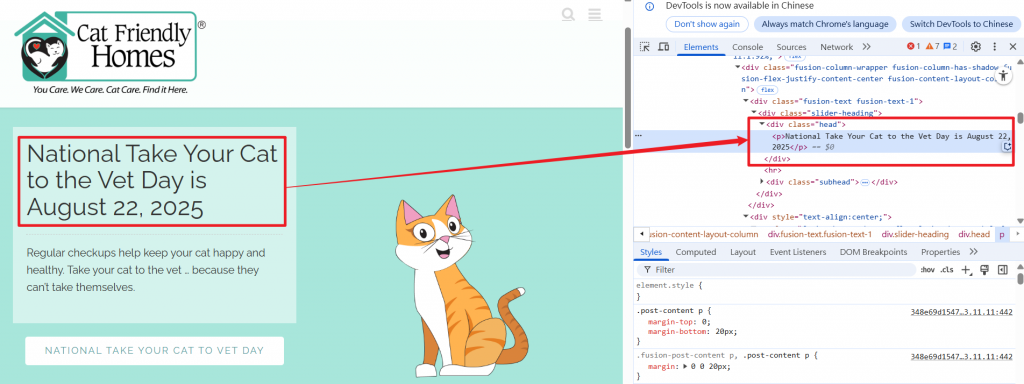
測試內容可以這樣寫:
import { test, expect } from './fixtures/customMatchers'

test('cat', async({ page }) => {
  // 前往目標網頁
  await page.goto('https://catfriendly.com/');

  // 拿到目標元素內的文字
  const text = await page.locator('div[class="head"] p').innerText();

  // 驗證是否包含 cat (忽略大小寫)
  await expect(text).toContainCat();
});
試著執行看看,是否能夠得到通過測試的結果: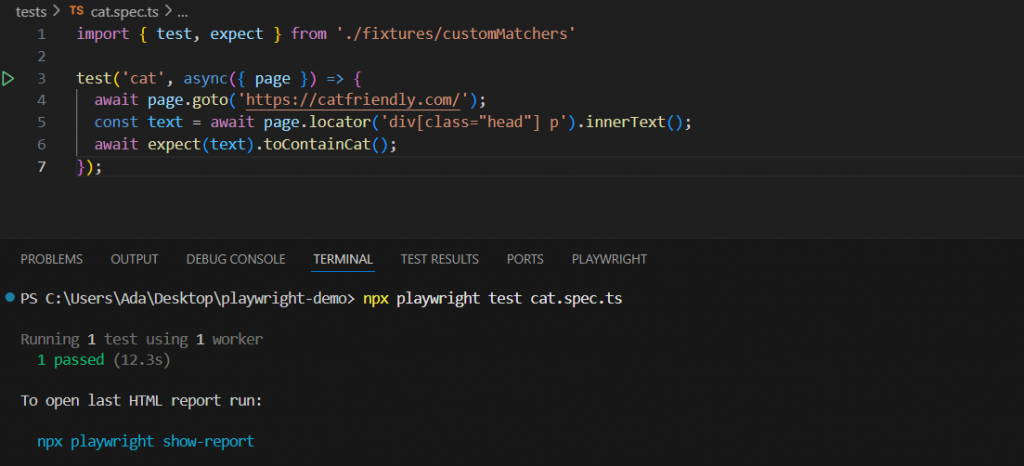
結果為 pass,代表我們的自定義 matcher 能夠順利地運作啦~
到這裡,我們已掌握 custom matcher 的打造技巧,這就像為 Playwright 的武器庫施展了量身訂做的魔法,不僅能讓斷言語法更易懂、更具彈性,更能幫助我們解決 Playwright 內建 matcher 所無法處理的獨特測試場景。接下來,接下來,我們將進一步剖析 async / await 機制,並理解它如何影響我們的測試流程。


 iThome鐵人賽