
網站如果只放在單一 S3 Bucket,可能在跨區存取時會遇到延遲、缺乏 CDN 快取,且沒有 HTTPS 預設支援。
透過 CloudFront 搭配 S3,我們能實現全球加速、安全傳輸,以及靜態網站的高可用部署,這個 Lab 主要解決以下問題:
(1) 靜態網站缺乏全球加速,跨國用戶體驗差。
(2) S3 雖可存放內容,但直接公開 Bucket URL 缺乏專業域名與 HTTPS。
(3) 缺乏內容快取與 DDoS 防護。
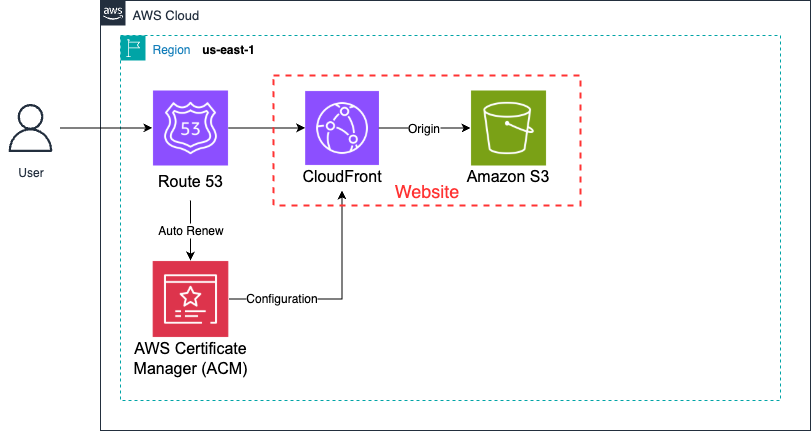
在整體 Serverless 架構中,S3 作為靜態內容來源,CloudFront 則是網站流量的「總管」,負責加速、快取、安全傳遞,並與前一日的 Route 53 + ACM 串接,完成安全網域對外服務。
最佳實務(Best Practices):
(1) 啟用 CloudFront Access Logs,方便日後流量分析與安全稽核。
(2) 搭配 WAF(Web Application Firewall)強化防護。
(3) 靜態檔案盡量版本化(e.g., app.v1.js),避免快取更新問題。
(4) 使用 Lambda@Edge 或 CloudFront Functions,處理簡單邏輯(如自動轉址、多語系)。
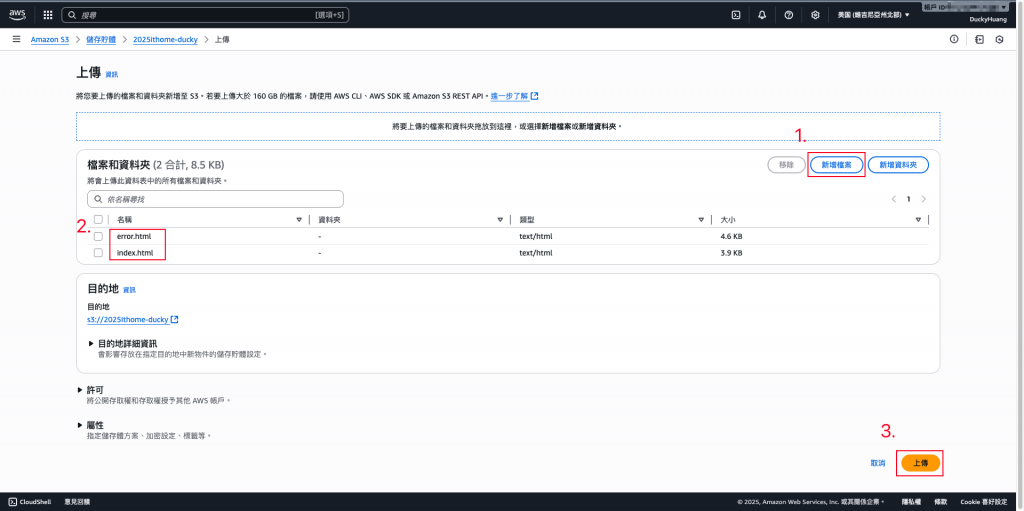
<html xmlns="http://www.w3.org/1999/xhtml" >
<head>
    <title>My Website Home Page</title>
</head>
<body>
  <h1>Welcome to my website</h1>
  <p>Now hosted on Amazon S3!</p>
</body>
</html>
errer.html
<html xmlns="http://www.w3.org/1999/xhtml" >
<head>
    <title>錯誤:頁面未找到</title>
</head>
<body>
    <h1>404 - 頁面未找到</h1>
    <p>抱歉!您所請求的頁面不存在。</p>
    <p>請確認網址是否正確,或返回首頁。</p>
</body>
</html>
進入「Cloudfrnot」服務頁面。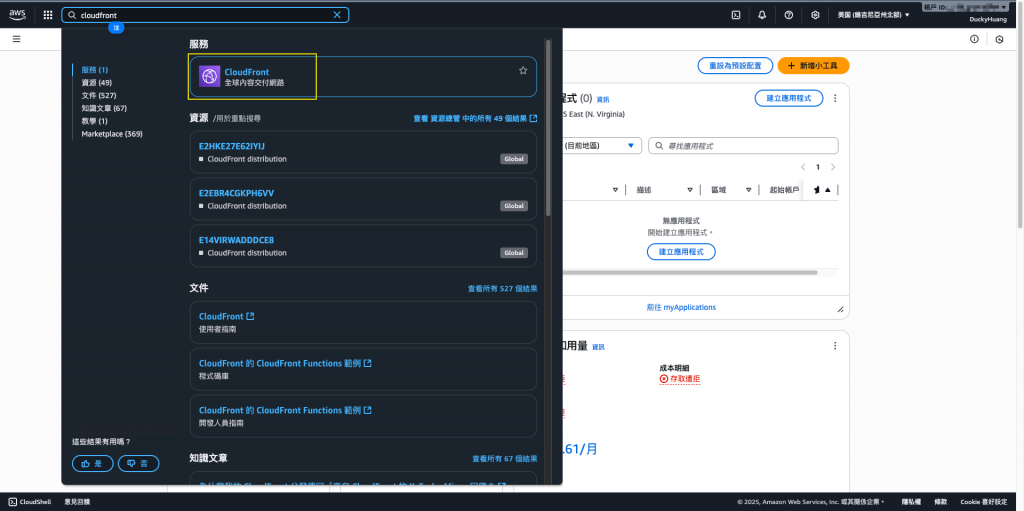
點選「建立分佈」。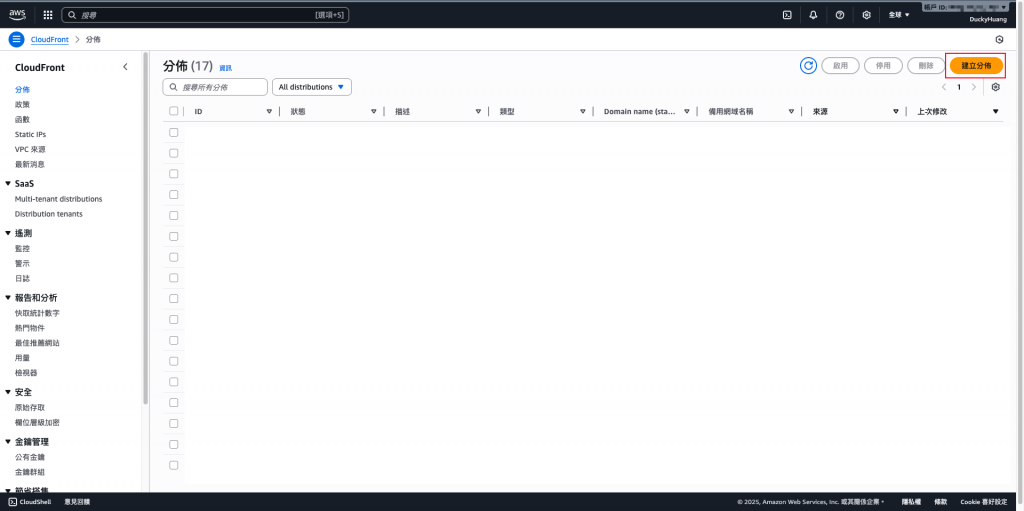
創建一個屬於自己的頁面前端轉發器(CDN),命名並創建。(※該頁面沒有中文)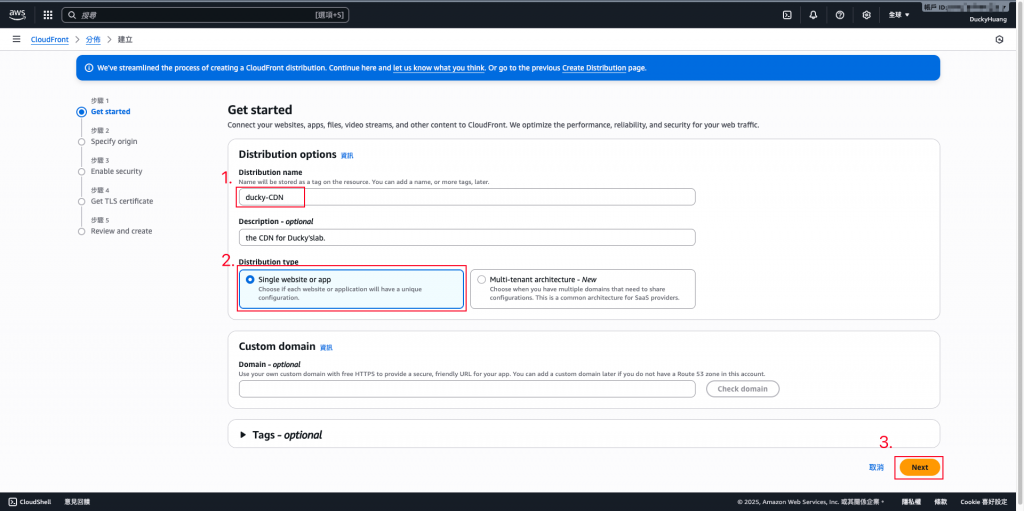
選用S3作為Origin(源站),這邊只能先設定一個源站。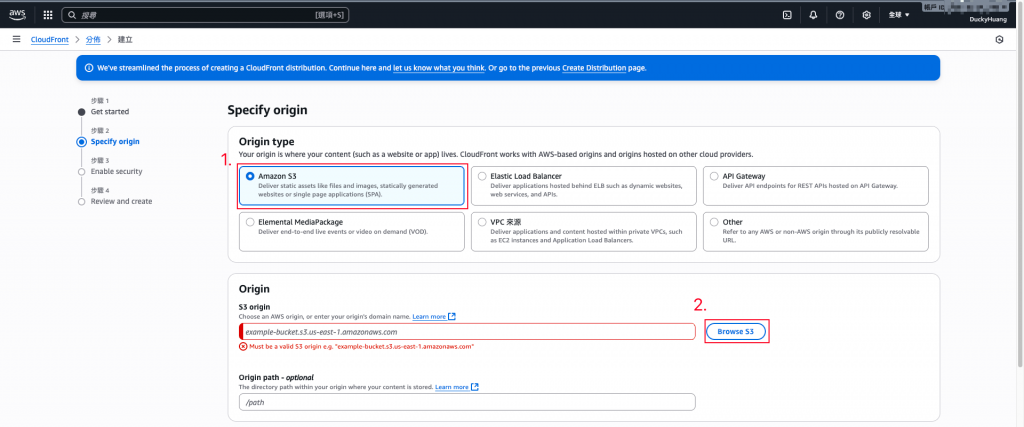
找到你的S3 bucket。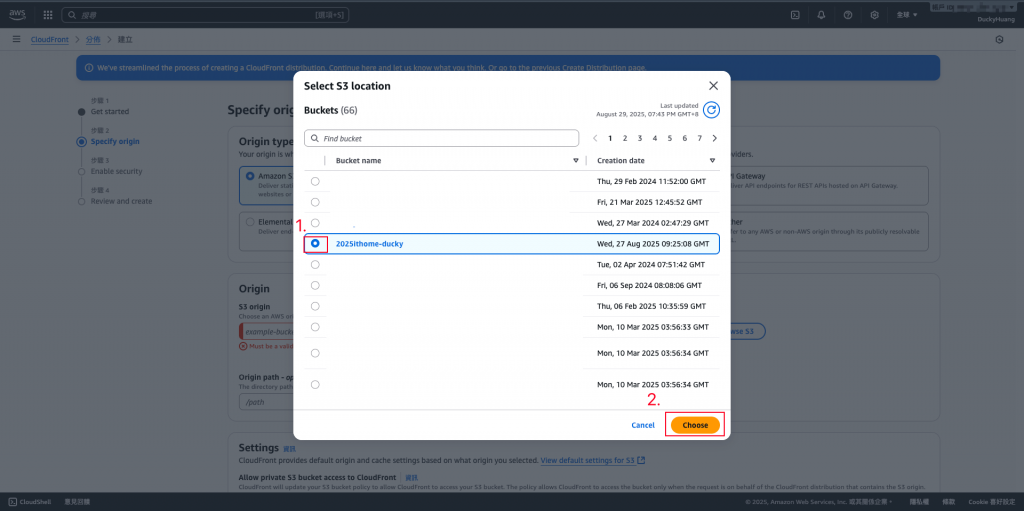
Origin 設定為 S3 Bucket(使用 OAC 授權)。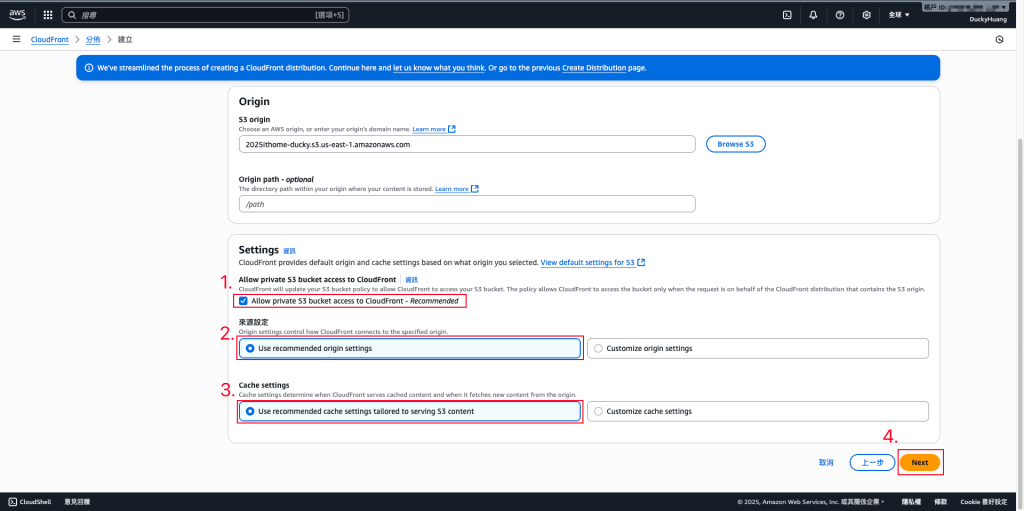
啟用WAF。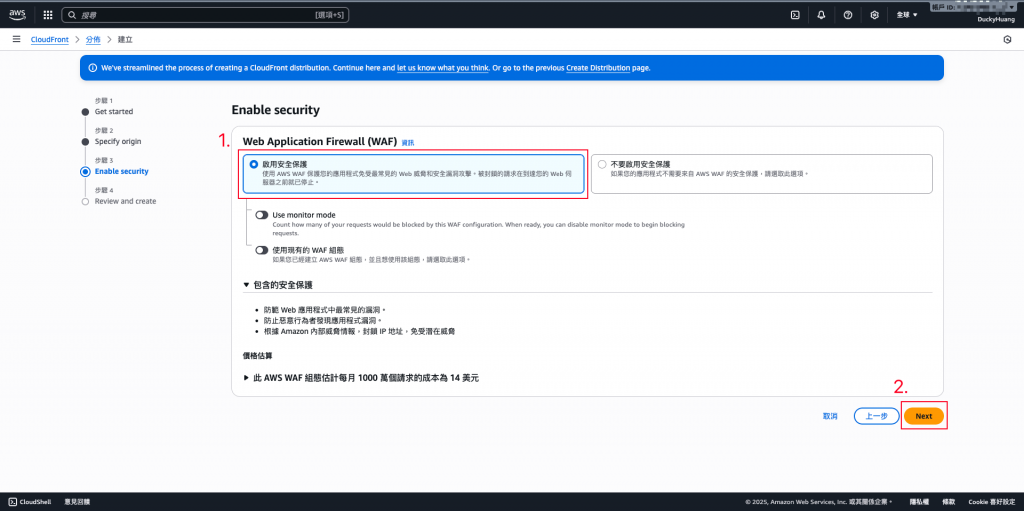
選擇ACM證書。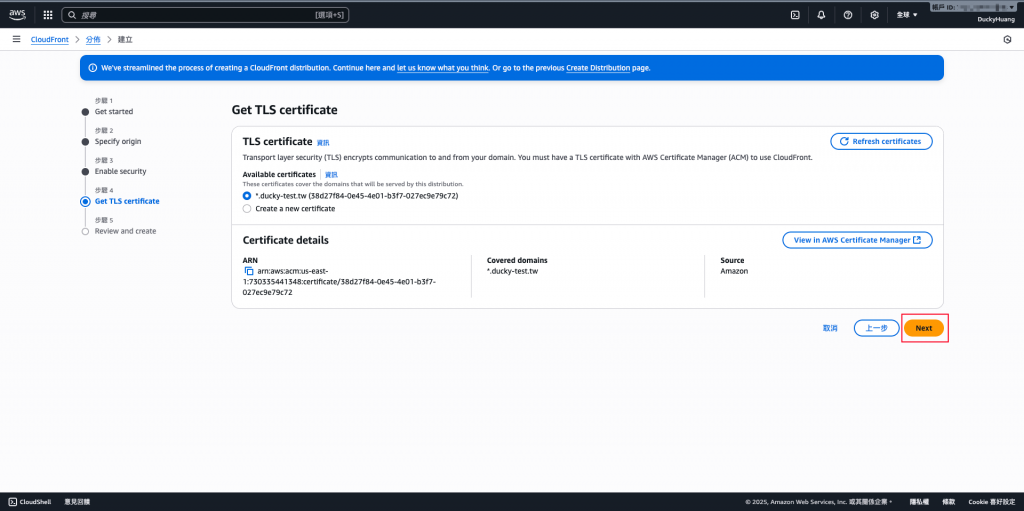
確認創建。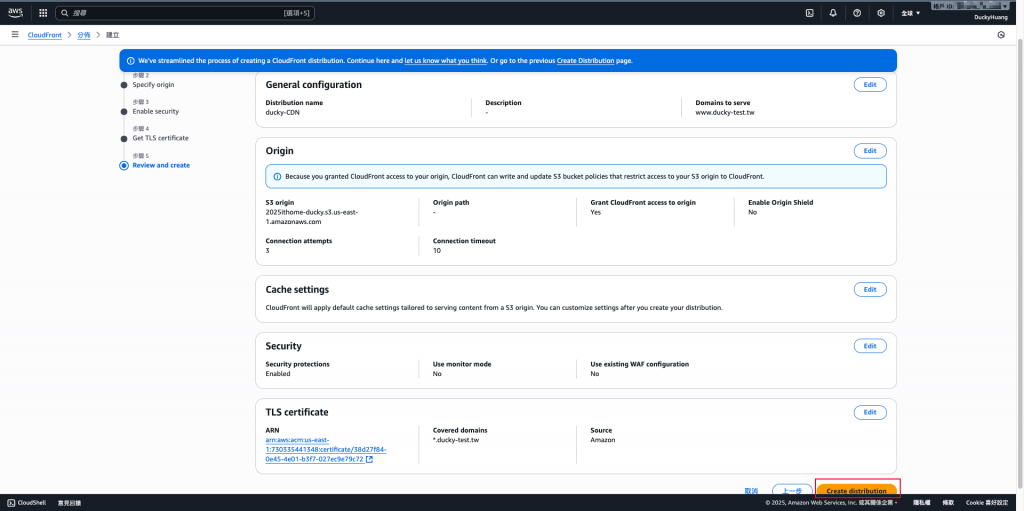
使用瀏覽器輸入專屬網域(如 www.example.com),檢查是否成功跳轉 HTTPS。
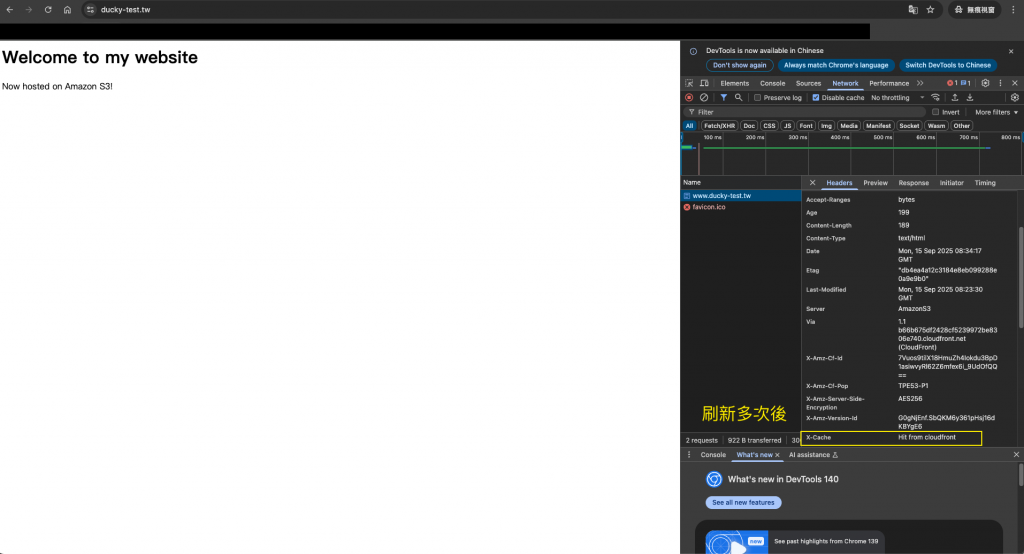
驗證 CloudFront 快取:第一次載入後是沒有快取的狀態 x-cache**:**Miss from cloudfront,再多刷新幾次,看是否有 X-cache: Hit from CloudFront 標頭。
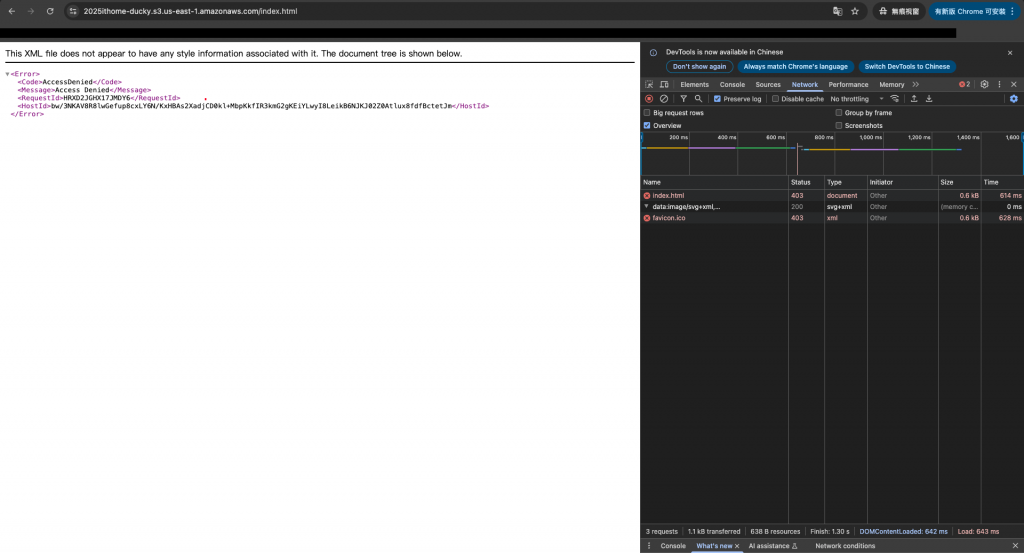
測試 OAC:嘗試直接存取 S3 URL,應會被拒絕。
使用S3的連結,被拒絕:
使用CloudFront網域名稱,成功訪問: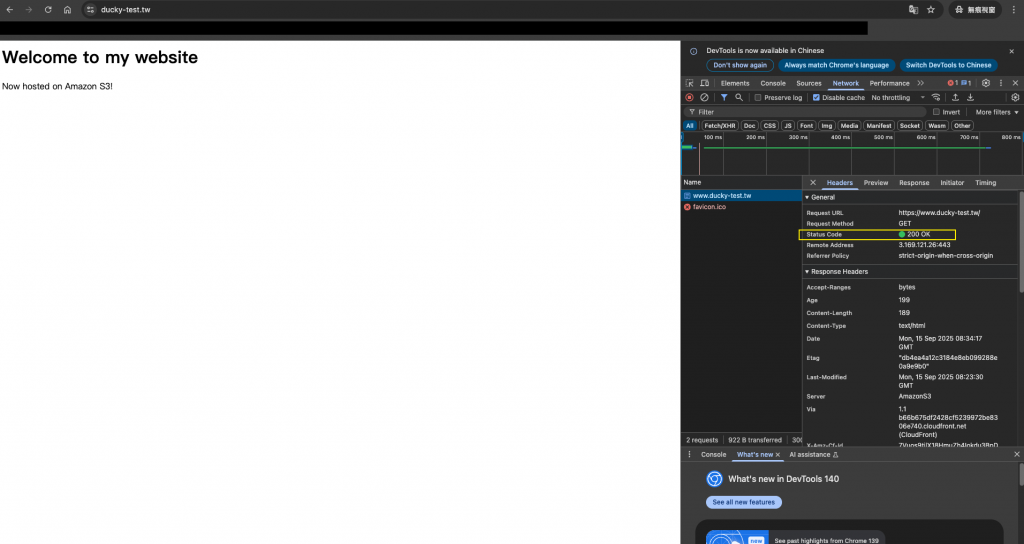
今天我們完成了從 S3 到 CloudFront 的串接,讓網站具備全球加速、HTTPS、存取管控的能力。這個組合是 Serverless 架構下最常見的前端靜態網站解決方案,兼顧安全性、效能與低成本,並與 Day 5 的 Route 53 + ACM 無縫整合。
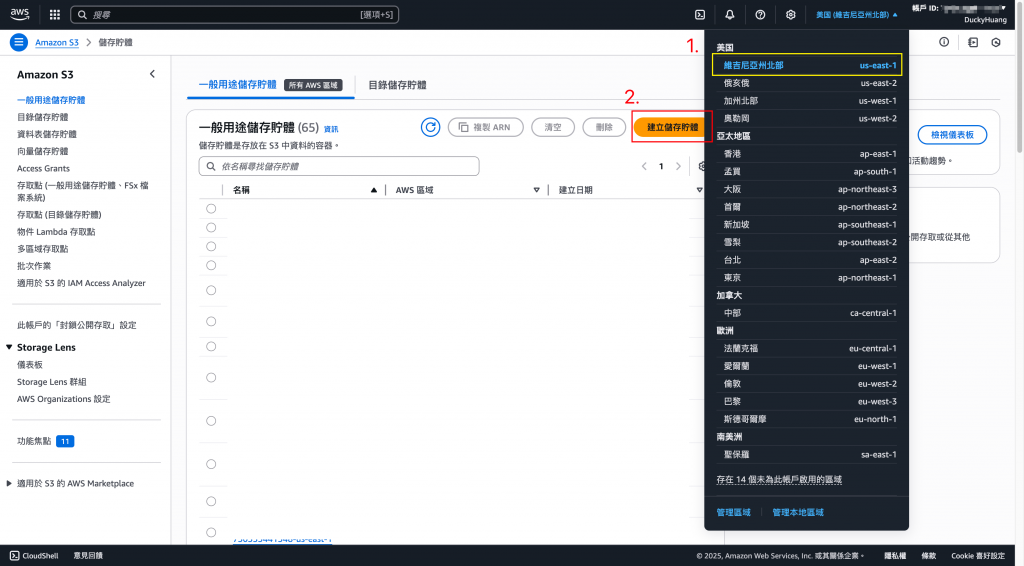
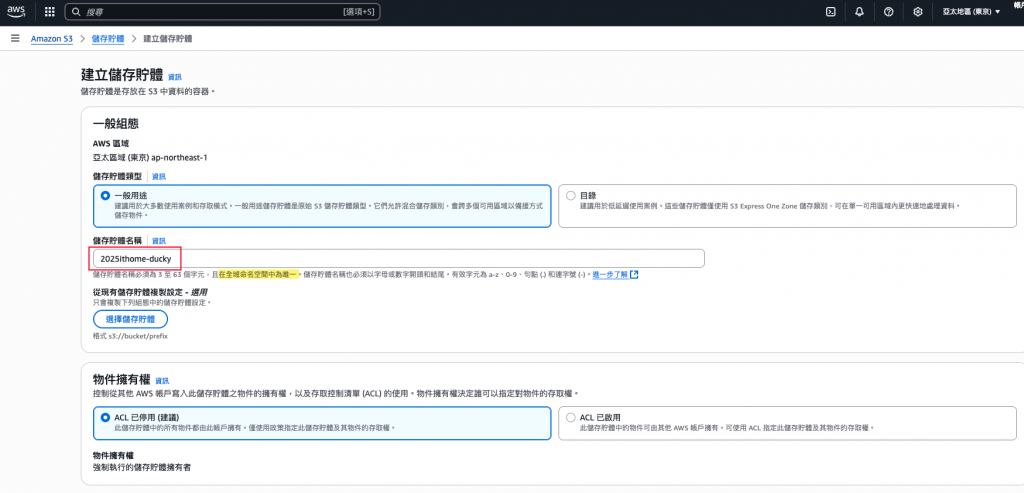
儲存桶名稱為「世界上的唯一值」。
請問這是不是說即便是別的region, 甚至是別的帳號也不能用2025ithome-ducky這bucket name呢?
滷荃是的唷,您可以創建看看,因為S3的名稱是「全世界唯一」的。
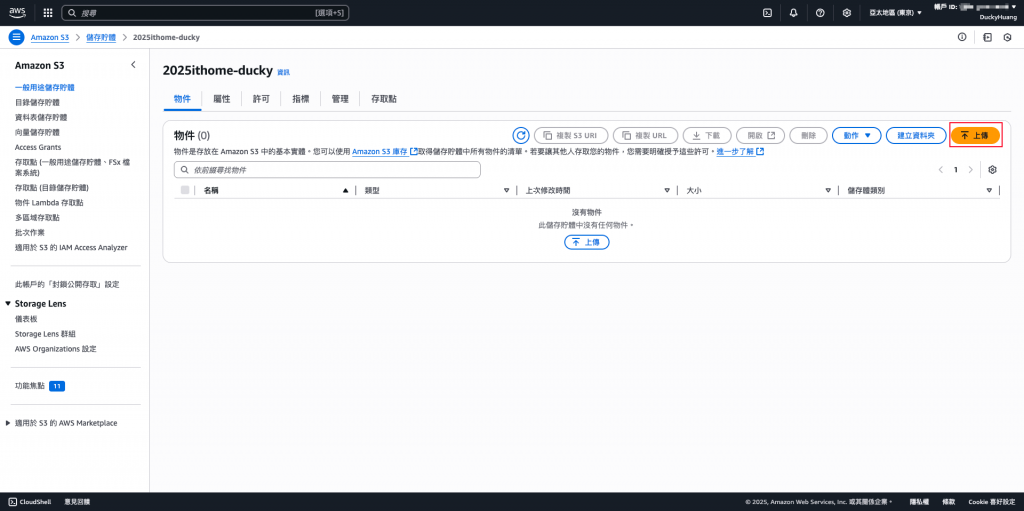
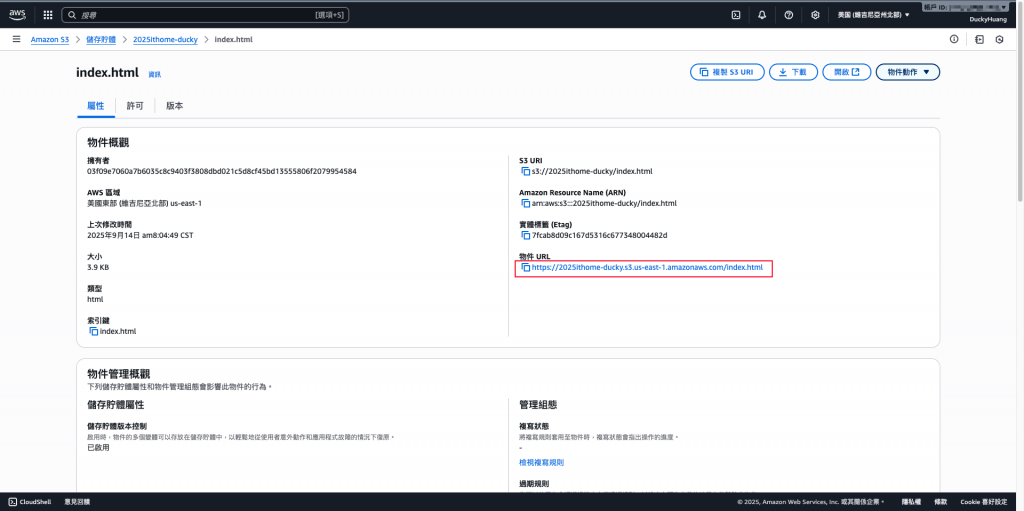
您可以看到您再創建S3後,出來的URL(連結)就是包含了您的S3 Bucket name唷

