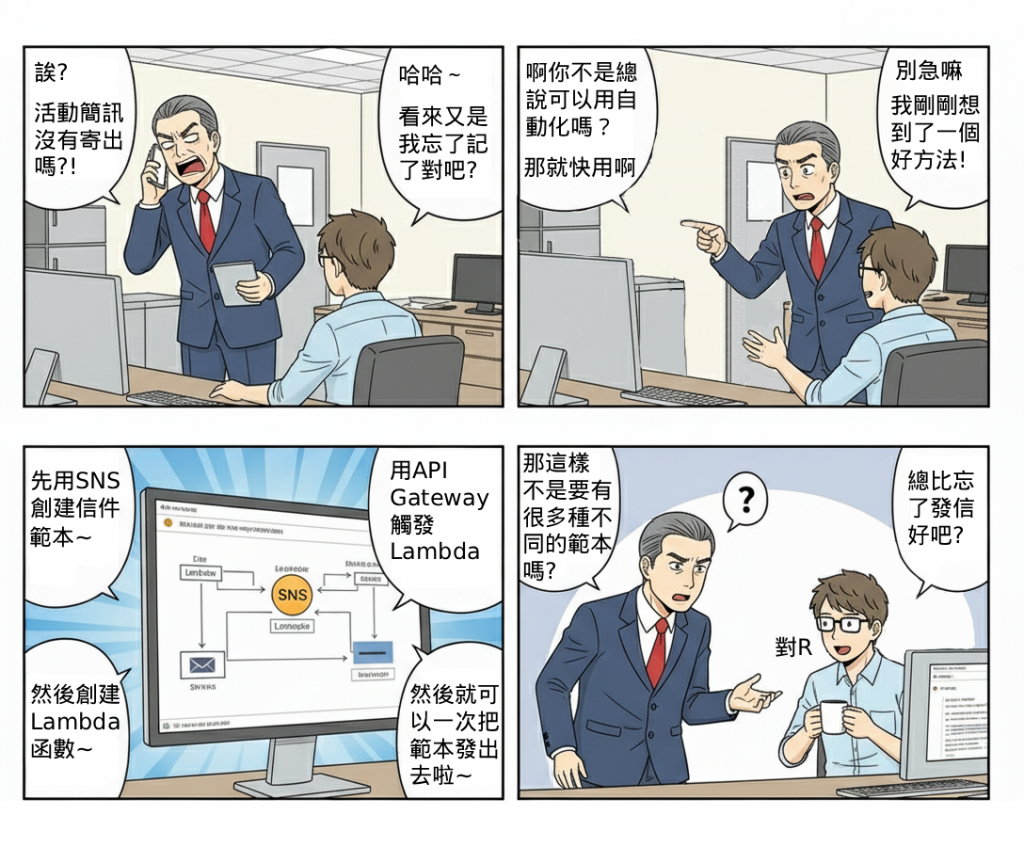
在一個完整的會員系統中,除了會員通知外,還需要讓管理員具備 一對多的公告能力,例如:系統維護公告、活動通知、緊急訊息。若沒有集中化的公告管道,管理員可能需要透過多種工具分別通知會員,既容易出錯,也難以統一管理。
透過 API Gateway x SNS / SES,可以實現由管理員後台統一發布公告,並自動推送到 Email 或其他通道。
此 Lab 的定位是 後台訊息發布模組,解決以下痛點:
(1) 管理員公告缺乏集中化,造成通知延遲與不一致。
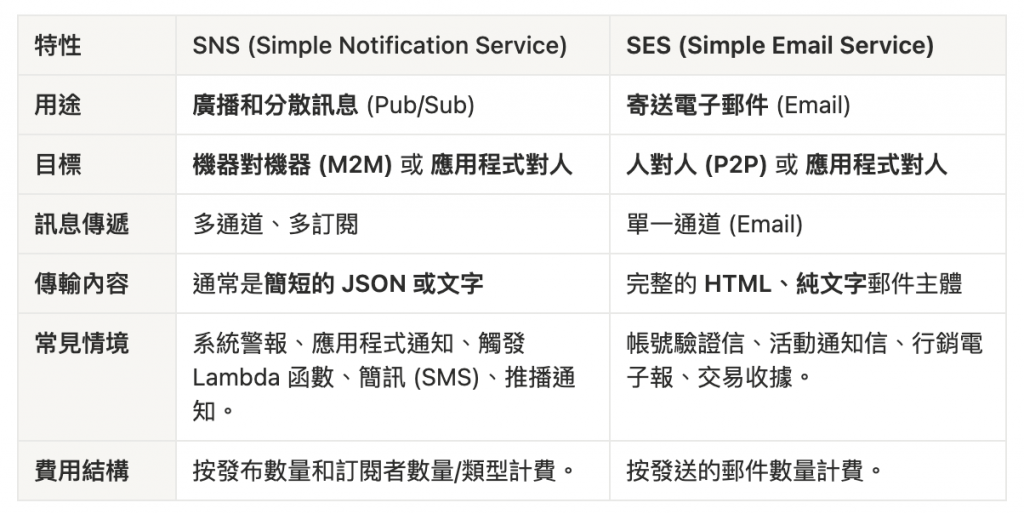
(2) 難以跨管道(Email / SMS / Push)同時發布訊息。
(3) 缺乏彈性與稽核機制,難以追蹤誰發布了公告。
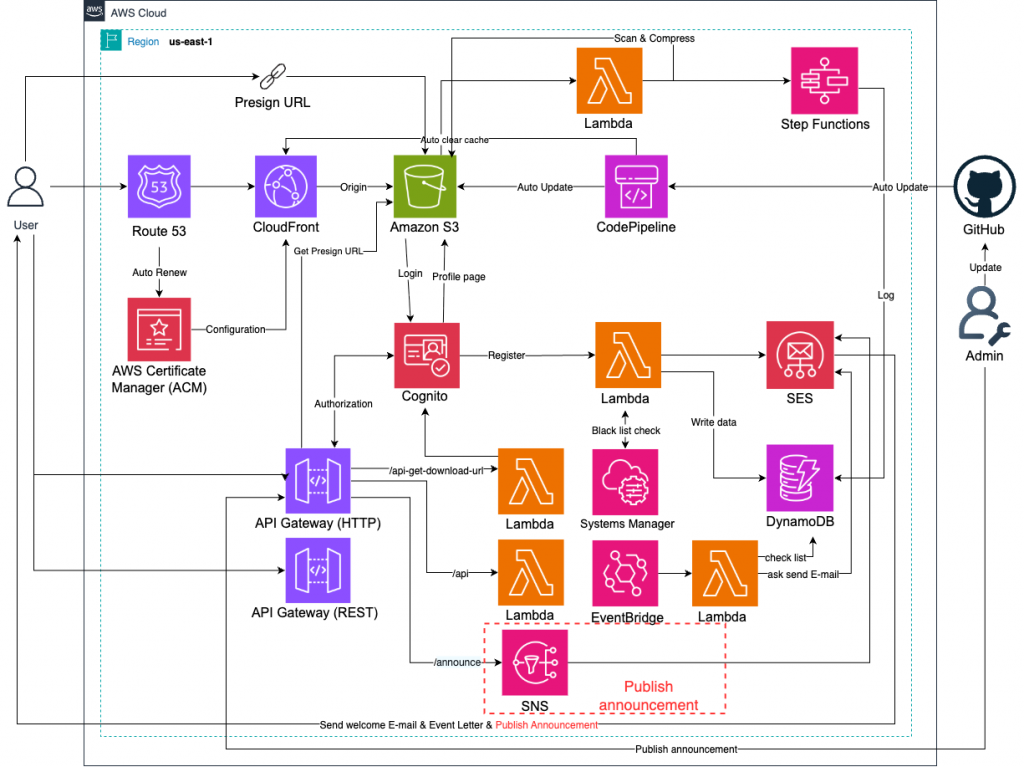
在整體 Serverless 架構中,它屬於 系統後台模組,負責公告訊息的統一入口,並整合至既有會員通知通道(SES / SNS)。
Admin 角色的使用者能呼叫公告 API。createdBy、createdAt,方便後續追蹤。進入「SNS」頁面。
點選「建立主題 (Create topic)」。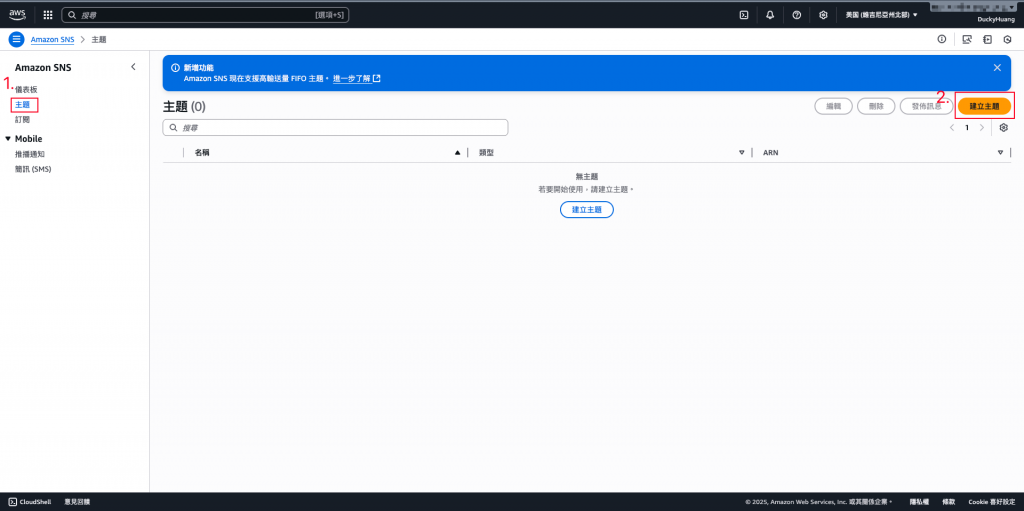
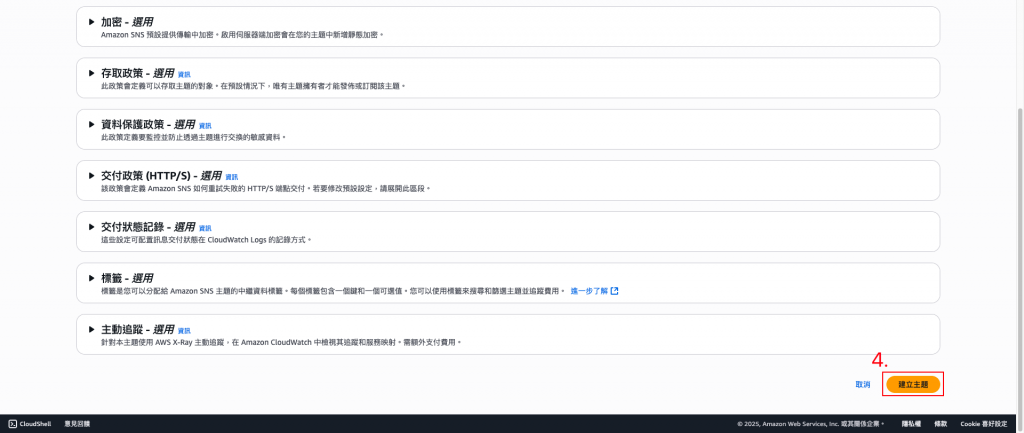
選擇「標準」類型,並創建主題。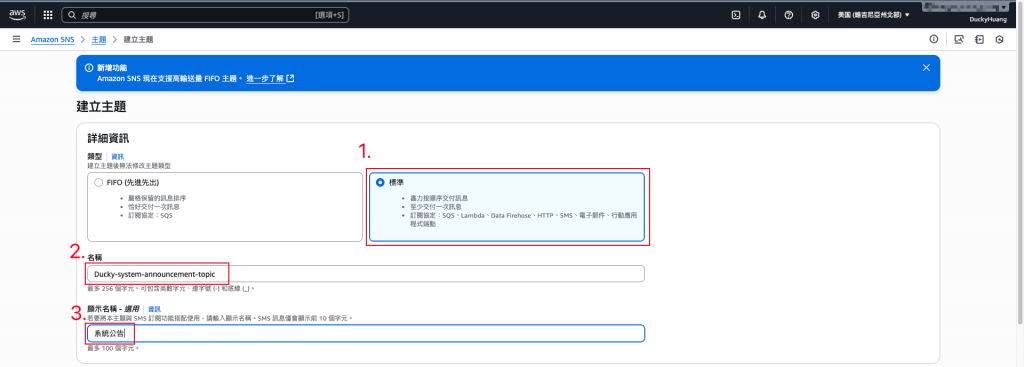
建立完成。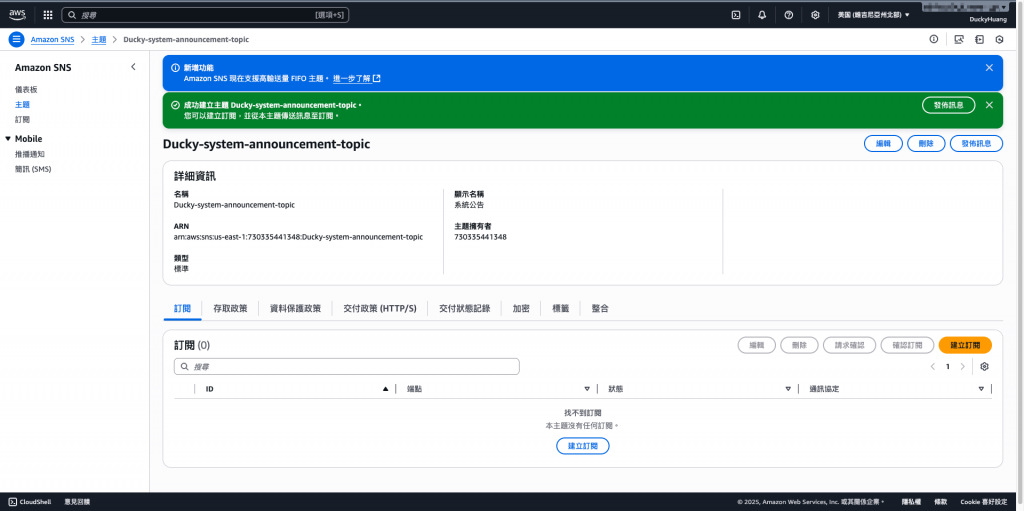
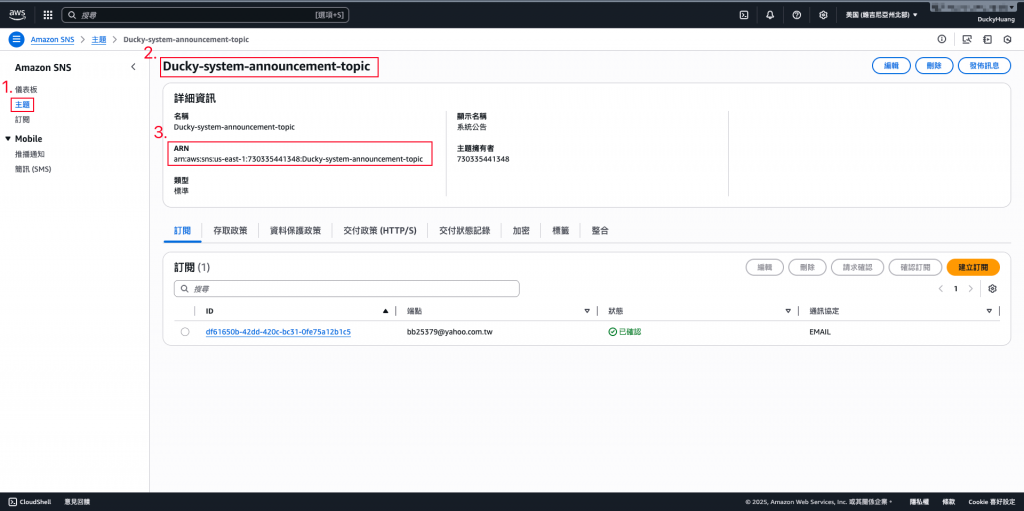
選擇剛建立的 SNS 主題(Topic)。
點擊 「建立訂閱 (Create subscription)」。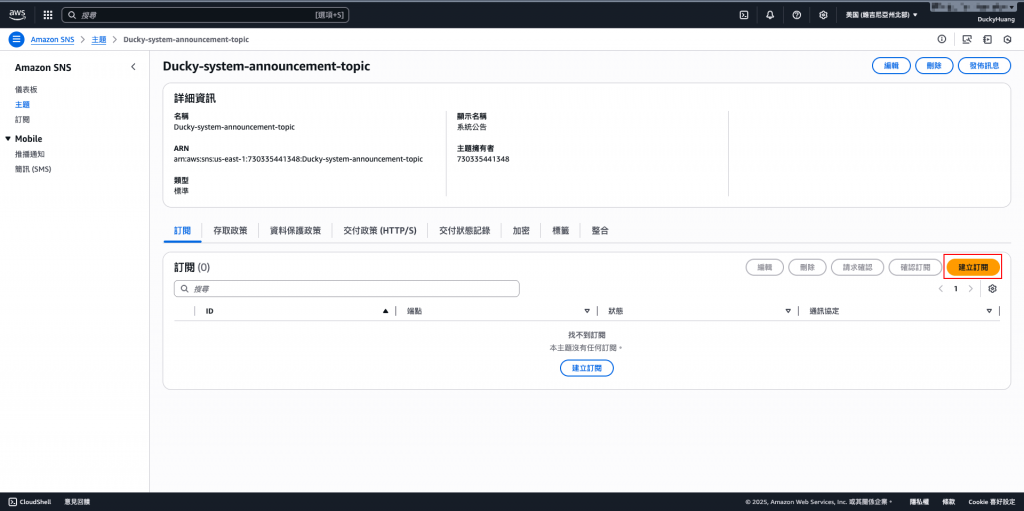
新增訂閱者的電子信箱。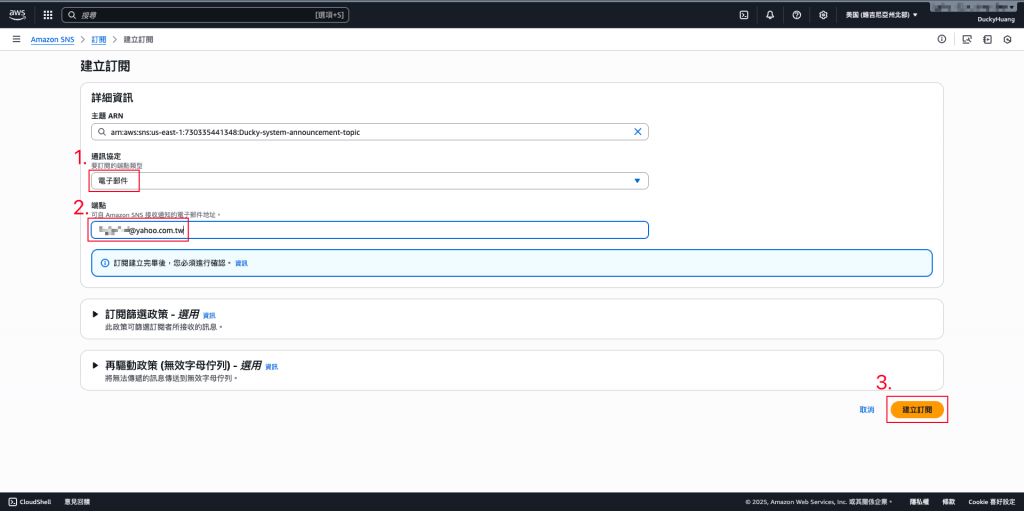
創建完成。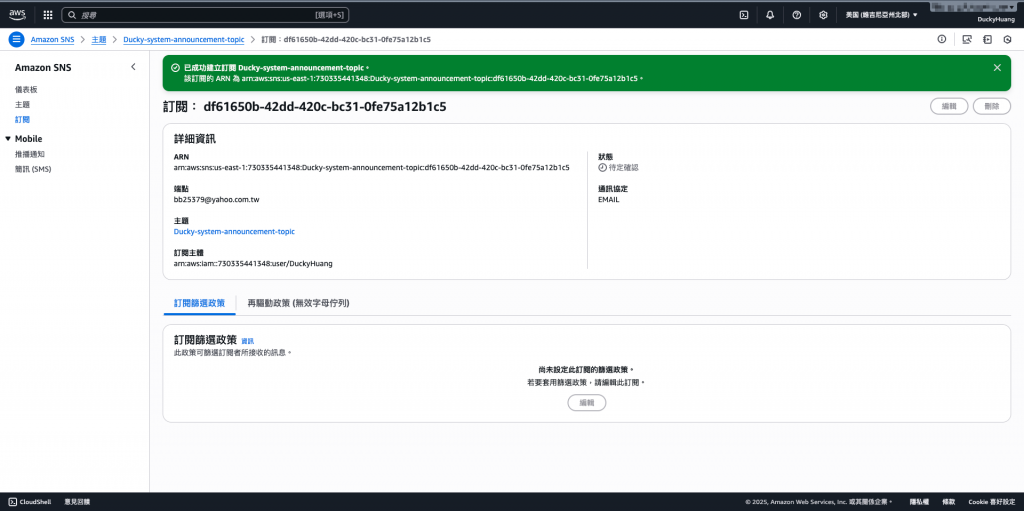
確認:該收件信箱將收到一封確認信,請務必點擊信中的連結來啟用訂閱。
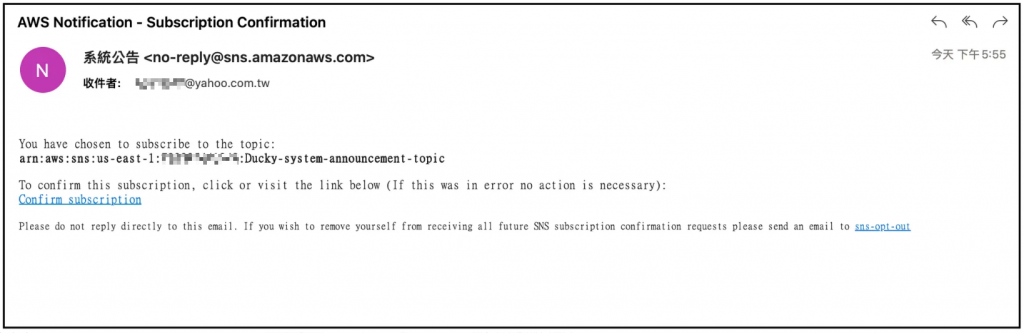
點擊確認連結後的畫面。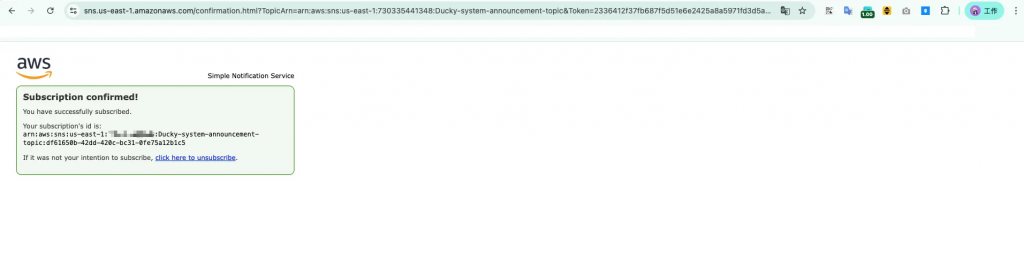
完成驗證。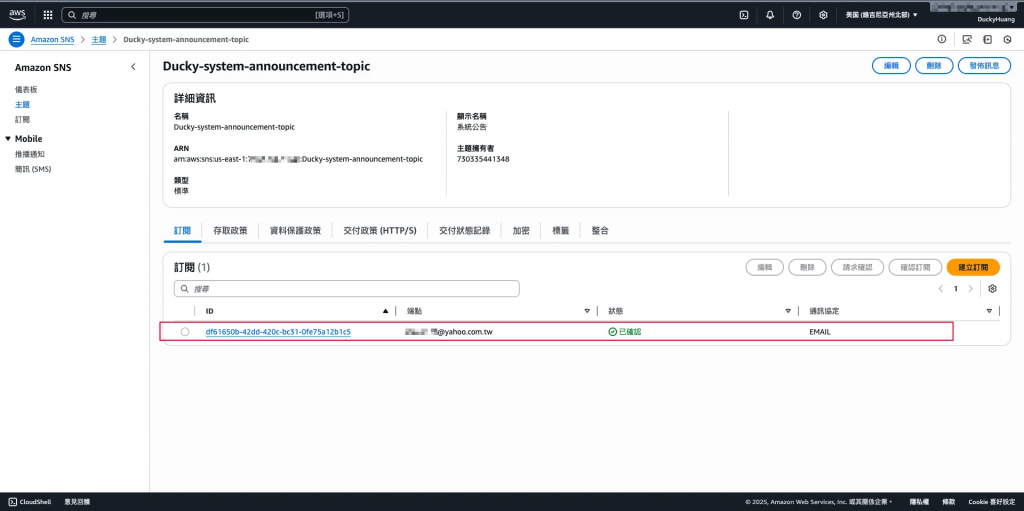
進入「Lambda」頁面。
創建一個新的函數。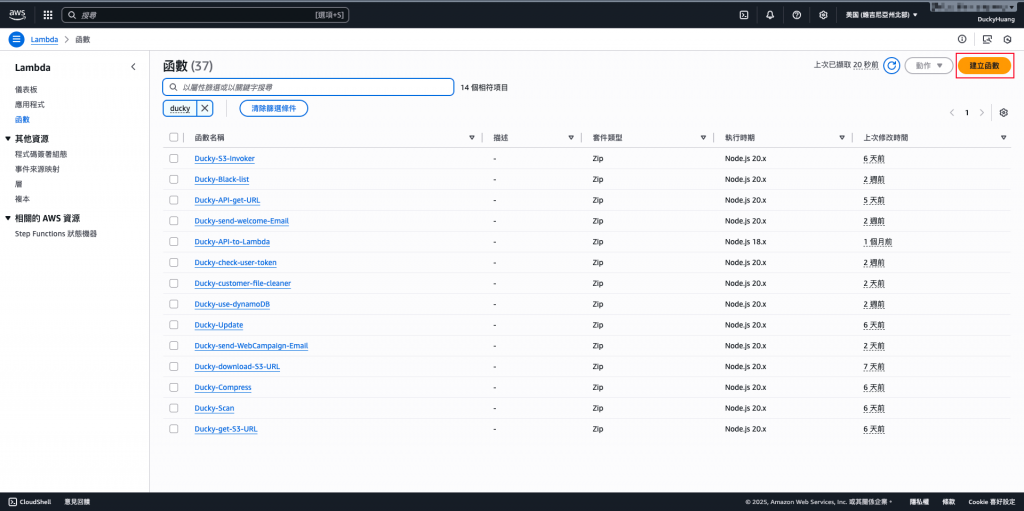
輸入函數名稱,並選擇編撰語言。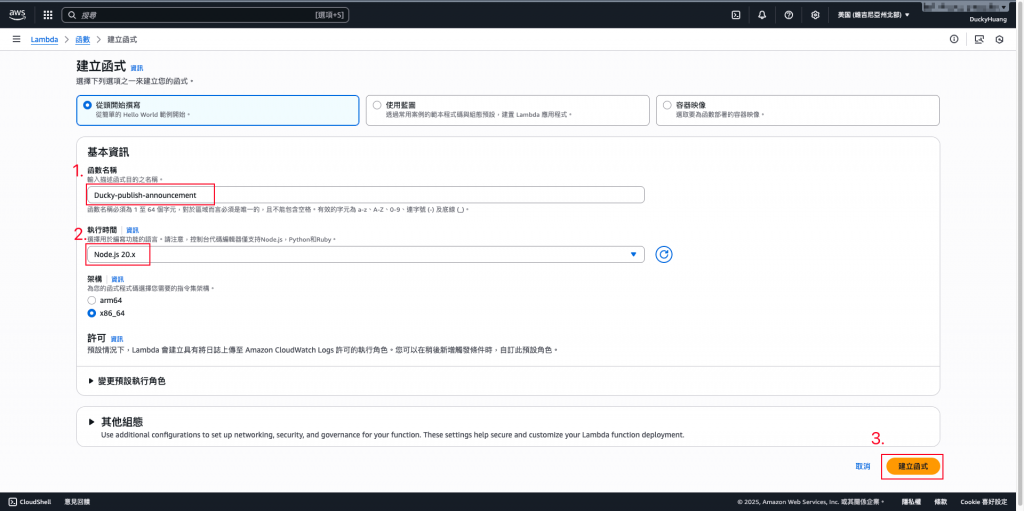
跳過建議畫面。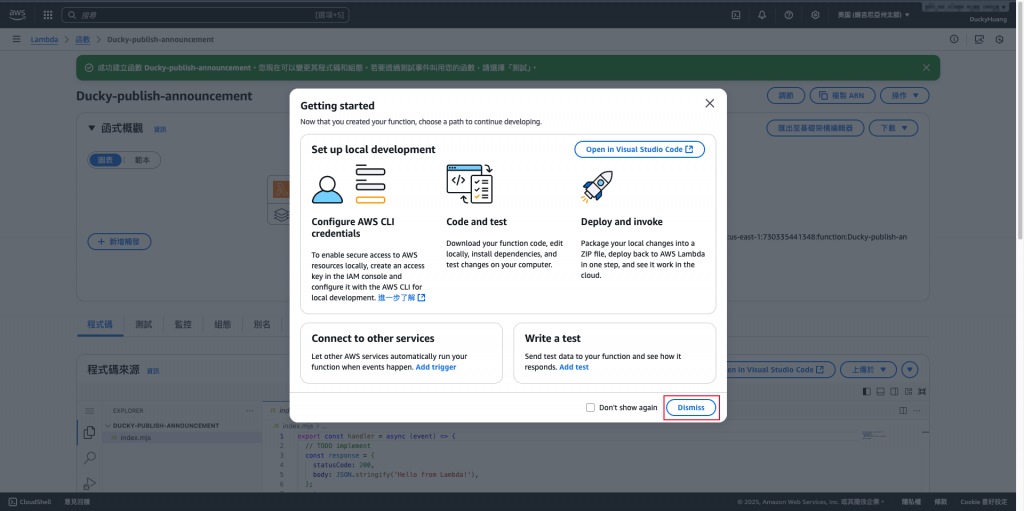
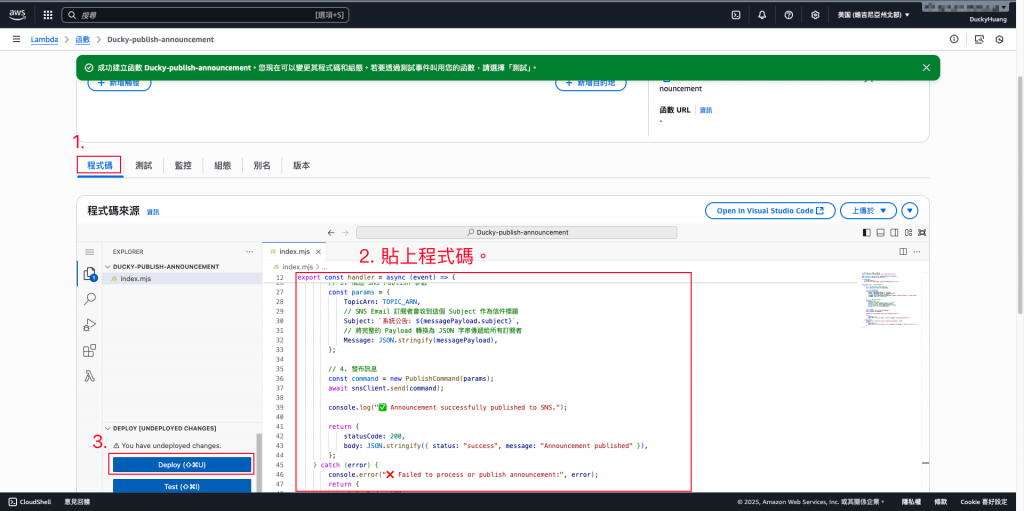
寫入程式碼,並部署。
程式碼範例
// index.mjs (使用 Node.js SDK v3)
import { SNSClient, PublishCommand } from "@aws-sdk/client-sns";

const snsClient = new SNSClient({ region: process.env.AWS_REGION });
const TOPIC_ARN = process.env.SNS_TOPIC_ARN;

if (!TOPIC_ARN) {
    // 確保環境變數已設定
    throw new Error('Environment variable SNS_TOPIC_ARN must be set.');
}

export const handler = async (event) => {
    try {
        // 1. 解析 API Gateway 傳入的 JSON Body
        const requestBody = JSON.parse(event.body);

        // 2. 構造訊息 Payload
        const messagePayload = {
            subject: requestBody.subject || '系統通知',
            content: requestBody.message || '沒有內容的公告。',
            // 嘗試從 API Gateway Context 獲取管理員資訊
            createdBy: event.requestContext?.authorizer?.claims?.['cognito:username'] || 'Admin Portal',
            createdAt: new Date().toISOString()
        };

        // 3. 構造 SNS Publish 參數
        const params = {
            TopicArn: TOPIC_ARN,
            Subject: `系統公告: ${messagePayload.subject}`,
            MessageStructure: "json",
            Message: JSON.stringify({
                default: messagePayload.content,   // 給 SMS、SQS 等用
                email: messagePayload.content,     // Email 訂閱者只收到這段
                sms: messagePayload.content        // 簡訊可用
            }),
        };

        // 4. 發布訊息
        const command = new PublishCommand(params);
        await snsClient.send(command);

        console.log("✅ Announcement successfully published to SNS.");

        return {
            statusCode: 200,
            body: JSON.stringify({ status: "success", message: "Announcement published" }),
        };
    } catch (error) {
        console.error("❌ Failed to process or publish announcement:", error);
        return {
            statusCode: 500,
            body: JSON.stringify({ status: "error", message: error.message || "Internal server error." }),
        };
    }
};
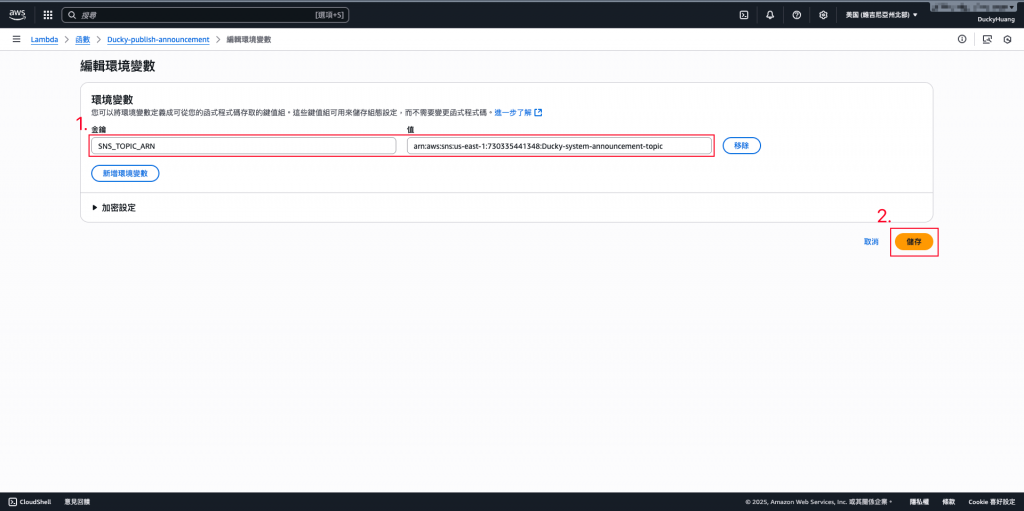
進入「組態」分頁,設定環境變數。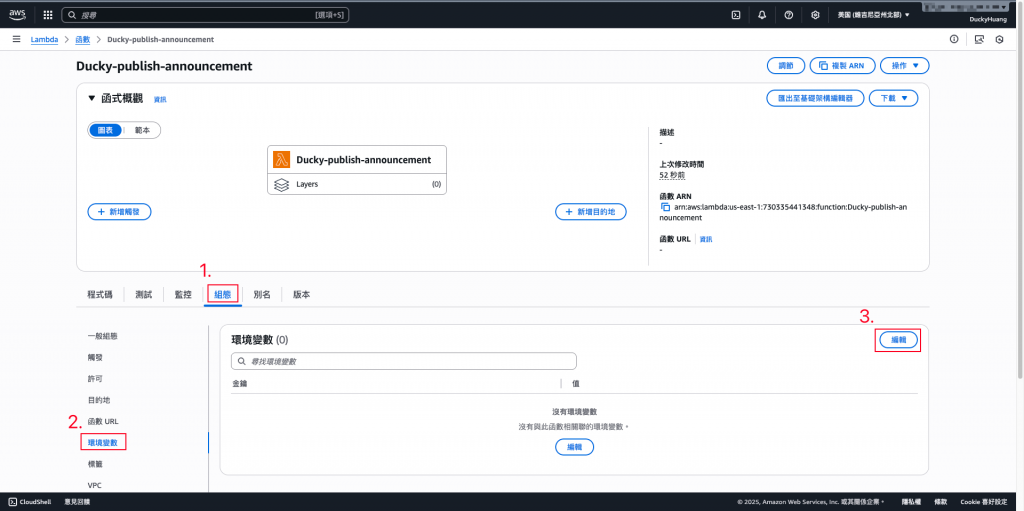
變數key「SNS_TOPIC_ARN」,Value為你在 SNS 的ARN。
進入「IAM 」頁面。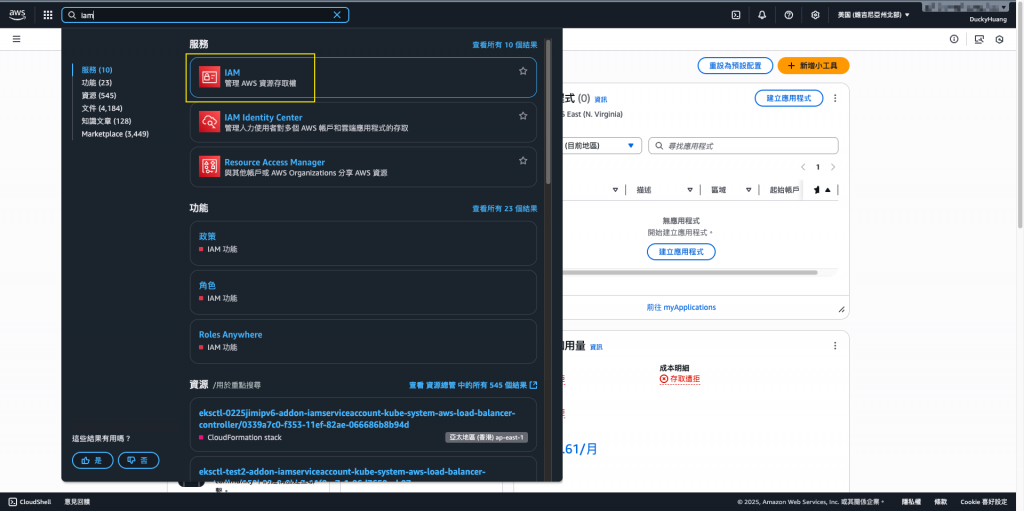
進入IAM role的頁面,點選該Lambda自動創建的IAM role。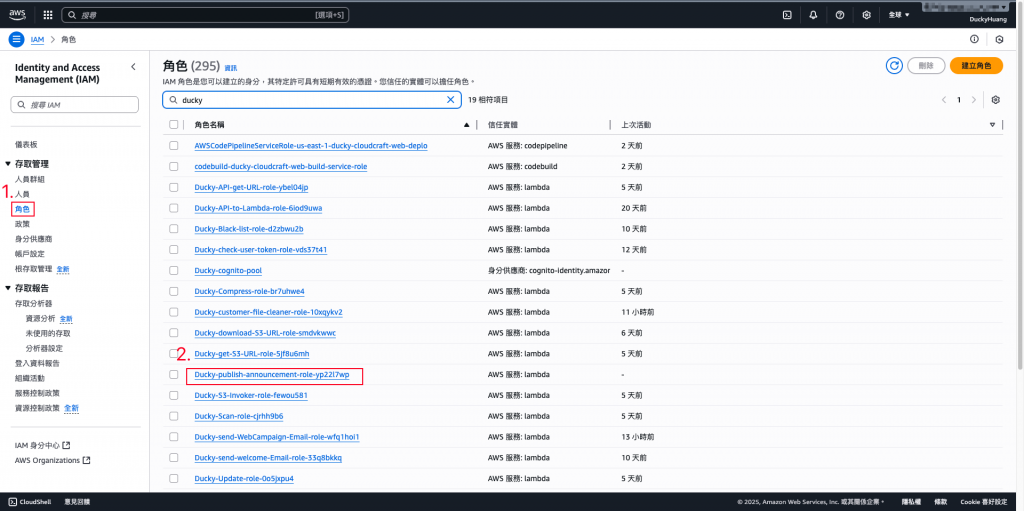
新增「許可政策」。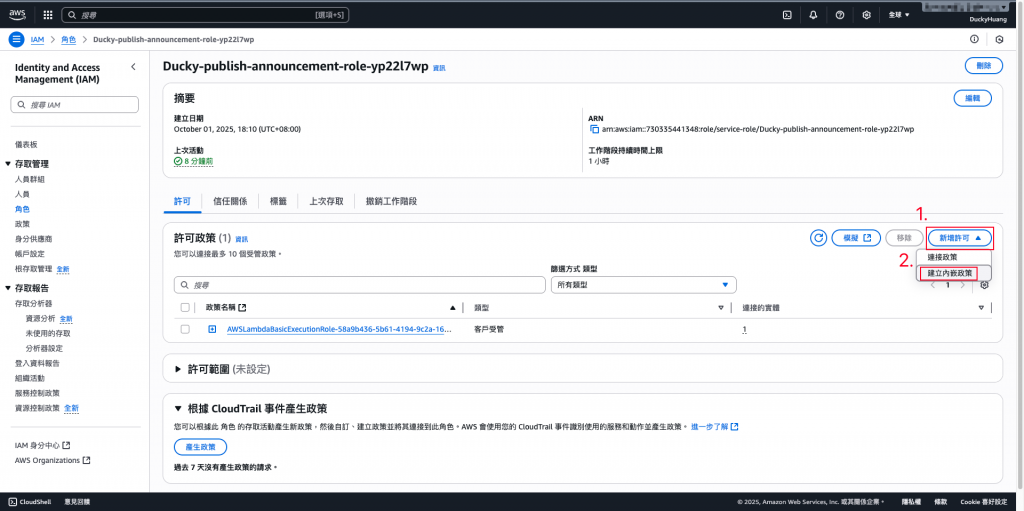
增加SNS的「Publish」權限。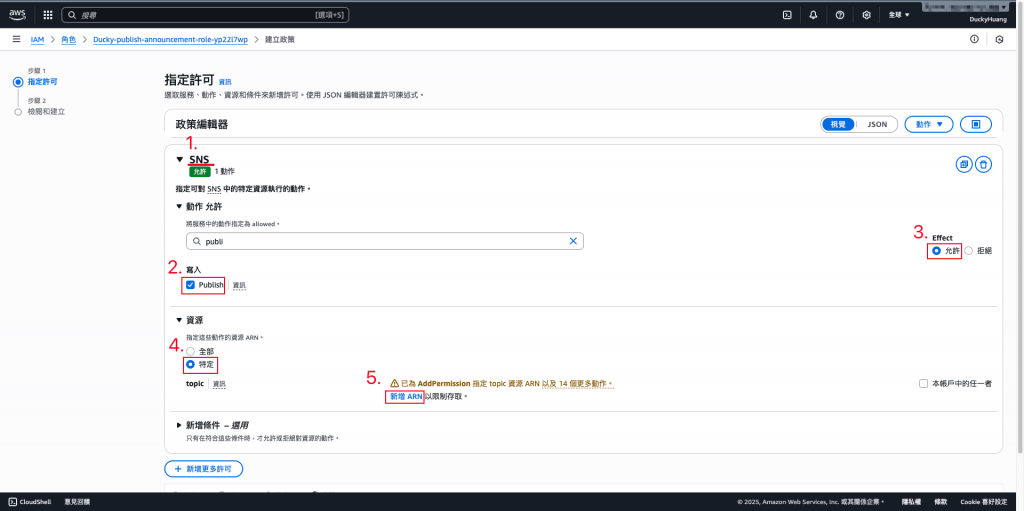
授權範圍為指定的SNS。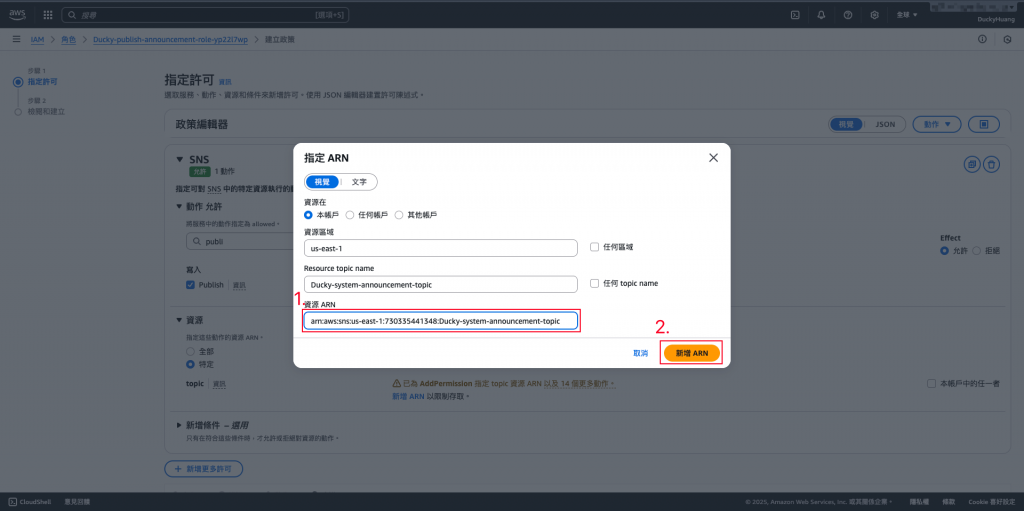

點選下一步。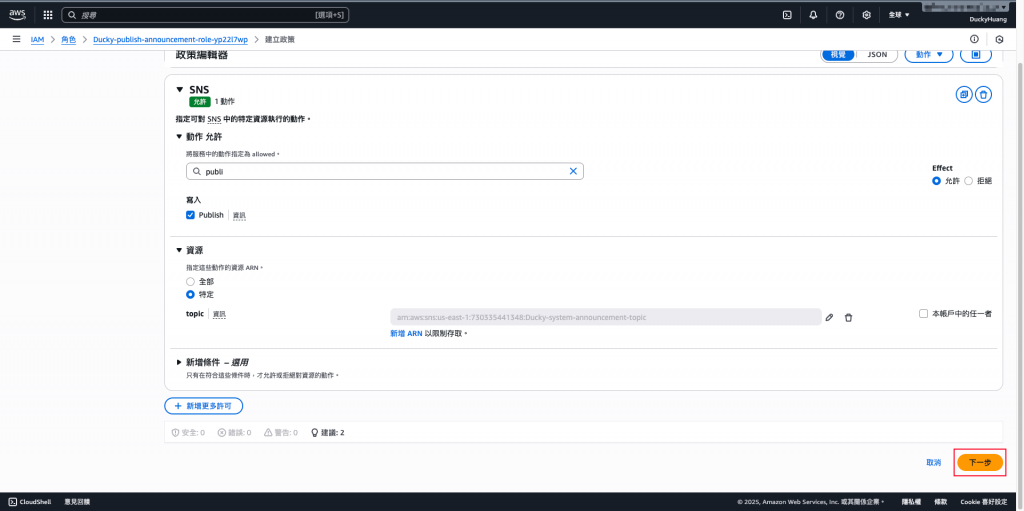
設定「許可政策」名稱。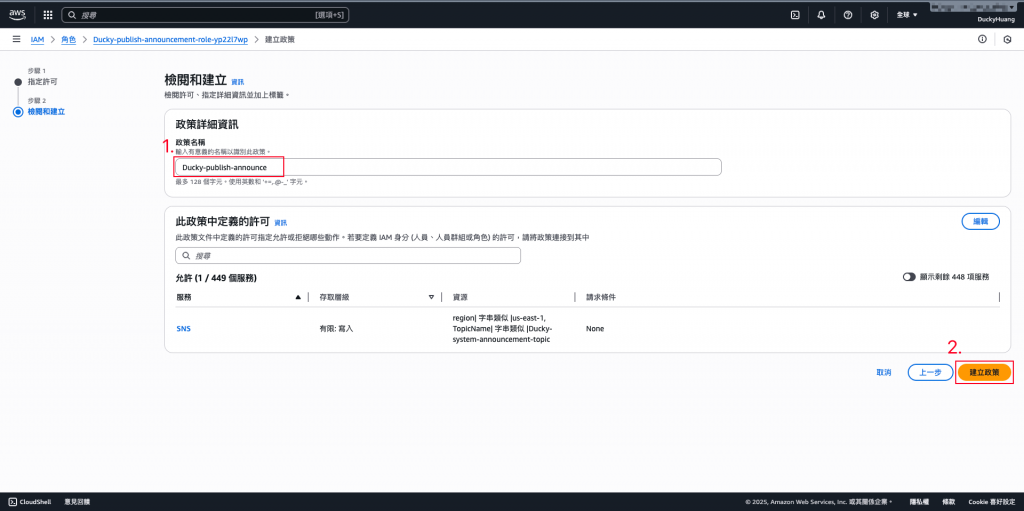
完成畫面。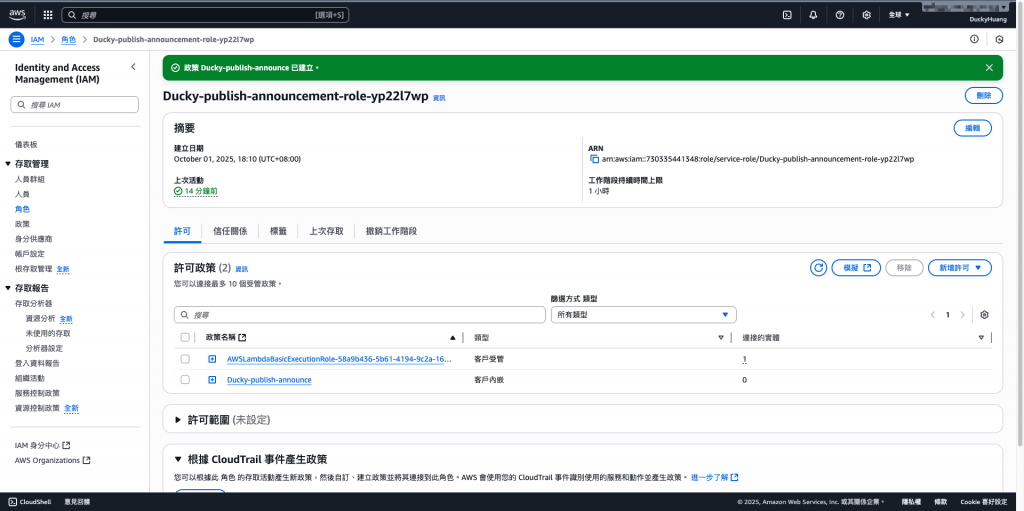
進入「API Gateway」頁面。
進入之前創建的HTTP API Gateway中。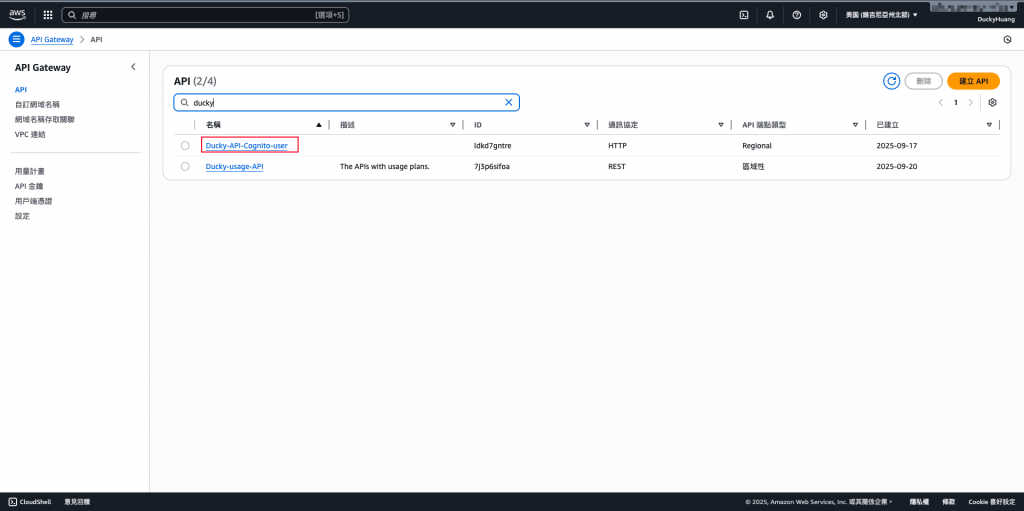
建立新的路由路徑。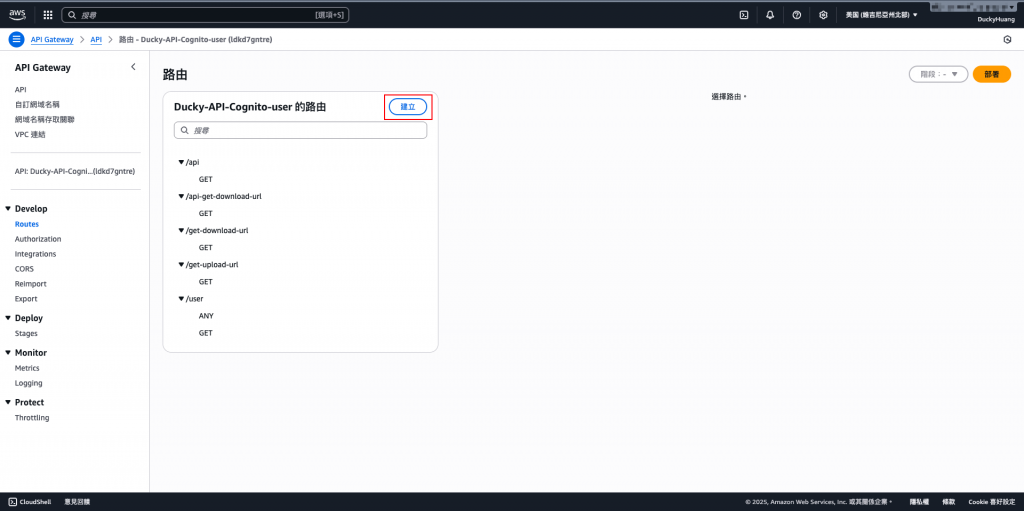
設定動作為「POST」,路徑可以自定義。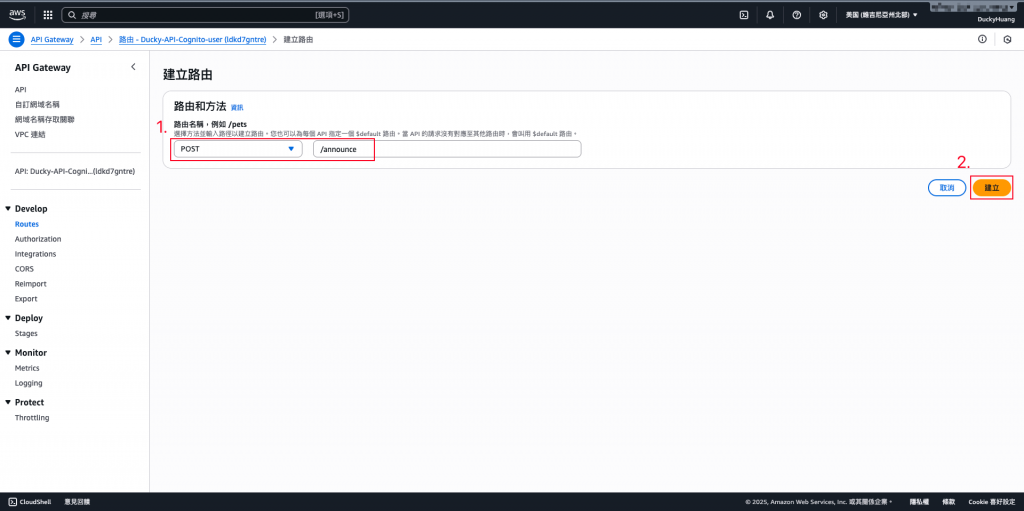
設定整合的配置。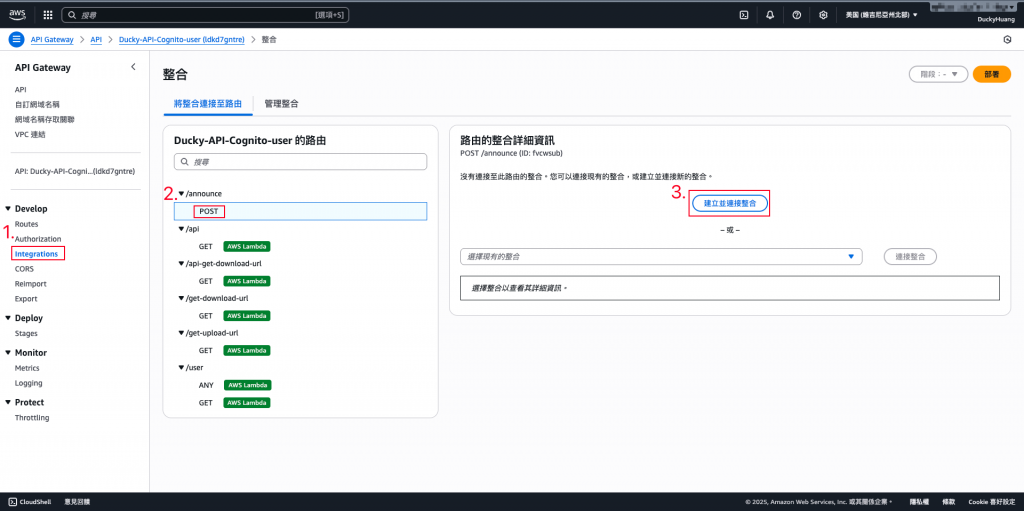
選擇剛剛創建的Lambda函數。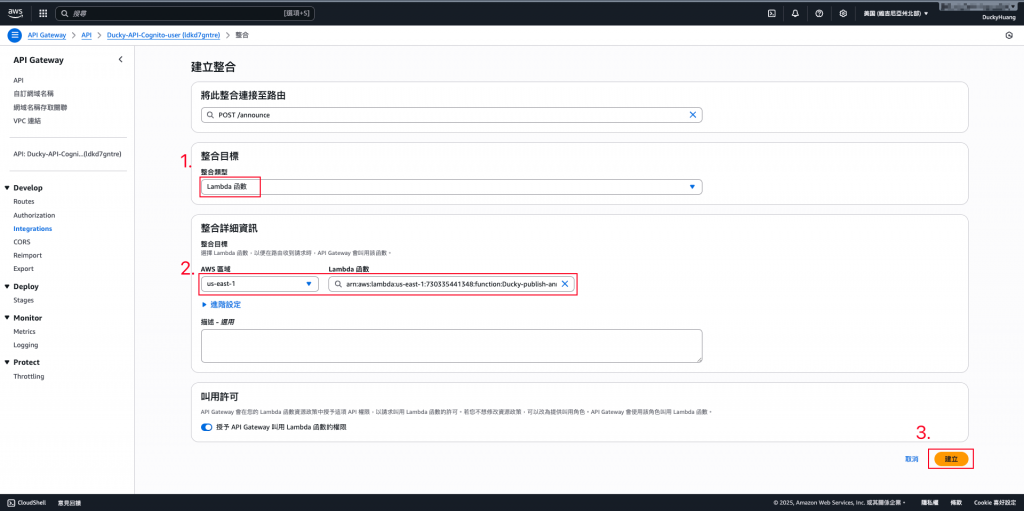
完成畫面。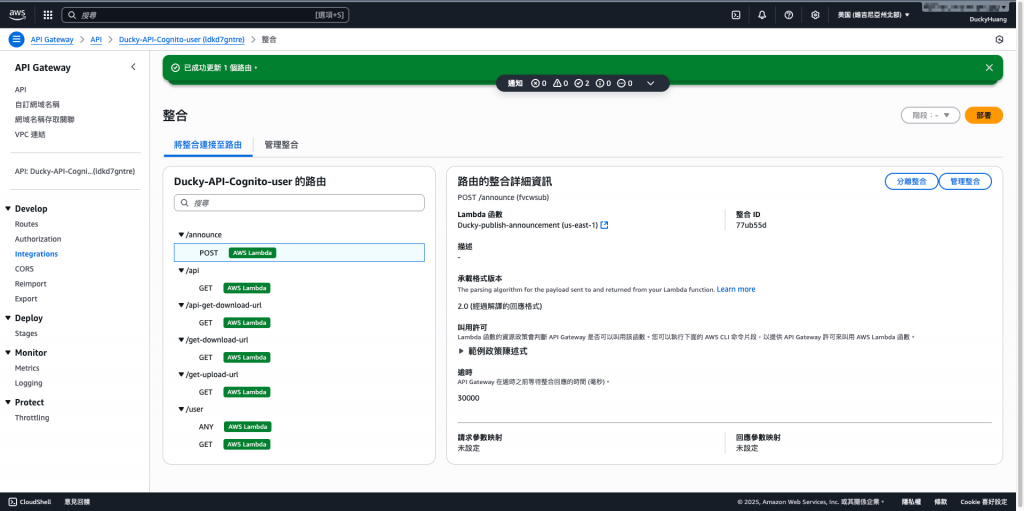
透過終端機(terminal)向Cognito取得 session。
第一段:
aws cognito-idp initiate-auth \
  --auth-flow USER_PASSWORD_AUTH \
  --client-id <Cognito_APP_CLIENT_ID> \
  --auth-parameters USERNAME=<username>,PASSWORD=<password>
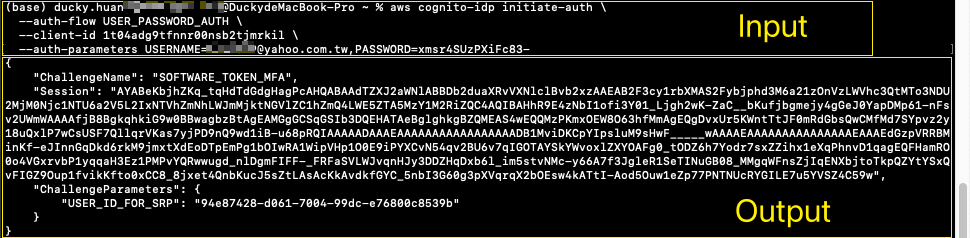
透過終端機(terminal),用 session向Cognito拿到對應的 IdToken 或 AccessToken。
第二段
aws cognito-idp respond-to-auth-challenge \
  --client-id <Cognito_APP_CLIENT_ID> \
  --challenge-name SOFTWARE_TOKEN_MFA \
  --session <上一步回傳的Session> \
  --challenge-responses USERNAME=<username>,SOFTWARE_TOKEN_MFA_CODE=<六位數驗證碼>

範例程式碼
# 替換 YOUR_API_ENDPOINT 和 YOUR_TOKEN
API_URL="https://YOUR_API_ID.execute-api.YOUR_REGION.amazonaws.com/prod/announce"
ADMIN_TOKEN="YOUR_ACTUAL_JWT_TOKEN"

curl -X POST \
  -H "Authorization: Bearer $ADMIN_TOKEN" \
  -H "Content-Type: application/json" \
  -d '{"subject": "系統緊急維護", "message": "服務將於 15 分鐘後停機,請提前儲存您的資料。"}' \
  "$API_URL"
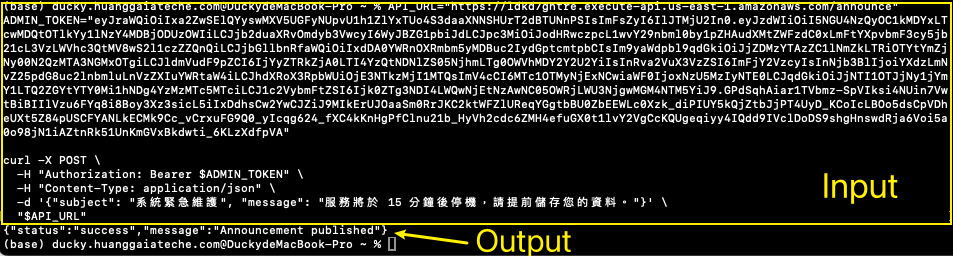
API 回應:您應收到 HTTP 200 和 JSON Body:{"status": "success", "message": "Announcement published"}。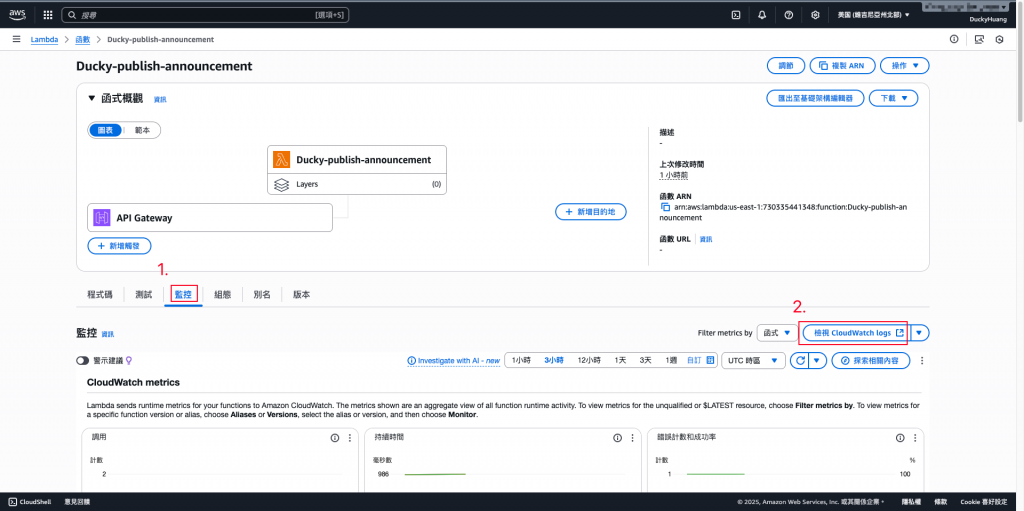
Lambda Logs:檢查 CloudWatch Logs for PublishAnnouncement 函數,確認 Log 顯示 ✅ Announcement successfully published to SNS.。
(1) 進到Lambda對應的CloudWatch頁面。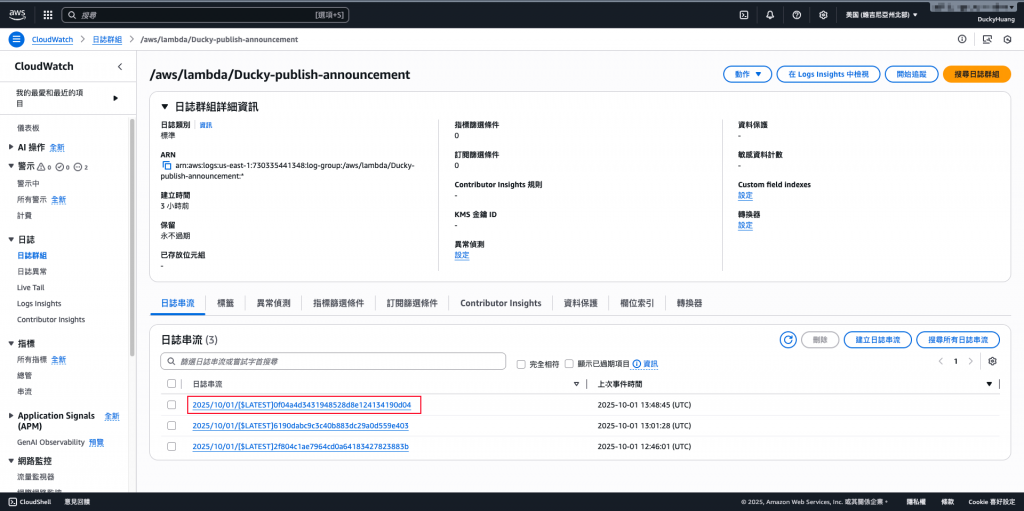
(2) 進到最近一筆的Log紀錄內。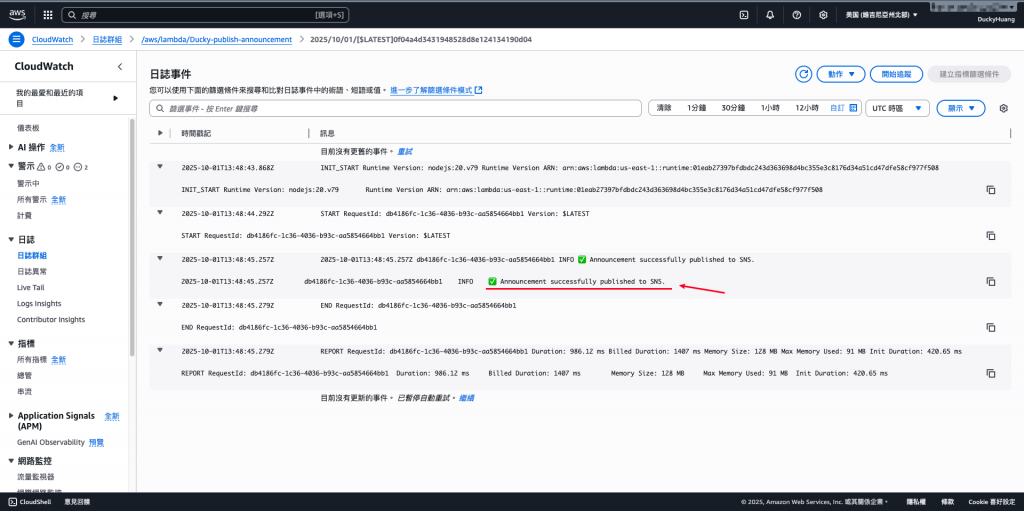
(3) 有看到已經成功寄出。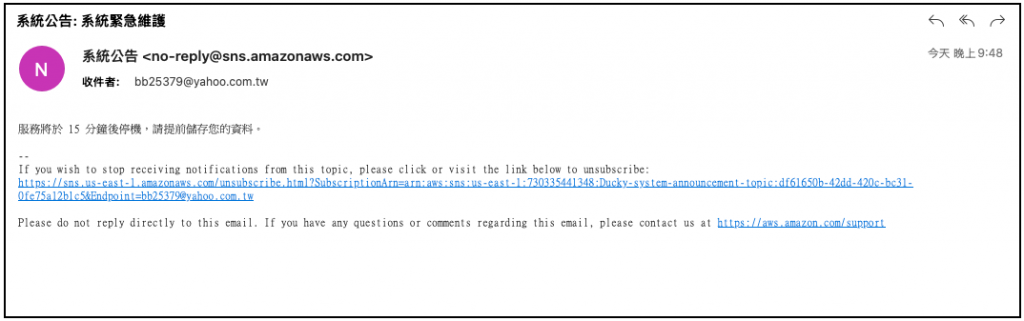
Email 驗證:檢查信件,主旨為:系統公告: 系統緊急維護,內容為一個 JSON 格式的訊息。
今天的 Lab 建立了一個 集中化的管理員公告系統,讓管理員能透過 Portal 發布公告,並由 SNS 自動分發至 Email(SES)或其他管道。這樣的架構解決了公告散亂、無法追蹤的問題,同時具備可擴充性,未來可支援多種通知通道,形成一個可靠的 系統訊息廣播中樞。

