


這篇文章會用 TDD 手刻 myFilterNot 和 myFilterIndexed,把 filter 系列的三個基本變體湊齊。順便從記憶體角度看看鏈式 filter 的成本
| Kotlin | C# LINQ | 備註 |
|---|---|---|
filter { } |
Where() |
Kotlin eager 回傳 List,C# lazy 回傳 IEnumerable |
filterNot { } |
Where(!...) |
C# 沒有直接對應,通常在 predicate 裡反轉 |
filterIndexed { idx, it -> } |
Where((item, index) => ...) |
C# Where 有帶 index 的多載 |
day 03 已經實作了 myFilter,day 04 補上了 inline,目前的版本長這樣
inline fun <T> Iterable<T>.myFilter(predicate: (T) -> Boolean): List<T> {
    val result = ArrayList<T>()
    for (element in this) {
        if (predicate(element)) {
            result.add(element)
        }
    }
    return result
}
測試也已經有了八個案例,day 03 的六個(基本篩選、Employee 篩選、空集合、全部符合、全部不符合、含 null 元素),加上 day 04 補的兩個(inline 後行為不變、non-local return),直接從 myFilterNot 開始
C# LINQ 沒有 filterNot,要排除符合的就在 predicate 裡反轉:Where(x => !x.IsActive)。Kotlin 多寫一個 filterNot 是「API 便利性」的設計選擇
兩個寫法在效能上一樣(編譯後都是判斷 + 反轉),差別在閱讀上
employees.filter { !it.isActive }      // 「留下不 active 的」
employees.filterNot { it.isActive }    // 「踢掉 active 的」
第二個寫法的意圖寫在函式名裡,讀的人不用看到 ! 才反應過來。Kotlin stdlib 在這類「語意常見但寫起來累贅」的地方會多提供一個函式。後面會看到 mapNotNull(map + 過濾 null)、takeUnless、getOrElse 都是同樣的考量,寧可多幾個函式,也要讓意圖一看就懂
@Test
fun `filterNot removes elements matching predicate`() {
    val numbers = listOf(1, 2, 3, 4, 5)
    val result = numbers.myFilterNot { it > 3 }
    assertEquals(listOf(1, 2, 3), result)
}

@Test
fun `filterNot employees not in Engineering`() {
    val result = employees.myFilterNot { it.department == "Engineering" }
    assertEquals(4, result.size)
    assertTrue(result.none { it.department == "Engineering" })
}

@Test
fun `filterNot empty list returns empty list`() {
    val empty = emptyList<Int>()
    val result = empty.myFilterNot { it > 0 }
    assertEquals(emptyList<Int>(), result)
}

@Test
fun `filterNot where all match returns empty`() {
    val numbers = listOf(1, 2, 3)
    val result = numbers.myFilterNot { it > 0 }
    assertEquals(emptyList<Int>(), result)
}

@Test
fun `filterNot where none match returns all`() {
    val numbers = listOf(1, 2, 3)
    val result = numbers.myFilterNot { it > 10 }
    assertEquals(listOf(1, 2, 3), result)
}

@Test
fun `filterNot removes null elements from nullable list`() {
    val numbers: List<Int?> = listOf(1, null, 2, null, 3)
    val result = numbers.myFilterNot { it == null }
    assertEquals(listOf(1, 2, 3), result)
}
測試的內容跟 myFilter 是差不多的。filter 是留下符合的,filterNot 是踢掉符合的。第六個測試確認 nullable 元素也能正常處理,null 對 filter 家族來說就是一般元素,沒有特殊待遇。至於例外案例,filter 家族本身沒有例外路徑,predicate 裡丟出的例外會直接往外拋,所以不另外硬湊一個例外測試
inline fun <T> Iterable<T>.myFilterNot(predicate: (T) -> Boolean): List<T> {
    val result = ArrayList<T>()
    for (element in this) {
        if (!predicate(element)) {
            result.add(element)
        }
    }
    return result
}
程式碼完全就跟 myFilter 一樣,只差在一個 !。真的就這樣
stdlib 的習慣是把「結果裝進哪個集合」抽出來,變成一個 To 結尾的函式。我們照做一次
inline fun <T, C : MutableCollection<in T>> Iterable<T>.myFilterNotTo(
    destination: C, predicate: (T) -> Boolean
): C {
    for (element in this) {
        if (!predicate(element)) {
            destination.add(element)
        }
    }
    return destination
}

inline fun <T> Iterable<T>.myFilterNot(predicate: (T) -> Boolean): List<T> {
    return myFilterNotTo(ArrayList<T>(), predicate)
}
測試全部維持綠燈。拆出 myFilterNotTo 之後,篩選邏輯只寫一次,要裝進 ArrayList 還是別的 MutableCollection 都可以。這跟 day 03 看到的 filterTo 是一模一樣的做法
@Test
fun `filterIndexed using both index and value`() {
    val numbers = listOf(0, 5, 2, 9, 4)
    val result = numbers.myFilterIndexed { index, value -> index == value }
    assertEquals(listOf(0, 2, 4), result)
}

@Test
fun `filterIndexed by even index`() {
    val numbers = listOf(10, 20, 30, 40, 50)
    val result = numbers.myFilterIndexed { index, _ -> index % 2 == 0 }
    assertEquals(listOf(10, 30, 50), result)
}

@Test
fun `filterIndexed employees first 3`() {
    val result = employees.myFilterIndexed { index, _ -> index < 3 }
    assertEquals(3, result.size)
    assertEquals("Alice", result[0].name)
    assertEquals("Charlie", result[2].name)
}

@Test
fun `filterIndexed empty list returns empty`() {
    val empty = emptyList<Int>()
    val result = empty.myFilterIndexed { _, _ -> true }
    assertEquals(emptyList<Int>(), result)
}

@Test
fun `filterIndexed none match returns empty`() {
    val numbers = listOf(1, 2, 3)
    val result = numbers.myFilterIndexed { index, _ -> index > 10 }
    assertEquals(emptyList<Int>(), result)
}
注意 Lambda 簽名變了。myFilter 是 (T) -> Boolean,myFilterIndexed 是 (Int, T) -> Boolean。第一個參數是 index,第二個是元素本身
第一個測試刻意讓 index 和 value 錯開,listOf(0, 5, 2, 9, 4) 裡只有位置 0、2、4 的值跟自己的 index 相同。這樣兩個參數的位置如果傳反了,測試就會抓到
後面的測試用 _ 來忽略不需要的參數,這是 Kotlin 的慣例
inline fun <T> Iterable<T>.myFilterIndexed(
    predicate: (index: Int, T) -> Boolean
): List<T> {
    val result = ArrayList<T>()
    var index = 0
    for (element in this) {
        if (predicate(index, element)) {
            result.add(element)
        }
        index++
    }
    return result
}
跟 myFilter 比,多了一個手動維護的 index 計數器。每跑一輪迴圈就 index++
這裡有個細節:index++ 放在 if 外面,不管元素有沒有被加入結果,index 都要遞增。因為 index 對應的是原始集合的位置,不是結果集合的位置
手動計數器能動,但 stdlib 已經有 forEachIndexed 這個「帶 index 遍歷」的現成工具,改用它可以把計數邏輯交出去
inline fun <T> Iterable<T>.myFilterIndexed(
    predicate: (index: Int, T) -> Boolean
): List<T> {
    val result = ArrayList<T>()
    forEachIndexed { index, element ->
        if (predicate(index, element)) {
            result.add(element)
        }
    }
    return result
}
測試維持綠燈。var index = 0 和 index++ 都不見了,少一個會被手滑改錯的可變變數
withIndex() 會把 index 和元素配成一對,再用解構宣告拿出來
inline fun <T> Iterable<T>.myFilterIndexed(
    predicate: (index: Int, T) -> Boolean
): List<T> {
    val result = ArrayList<T>()
    for ((index, element) in this.withIndex()) {
        if (predicate(index, element)) {
            result.add(element)
        }
    }
    return result
}
測試一樣全綠,而且讀起來可能是三個版本裡最直覺的:迴圈長得跟一般的 for (element in this) 幾乎一樣,只是多解構出一個 index
差別在成本。withIndex() 不是 inline 函式,它回傳一個 IndexingIterable,走訪時再包一層 IndexingIterator(定義在 kotlin.collections 的 Iterators.kt)
internal class IndexingIterator<out T>(private val iterator: Iterator<T>) : Iterator<IndexedValue<T>> {
    private var index = 0
    final override fun hasNext(): Boolean = iterator.hasNext()
    final override fun next(): IndexedValue<T> = IndexedValue(checkIndexOverflow(index++), iterator.next())
}
next() 每被呼叫一次就 new 一個 IndexedValue,也就是每個元素多配一個物件。JIT 的 escape analysis 有機會判定這些物件沒有逃出迴圈、把配置消掉,但那是有機會,不是保證
stdlib 手上就有 withIndex(),forEachIndexed 卻選擇自己維護計數器
public inline fun <T> Iterable<T>.forEachIndexed(action: (index: Int, T) -> Unit): Unit {
    var index = 0
    for (item in this) action(checkIndexOverflow(index++), item)
}
這個選擇說明了取捨落在哪一邊。自己的程式碼裡 withIndex() 通常沒問題,好讀更重要,但寫的是會被大量呼叫的底層工具時,就會像 stdlib 一樣把那個物件省下來
原始碼位置:kotlin.collections 的 _Collections.kt
先看 filterNot,這次不用貼程式碼了。Refactor 那步推導出來的形狀,就是 stdlib 的形狀:入口函式只負責準備 ArrayList,真正的迴圈在 filterNotTo 裡,核心是 if (!predicate(element))。連泛型約束 C : MutableCollection<in T> 和參數順序都一樣,差別只剩 public 修飾和大括號的寫法
filterIndexed 才有東西可看。我們的版本停在直接回傳 List,stdlib 多了一層
public inline fun <T, C : MutableCollection<in T>> Iterable<T>.filterIndexedTo(
    destination: C, predicate: (index: Int, T) -> Boolean
): C {
    forEachIndexed { index, element ->
        if (predicate(index, element)) destination.add(element)
    }
    return destination
}
處理 index 的方式跟我們一樣交給 forEachIndexed,差別是它同樣套上了 xxxTo 模式。這個模式從 day 03 的 filterTo 開始就一直出現,而 filter 家族是整組做完的:filterNotTo、filterIndexedTo、filterNotNullTo、filterIsInstanceTo 全都有。stdlib 不會只挑幾個做
每次呼叫 filter 都會建立一個新的 ArrayList 裝結果。如果你鏈式呼叫
val result = employees
    .myFilter { it.salary > 60000 }
    .myFilter { it.department == "Engineering" }
第一個 myFilter 產出一個中間 List,第二個 myFilter 再從這個中間 List 裡篩出最終結果。兩個 ArrayList,兩次遍歷
C# 的做法不一樣。Where(A).Where(B) 回傳的是 IEnumerable,只有一條 iterator chain。在最終消費(比如 ToList())之前,不會產生中間集合。每個元素只走一趟,通過 A 再通過 B
Kotlin 要達到類似效果,得用 Sequence。day 27 開始會進入 Sequence 的世界,到時候會看到 lazy evaluation 如何避免中間集合的問題
不過話說回來,對大多數場景來說,eager 的 filter 已經夠用了。只有在資料量大或鏈式操作很長的時候,才需要考慮切換到 Sequence
filter 家族還有一個成員:filterIsInstance<T>(),用來篩選特定型別的元素
val mixed: List<Any> = listOf(1, "hello", 2, "world", 3)
val strings = mixed.filterIsInstance<String>()
// ["hello", "world"]
這個函式需要 reified 泛型才能在 runtime 取得型別資訊。reified 是什麼、為什麼需要,留到 day 34(泛型進階)再實作。這裡先知道有這個東西就好
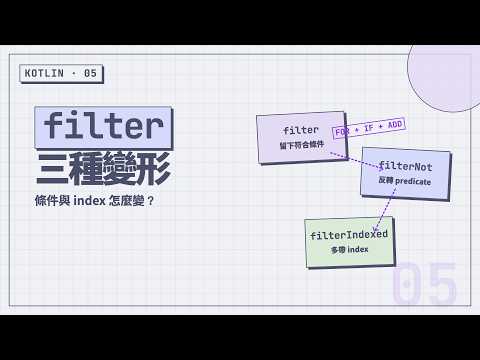
filter 系列就是 for + if + add 的排列組合。filterNot 反轉條件,filterIndexed 多帶一個 index。結構都很單純,沒有複雜的邏輯
但要注意每次 filter 都會分配新的 ArrayList。鏈式呼叫會產生中間集合,這是 eager 操作的天生限制。day 27 的 Sequence 會回來解決這個問題
下一篇換個方向:如果不是要篩出一堆元素,而是只要找「一個」呢?day 06 來看 first / last / single
同步刊登於 Blog
圖片來源:AI 產生


 iThome鐵人賽
 看影片追技術