
在 Day 21 完成「時光相簿」的資料封存與清單陳列後,Day 22 的核心目標有兩個:
html2canvas 套件,在「當月色卡彈窗」與「相簿大圖彈窗」都提供一鍵下載 PNG 圖檔的功能。html2canvas 是一個可以將網頁上的 HTML / DOM 元素轉換成 Canvas 圖像的 JavaScript 套件。這次月卡本身是由 HTML、CSS 與漸層效果組成,因此可以利用它把畫面上的色卡「截取」成 Canvas,再進一步轉換成 PNG 圖檔,讓使用者可以將月卡保存到自己的裝置。
在終端機執行安裝指令,安裝常用的 DOM 轉圖片套件:
npm install html2canvas
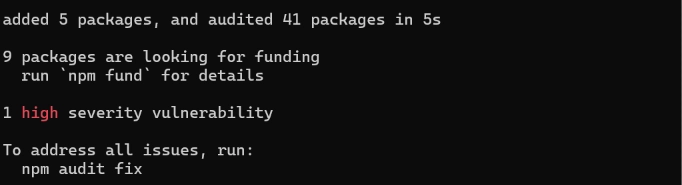
有顯示出最上面那行就代表安裝成功了喔!
打開 src/components/GemJar.vue,在 <script setup> 區塊進行以下擴充:
在最上方加入引入:
import html2canvas from 'html2canvas'
在 showAlbum 變數附近加入:
// 目前在相簿中被點選、要展開大圖檢視的色卡
const selectedAlbumCard = ref(null)

// 打開相簿卡片大圖
function openCardDetail(card) {
  selectedAlbumCard.value = card
}

// 關閉相簿卡片大圖
function closeCardDetail() {
  selectedAlbumCard.value = null
}

// 綁定卡片 DOM 的 ref 與匯出狀態
const currentCardRef = ref(null)
const detailCardRef = ref(null)
const isExporting = ref(false)
使用 html2canvas 抓取 DOM 繪製成 Canvas。這裡特別加入 onclone 與白色底色設定,確保截圖時能排除外層動畫與陰影干擾,還原最純粹鮮明的極光色彩:
async function exportCardAsImage(elementRef, filenamePrefix = 'mood-card') {
  if (!elementRef || isExporting.value) return

  try {
    isExporting.value = true

    // 將 DOM 節點繪製為高解析度 Canvas
    const canvas = await html2canvas(elementRef, {
      scale: 2, // 解析度清晰
      useCORS: true,
      backgroundColor: '#ffffff',
      onclone: (clonedDoc, clonedElement) => {
        // 排除動畫、變形與陰影運算對 Canvas 像素的干擾
        clonedElement.style.animation = 'none'
        clonedElement.style.transform = 'none'
        clonedElement.style.boxShadow = 'none'

        const blurGlass = clonedElement.querySelector('.aurora-blur-glass')
        if (blurGlass) blurGlass.style.display = 'none'

        const innerGlow = clonedElement.querySelector('.aurora-inner-glow')
        if (innerGlow) innerGlow.style.display = 'none'
      }
    })

    // 轉成 Base64 圖檔連結並觸發下載
    const image = canvas.toDataURL('image/png')
    const link = document.createElement('a')
    link.href = image
    link.download = `${filenamePrefix}-${Date.now()}.png`
    link.click()
  } catch (error) {
    console.error('色卡匯出失敗:', error)
    alert('匯出圖片時發生問題,請稍候再試!')
  } finally {
    isExporting.value = false
  }
}
<template> 加入按鈕與大圖彈窗在原本的月度色卡彈窗中,做兩處小調整:
ref="currentCardRef"。data-html2canvas-ignore="true",確保下載下來的圖片不會印出網頁按鈕:<div class="monthly-art-card" ref="currentCardRef" @click.stop>
<!-- 畫布主體與下方文字維持原樣 ... -->
<!-- 操作按鈕群組:珍藏與下載 -->
<div class="card-modal-actions" data-html2canvas-ignore="true">
<button class="btn-seal" @click="sealMonthlyCard">珍藏至時光相簿</button>
<button
class="btn-download"
:disabled="isExporting"
@click="exportCardAsImage(currentCardRef, `mood-${cardMonthTarget}`)"
>
{{ isExporting ? '匯出中...' : '儲存為圖片' }}
</button>
</div>
</div>
找到時光相簿清單中的小卡片,加上點擊展開事件與樣式 class:
<div
  v-for="card in archivedCards"
  :key="card.month"
  class="album-card-item is-clickable"
  @click="openCardDetail(card)"
>
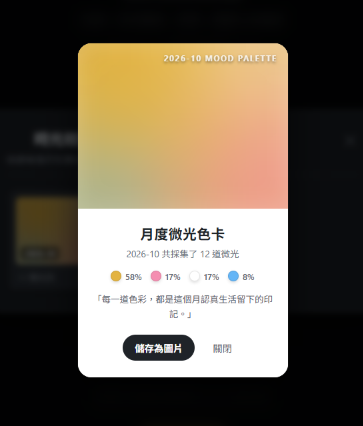
在時光相簿彈窗外層下方,新增獨立的大圖檢視彈窗。結構與原本色卡相同,資料來源讀取 selectedAlbumCard,並提供大圖下載功能:
<!-- 3. 相簿歷史色卡大圖檢視彈窗 -->
<div v-if="selectedAlbumCard" class="modal-backdrop z-top" @click="closeCardDetail">
  <div class="monthly-art-card" ref="detailCardRef" @click.stop>
    <!-- 卡片內容結構與月度色卡相同,維持原樣(僅資料來源綁定 selectedAlbumCard) ... -->

    <!-- 操作列:只有下載與關閉 -->
    <div class="card-modal-actions" data-html2canvas-ignore="true">
      <button
        class="btn-download primary"
        :disabled="isExporting"
        @click="exportCardAsImage(detailCardRef, `mood-${selectedAlbumCard.month}`)"
      >
        {{ isExporting ? '匯出中...' : '儲存為圖片' }}
      </button>
      <button class="btn-cancel" @click="closeCardDetail">關閉</button>
    </div>
  </div>
</div>
在 <style scoped> 尾部補上按鈕與彈窗層級樣式:
/* 操作按鈕並排群組 */
.card-modal-actions {
  display: flex;
  justify-content: center;
  align-items: center;
  gap: 10px;
}

/* 下載按鈕樣式 */
.btn-download {
  background: rgba(31, 35, 40, 0.08);
  border: 1px solid rgba(31, 35, 40, 0.2);
  color: #24292f;
  padding: 8px 16px;
  border-radius: 20px;
  font-size: 0.8rem;
  font-weight: 600;
  cursor: pointer;
  transition: all 0.2s ease;
}

.btn-download:hover {
  background: rgba(31, 35, 40, 0.15);
}

.btn-download.primary {
  background: #1f2328;
  color: #ffffff;
  border: none;
}

.btn-download.primary:hover {
  opacity: 0.9;
}

.btn-download:disabled {
  opacity: 0.5;
  cursor: not-allowed;
}

.btn-cancel {
  background: none;
  border: none;
  color: #57606a;
  font-size: 0.8rem;
  padding: 8px 14px;
  cursor: pointer;
}

/* 相簿卡片點擊手勢 */
.album-card-item.is-clickable {
  cursor: pointer;
}

/* 確保大圖彈窗疊在相簿彈窗最上層 */
.modal-backdrop.z-top {
  z-index: 200;
}
做完這邊就可以到瀏覽器看看今天的大重點「下載圖片」,能不能操作成功!
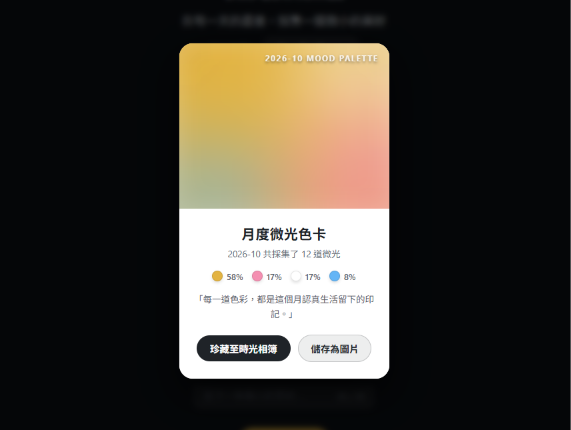
在測試色卡彈窗時,遇到了一個棘手的問題:畫面上的按鈕完全點不進去,點擊毫無反應,也沒有觸發任何下載或關閉行為。
打開瀏覽器開發者工具,發現主控台拋出了多條紅色錯誤警告:

在計算屬性 monthlyGradientStyle 中,使用了 dominant.color,但函式內漏掉了 const dominant = stats[0] 的宣告。當模板重新渲染並執行這個計算屬性時,會拋出 ReferenceError,造成 Vue 的渲染流程發生錯誤,因此畫面上的互動也受到影響,出現按鈕完全無法點擊的情況。
在 monthlyGradientStyle 與 getCardGradientStyle 讀取屬性前,確保變數正確宣告並賦值:
	// 補上主導色變數宣告,避免未定義錯誤導致渲染中斷
  const dominant = stats[0]
今天我們順利完成了色卡的大圖檢視與高畫質圖片匯出,讓每個月的生活印記都能保存成一張專屬的圖片。
不過目前專案一開啟就直接進入微光採集瓶,少了一個能讓使用者認識「微光日常」的入口與儀式感。明天(Day 23)我要打造一個「首頁」,加入簡單的情境引導與「開啟微光採集瓶」入口,並搭配視圖轉場效果,讓使用者能更自然地進入微光日常的主畫面,進一步完善整體使用體驗。



 iThome鐵人賽
 看影片追技術