上一篇我們簡單介紹了 Skype Bot C# 程式中如何傳送與回覆訊息,而在這一篇,我們將簡單介紹如何讓機器人觸發 TeamCity build confguration,讓您直接與機器人聊天,就能完成自動化建置工作,若有錯誤或任何建議,請各位先進不吝提出,謝謝。
透過 TeamCity Restful API,您能對 TeamCity 進行任何操作,像是列出所有 project、建置工作、觸發 build confguration 與檢視其結果...等,功能相當完善。
Step 1.首先,我們必須先做登入驗證。TeamCity Restful API 是使用 Basic HTTP authentication 方式進行驗證,我們必須在 header 加入 Basic HTTP authentication,範例如下:
範例:Authorization: Basic QWxhZGRpbjpPcGVuU2VzYW1l
其中 QWxhZGRpbjpPcGVuU2VzYW1l 為 base64 encode 後的字串,你必須使用TeamCity的帳號與密碼,中間以":"分隔連成字串後,進行 base64 編碼,如下所示:
格式:TeamCity_User_Accoount:TeamCity_User_Password
範例:duran_hsieh:password
'
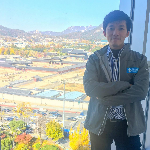
Step 2.TeamCity WebAPI URL 為 http://TeamCityUrl:TeamcityPort/ ,您可以透過 postman 測試 TeamCity REST API,如下範例所示:
| 名稱 | 描述 |
|---|---|
| 方法 | Get |
| Url | http://localhost:9998/app/rest/latest |
| Header | Authorization: Basic QWxhZGRpbjpPcGVuU2VzYW1l |
'
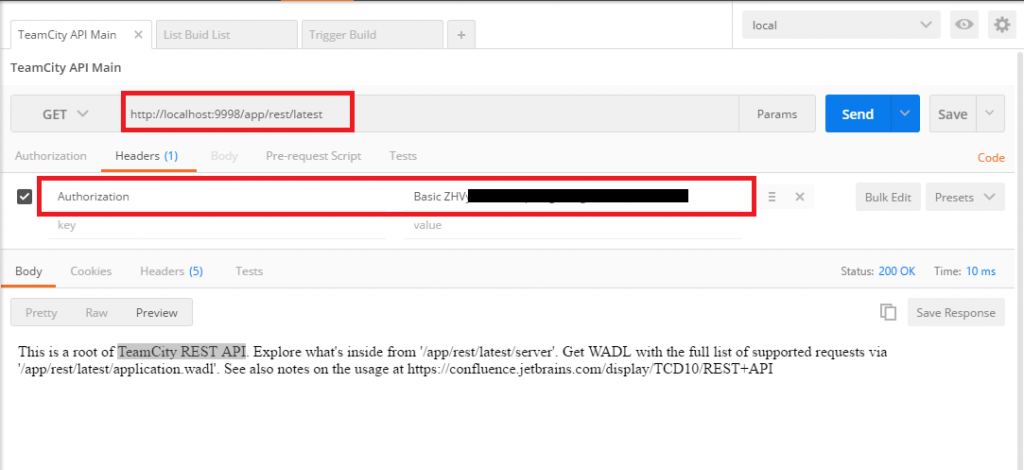
Step 3.我們本篇要觸發 build configuration api 必須傳送 xml 格式資料。您最少必須包含要執行build configuration id,範例如下:
<build>
    <buildType id="build_configuration_id"/>
</build>
您能在setting 中找到您的build configuration id。
postman 設定如下:
| 名稱 | 描述 |
|---|---|
| 方法 | Get |
| Url | http://localhost:9998/app/rest/buildQueue |
| Header | Authorization: Basic QWxhZGRpbjpPcGVuU2VzYW1l |
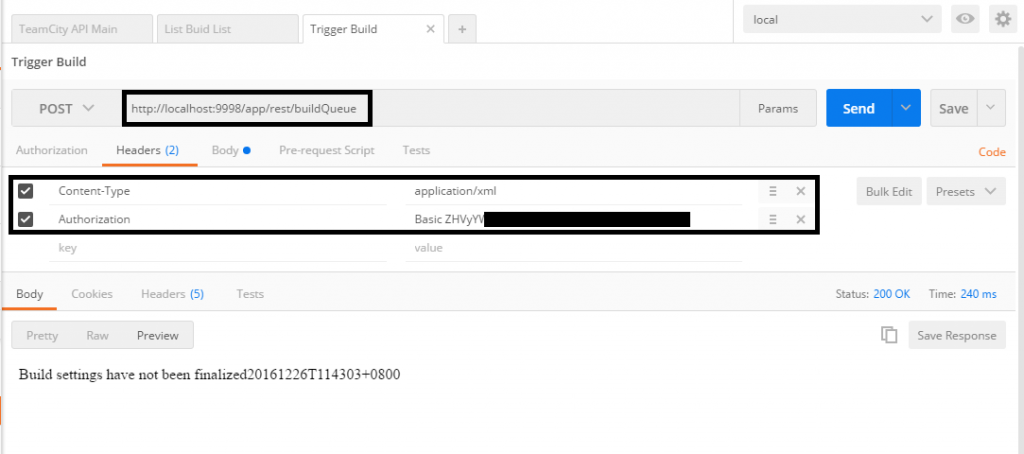
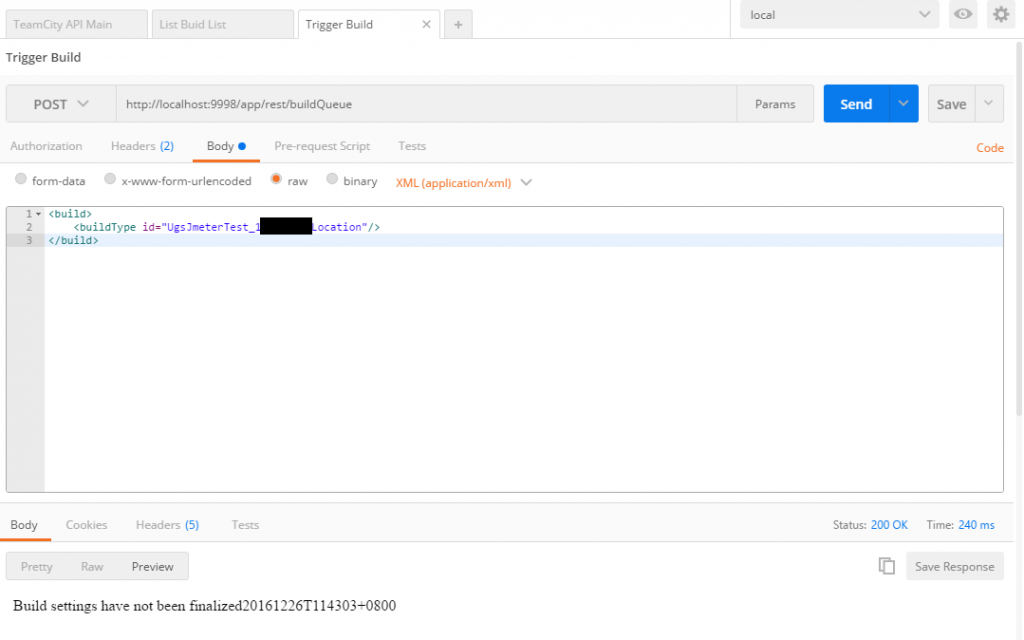
'
Step 1.首先,我們的機器人必須接受到指定訊息才開始進行 build 工作
if (activity.Text.StartsWith("start stress test"))
{

}
Step 2.我們建立一個 Httpclient 與使用 base http auth
HttpClient client = new HttpClient();

//加入xml內容
var httpContent = new StringContent("<build><buildType id=\"JmeterTest_Location\"/></build>", Encoding.UTF8, "application/xml");

//加入驗證
var byteArray = Encoding.ASCII.GetBytes("duran.hsieh:password");
client.DefaultRequestHeaders.Authorization = new AuthenticationHeaderValue("Basic", Convert.ToBase64String(byteArray));

//送出資料
var respone = await client.PostAsync("http://localhost:9998/app/rest/buildQueue", httpContent);

if (!respone.IsSuccessStatusCode)
{
    throw new Exception();
}

Activity reply = activity.CreateReply("building...");
await connector.Conversations.ReplyToActivityAsync(reply);
Step 3.完整程式如下: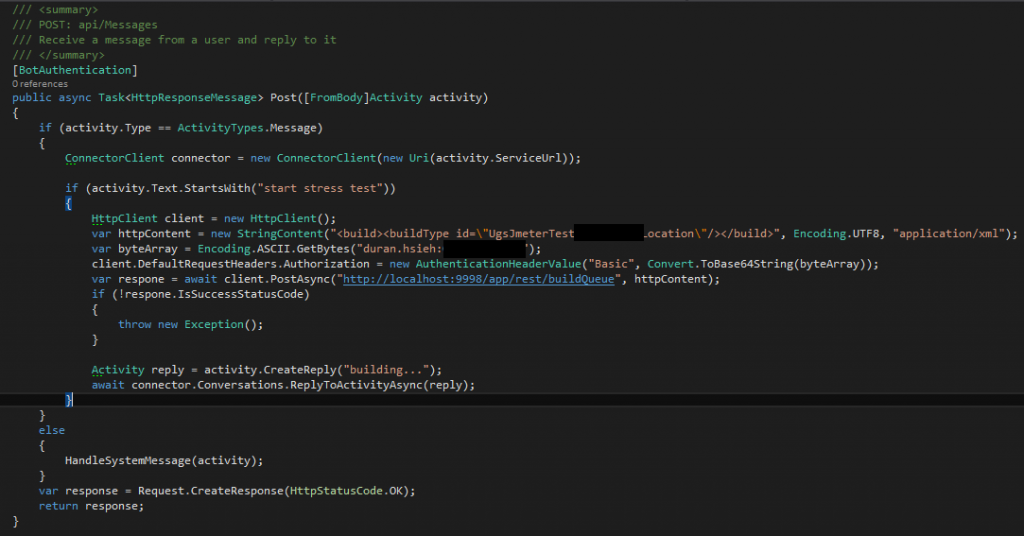
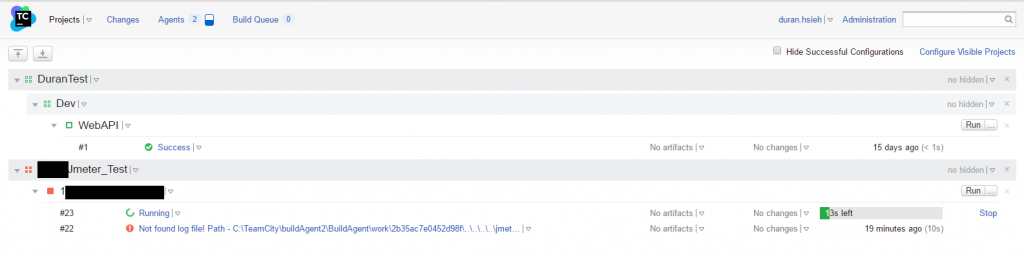
Step 4.我們進行測試,當機器人回覆後,TeamCity沒多久就開始啟動了。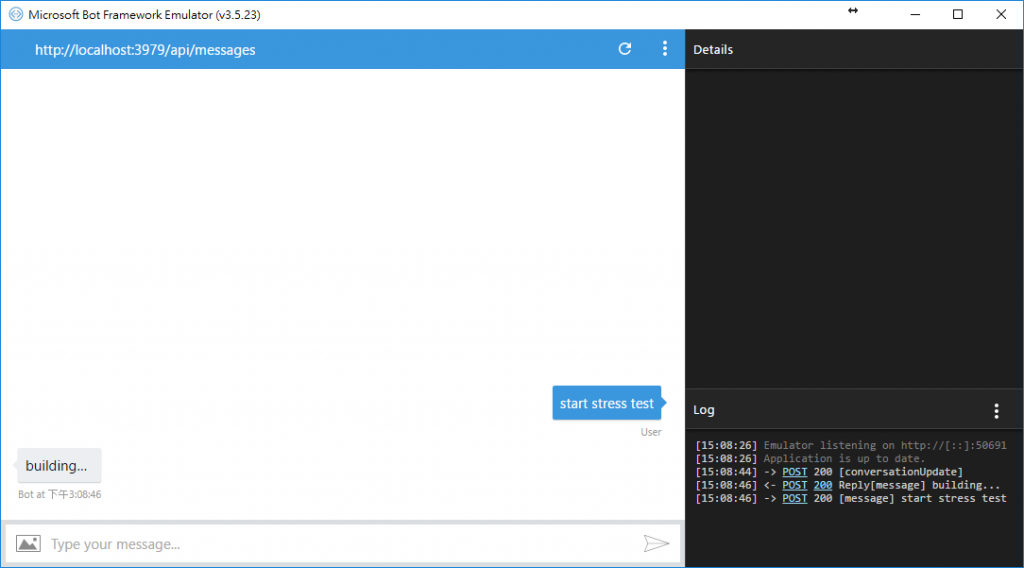
上一篇:Skype Bot C# 基本教學
下一篇:Skype Bot 與 TeamCity 整合 2 - TeamCity Notification
返回目錄
註:本系列文章將於2016 IT邦幫忙鐵人賽進行同時,一併發佈於個人blogger與dotblog。