歡迎來我Blog看完整範例:http://wcc723.github.io/d3js/2014/10/01/Ironman-30-days-02/
這部分會持續幾篇,主要是我先前Blog整理出來的,不會相當的深入,是為了解SVG的使用方式。另外這次鐵人賽也有高手是介紹SVG,如果有興趣也可以參考其他高手的文章。
SVG(Scalable Vector Graphics),中文直譯就是”可縮放向量圖形 “,它是以XML格式儲存,而在瀏覽器上是從IE9後才開始支援SVG。也因為是XML格式,所以D3對它特別容易進行操作。
教程參考:http://tutorials.jenkov.com/svg/
在svg標簽內就可以直接開始繪製向量圖型,而其中xmlns="http://www.w3.org/2000/svg"在微軟MSDN的解釋為定義SVG區段的命名空間,移除也沒什麼差別。
在定義SVG時,也建議同時給予寬與高,如果沒有,預設是100%。

<!-- SVG tag -->
<svg xmlns="http://www.w3.org/2000/svg" width="100%" height="120">
    <!-- 矩行 tag -->
    <rect x="2" y="2" width="100" height="100" style="stroke: #333; stroke-width: 3; fill: MediumTurquoise;"/>
</svg>
SVG是屬於向量的圖形,所以他有許多的繪圖概念與Illustrator相似,如矩行、圓形、多邊形等等...。
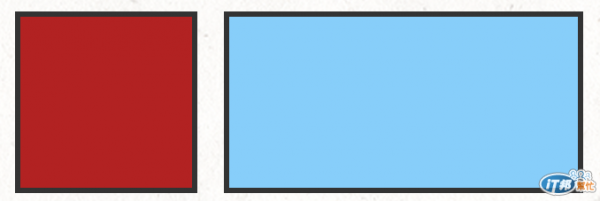
在定義一個形狀時,通常會定義以下屬性,形狀、位置、尺寸以及樣式。矩行是相當基本的圖形,所以就依序定義以下屬性。
"shapes tag" "x" "y" "width" "height" "style"

<svg width="100%" height="105">
    <rect x="2" y="2" width="100" height="100" style="stroke: #333; stroke-width: 3; fill: FireBrick;"/>
    <rect x="120" y="2" width="200" height="100" style="stroke: #333; stroke-width: 3; fill: LightSkyBlue;"/>
</svg>

而矩形除了一般的方形、長方形以外,也可以增加圓角的屬性rx、ry,但這就沒有像css的border-radius那麼的自由了,只能四個角設定相同的值;rx、ry也僅僅是設定其圓角垂直以及水平的半徑而已。
<svg width="100%" height="105">
    <rect x="2" y="2" width="100" height="100" rx="10" style="stroke: #333; stroke-width: 3; fill: FireBrick;"></rect>
    <rect x="120" y="0" width="200" height="100" rx="40" ry="10" style="stroke: #333; stroke-width: 3; fill: LightSkyBlue;"></rect>
</svg>
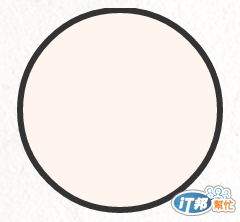
圓形中有一點要特別注意,圓形的cx,cy所代表的是圓心(r)的位置,所以在定義圓形的位置,如果不想跑到圖框外,務必cx、cy要大於r的值。

<svg width="100%" height="105">
    <circle cx="100" cy="51" r="50" style="stroke: #333; stroke-width: 3; fill: SeaShell;"/>
</svg>

### 橢圓形

橢圓形概念和圓形也相當類似,只是將半徑r的值改成垂直及水平半徑rx、ry。

<svg width="100%" height="100">
    <ellipse cx="100" cy="51" rx="80" ry="30" style="stroke: #333; stroke-width: 3; fill: MediumVioletRed;"/>
</svg>
SVG就像HTML的物件一樣很好控制,但不同的是他有屬於它自己的屬性,就好比我們要將顏色填滿在一般html物件會使用background-color,而在SVG內會使用fill,這部分也會運用到D3。
先產生一個SVG物件,但不要設定Style,只增加class。
<svg width="100%" height="105">
    <rect x="2" y="2" width="100" height="100"/>
    <rect class="rect" x="120" y="2" width="200" height="100"/>
</svg>
接下來寫一段CSS,針對剛剛增加的class,控制它的填滿以及筆畫寬度(跟Illustrator很像吧),還可以補上:hover。
.rect{
    fill: HotPink;
    stroke: LightSlateGray;
    stroke-width: 3px;
    transition: fill .3s;
}
.rect:hover{
    fill: SlateGray;
}
結果我們會看到以下這樣的結果,左邊沒有設定會是黑色(沒設定是黑色、不會是透明!),右邊就是剛剛所設定的樣式。

如果對於SVG有興趣的設計師,也可以試試看把Illustrator的檔案轉出成SVG,在一個個拆解,就會發現SVG跟Illustrator根本就是太像了。用canvas的概念來思考,當然也可以將Photoshop轉成png,只是最終發現他還是一張圖...(認真)。
