今天我們將使用上篇文章中所建立的模型,來進行訓練,並且查看結果。
model.compile(loss='categorical_crossentropy',
              optimizer='adam',
              metrics=['accuracy']
             )
設定損失函數,最優化方法以及評估方法等。
train_history=model.fit(x=x_train_nor,y=y_train_one,validation_split=0.1,epochs=15,batch_size=200,verbose=2)
x=>影像特徵值
y=>影像實際值
validation_split=>設定訓練及驗證資料比例
epochs=>訓練周期
batch_size=>每一批次多少筆資料
verbose=>顯示訓練過程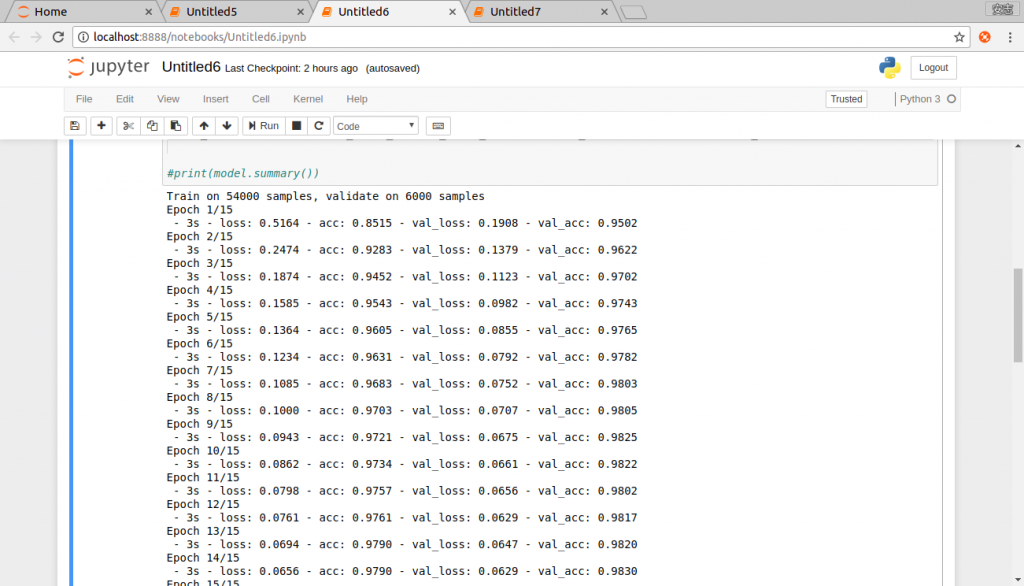
def plot_images_labels(images,labels,prediction,idx,num=10):
    fig=plt.gcf()
    fig.set_size_inches(12,14)
    if num>25:
        num=15
    for i in range(0,num):
        ax=plt.subplot(5,5,1+i)
        ax.imshow(np.reshape(images[idx],(28,28)), cmap='binary')
        title="label=" +str(labels[idx])
        if len(prediction)>0:
            title+=",predict="+str(prediction[idx])
        ax.set_title(title,fontsize=10)
        ax.set_xticks([])
        ax.set_yticks([])
        idx=idx+1
    plt.show()
前面有使用過,不多講。
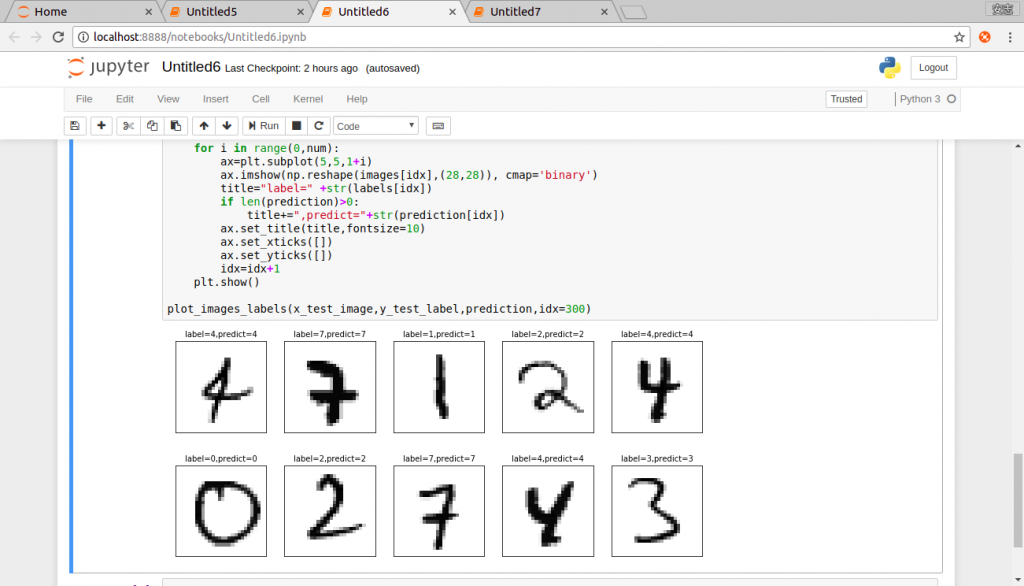
prediction=model.predict_classes(x_test)

plot_images_labels(x_test_image,y_test_label,prediction,idx=300)
第1行:輸入影像,並儲存結果。
第3行:印出預測值,從第300筆開始,印10筆,也就是(300-309)。
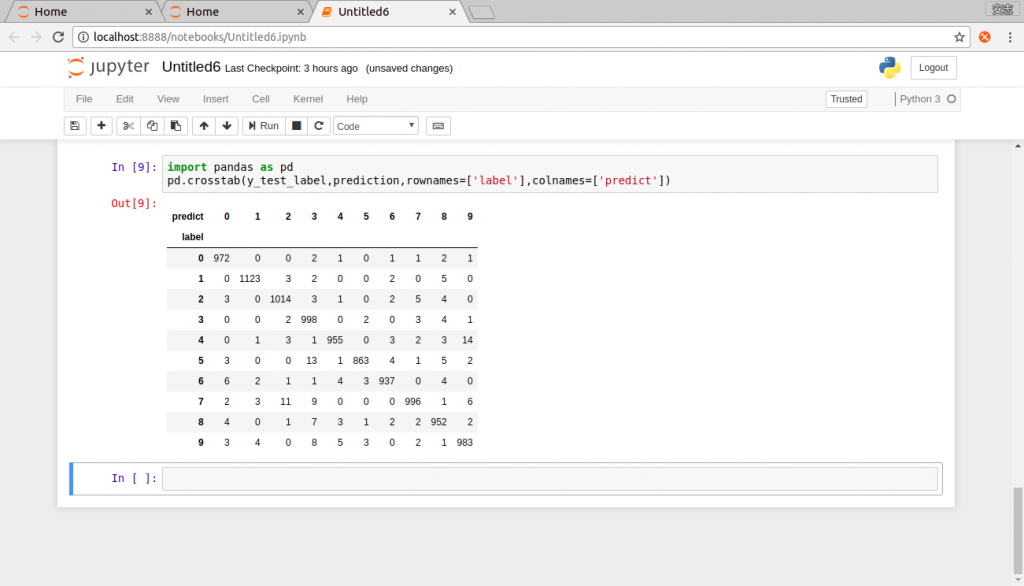
import pandas as pd
pd.crosstab(y_test_label,prediction,rownames=['label'],colnames=['predict'])
引入pandas crosstab函式來建立混淆矩陣。
到了這邊,用keras做多層感知器就練習就完成了,下一篇開始使用keras+CNN來做手寫數字辨識。


 iThome鐵人賽