我們昨天提到在以前的ASP.NET環境下,在IIS裏有個[網站管理工具],如下圖所示,這個是Google查找來的圖示,現在新環境都沒這個管理工具可用了。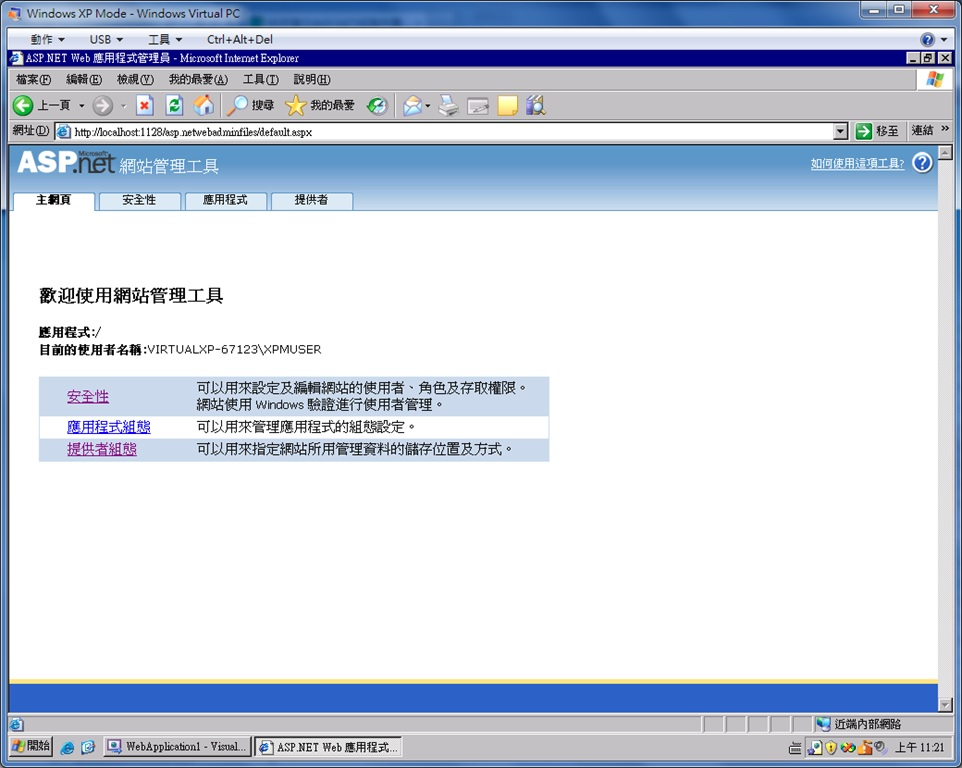
我知道有些大神乾脆自已造一個類似網站管理工具的網站來用,Google一下可以找到很多文章說明,但我要談的不是這些如何自已建管理工具網站,我想簡單談談如何控制登入機制,以及如何用簡單的程式來添加Role,和如何指派使用者的Role等方面的程式控制。
我們怎麼控制使用者的登入行為?例如,密碼輸入錯誤次數,密碼的複雜度等的控制。
ASP.NET Core是利用IdentityOptios這個組件來實現對登入行為的控制。由於登入行為控制必須在焹站一開始啟動時就載入監控,所以,我們要寫在Startup.cs類別檔案中,這個類別檔是用來安排網站啟動時的一些網站初始化參數及網站環境參數配置的檔案。startup.cs類別檔中的service.configure<>程式碼段,則是這些網站初始化參數及網站環境參數配置的區段。如下圖,是我用來控制登入行為的參數設定:(其實也是Google微軟官網來的程式碼,因為程式碼有點長,所以我切成兩張圖)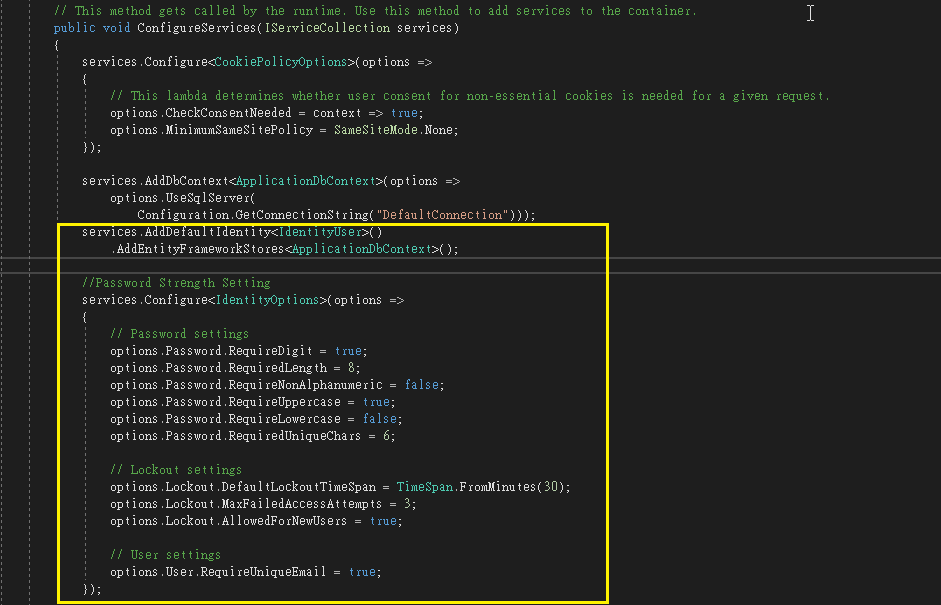

程式碼本文附在這裏:
            services.AddDbContext<ApplicationDbContext>(options =>
                options.UseSqlServer(Configuration.GetConnectionString("DefaultConnection")));
      //從下面一行開始
            //Password Strength Setting
            services.Configure<IdentityOptions>(options =>
            {
                // Password settings
                options.Password.RequireDigit = true;    //密碼要有數字
                options.Password.RequiredLength = 8;     //密碼至少要8個字元長
                options.Password.RequireNonAlphanumeric = false;  //不需要符號字元
                options.Password.RequireUppercase = true;         //要有大寫英文字母
                options.Password.RequireLowercase = false;        //不一定要有小寫英文字母
                options.Password.RequiredUniqueChars = 6;         //至少要有個字元不一樣

                // Lockout settings
                options.Lockout.DefaultLockoutTimeSpan = TimeSpan.FromMinutes(5);  //5分鐘沒有動靜就自動鎖住定網站,預設5分鐘
                options.Lockout.MaxFailedAccessAttempts = 3;                       //三次密碼誤就鎖定網站, 預設5次
                options.Lockout.AllowedForNewUsers = true;                         //新增的使用者也會被鎖定,就是犯規沒有新人優待

                // User settings
                options.User.RequireUniqueEmail = true;             //郵箱不能重覆使用
            });

            //Seting the Account Login page
            services.ConfigureApplicationCookie(options =>
            {
                // Cookie settings
                options.Cookie.HttpOnly = true;
                options.ExpireTimeSpan = TimeSpan.FromMinutes(5);
                options.LoginPath = "/Account/Login"; // If the LoginPath is not set here, ASP.NET Core will default to /Account/Login
                options.LogoutPath = "/Account/Logout"; // If the LogoutPath is not set here, ASP.NET Core will default to /Account/Logout
                options.AccessDeniedPath = "/Account/AccessDenied"; // If the AccessDeniedPath is not set here, ASP.NET Core will default to /Account/AccessDenied
                options.SlidingExpiration = true;
            });
            //複製到這邊
            // Add application services.
            services.AddTransient<IEmailSender, EmailSender>();

            services.AddMvc();
至於設定的意義,我也註記在程式裏了。各位可以實際操作看看效果如何。
接下來,我們來談談怎麼新增角色及設定使用者的角色。
我們先在SSMS裏查詢一下使用者及角色資料表,如下圖,可以看到有使用者,但沒有角色,使用者也沒有指派角色。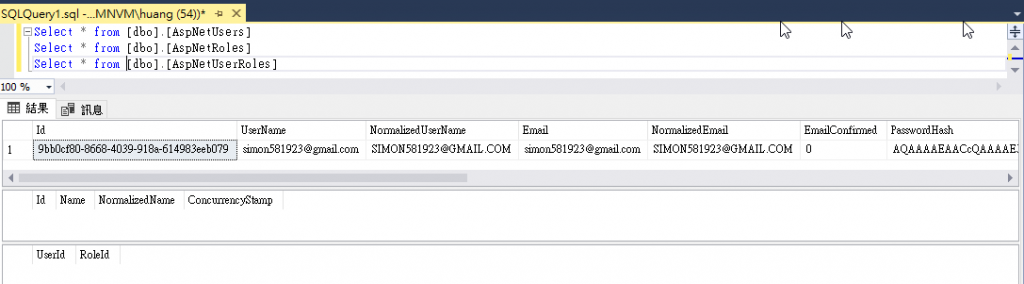
然後,我還是在startup.cs程式中添加設置角色及指派使用者的程式碼段,這樣可以在網站初始階段就把角色和使用者所屬角色設定完成。
我們先在ConfigureServices程式碼段後,添加一個Private程式段CreateUserRoles,如下圖: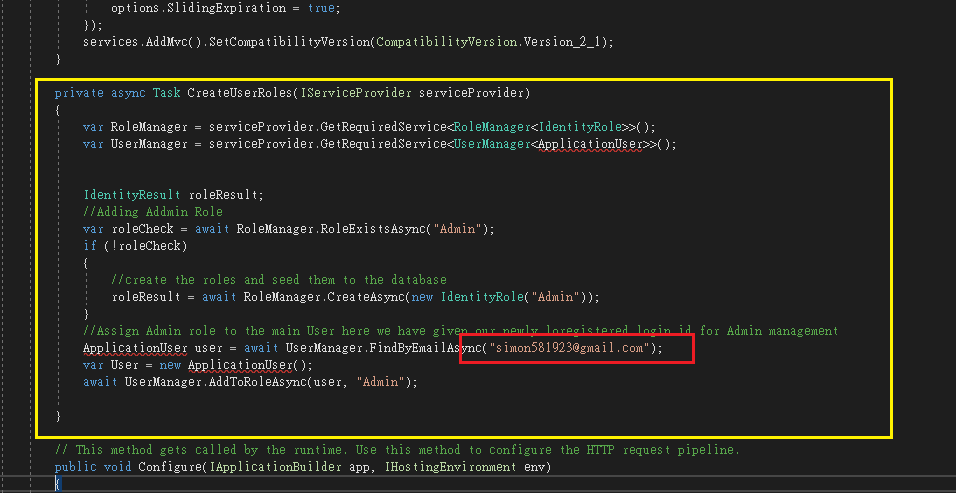
請注意上圖紅框的部份程式碼,這是在指定使用者來指派角色。相關程式碼如下:
services.AddTransient<IEmailSender, EmailSender>();
        services.AddMvc();

    }
    //從這裏複製
    private async Task CreateUserRoles(IServiceProvider serviceProvider)
    {
        var RoleManager = serviceProvider.GetRequiredService<RoleManager<IdentityRole>>();
        var UserManager = serviceProvider.GetRequiredService<UserManager<ApplicationUser>>();


        IdentityResult roleResult;
        //Adding Addmin Role
        var roleCheck = await RoleManager.RoleExistsAsync("Admin");
        if (!roleCheck)
        {
            //create the roles and seed them to the database
            roleResult = await RoleManager.CreateAsync(new IdentityRole("Admin"));
        }
        //Assign Admin role to the main User here we have given our newly loregistered login id for Admin management
        ApplicationUser user = await UserManager.FindByEmailAsync("simon581923@gmail.com");
        var User = new ApplicationUser();
        await UserManager.AddToRoleAsync(user, "Admin");

    }
    //以上是要複製的程式碼
    // This method gets called by the runtime. Use this method to configure the HTTP request pipeline.
    public void Configure(IApplicationBuilder app, IHostingEnvironment env, IServiceProvider Services)
    {
        if (env.IsDevelopment())
然後在startup.cs的末尾呼叫執行CreateUserRoles,如下圖。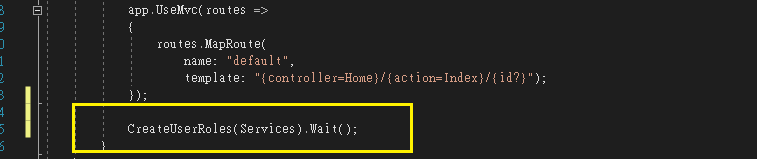
把角色建好,並指派使用者的角色。程式碼如下:
....
....
});
//複製這段最後的程式碼即可
CreateUserRoles(Services).Wait();
}
}
程式碼都擺好以後,執行網站。如果沒有報錯,我們再到SSMS查詢一下,如果如下圖: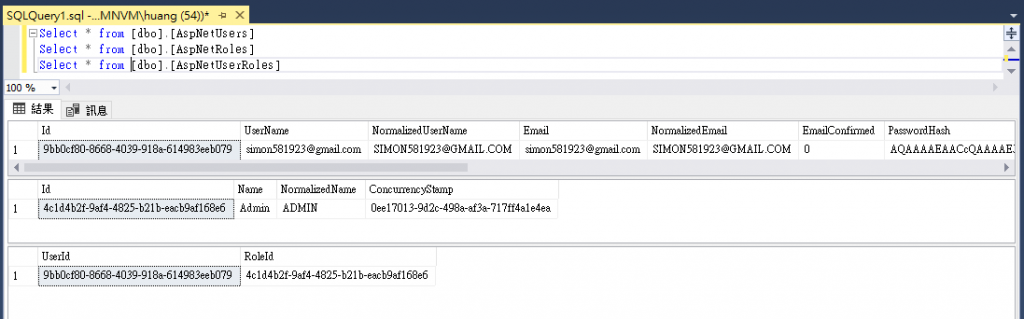
從上圖可以看到已經建好Role,也把使用者和Role的關聯建起來了,那麼,我們怎麼利用Role來控制使用者在網站中的權限呢?這部份明天再來討論。
程式碼都擺好以後
出現錯誤訊息
不曉得是什麼原因呢?
你的專案可能選了不需驗證的專案模板.
有選擇"個別使用者帳戶"喔!


 iThome鐵人賽