
首頁部分已經差不多了
剩下頁尾以及一些小區塊
因為元件都跟之前的文章有重複到
故在這邊就不實作會功能重複的區塊了
沒錯,我們要開始做從首頁點進去的 景點文章 啦
首先在我們 src/pages 下面多開一個 place 的文件夾,一樣也在裡面建一個Index.vue當作文章的主要頁面
因為也是第一層的網頁 記得要用 q-page 喔
<template>
  <q-page>

  </q-page>
</template>
多了其他頁面,就要到router中作設定才看得到喔
const routes = [
  {
    path: '/',
    component: () => import('layouts/MyLayout.vue'),
    children: [
      { path: '', component: () => import('pages/Index') },

      //加上這行,並指定新的資料夾位置
      { path: 'place' , component: () => import('pages/Place')}
    ]
  }
]
之後到 http://localhost:8080/#/place 就看得到啦
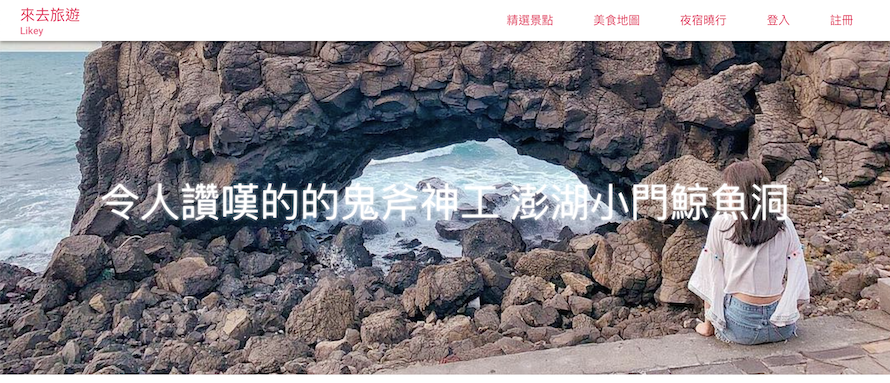
這個元件實在有點難說明,直接餵狗翻出來是 視差 就先當是這樣吧
功能基本上就滾動捲軸時可以看到圖片的其他部分
可以參考官方的DEMO
這個元件使用也非常的簡單
只有兩個屬性 src 跟 height 分別為用來置入圖片/影片 以及 設定高度
一樣要引入 QParallax 哦
    <q-parallax :src="localData.image"  height="400">
      <p>{{ localData.title }}</p>
    </q-parallax>
這裡就直接模擬從後端拿資料來套,變數上我習慣是用localData
export default {
data(){
return{
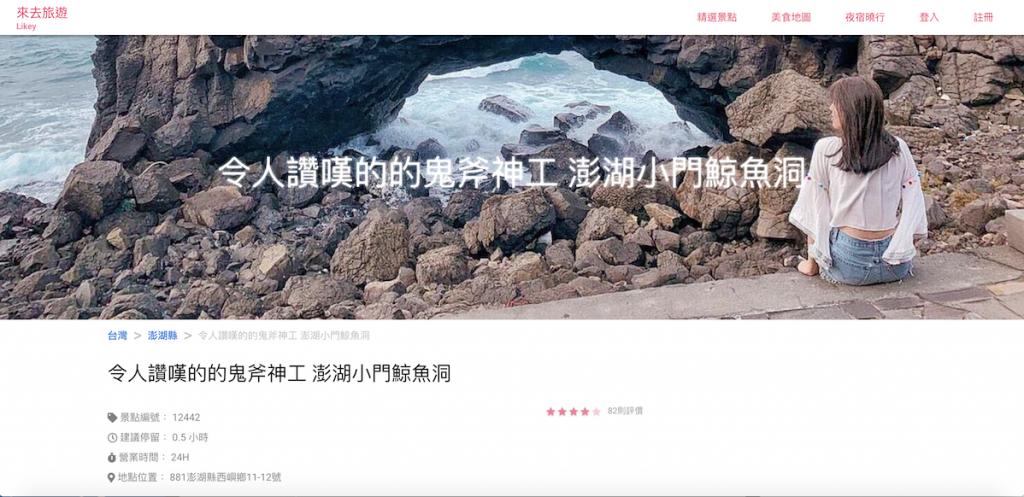
localData: {
image:'https://instagram.ftpe8-4.fna.fbcdn.net/vp/f93efc19ab7686509713585bf9187e12/5C53A410/t51.2885-15/e35/43140377_2151186321761409_76062690586049376_n.jpg',
title : '令人讚嘆的的鬼斧神工 澎湖小門鯨魚洞'
}
}
}
}
</script>
//由於預設的文字是黑的。這邊調整文字大小及顏色
<style lang="stylus">
.q-parallax
p
font-size 48px
color #fff
</style>
這邊參考其他網站基本上都是8格+4格這樣分
    <div class="row place-main">
      <div class="col-8">

      </div>
      <div class="col-4">

      </div>
    </div>
CSS一樣要補上左右 margin 5% 讓頁面看起來不會那麼滿
  .place-main
    margin-left 5%
    margin-right 5%
這邊要來用 Quasar 的 麵包屑(Breadcrumbs) 元件
一樣的需要到quasar.conf.js引入
  components: [
    'QBreadcrumbs',
    'QBreadcrumbsEl'
  ]
}
然後把他塞到剛剛的layout內
<q-breadcrumbs
  separator=">"
  color="light"
>
  <q-breadcrumbs-el :label="localData.country" to="/" />
  <q-breadcrumbs-el :label="localData.locate" to="/" />
  <q-breadcrumbs-el :label="localData.title" to="/" />
</q-breadcrumbs>
<br>
<span class="title"> {{ localData.title }}</span>
這裡格式我們給他 國家 > 縣市 > 標題
順便補個標題 一樣用CSS調整文字大小
    .title
      font-size 28px
      margin-top 20px
data裡記得補上
        country: '台灣',
        locate: '澎湖縣',
為了節省畫面的空間 這裡一樣要切版
這裡再切成 8格+4格
<div class="row q-mt-lg">
  <div class="col-8">

  </div>
  <div class="col-4 info-right">

  </div>
</div>
由於左側欄要設為文字靠右對齊
因次也給他們class,然後用CSS控制‘對齊‘
  .info-right
      text-align right
      color #979797
      font-size 12px
這裡格式又是 icon+文字 啦
那我們繼續把之前做的 LIcon 搬來用 XD
import LIcon from 'src/components/LIcon.vue'
<div class="col-8 info-left">
  <l-icon class="q-mt-sm" :text="'景點編號:  ' + localData.id" :icon="'fas fa-tag'" :color="'grey'"/>
  <br>
  <l-icon class="q-mt-sm" :text="'建議停留:  ' + localData.stay_time + ' 小時'" :icon="'far fa-clock'" :color="'grey'"/>
  <br>
  <l-icon class="q-mt-sm" :text="'營業時間:  ' + localData.open_time" :icon="'fas fa-stopwatch'" :color="'grey'"/>
  <br>
  <l-icon class="q-mt-sm" :text="'地點位置:  ' + localData.address" :icon="'fas fa-map-marker-alt'" :color="'grey'"/>
</div>
一樣補上Data
   address: '881澎湖縣西嶼鄉11-12號',
   id: '12442',
   stay_time: '0.5',
   open_time: '24H',

Quasar 同樣也有評分元件
同樣要引入
framework: {
  components: ['QRating']
}
屬性也不多,也是塞在剛剛的col-4裡面
<div class="col-4 info-right">
  <q-rating v-model="localData.rate" :max="5" color="pink-13" size="16px" disable />
  <span class="q-ml-sm">{{ localData.comment}}則評價</span>
</div>
max 最多有幾顆星星v-model 綁定評分的數值size 調整星星大小disable 禁止操作,正常來講這邊也是可以直接做評分的操作補上Data缺的資料~~
今天就大功告成啦
        rate: '4.5',
        comment: '82'

今天好像有點太多了,剩下留給明天吧 XD
<template>
  <q-page>
    <q-parallax :src="localData.image"  height="400">
      <p>{{ localData.title }}</p>
    </q-parallax>

    <div class="row place-main">
      <div class="col-8 q-pa-sm">
        <q-breadcrumbs
          separator=">"
          color="light"
        >
          <q-breadcrumbs-el :label="localData.country" to="/" />
          <q-breadcrumbs-el :label="localData.locate" to="/" />
          <q-breadcrumbs-el :label="localData.title" to="/" />
        </q-breadcrumbs>
        <br>
        <span class="title"> {{ localData.title }}</span>

        <div class="row q-mt-lg">
          <div class="col-8">
            <l-icon class="q-mt-sm" :text="'景點編號:  ' + localData.id" :icon="'fas fa-tag'" :color="'grey'"/>
            <br>
            <l-icon class="q-mt-sm" :text="'建議停留:  ' + localData.stay_time + ' 小時'" :icon="'far fa-clock'" :color="'grey'"/>
            <br>
            <l-icon class="q-mt-sm" :text="'營業時間:  ' + localData.open_time" :icon="'fas fa-stopwatch'" :color="'grey'"/>
            <br>
            <l-icon class="q-mt-sm" :text="'地點位置:  ' + localData.address" :icon="'fas fa-map-marker-alt'" :color="'grey'"/>
          </div>
          <div class="col-4 info-right">
            <q-rating v-model="localData.rate" :max="5" color="pink-13" size="16px" disable />
            <span class="q-ml-sm">{{ localData.comment}}則評價</span>
          </div>
        </div>

      </div>
      <div class="col-4">

      </div>
    </div>

  </q-page>
</template>


<script>
import LIcon from 'src/components/LIcon.vue'
export default {
  data(){
    return{
      localData: {
        image:'https://instagram.ftpe8-4.fna.fbcdn.net/vp/f93efc19ab7686509713585bf9187e12/5C53A410/t51.2885-15/e35/43140377_2151186321761409_76062690586049376_n.jpg',
        title : '令人讚嘆的的鬼斧神工 澎湖小門鯨魚洞',
        country: '台灣',
        locate: '澎湖縣',
        address: '881澎湖縣西嶼鄉11-12號',
        id: '12442',
        stay_time: '0.5',
        open_time: '24H',
        rate: '4.5',
        comment: '82'

      }
    }
  },
  components:{
    LIcon
  }
}
</script>

<style lang="stylus">
  .q-parallax
    p
      font-size 48px
      color #fff
  .place-main
    margin-left 10%
    margin-right 10%

    .title
      font-size 28px
      margin-top 20px

  .q-breadcrumbs-el
    font-size 14px

  .info-right
      text-align right
      color #979797
      font-size 12px

</style>
