folium官網提供的Raster Layer包含:
命名與leaflet差不多,除了TileLayer.WMS在folium命名為WmsTileLayer
我們來回顧一下在leaflet時使用的程式碼:
var imageUrl = 'https://opendata.cwb.gov.tw/fileapi/opendata/MSC/O-B0028-003.jpg',
    imageBounds = [[18.600625745, 115.976888855], [27.79937425, 126.02300114]];
imageUrlLayer = L.imageOverlay(imageUrl, imageBounds, {
    opacity:0.4
}).addTo(myMap);
其實在folium裡面,imageOverlay的用法差不多,只是寫法要稍微留意一下:
imageUrl = 'https://opendata.cwb.gov.tw/fileapi/opendata/MSC/O-B0028-003.jpg'
imageBounds = [
    [18.600625745, 115.976888855],
    [27.79937425, 126.02300114]
];
folium.raster_layers.ImageOverlay(
    imageUrl,
    imageBounds,
    opacity = 0.4
).add_to(myMap)
myMap
這邊與leaflet都設定一樣的參數,因此透明度也同樣設定0.4,讓圖片跟地圖重和,同時讀取兩邊的資訊。但奇怪的是,imageOverlay在呼叫時無法直接用folilum.ImageOverlay建立,需輸入完整的folium.raster_layers.ImageOverlay()才能使用。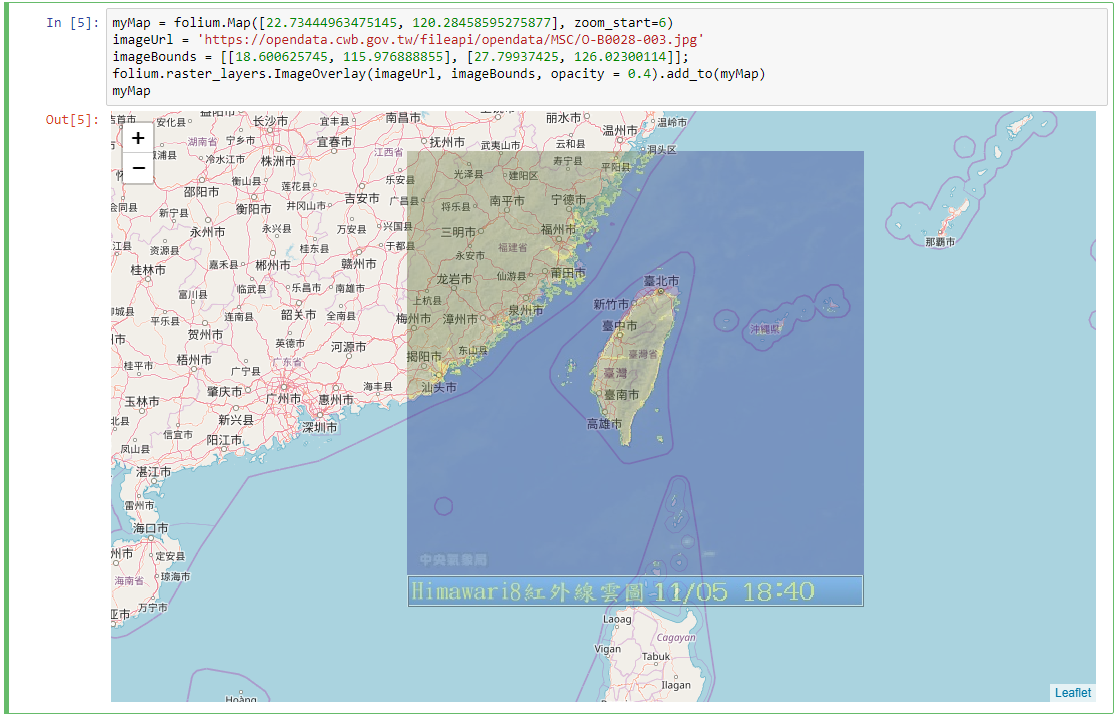
在leaflet中,透過下列方式建立tileLayer:
L.tileLayer('https://{s}.tile.opentopomap.org/{z}/{x}/{y}.png', {
        maxZoom: 14,
        attribution: 'Map data: © <a href="http://www.openstreetmap.org/copyright">OpenStreetMap</a>, <a href="http://viewfinderpanoramas.org">SRTM</a> | Map style: © <a href="https://opentopomap.org">OpenTopoMap</a> (<a href="https://creativecommons.org/licenses/by-sa/3.0/">CC-BY-SA</a>)'
}).addTo(map);
在folium的tileLayer提供以下tiles參數,可選擇以下字串直接讀取tileLayers,部分在輸入時需要加上api key才能使用:
也可以輸入自訂的url建立tileLayer,可參考Leaflet Provider Demo網站,以下為使用上述網站中的OpenStreetMap.HOT建立tileLayer:
myMap = folium.Map([22.73444963475145, 120.28458595275877], zoom_start=6)
folium.raster_layers.TileLayer(
tiles = "https://{s}.tile.openstreetmap.fr/hot/{z}/{x}/{y}.png",
attr = '© <a href="http://www.openstreetmap.org/copyright">OpenStreetMap</a>, Tiles courtesy of <a href="http://hot.openstreetmap.org/" target="_blank">Humanitarian OpenStreetMap Team</a>'
).add_to(myMap)
myMap
要注意的是,folium有規定使用自訂的url,需要同時建立attribution才可使用,不然會報錯!!

回顧一下如何使用leaflet建立videoOverlay
var videoUrl = 'https://www.mapbox.com/bites/00188/patricia_nasa.webm',
    videoBounds = [[ 32, -130], [ 13, -100]];
L.videoOverlay(videoUrl, videoBounds).addTo(myMap);
myMap.fitBounds(videoBounds);
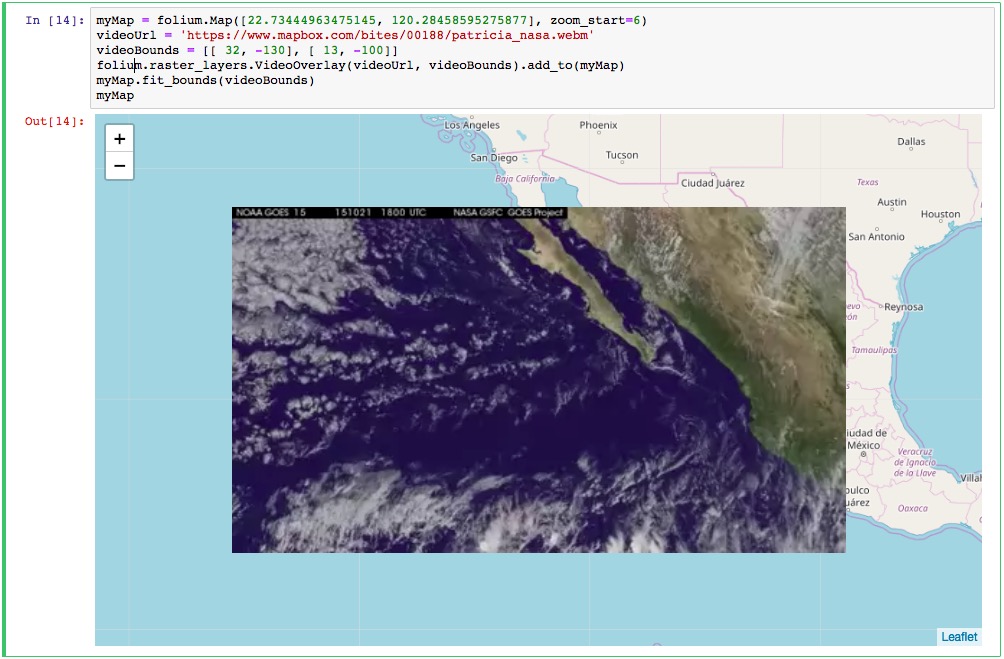
調整一下程式碼,使用folium.raster_layers.VideoOverlay()建立
videoUrl = 'https://www.mapbox.com/bites/00188/patricia_nasa.webm'
videoBounds = [[ 32, -130], [ 13, -100]]
folium.raster_layers.VideoOverlay(
    videoUrl,
    videoBounds
).add_to(myMap)
myMap.fit_bounds(videoBounds)
myMap
var nexrad = L.tileLayer.wms("http://mesonet.agron.iastate.edu/cgi-bin/wms/nexrad/n0r.cgi", {
    layers: 'nexrad-n0r-900913',
    format: 'image/png',
    transparent: true,
    attribution: "Weather data © 2012 IEM Nexrad"
}).addTo(myMap);
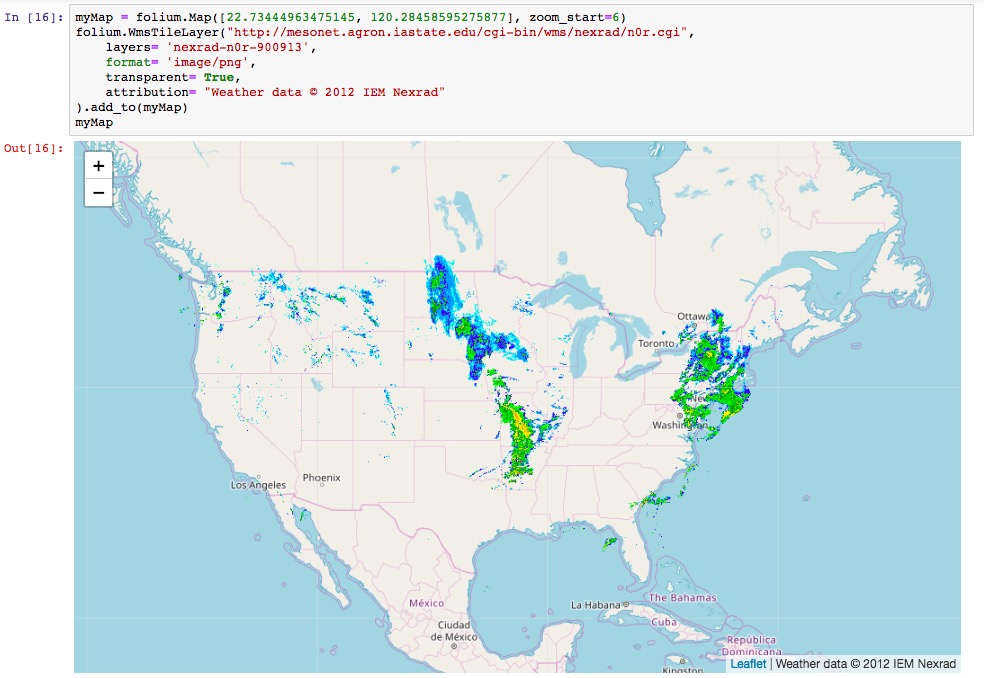
改用folium試試看,注意這邊是用WmsTileLayer而不是tileLayer.wms:
folium.WmsTileLayer("http://mesonet.agron.iastate.edu/cgi-bin/wms/nexrad/n0r.cgi",
    layers= 'nexrad-n0r-900913',
    format= 'image/png',
    transparent= True,
    attribution= "Weather data © 2012 IEM Nexrad"
).add_to(myMap)
myMap
Folium的Raster Layers就介紹到這邊,下一篇將繼續介紹Extra Features。還是那一句話,如果有任何問題,歡迎在下面留言喔~~剩下最後8天了!!