
相信稍微研究 ML 領域的大家都不陌生 regularization,只是在使用 tensorflow 時,可能有些人就直接忽略它不做,所以!今天就來為大家介紹我都怎麼使用。
快速複習一下,regularization 在 ML 領域是一種防止模型過擬合的一種手段,那有 L1 (絕對值)和 L2 (平方) 兩種方法,以下是 L2 公式:(痾...寫的很醜我知道XD)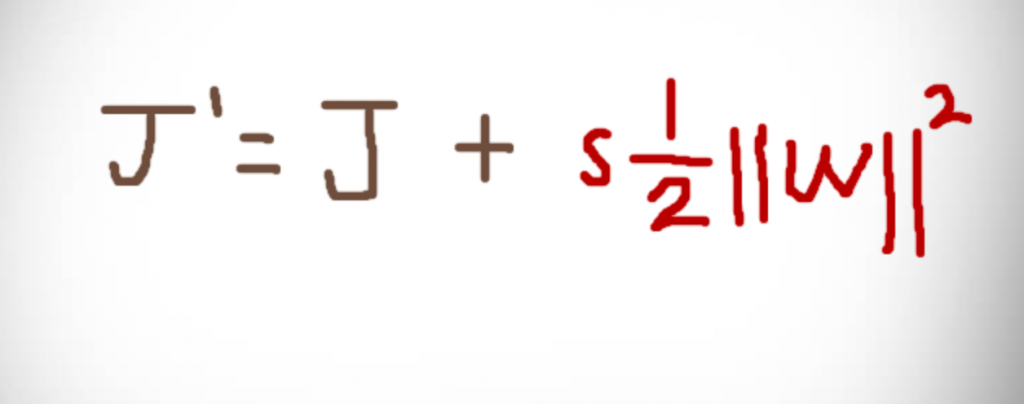
原本的 cost 多加上一個權重平方的值,然後我們會對這個值乘上一個 s (scale),在 tensorflow 中我們是這樣定義:
REGULARIZER = tf.contrib.layers.l2_regularizer(0.1)
後面的 0.1 即 scale。
再來,我們該如何對複雜模型做 regularization 呢?跟昨天一樣,tensorflow 有個 global 存參數的地方叫 tf.get_collection() ,我們在產生 variable 時,可以將它丟到 tf.GraphKeys.REGULARIZATION_LOSSES 這個集合裡面。
x = tf.placeholder(shape=[None, 2], dtype=tf.float32, name='x')

w = tf.get_variable(
   name='weight',
   shape=(2, 4),
   dtype=tf.float32,
   regularizer=REGULARIZER)
b = tf.get_variable(
   name='bias',
   shape=4,
   dtype=tf.float32,
   regularizer=REGULARIZER)

assign_w = tf.assign(w, WEIGHT_VALUE)
assign_b = tf.assign(b, BIAS_VALUE)

out = tf.matmul(x, w) + b
所產生的圖: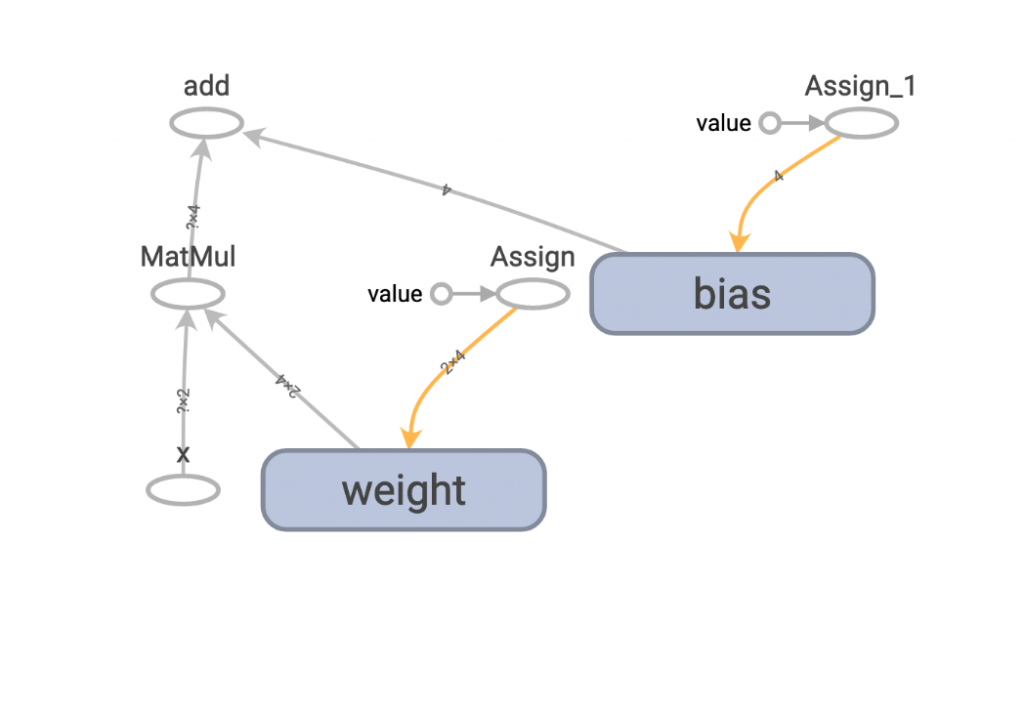
在 session 執行後,可以藉由 tf.get_collection(tf.GraphKeys.REGULARIZATION_LOSSES) 拿到經過 L2 regularization 的數值,再用 tf.reduce_sum 加總起來,就是上述的 weight loss 了。
with tf.Session() as sess:
   sess.run([assign_w, assign_b])

   result = sess.run(out, feed_dict={x: INPUT_VALUE})

   wd_loss = tf.reduce_sum(
       tf.get_collection(tf.GraphKeys.REGULARIZATION_LOSSES), name='wd_loss')
   weight_loss = sess.run(wd_loss)

   print(f'result:{result}, weight_loss:{weight_loss}')
OK,那如果你說,如果今天我不想用那麼底層的方法,想用 tf.layers 來實作,那我該如何把我的 dense layer 權重丟到 tf.GraphKeys.REGULARIZATION_LOSSES 呢?其實道理一樣,tensorflow API 都有做接口供你用。
x = tf.placeholder(shape=[None, 2], dtype=tf.float32, name='x')

weight_init = tf.constant_initializer(WEIGHT_VALUE)
bias_init = tf.constant_initializer(BIAS_VALUE)
out = tf.layers.dense(x, 4, kernel_initializer=weight_init,
                            bias_initializer=bias_init,
                            kernel_regularizer=REGULARIZER,
                            bias_regularizer=REGULARIZER)
產生圖表: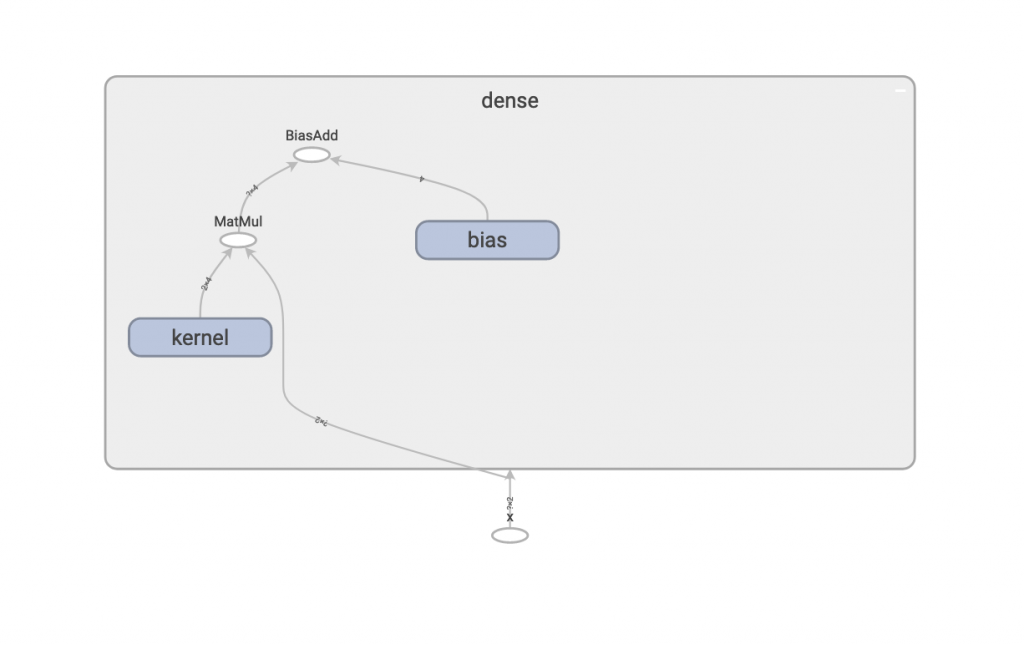
也一樣可以透過 tf.get_collection(tf.GraphKeys.REGULARIZATION_LOSSES) 拿到 weight loss。
wd_loss = tf.reduce_sum(
   tf.get_collection(tf.GraphKeys.REGULARIZATION_LOSSES), name='wd_loss')
weight_loss = sess.run(wd_loss)
最後再來確認兩種 dense layer 的實作方式,在兩個 weight 和 bias 都相同的情況下,weight loss 是否也相同。
raw_value, raw_lose = raw_dense()
tf.reset_default_graph()
layers_value, layers_loss = layer_dense()

assert np.alltrue(raw_value == layers_value)
assert raw_lose == layers_loss
印出: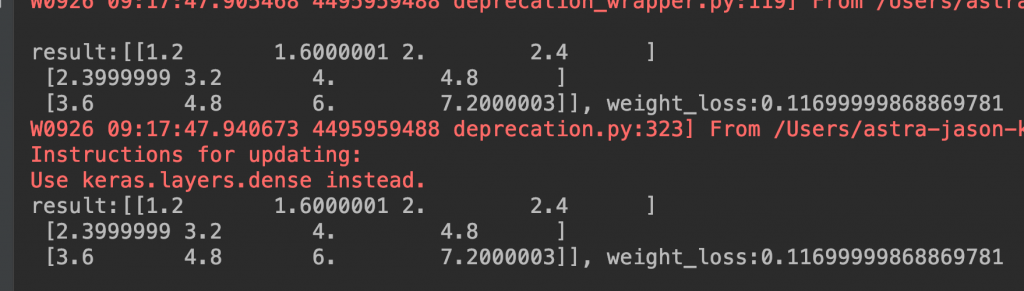
看來沒有問題,即便兩個不同的實作方式,最後拿到的 weight loss 是一樣的。
以上就是今天的實作內容,希望大家會喜歡!

 iThome鐵人賽