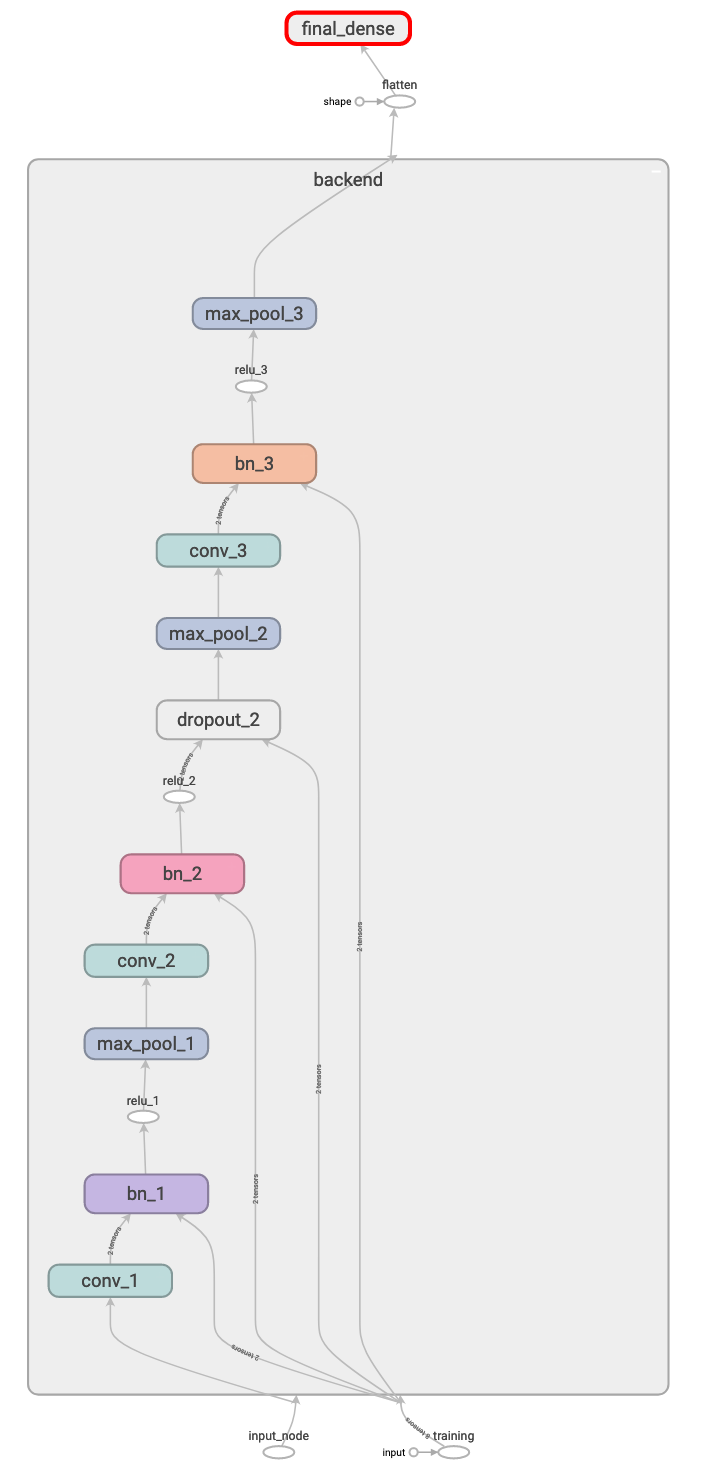
前面幾個篇章對模型做了不少的修改,今天就來是實測看看,能有多少個改進,我們先來看看優化前的graph:
優化過後的 graph:
可以看到下列幾個變化:
接下來我們讓優化前的模型推論 1000 次看看花費多少時間,和之前一樣,第一次的推論不會採計。
def before_opt():
   graph_def = tf.get_default_graph().as_graph_def()
   with gfile.FastGFile('../pb/frozen_shape_23.pb', 'rb') as f:
       graph_def.ParseFromString(f.read())
   tf.import_graph_def(graph_def, name='')

   with tf.Session() as sess:
       input_node = tf.get_default_graph().get_tensor_by_name(
           "input_node:0")
       training_node = tf.get_default_graph().get_tensor_by_name(
           "training:0")
       output_node = tf.get_default_graph().get_tensor_by_name(
           "final_dense/MatMul:0")

       image = get_preprocess_image()
       output = sess.run(output_node, feed_dict={
           input_node: np.expand_dims(image, 0),
           training_node: False})

       start = timeit.default_timer()
       for _ in range(0, TIMES):
           image = get_preprocess_image()
           sess.run(output_node, feed_dict={
               input_node: np.expand_dims(image, 0),
               training_node: False})

       print(f'before opt cost time:{(timeit.default_timer() - start)} sec')
       print(f'output:{output}.\n')
再來是優化後的檢測如下:
def after_opt():
   graph_def = tf.get_default_graph().as_graph_def()
   with gfile.FastGFile('../pb/frozen_shape_28.pb', 'rb') as f:
       graph_def.ParseFromString(f.read())
   tf.import_graph_def(graph_def, name='')

   with tf.Session() as sess:
       input_node = tf.get_default_graph().get_tensor_by_name(
           "new_input_node:0")
       output_node = tf.get_default_graph().get_tensor_by_name(
           "final_dense/MatMul:0")

       image = get_row_image()
       output = sess.run(output_node, feed_dict={
           input_node: np.expand_dims(image, 0)})

       start = timeit.default_timer()
       for _ in range(0, TIMES):
           image = get_row_image()
           sess.run(output_node, feed_dict={
               input_node: np.expand_dims(image, 0)})

       print(f'after opt cost time:{(timeit.default_timer() - start)} sec')
       print(f'output:{output}.\n')
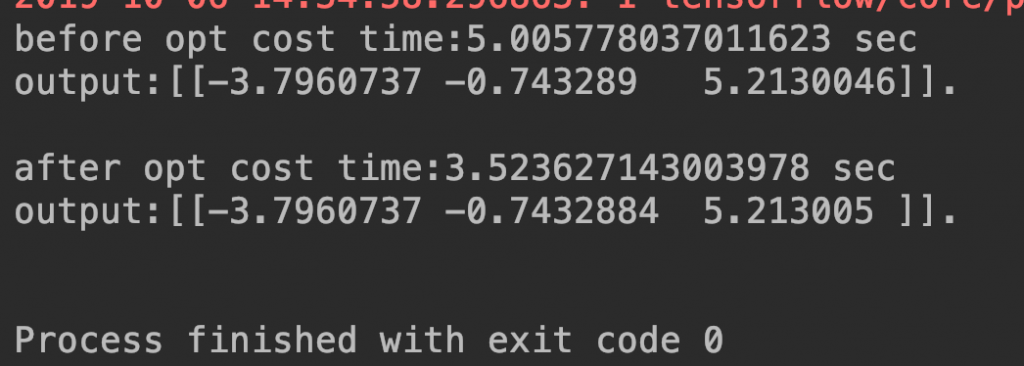
執行後結果:
可以看到快了將近 1.5 秒,但我們的模型非常的小,如果你有一個更大的模型,那節省下來的時間將會更多!
以上模型手術優化篇就到這裡囉!
