在昨天介紹完Day21:如何在沒有MacOS時設計MainStoryBoard的畫面,今天我們來談
一下如何使用Auto Layout
實做步驟 :
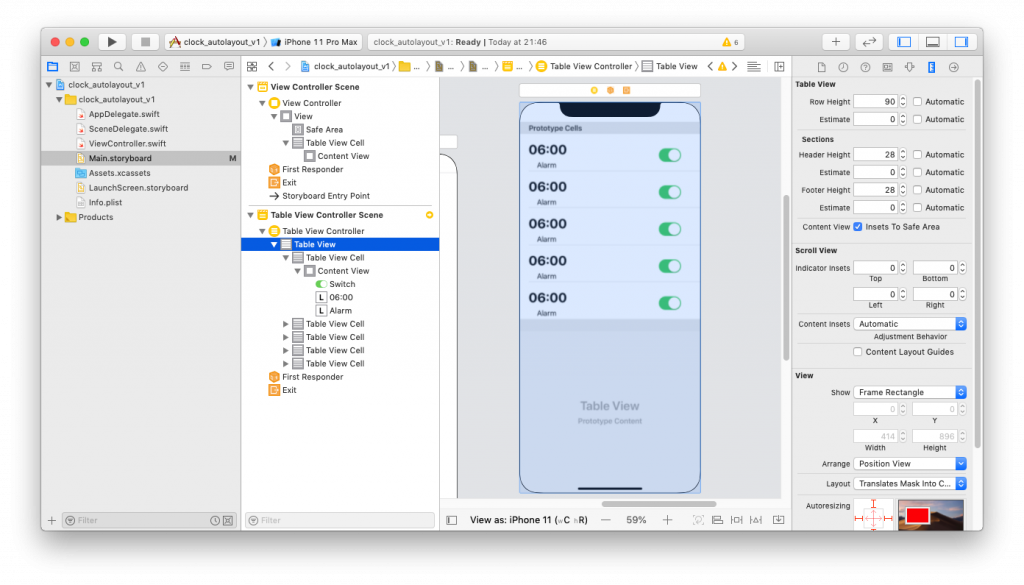
1.先設定MainStoryBoard的Clock App Tabel cell的高度是固定的,不需要用 Auto Layout
計算高度 , Table View 的 Row Height 設為 90,Estimate 的 Automatic取消勾選
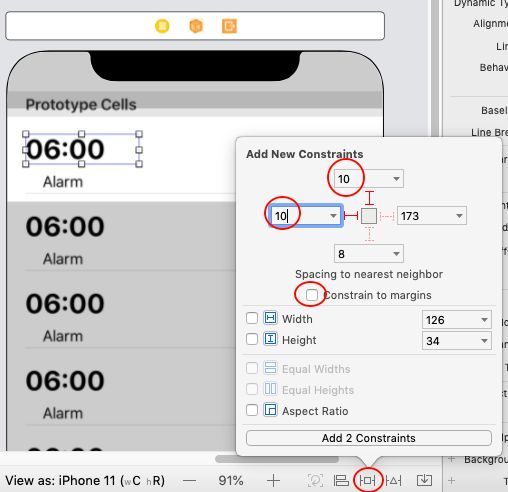
2.在Cell上加入顯示時間的Label,點選右下角的 Add New Constraints,設定
leading & top 間距 10,取消 Constrain to margins 的勾選,否則
label 跟 cell 邊界的間距將是 10 + margin。
3.在cell上加入顯示Alarm名稱的Label
點選右下角的 Add New Constraints,設定 top 間距10。

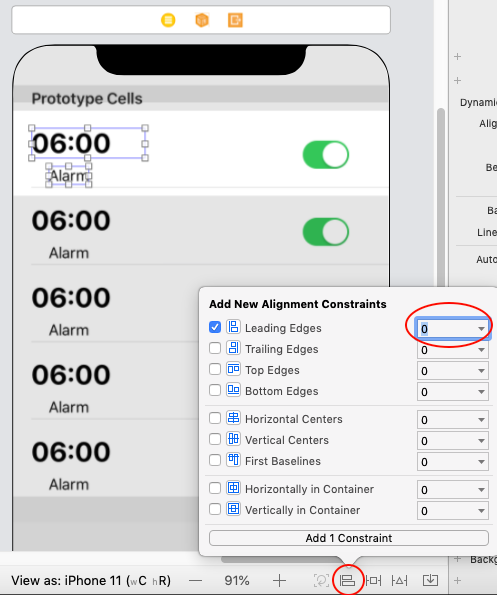
4.選取時間和 alarm 名稱的 label,點選右下角的 Align,加入 Leading Edges 0 的條件,
讓兩個 label 的左邊界對齊。
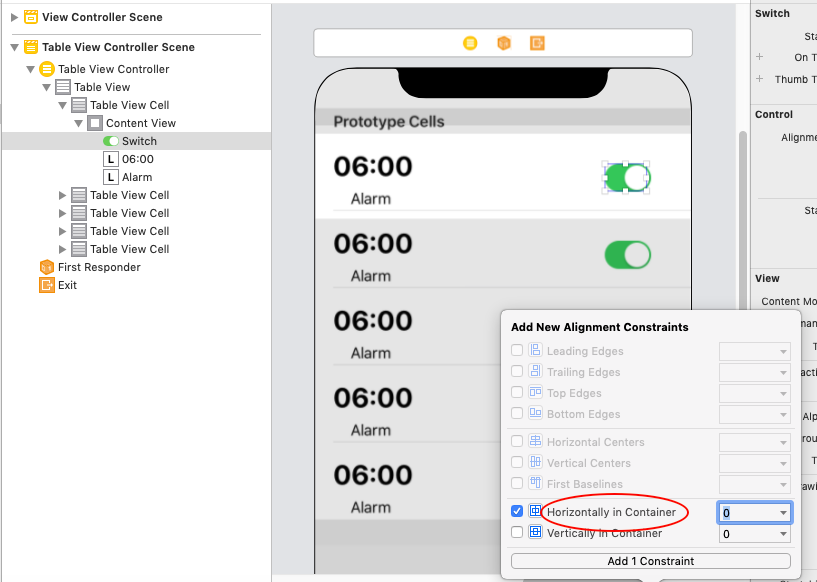
5.在Cell上加入Switch開關
設定 trailing 間距為 20,取消勾選 Constrain to margins。
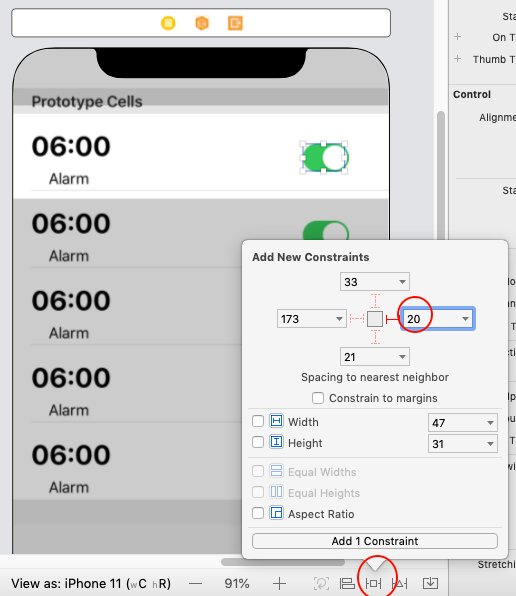
加入垂直置中的條件,將 Vertically in Container 設為 0。
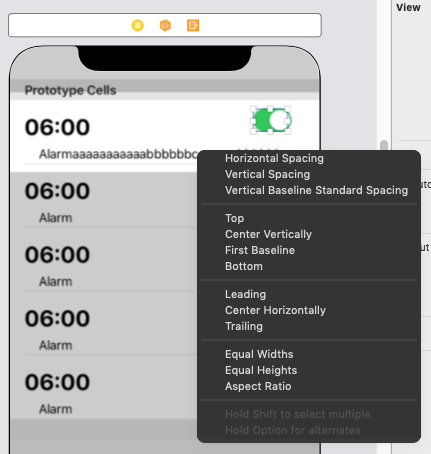
6.讓Alarm名字Label的長度不要超過Switch
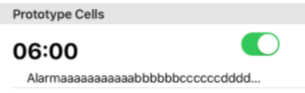
如下圖所示,當名字太長時,label 的長度將超過 swtich。

我們不想要這樣,所以我們設定名字 label & switch 之間有著5 pt 的安全距離。
7.從switch 拉線到Label,選擇 Horizontal Spacing
8.將條件的 Constant 設為 10,讓 switch 和名字 label 間有著 10 pt的間距
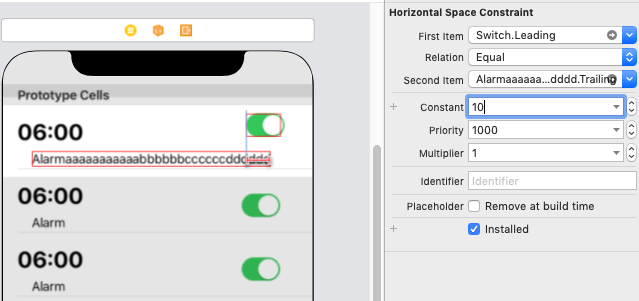
但當label 字太多時,畫面的空間將無法同時顯示完整的文字並跟 switch 保持間距 10
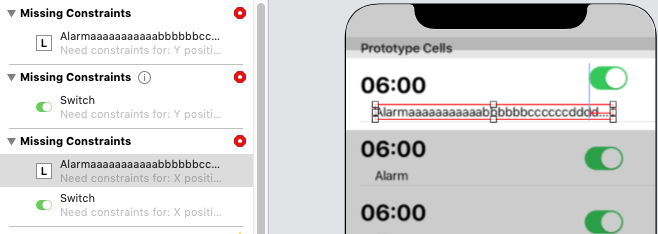
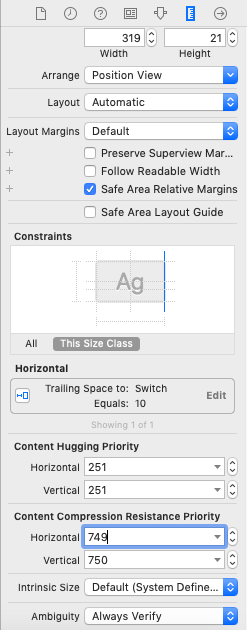
因此我們調降名字label 的 Horizontal Content Compression Resistance Priority,讓它變成小於 switch 的749。如此到時候不夠空間顯示時,label 的文字將變成 …。
調整後結果
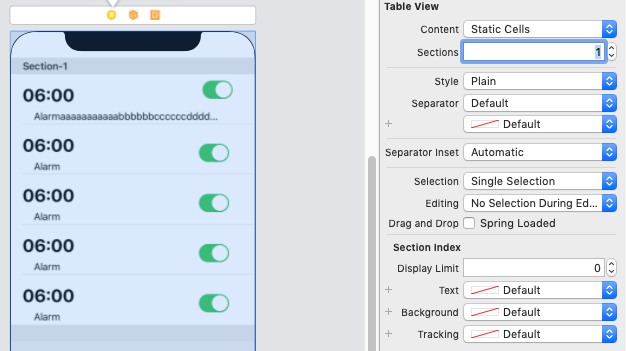
9.利用static cells 或 UITableViewDataSource 設定表格的內容
以下將Table View 的 content 設為 static cells
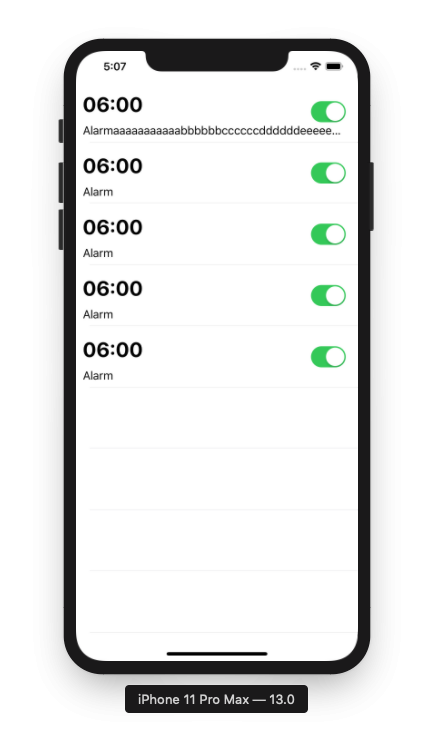
10.執行iPhone 11 Max Pro模擬器,即可看到設定結果,alarm文字超過Switch的部份
會以.....來取代


 iThome鐵人賽