今日關鍵字:Navigation
首先先看到最外層的App.tsx這支檔案
import React from 'react';
import {
  SafeAreaView,
  StyleSheet,
  ScrollView,
  View,
  Text,
  StatusBar,
} from 'react-native';

import {
  Header,
  LearnMoreLinks,
  Colors,
  DebugInstructions,
  ReloadInstructions,
} from 'react-native/Libraries/NewAppScreen';

declare const global: {HermesInternal: null | {}};

const App = () => {
  return (
    <>
      <StatusBar barStyle="dark-content" />
      <SafeAreaView>
        <ScrollView
          contentInsetAdjustmentBehavior="automatic"
          style={styles.scrollView}>
          <Header />
          {global.HermesInternal == null ? null : (
            <View style={styles.engine}>
              <Text style={styles.footer}>Engine: Hermes</Text>
            </View>
          )}
          <View style={styles.body}>
            <View style={styles.sectionContainer}>
              <Text style={styles.sectionTitle}>Step One</Text>
              <Text style={styles.sectionDescription}>
                Edit <Text style={styles.highlight}>App.tsx</Text> to change
                this screen and then come back to see your edits.
              </Text>
            </View>
            <View style={styles.sectionContainer}>
              <Text style={styles.sectionTitle}>See Your Changes</Text>
              <Text style={styles.sectionDescription}>
                <ReloadInstructions />
              </Text>
            </View>
            <View style={styles.sectionContainer}>
              <Text style={styles.sectionTitle}>Debug</Text>
              <Text style={styles.sectionDescription}>
                <DebugInstructions />
              </Text>
            </View>
            <View style={styles.sectionContainer}>
              <Text style={styles.sectionTitle}>Learn More</Text>
              <Text style={styles.sectionDescription}>
                Read the docs to discover what to do next:
              </Text>
            </View>
            <LearnMoreLinks />
          </View>
        </ScrollView>
      </SafeAreaView>
    </>
  );
};

const styles = StyleSheet.create({
  scrollView: {
    backgroundColor: Colors.lighter,
  },
  engine: {
    position: 'absolute',
    right: 0,
  },
  body: {
    backgroundColor: Colors.white,
  },
  sectionContainer: {
    marginTop: 32,
    paddingHorizontal: 24,
  },
  sectionTitle: {
    fontSize: 24,
    fontWeight: '600',
    color: Colors.black,
  },
  sectionDescription: {
    marginTop: 8,
    fontSize: 18,
    fontWeight: '400',
    color: Colors.dark,
  },
  highlight: {
    fontWeight: '700',
  },
  footer: {
    color: Colors.dark,
    fontSize: 12,
    fontWeight: '600',
    padding: 4,
    paddingRight: 12,
    textAlign: 'right',
  },
});

export default App;
App.tsx裡面撰寫整個App的畫面以及邏輯
之後需要將各自的功能從App.tsx拆解出來
App.tsx可以是Class的形式
也可以是函數的形式
官方最近比較推薦使用Functional Component
可以看到預設的App.tsx就是一個Arrow Function
最後的StyleSheet.create({...})為元件的樣式
React Native預設使用的是Flex佈局(不知道有沒有時間講)
由於App中沒有css
所以樣式必須以inline style的形式撰寫
React中將插入的各個元件
以<Component></Component>的形式包裹
並將各個元件組合(如同拼圖一般)
最後Function return拼圖的成品
不光是React Native,React也是一樣的寫法
由於基礎元件很多
等用到時再順便解釋功能
在寫Web時,我第一個寫的就是路徑,也就是Router的設定
在App中叫做Navigation
(其實還是不太ㄧ樣啦,不過做的事情就是導航到特定的頁面)
React Native中雖然也有內建
不過因為套件中通常有些比較好用的函式
所以還是找個套件來用吧
這次使用的是React Navigation
一定會有人想問套件那麼多,怎麼選?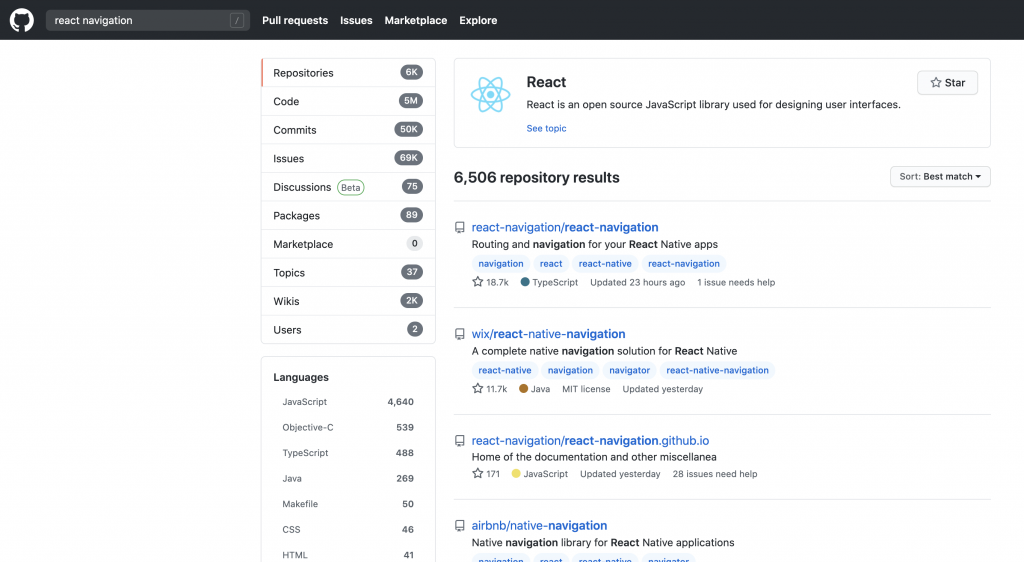
選星星多的(毆)
不過說正經的
星星少不見得不好
但星星多得必有其長處
除非有設定等等不能使用的原因
不然還是推薦星星多的
在終端機輸入
yarn add @react-navigation/native
這裡需要使用的Navigation是Tab navigation
還要再安裝
yarn add @react-navigation/bottom-tabs
來看一下官方範例的重點
function HomeScreen() {
  return (
    <View style={{ flex: 1, justifyContent: 'center', alignItems: 'center' }}>
      <Text>Home!</Text>
    </View>
  );
}

function SettingsScreen() {
  return (
    <View style={{ flex: 1, justifyContent: 'center', alignItems: 'center' }}>
      <Text>Settings!</Text>
    </View>
  );
}

const Tab = createBottomTabNavigator();

export default function App() {
  return (
    <NavigationContainer>
      <Tab.Navigator>
        <Tab.Screen name="Home" component={HomeScreen} />
        <Tab.Screen name="Settings" component={SettingsScreen} />
      </Tab.Navigator>
    </NavigationContainer>
  );
}
這裡的重點有幾個
讓我們把範例跟初始專案融合
(把初始的內容當成首頁)
// ...import...

function SettingsScreen() {
  return (
    <View style={{flex: 1, justifyContent: 'center', alignItems: 'center'}}>
      <Text>Settings!</Text>
    </View>
  );
}

const HomeScreen = () => {
  return (
    <>
      <StatusBar barStyle="dark-content" />
      <SafeAreaView>
        <ScrollView
          contentInsetAdjustmentBehavior="automatic"
          style={styles.scrollView}>
          <Header />
          {global.HermesInternal == null ? null : (
            <View style={styles.engine}>
              <Text style={styles.footer}>Engine: Hermes</Text>
            </View>
          )}
          <View style={styles.body}>
            <View style={styles.sectionContainer}>
              <Text style={styles.sectionTitle}>Step One</Text>
              <Text style={styles.sectionDescription}>
                Edit <Text style={styles.highlight}>App.tsx</Text> to change
                this screen and then come back to see your edits.
              </Text>
            </View>
            <View style={styles.sectionContainer}>
              <Text style={styles.sectionTitle}>See Your Changes</Text>
              <Text style={styles.sectionDescription}>
                <ReloadInstructions />
              </Text>
            </View>
            <View style={styles.sectionContainer}>
              <Text style={styles.sectionTitle}>Debug</Text>
              <Text style={styles.sectionDescription}>
                <DebugInstructions />
              </Text>
            </View>
            <View style={styles.sectionContainer}>
              <Text style={styles.sectionTitle}>Learn More</Text>
              <Text style={styles.sectionDescription}>
                Read the docs to discover what to do next:
              </Text>
            </View>
            <LearnMoreLinks />
          </View>
        </ScrollView>
      </SafeAreaView>
    </>
  );
};

// ...styles...

const Tab = createBottomTabNavigator();

const App = () => {
  return (
    <NavigationContainer>
      <Tab.Navigator>
        <Tab.Screen name="Home" component={HomeScreen} />
        <Tab.Screen name="Settings" component={SettingsScreen} />
      </Tab.Navigator>
    </NavigationContainer>
  );
};

export default App;
來跑跑看吧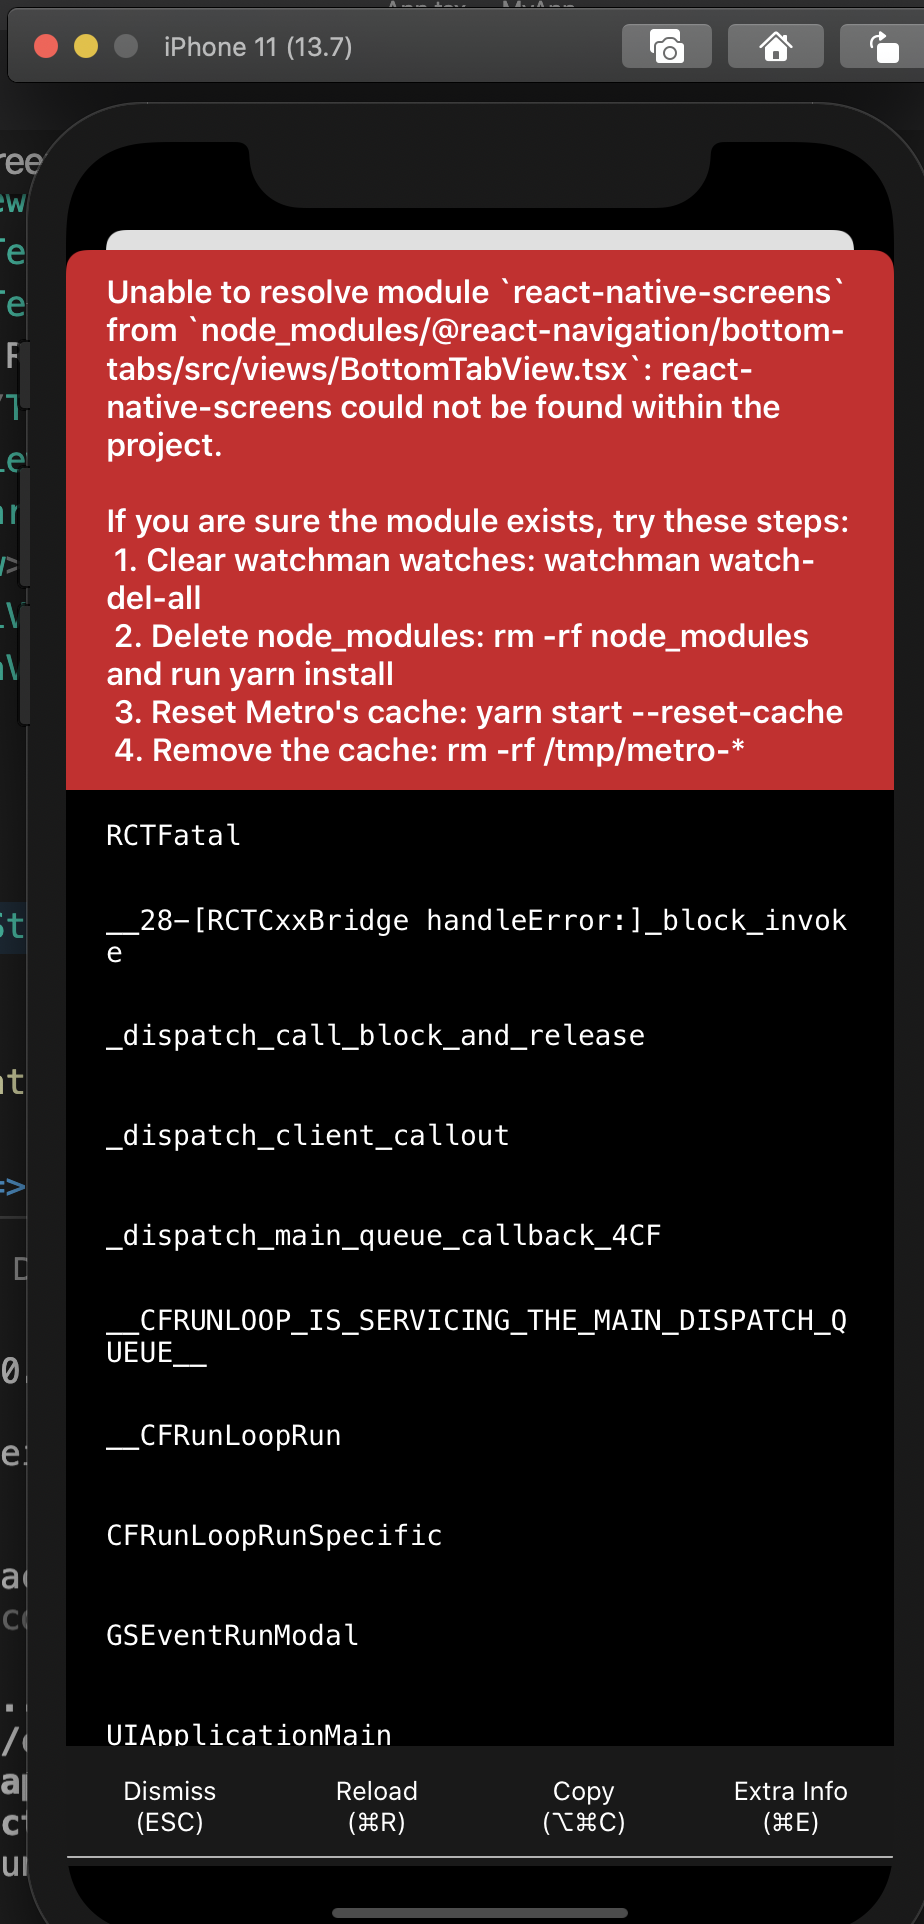

很明顯地看得出來還有東西沒安裝,這也是React Native為人詬病的原因之一:文件不完整
另外要記得只有ios每次安裝套件時,都需要跑進ios的資料夾執行安裝
所以還需要以下指令
yarn add react-native-safe-area-context react-native-screens


ios:
cd ios && pod install && cd ..
這裡來跑跑看android
打開android Studio,點選右上角的AVD Manager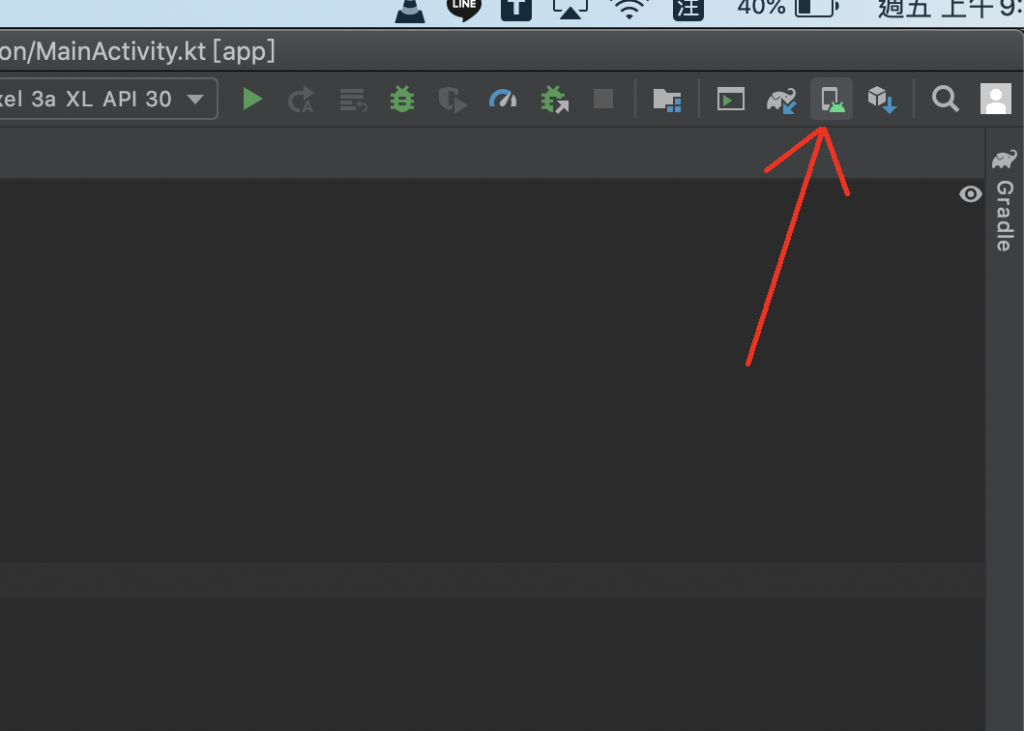
點擊下方的Create Virtual Device後安裝指定型號的虛擬機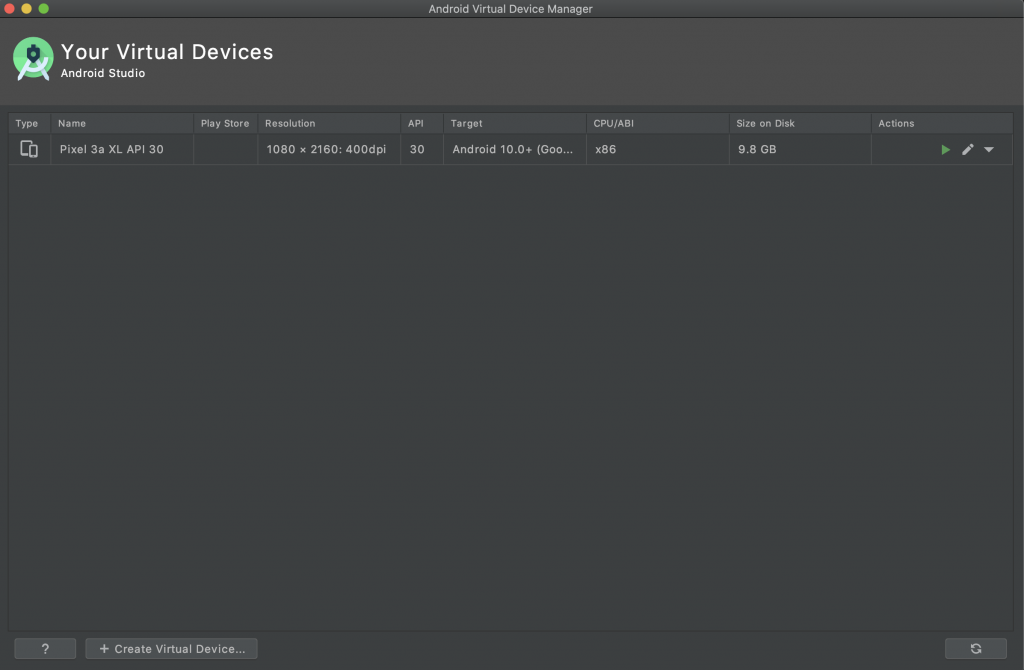
安裝完後按下播放按鈕
然後終端機執行
yarn android
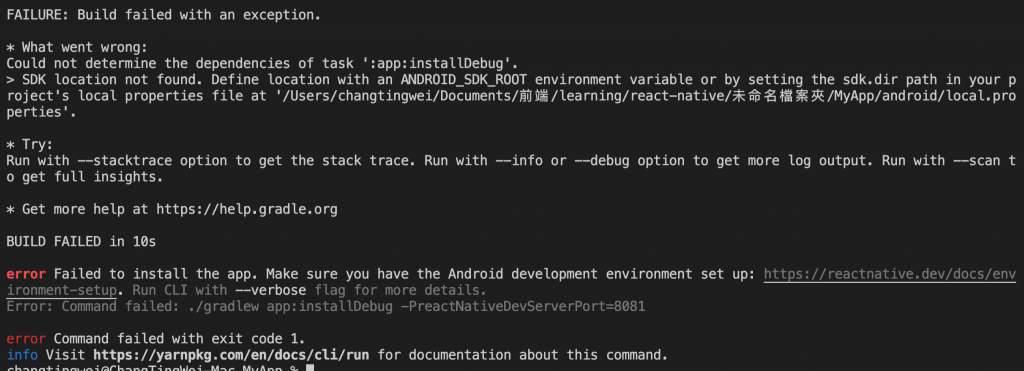

這個其實是昨天偷懶的下場:Android沒有設定完成
點開官方網站
選擇React Native Cli Quickstart下的Target OS:Android
第三點:將以下內容加入$HOME/.bash_profile or $HOME/.bashrc
(如果是 zsh 則是 ~/.zprofile 或是 ~/.zshrc
export ANDROID_HOME=$HOME/Library/Android/sdk
export PATH=$PATH:$ANDROID_HOME/emulator
export PATH=$PATH:$ANDROID_HOME/tools
export PATH=$PATH:$ANDROID_HOME/tools/bin
export PATH=$PATH:$ANDROID_HOME/platform-tools
詳細可以參考這支影片
然後在現在的終端機載入剛剛寫的東西
bash
source $HOME/.bash_profile
other
$HOME/.zprofile
接著再啟動一次
yarn ios
yarn android
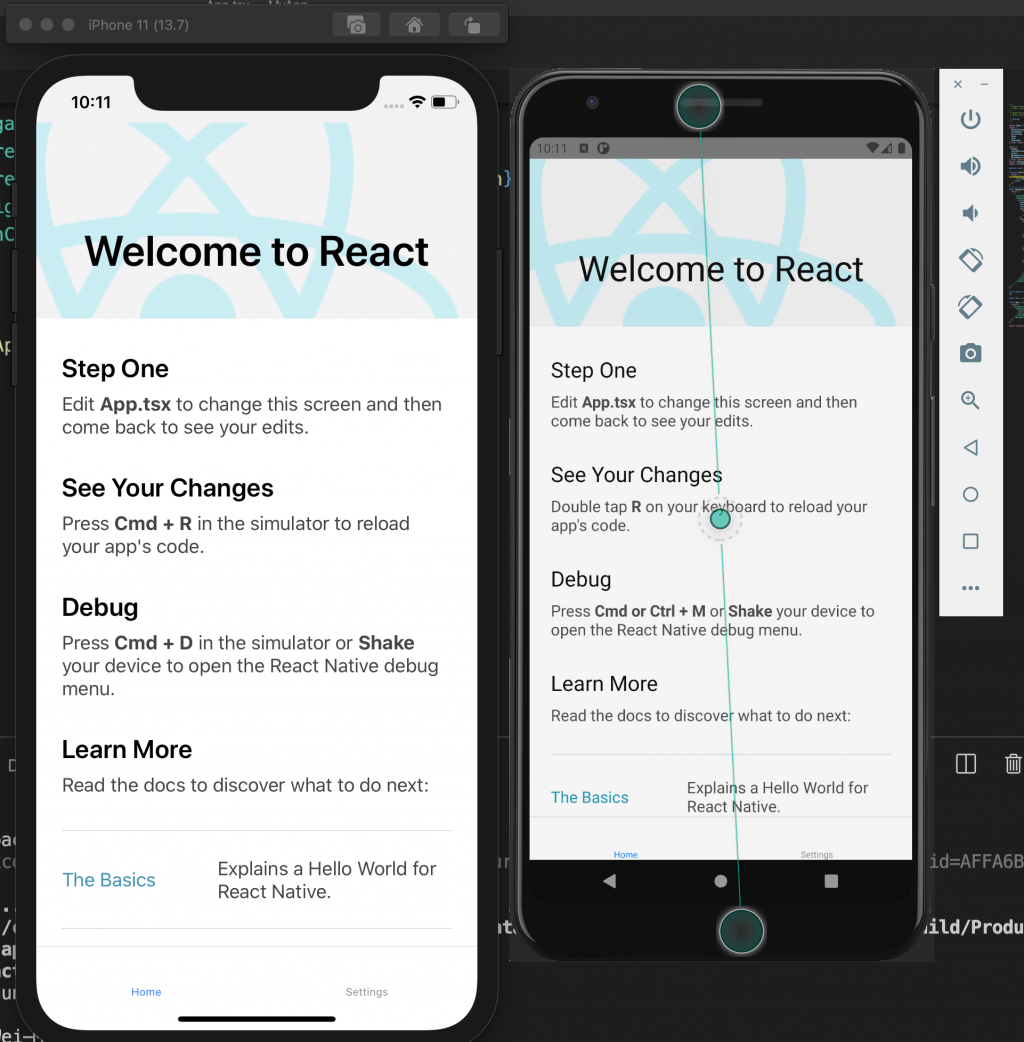
成功啦
可以看到下方的導覽列顯示的字就是name這個property
今天原本以為安裝個套件很單純
結果意外遭遇亂流,還好安全下莊
明天來幫導覽列加入圖示
參考:React Navigation Tab Navigation
React Native環境設定