我們用了四天帶大家練習了官網的範例教學,
現在我們要部署專案到Azure Webapp,並使用Azer SQL DB,
在Day08 Azure SQL 服務我們創建了SQL服務,
接下來要整合到專案裡面。
參考:教學課程:在 Azure App Service 中建置 ASP.NET Core 和 SQL Database 應用程式
這邊幫大家複習一下主要是幾個指令,下面幫大家複習一下
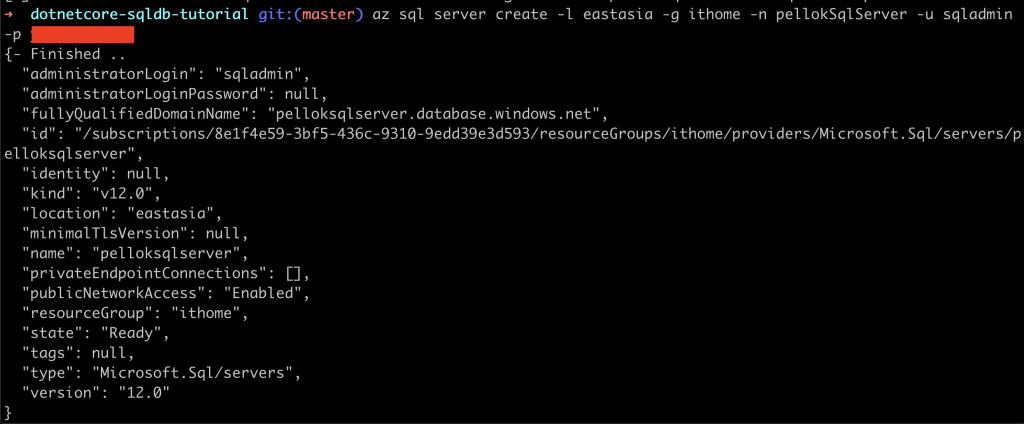
az sql server create -l eastasia -g ithome -n pellokSqlServer -u sqladmin -p password
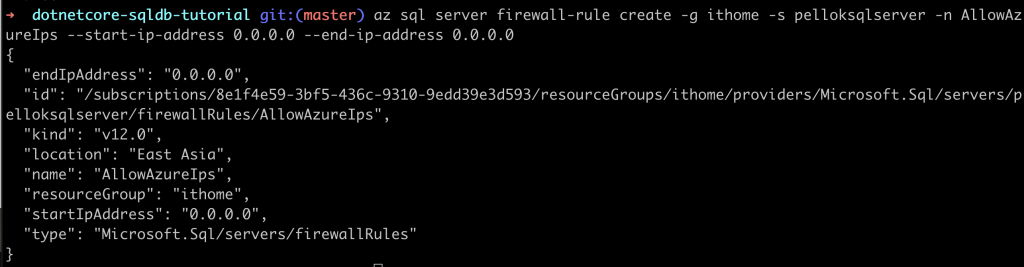
# 當起始 IP 和結束 IP 都設為 0.0.0.0 時,防火牆只會為其他 Azure 資源開啟
az sql server firewall-rule create -g ithome -s pellokSqlServer -n AllowAzureIps --start-ip-address 0.0.0.0 --end-ip-address 0.0.0.0

# 本機 Public IP ,使用 whatsmyip 替換<<your-ip-address>>
az sql server firewall-rule create --name AllowLocalClient -s pellokSqlServer --resource-group ithome --start-ip-address=<your-ip-address> --end-ip-address=<your-ip-address>
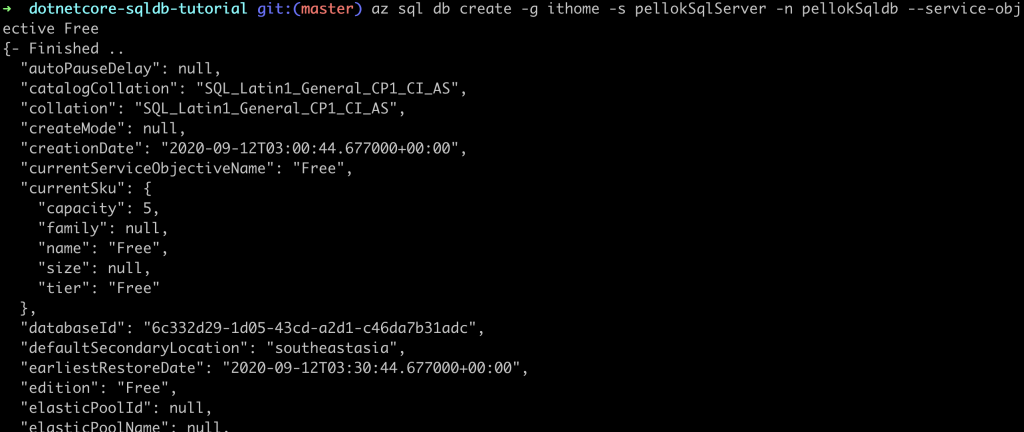
az sql db create -g ithome -s pellokSqlServer -n pellokSqldb --service-objective Free
az sql db show-connection-string --client ado.net -s pellokSqlServer -n pellokSqldb
內容如下,記得替換username和password
"Server=tcp:pellokSqlServer.database.windows.net,1433;Database=pellokSqldb;User ID=<username>;Password=<password>;Encrypt=true;Connection Timeout=30;"
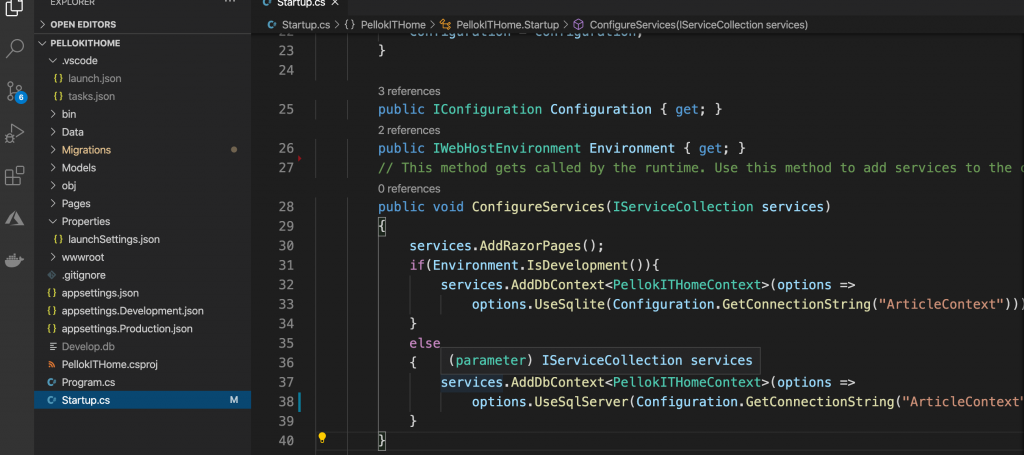
修改 Startup.cs 檔案,如果環境不是開發環境,就切換使用 UseSqlServer
public void ConfigureServices(IServiceCollection services)
{
    services.AddRazorPages();
    if(Environment.IsDevelopment()){
        services.AddDbContext<PellokITHomeContext>(options =>
            options.UseSqlite(Configuration.GetConnectionString("ArticleContext")));
    }
    else
    {
        services.AddDbContext<PellokITHomeContext>(options =>
            options.UseSqlServer(Configuration.GetConnectionString("ArticleContext")));
    }
}
設定 ConnectionStrings 在環進變數裡面,
我們使用 Bash 環境,在 Bash 環境無法使用 : 符號,
所以改用 兩個底線替代,
所以變數名稱變成 ConnectionStrings__ArticleContext
# 創建 ConnectionStrings__ArticleContext 變數,裡面儲存 SQL DB 的連線字串,記得更換<Password>
export ConnectionStrings__ArticleContext='Server=tcp:pelloksqlserver.database.windows.net,1433;Database=pellokSqldb;User ID=sqladmin;Password=<password>;Encrypt=true;Connection Timeout=30;'

# 創建 SQL Database Table
dotnet ef database update
遇到問題 "Keyword not supported: 'server'"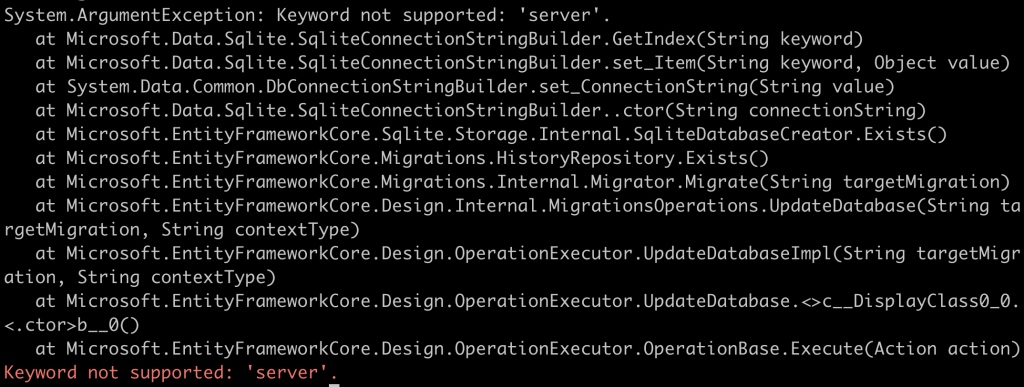
解決步驟,使用 -v 查看細節,發現 "Using environment 'Development'."
dotnet ef database update -v
所以我們要修改環境變數,在嘗試一次
# 創建 ASPNETCORE_ENVIRONMENT 變數,內容是 Production
export ASPNETCORE_ENVIRONMENT="Production"
# 創建資料表
dotnet ef database update
啟用服務
dotnet run
遇到問題:再次遇到 "System.ArgumentException: Keyword not supported: 'server'."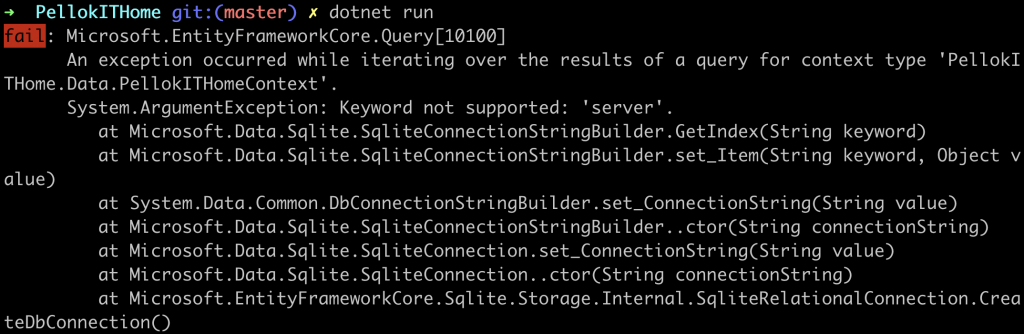
解決步驟,使用 -v normal 查看執行細節,
發現啟動服務預設使用了launchSettings.json的設定
launchSettings.json裡面的 "ASPNETCORE_ENVIRONMENT": "Development"
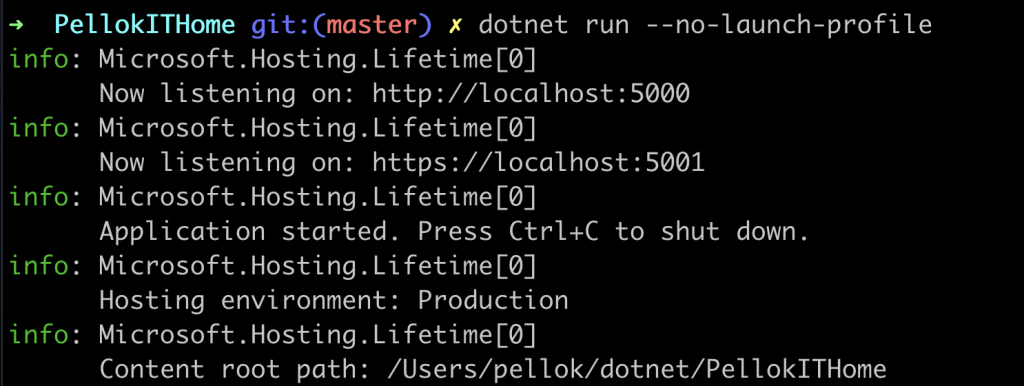
覆蓋了我們設定環境變數,所以我們需要不使用 launch-profile
dotnet run -v normal
dotnet run --no-launch-profile
在實作上面從本機的 SQLite DB 切換到使 SQL Server 遇到很多環境設定的問題
後來在 在 ASP.NET Core 中使用多個環境,暸解到設定環境與launchSettings.json的設定。
更安全一點需要保護我們的 SQL Server 連線字串可以參考
在 ASP.NET Core 的開發中安全儲存應用程式秘密
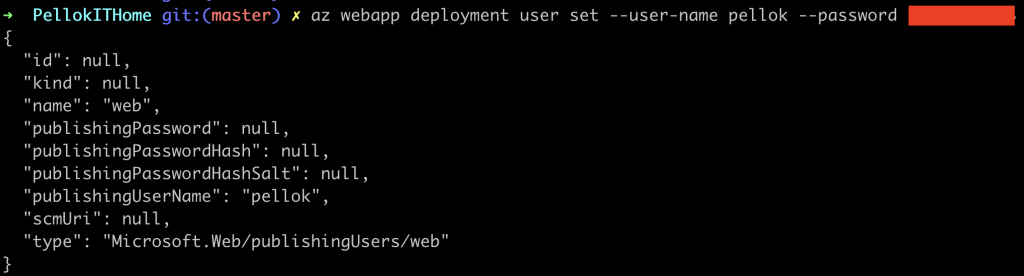
az webapp deployment user set --user-name <username> --password <password>
應用服務可以參考之前的 Day07 WebApp服務-原始碼部署,比對教學的之後,有一些不太一樣的做法。
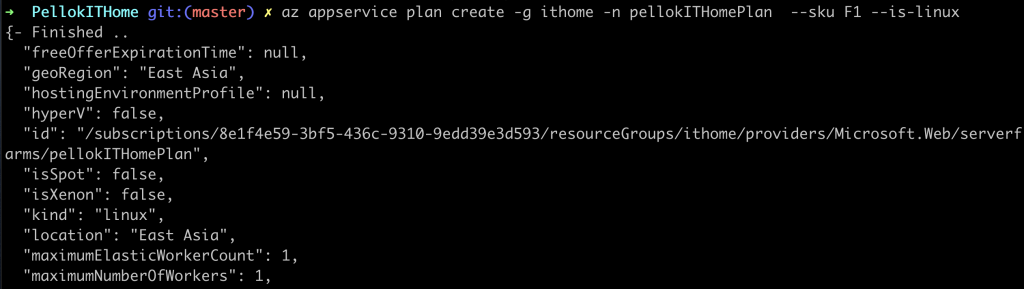
資源群組: ithome
名稱: pellokITHomePlan
容器: Linux 容器
定價層: 免費
az appservice plan create -g ithome -n pellokITHomePlan --sku F1 --is-linux
資源群組: ithome
方案名稱: pellokITHomePlan
Webapp名稱: pellokITHome
執行: DOTNETCORE|3.1
部署方式: --deployment-local-git
az webapp create -g ithome -p pellokITHomePlan -n pellokITHome --runtime "DOTNETCORE|3.1" --deployment-local-git
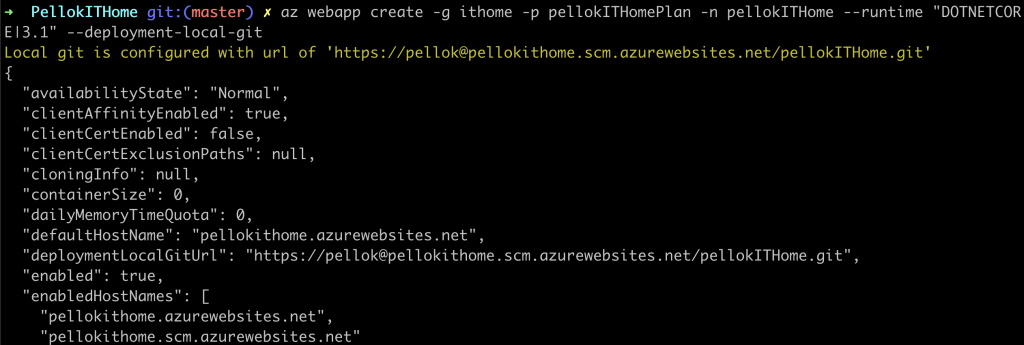
注意留意上面的顯示訊息,記住 Local git is configured with url of
https://pellok@pellokithome.scm.azurewebsites.net/pellokITHome.git
若要設定 Azure 應用程式的連接字串,請在 Cloud Shell 中使用 az webapp config appsettings set 命令。 在下列命令中,將 與 參數取代為您稍早建立的連接字串。
資源群組: ithome
Webapp名稱: pellokITHome
變數名稱: ArticleContext
變數內容: 連線字串
連線類型: SQLAzure
az webapp config connection-string set -g ithome -n pellokITHome --settings ArticleContext="Server=tcp:pelloksqlserver.database.windows.net,1433;Database=pelloksqldb;User ID=sqladmin;Password=<password>;Encrypt=true;Connection Timeout=30;" --connection-string-type SQLAzure
在 App Service 中執行時,App Service 中所定義的連接字串會優先於 appsettings.json** 中所定義的連接字串。

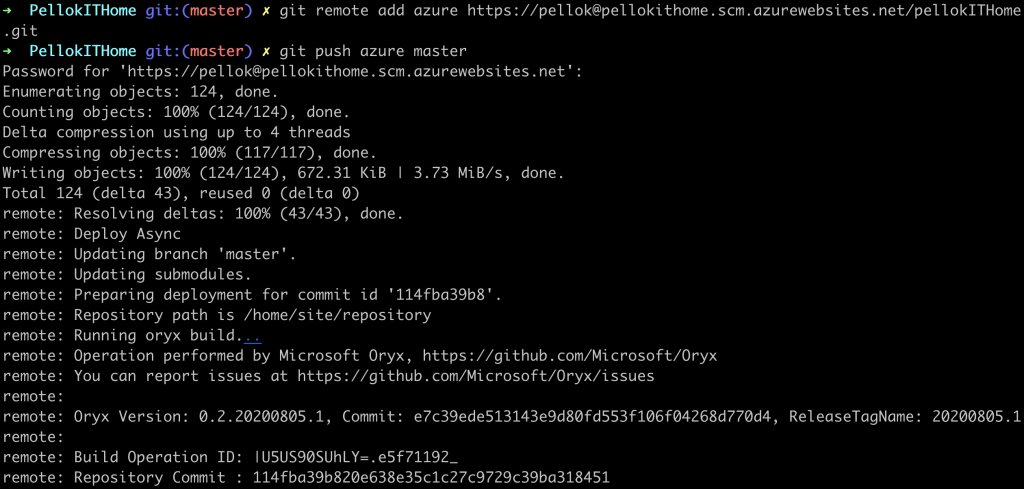
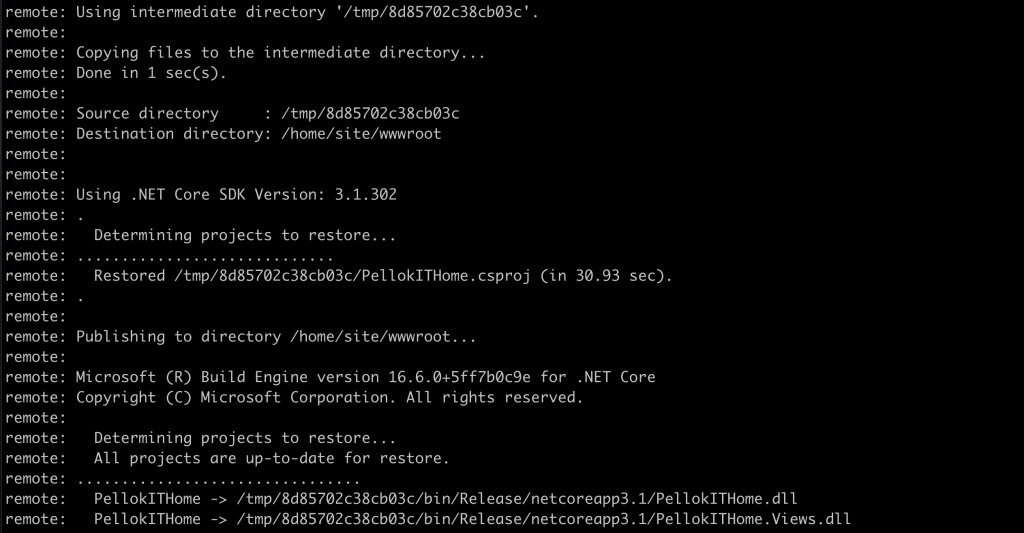
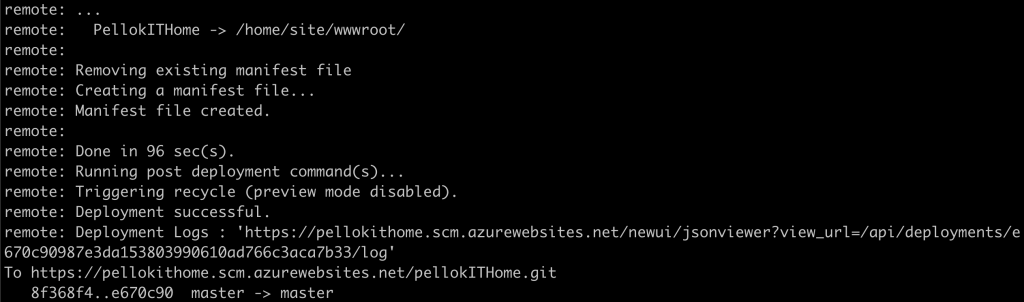
# 增加遠端位置
git remote add azure https://pellok@pellokithome.scm.azurewebsites.net/pellokITHome.git
# 上傳到遠端,會詢問密碼,在上面的設定本機 git 部署有設定
git push azure master
https://pellokithome.azurewebsites.net/

遇到問題 "Development Mode"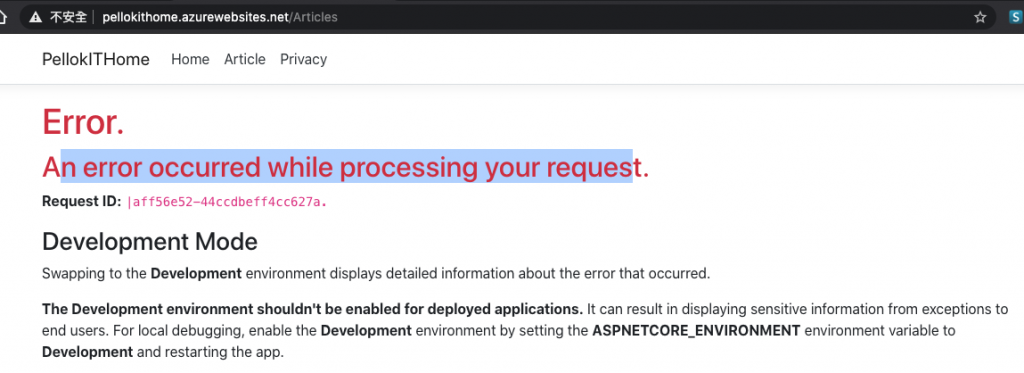
解決
az webapp config appsettings set -g ithome -n pellokITHome --settings ASPNETCORE_ENVIRONMENT="Production"
開啟服務Log紀錄
az webapp log config -g ithome -n pellokITHome --application-logging true --level information
查看服務紀錄檔
az webapp log tail -g ithome -n pellokITHome
完成以上設定後,每次有新版本就推上Azure提供的遠端倉庫,就會馬上進行更新部署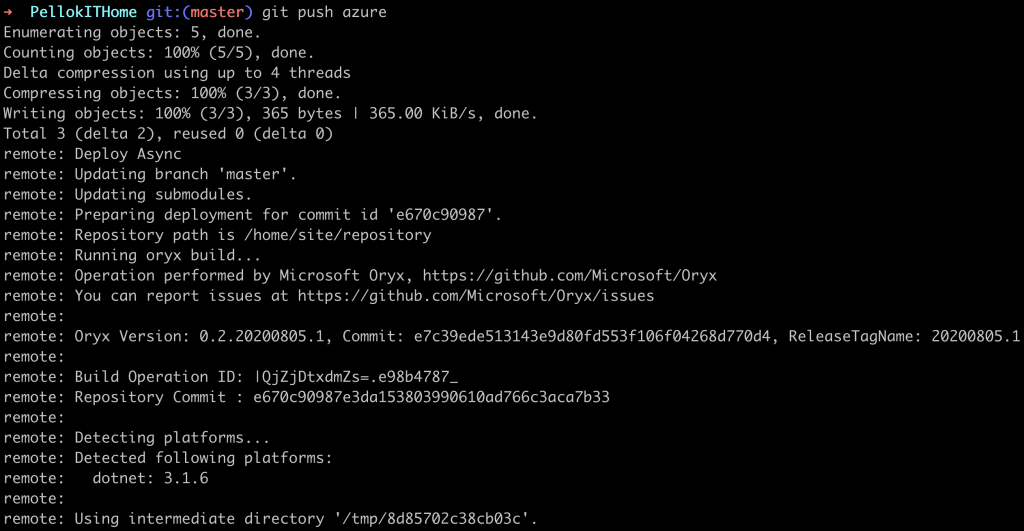
上一篇 Day12 實作官網 ASP.NET Core 教學(四)
下一篇 Day14 實作 ASP.NET Core 建立 Web API 教學