到目前為止,我們雖然有了 Task 這張表能夠記錄任務資訊,但既然我們是開發後端的,其中滿精髓的一點就是身份認證(Authentication),我要知道這個任務是屬於哪一個人的(哪個帳號的),這樣他下次登入進來後才能打獲取所有任務資訊 API,得到屬於他的任務。
那我們就來吧,先打開 DBeaver,到 taskmanagement 這顆 DB 進行新建表: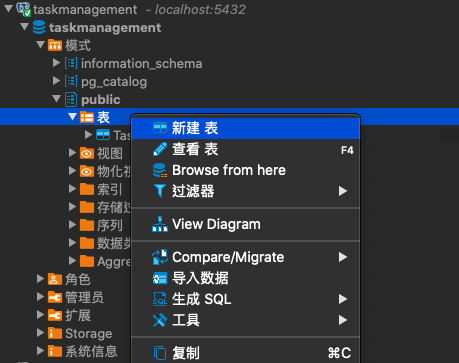
打開之後,先將表名取為 user:
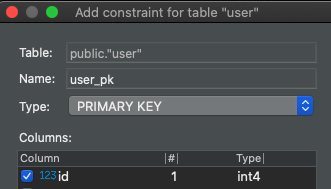
然後它會需要一個 Primary Key,弄個 id 給它:
然後這邊假設前端會用 Firabase 來處理登入相關事項,這邊先記錄 Firebase OAuth ID:
最後再給它一個創建時間戳吧,那這張表目前長這樣:
再來我們要新增 User 跟 Task 這兩張表的關係,但我們必須先到 Task 這張表新增一個屬性,我們先將 Task 清空:
然後新增一個欄位 user_id 用來對應身份的:
然後我們到 Task 表的外鍵,選擇新增外鍵:
這邊我們選擇 Task 的 user_id 是參照 user 表的 id: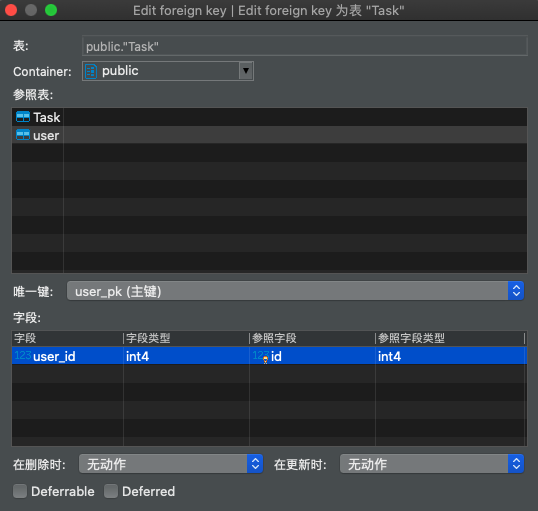
好了之後,這兩者之間就會建立關聯: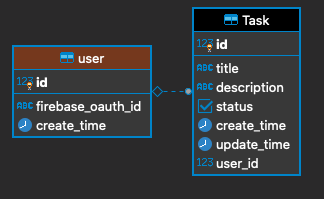
然後我們更新一下 Orm,看看長怎樣。
OK,這樣 User 表自動生成了,然後也幫我們建立了一對多的關係: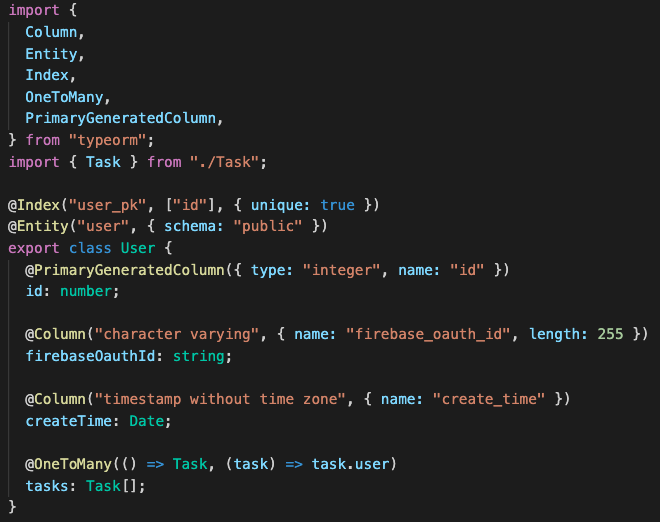
到 Task 表這邊也更新了多對一的關係:
/*
本系列文係個人新手開發心得,可能會有許多錯誤,煩請多多包容不吝指教。
*/


 iThome鐵人賽