iT邦幫忙

第 12 屆 iThome 鐵人賽

DAY 22
0
自我挑戰組

從零開始的後端異世界生活系列 第 22

Day 22 - 在 NestJS 中實作 JWT 與 AuthModule (1)

引入 Dependencies

在上一篇章的時候,我們完成了新建 User Entity 及新增 UserTask 的關聯,再來下一步我們要來實作有關 Token 的部分,這裡我們會參考 Udemy 課程引入 JWT 及 Passport 來進行實作(但不會跟影片一樣 XD)。

那我們先在專案中引入我們需要的四個 Dependencies:

yarn add @nestjs/jwt @nestjs/passport passport passport-jwt

OK,新增完畢:
https://ithelp.ithome.com.tw/upload/images/20201007/20119619Xw4tUxzF1P.png
https://ithelp.ithome.com.tw/upload/images/20201007/20119619uw8x2JnJOf.png

新增 AuthModule 與 AuthService

再來我們要新增處理有關授權部分的模塊,之後任何跟授權有關的都會在此模塊中做處理,那先新增 Module:

nest g module auth

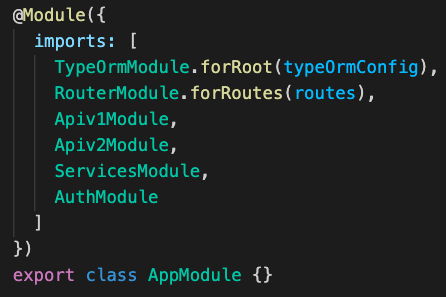
OK,新增完畢,AppModule 也為我們自動引入了此模塊:
https://ithelp.ithome.com.tw/upload/images/20201007/20119619TGxdpBz55C.png
https://ithelp.ithome.com.tw/upload/images/20201007/201196194XQgPAqFrV.png

剩下是新增 AuthService,較簡單,就不貼圖了:

nest g service auth

設定 JwtModule 註冊

我們回到 AuthModule 這邊,接下來我們要做的是 JwtModule 的註冊,在 imports 這邊我們放入:
https://ithelp.ithome.com.tw/upload/images/20201007/20119619XYTuzpCgIz.png

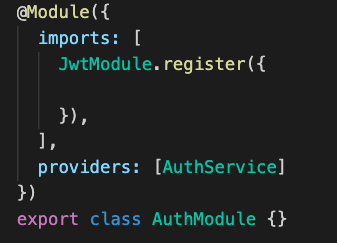
相關實作方法亦可以看 nestjs/jwt 的 GitHub,再來我們要放入的參數是 secret(jwt 簽名的方式),先依照課程放入:
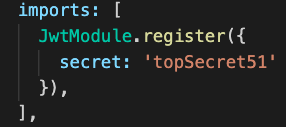
https://ithelp.ithome.com.tw/upload/images/20201007/20119619auj72UL5kD.png

然後我們來設定 JWT 過期的時間:
https://ithelp.ithome.com.tw/upload/images/20201007/201196197wUyQCPZ67.png

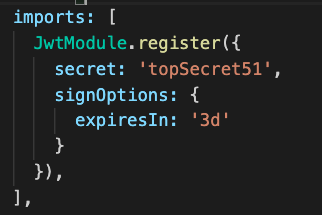
最後看要不要設定 defaultStrategy,這樣之後設定 AuthGuard 的時候就不用一直指定前綴:
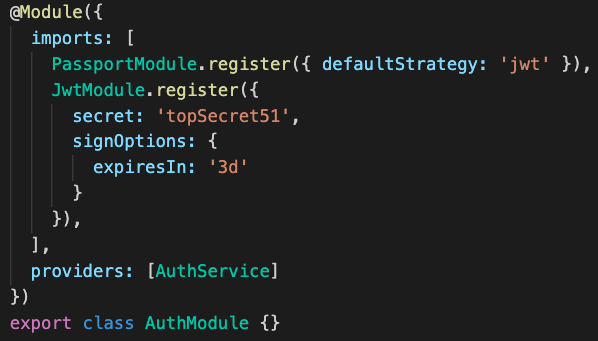
https://ithelp.ithome.com.tw/upload/images/20201007/20119619nZ8JfthpIo.png

好,明天繼續。

/*
本系列文係個人新手開發心得,可能會有許多錯誤,煩請多多包容不吝指教。
*/


上一篇
Day 21 - 新增 User Entity 並增加與 Task 之 Database Relation
下一篇
Day 23 - 在 NestJS 中實作 JWT 與 AuthModule (2)
系列文
從零開始的後端異世界生活30
圖片
  直播研討會
圖片
{{ item.channelVendor }} {{ item.webinarstarted }} |
{{ formatDate(item.duration) }}
直播中

尚未有邦友留言

立即登入留言