在 介紹影像辨識的處理流程 - Day 10 有提到 YOLO 模型是由 Joseph Redmon 所提出,而到了 YOLOV4 後才換成另外一群人繼續發展,YOLOV4 的作者是 Alexey Bochoknovskiy, Chien-Yao Wang, 與 Hong-Yuan Mark Liao,YOLOV5 的作者 Glenn Jocher。
安裝 YOLO
今天會將 YOLOV3 安裝在 Amazon Linux 2,首先從 Joseph Redmon 所建立的 Darknet 進入安裝步驟,首先去 darknet 的 github 官網下載套件,接著修改 Makefile 編譯組態檔,將 GPU,CUDNN 打開,因為這個版本的 AMI 已經有安裝 CUDA 等驅動程式,此外還要設定 GPU 架構,因為 gx4n 這類 EC2 使用的是 Tesla T4 的 GPU,所以要去查相對應的架構,可以在 Matching CUDA arch and CUDA gencode for various NVIDIA architectures 這個網站中查到,下圖中一個顯示 Makefile 的內容,一個透過指令來查 GPU 的使用狀況。
git clone https://github.com/pjreddie/darknet.git
cd darknet
# 檢查 GPU 的型號與記憶體容量
nvidia-smi
# 修改 Makefile 編譯組態檔
vi Makefile
make
Makefile
GPU=1 # enable GPU
CUDNN=1 # enable CUDNN
OPENCV=0
OPENMP=0
DEBUG=0

ARCH= -gencode arch=compute_30,code=sm_30 \
      -gencode arch=compute_35,code=sm_35 \
      -gencode arch=compute_50,code=[sm_50,compute_50] \
      -gencode arch=compute_52,code=[sm_52,compute_52]\
      -gencode arch=compute_75,code=[sm_75,compute_75]
# for Tesla T4
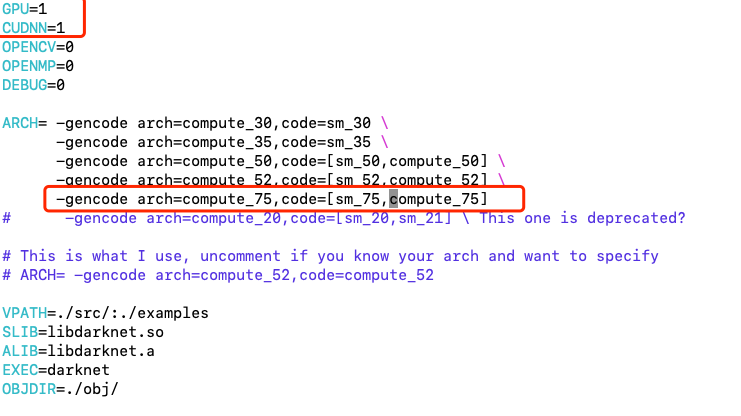
圖 1、修改 Makefile 設定
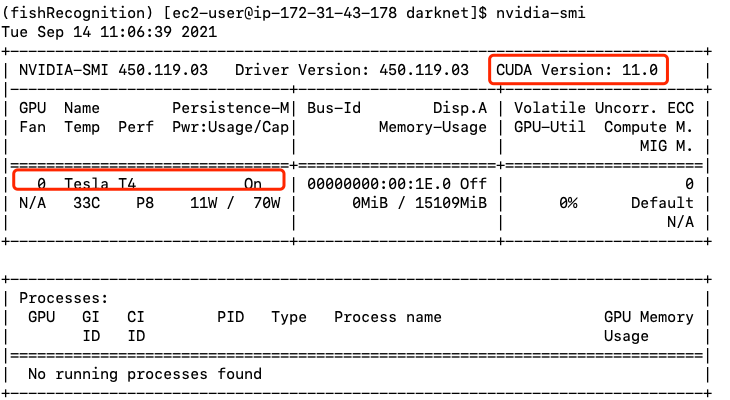
圖 2、檢查 GPU 的型號與記憶體容量
執行 YOLO
執行 yolov3 演算法,用來辨識 dog.jpg 這張圖片,使用的是事先訓練好的模型 yolov3.weights,採用 cfg/yolov3.cfg 的組態設定。
# 下載預先訓練好的權重模型
wget https://pjreddie.com/media/files/yolov3.weights
# 注意一下執行的所在文件夾應為 /home/ec2-user/fishRecognition/fishsite/darknet
./darknet detector test cfg/coco.data cfg/yolov3.cfg yolov3.weights data/dog.jpg
下圖中可以看出來,總共辨識出三種物件,分別是狗、卡車跟腳踏車,所花的辨識時間為 0.0934 秒,主要是因為有開啟 GPU。
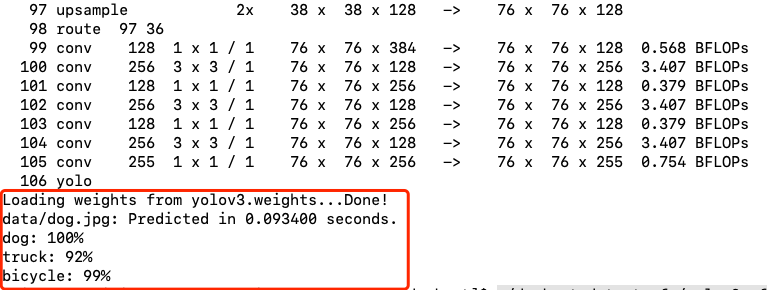
圖 3、利用預先訓練好的模型來辨識圖片
下圖為待預測的圖片 data/dog.jpg。
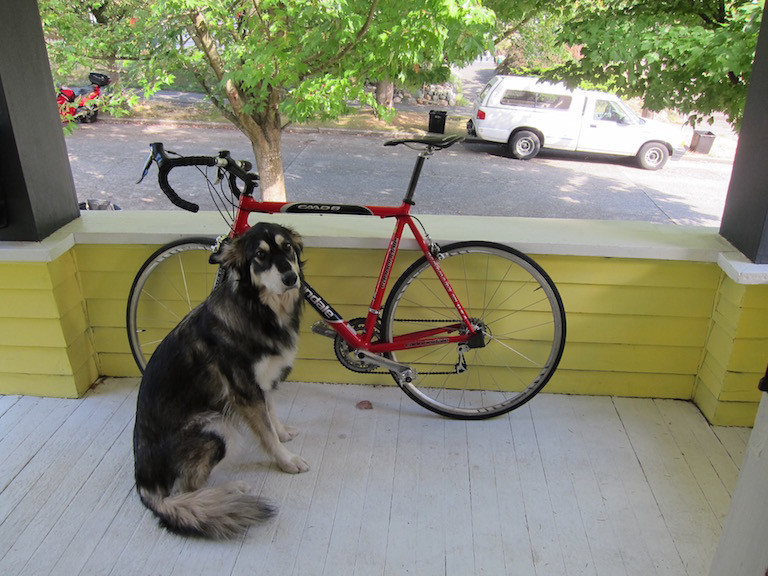
圖 4、待預測的圖片
下圖為預測後的圖片,預設會存為 predictions.jpg。
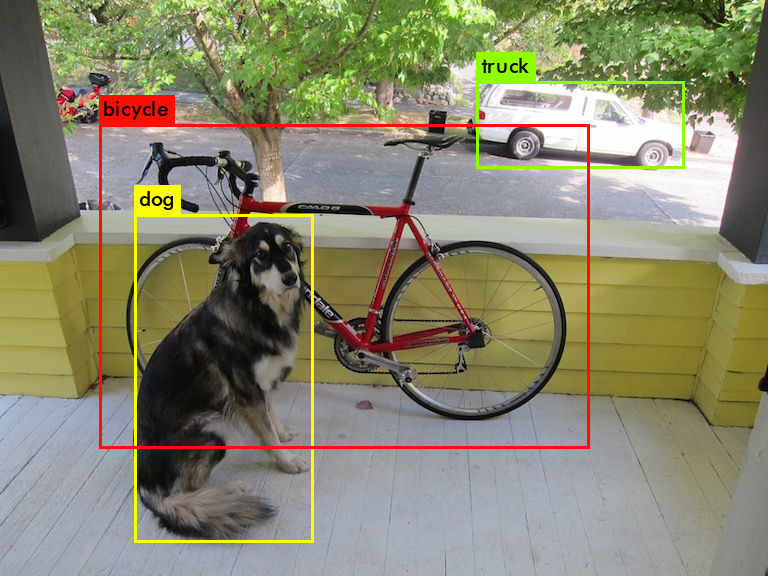
圖 5、預測後的圖片
而之所以會辨識為 dog, truck, bicycles,是在 cfg/coco.data 內定義的。
使用 Python 執行 YOLO
我們這裡用的方法並不是全部用 Python 重寫一遍,而是在 Python 中呼叫 c 語言所提供的呼叫介面,存取 libdarknet.a 這個靜態函式庫。
darknet 已經將 Python 呼叫 C 語言函式庫的介面寫好了,放在 python/darknet.py 這個檔案裡,唯一需要修改的是將 154 行中的語法改成 Python 3的語法,如下圖所示。
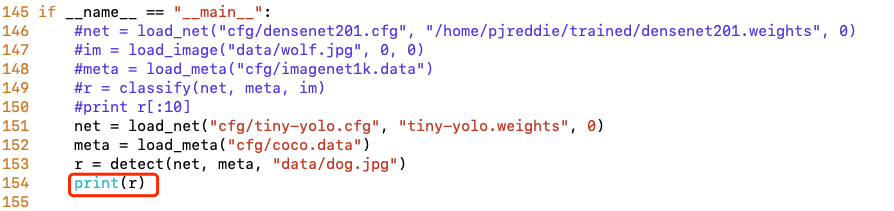
圖 6、修改 darknet.py 的代碼
接著撰寫 fishRecognition.py 這個檔案,就是把命令列中的參數,都直接放到 Python原始碼內就可以。最後呼叫 dn.detect 方法來進行預測。
fishRecognition.py
# 引入 python/darknet.py
import python.darknet as dn
from datetime import datetime

print('load view model')
net = dn.load_net(str.encode("./cfg/yolov3.cfg"),
                  str.encode("./yolov3.weights"), 1)
meta = dn.load_meta(str.encode("./cfg/coco.data"))
print('start to predict...\n')
n = datetime.now()
r = dn.detect(net, meta, str.encode("./data/dog.jpg"))
print(r, '\n', datetime.now()-n)
下圖是執行結果,不只是得到每個物件的名稱,準確度,還有方塊框的座標,最後一個是我們寫來判斷預測所花的時間,約 0.11 秒
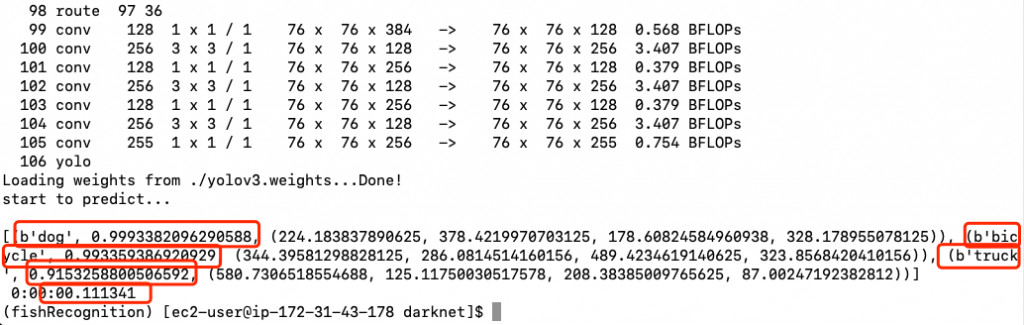
圖 7、使用 Python 語法呼叫 darknet 函式庫