首先,先建立一個controller&config的package在 com.stockAPI底下
接著在controller內新增一個Class- UserController
package com.stockAPI.controller;

import org.springframework.web.bind.annotation.GetMapping;
import org.springframework.web.bind.annotation.RequestMapping;
import org.springframework.web.bind.annotation.RestController;

@RestController
@RequestMapping("user")
public class UserController {

	@GetMapping("testBlock")
	public String testBlock() {
		return "testBlock";
	}

	@GetMapping("testUnblock")
	public String testUnblock() {
		return "testUnblock";
	}
}
此時我們如果直接用瀏覽器打上
http://localhost:8080/user/testBlock 和 http://localhost:8080/user/testUnBlock
這兩個網址的話,你會看到預設的登入畫面且 網址也會被引導到 http://localhost:8080/login。
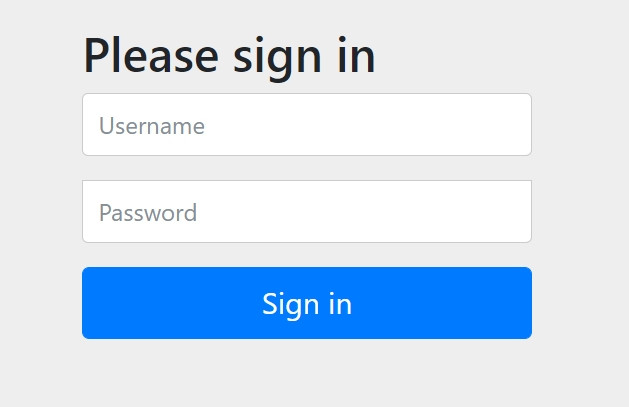
這是因為Spring Security已經預設所有除了/login以外的連結都會需要驗證。
再來,我們新建一個 package- config,
然後在裡面新增一個 Class-SecurityConfig 並繼承 WebSecurityConfigurerAdapter
package com.stockAPI.config;

import org.springframework.beans.factory.annotation.Autowired;
import org.springframework.security.config.annotation.authentication.builders.AuthenticationManagerBuilder;
import org.springframework.security.config.annotation.web.builders.HttpSecurity;
import org.springframework.security.config.annotation.web.configuration.EnableWebSecurity;
import org.springframework.security.config.annotation.web.configuration.WebSecurityConfigurerAdapter;


@EnableWebSecurity
public class SecurityConfig extends WebSecurityConfigurerAdapter {

	@Override
    protected void configure(AuthenticationManagerBuilder auth) throws Exception {

    }


    @Override
    protected void configure(HttpSecurity http) throws Exception {

    }
}
當你打開瀏覽器打上
http://localhost:8080/user/testBlock 和http://localhost:8080/user/testUnBlock
分別會看到這兩個畫面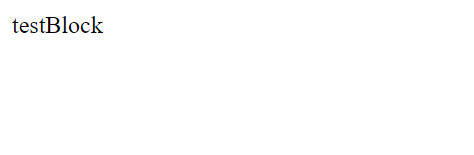
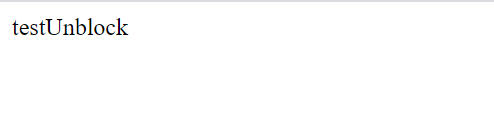
這是因為我們還沒實作security的設定,所以才會兩個連結都看得到。
由此可以看到,如果我們沒有實作security的設定的話,他預設是會需要驗證所有連結的
如果點進去看WebSecurityConfigurerAdapter的介紹可以發現,其中一個方法 configure(HttpSecurity http)
已經有預設的寫法了
protected void configure(HttpSecurity http) throws Exception {
		this.logger.debug("Using default configure(HttpSecurity). "
				+ "If subclassed this will potentially override subclass configure(HttpSecurity).");
		http.authorizeRequests((requests) -> requests.anyRequest().authenticated());
		http.formLogin();
		http.httpBasic();
	}
那為什麼我們的設定是如何實現的呢?
//初始化觸發
@Override
public void init(WebSecurity web) throws Exception {
		HttpSecurity http = getHttp();
		web.addSecurityFilterChainBuilder(http).postBuildAction(() -> {
			FilterSecurityInterceptor securityInterceptor = http.getSharedObject(FilterSecurityInterceptor.class);
			web.securityInterceptor(securityInterceptor);
		});
	}


/**
	 * Creates the {@link HttpSecurity} or returns the current instance
	 * @return the {@link HttpSecurity}
	 * @throws Exception
	 */
	@SuppressWarnings({ "rawtypes", "unchecked" })
	protected final HttpSecurity getHttp() throws Exception {
		if (this.http != null) {
			return this.http;
		}
		AuthenticationEventPublisher eventPublisher = getAuthenticationEventPublisher();
		this.localConfigureAuthenticationBldr.authenticationEventPublisher(eventPublisher);
		AuthenticationManager authenticationManager = authenticationManager();
		this.authenticationBuilder.parentAuthenticationManager(authenticationManager);
		Map<Class<?>, Object> sharedObjects = createSharedObjects();
		this.http = new HttpSecurity(this.objectPostProcessor, this.authenticationBuilder, sharedObjects);
		if (!this.disableDefaults) {
			applyDefaultConfiguration(this.http);
			ClassLoader classLoader = this.context.getClassLoader();
			List<AbstractHttpConfigurer> defaultHttpConfigurers = SpringFactoriesLoader
					.loadFactories(AbstractHttpConfigurer.class, classLoader);
			for (AbstractHttpConfigurer configurer : defaultHttpConfigurers) {
				this.http.apply(configurer);
			}
		}

//最後會觸發我們的客製化設定
configure(this.http);
		return this.http;
	}
在WebSecurityConfigurerAdapter 會初始化時引用 getHttp方法,getHttp在引用configure(HttpSecurity http) 方法,如此我們客製化設定便可以啟用。
OK! 了解原理後讓我們來實作這個功能吧!
package com.stockAPI.config;

import org.springframework.beans.factory.annotation.Autowired;
import org.springframework.security.config.annotation.authentication.builders.AuthenticationManagerBuilder;
import org.springframework.security.config.annotation.web.builders.HttpSecurity;
import org.springframework.security.config.annotation.web.configuration.EnableWebSecurity;
import org.springframework.security.config.annotation.web.configuration.WebSecurityConfigurerAdapter;

@EnableWebSecurity
public class SecurityConfig extends WebSecurityConfigurerAdapter {


	@Override
    protected void configure(AuthenticationManagerBuilder auth) throws Exception {

    }


    @Override
    protected void configure(HttpSecurity http) throws Exception {
    	http
    		.authorizeRequests()
    		.antMatchers("/user/testBlock").authenticated()
    		.antMatchers("/user/testUnblock").permitAll();

    }
}
http.authorizeRequests(): 請求權限分配
antMatchers: 當符合這個條件的路徑
authenticated: 需要通過驗證,才能使用
permitAll: 允許所有用戶使用
底下是設置後的執行結果
http://localhost:8080/user/testBlock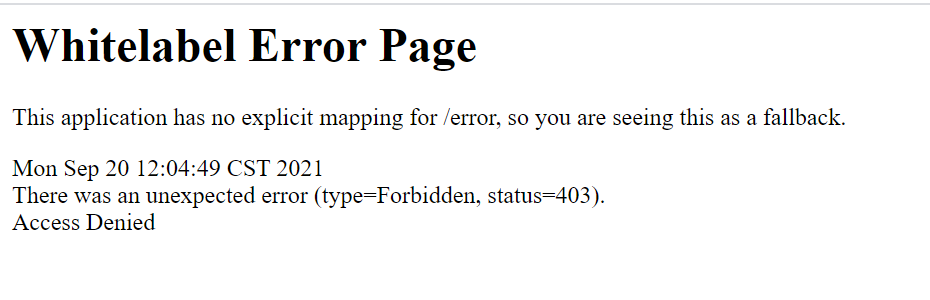
http://localhost:8080/user/testBlock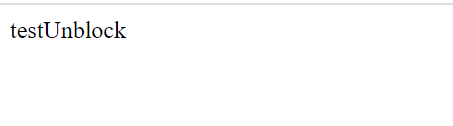
好的,今天先實作到這邊,明天會開始實作用戶登入的功能。
參考資料:
https://blog.csdn.net/u012702547/article/details/107655180
https://www.jianshu.com/p/e6655328b211


 iThome鐵人賽