進場特效也是基本再基本的網頁動態!
尤其是當網頁內容塞太多時,適當地加上進場特效可以幫助使用者閱讀重點。
以前常用的套件如Scroll Magic,
或計算網頁滑動的高度,等到滑到位置時搭配Animate.css做簡單進場。
但今天不用套件,我們用 JS的 Web API : Intersection Observer
輕鬆愉快做出進場特效!
Intersection Observer API 可以非同步偵測目標與其他元素發生交集,
好處就是可以取代過去監聽scroll的同步事件(一直監聽讓網頁效能變差)
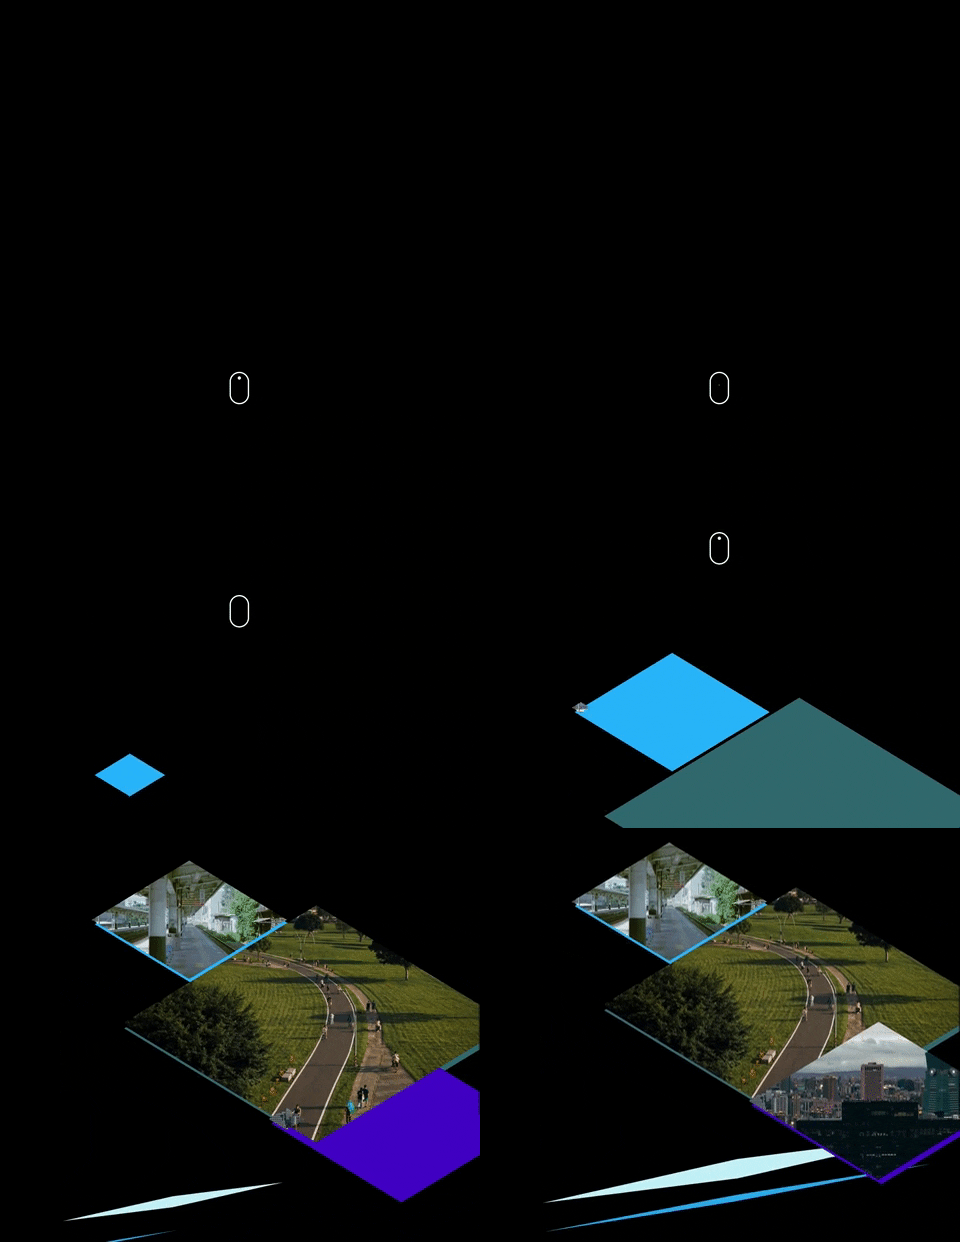
老樣子,先看一下今天的成果:

讓我們一步步拆解吧!
Intersection Observer API可以幫我們觀察兩個物件是否有交集
這兩個物件一定要是父層子層關係,沒有設定的話預設都是視窗。
可以搭配服用這一篇,解釋得非常清楚!
認識 Intersection Observer API:實作 Lazy Loading 和 Infinite Scroll
流程就是
1.創建新的API
2.設定觀察對象
3.設定API選項
4.建立callback-->當兩個物件交集的時候要做什麼事情
我們要做的就是當物件(我的圖片們)和視窗交集時,
加上animation Class
來看code:
//設定observer api 選項
//root預設就是視窗
const options = {
  rootMargin: '0px 0px 50px 0px',
  threshold: 0
}

//選定要觀察的對象
const shapes = document.querySelectorAll('.shape')
const images = document.querySelectorAll('.img')

//設定call back
const callback = (entries, observer) => {
  entries.forEach(entry => {
    if (!entry.isIntersecting) return //如果還沒有交集的話就return

    entry.target.classList.add('animation');// 近來視窗的話幫我加上animation class
    observer.unobserve(entry.target)
  })
}

//創建新的觀察API
let observer = new IntersectionObserver(callback, options);

//所有觀察對象都設定觀察
images.forEach((target) => {
observer.observe(target)
})

//所有觀察對象都設定觀察
shapes.forEach((shape) => {
observer.observe(shape)
})
這次的進場效果使用clip-path做。
搭配這個網站:CSS clip-path maker做出想要的遮罩效果!
原理就是讓圖片下面都壓一層有顏色的區塊,
1.然後讓遮罩先罩住有顏色的區塊
2.再讓遮罩照著圖片
圖片和色塊都用一樣的animation,但用animation-delay做出時間差
@keyframes image-img{
  from{
    clip-path: polygon(0% 50%, 0% 50%, 0% 50%, 0% 50%);
    opacity: 1;
  }
  to{
    clip-path: polygon(50% 0%, 100% 50%, 50% 100%, 0% 50%);
    opacity: 1;
  }
}
看看全部的HTML & SCSS code:
//HTML
<section>
  <div class="img-wrapper">
    <img class="img img-1"src="https://source.unsplash.com/random/640x390?taipei" alt="">
    <img class="img img-2" src="https://source.unsplash.com/random/640x390?taiwan" alt="">
    <img class="img img-3"  src="https://source.unsplash.com/random/640x390?taipei-101" alt="">
    <div class="shape shape-1"></div>
    <div class="shape shape-2"></div>
    <div class="shape shape-3"></div>
    <div class="shape shape-4"></div>
    <div class="shape shape-5"></div>
  </div>
</section>
//scss
.img-wrapper{
  position: relative;
  width: 60%;
  height: 100vh;

  .img{
    position: absolute;
    clip-path: polygon(50% 0%, 100% 50%, 50% 100%, 0% 50%);
    z-index: 2;
    opacity: 0;

    &.animation{
    animation: image-img 0.8s ease-in 1 forwards;
    animation-delay: 1s;
    }

    &-1{
      width: 300px;
      left: 0%;
      top:10%;
      z-index: 3;
    }
    &-2{
      width: 600px;
      top: 20%;
      left: 10%;
    }
    &-3{
      width: 400px;
      left: 60%;
      top: 50%;}

  }

  .shape{
    @extend .img;
    z-index: 1;
    opacity: 0;

    &.animation{
      animation: image-img 0.8s ease-in 1 forwards;
      animation-delay: 0s;
    }

    &-1{
      @extend .img-1;
      left: 1%;
      top:11%;
      height: calc(300 / 640 * 390px);
      background: rgba(25, 181, 254, 1);
    }
    &-2{
      @extend .img-2;
      top: 21%;
      left: 11%;
      height: calc(600 / 640 * 390px);
      background: rgba(51, 110, 123, 1);
    }
    &-3{
      @extend .img-3;
      left: 61%;
      top: 51%;
      height: calc(400 / 640 * 390px);
      background: rgba(77, 19, 209, 1);
    }

    &-4{
      width: 600px;
      height: 30px;
      background: rgba(197, 239, 247, 1);
      left: -10%;
      bottom: 15%;
      clip-path: none;
      animation: none;
      transform: skewY(
-10deg
);
      z-index: 0;
    }
    &-5{
      width: 600px;
      height: 10px;
      background: rgba(34, 167, 240, 1);
      left: -10%;
      bottom: 10%;
      clip-path: none;
      animation: none;
      transform: skewY(
-10deg
);
      z-index: 0;
    }
  }


}

@keyframes image-img{
  from{
    clip-path: polygon(0% 50%, 0% 50%, 0% 50%, 0% 50%);
    opacity: 1;
  }
  to{
    clip-path: polygon(50% 0%, 100% 50%, 50% 100%, 0% 50%);
    opacity: 1;
  }
}
搭配了昨天向下滑的code,code放這裡
有任何問題/錯誤/想法請留言~~
