這篇文章會介紹使用 Python 第三方 pyautogui 函式庫,搭配 for 迴圈與 time 函式庫,實作一個可以定時擷取螢幕畫面的功能,最後還會在截圖後將截圖透過 LINE Notify 傳送出去的程式。
執行 pyautogui 會由程式控制電腦滑鼠、鍵盤或畫面,因此所以請使用本機環境 ( 參考:使用 Python 虛擬環境 ) 或使用 Anaconda Jupyter 進行實作 ( 參考:使用 Anaconda ) 。
輸入下列指令,就能安裝 pyautogui 函式庫 ( 依據每個人的作業環境不同,可使用 pip 或 pip3 或 pipenv )。
pip install pyautogui
要使用 pyautogui 必須先 import pyautogui 模組。
import pyautogui
下方的程式碼執行後,會自動進行「全螢幕」截圖,並將圖片存在指定的路徑下。
import pyautogui

myScreenshot = pyautogui.screenshot()
myScreenshot.save('圖片路徑\圖片名稱.png')
如果在後方加入 region 參數,指定左上 ( x1, y1 ) 和右下 ( x2, y2 ) 的座標,就能擷取某個範圍的畫面
import pyautogui

myScreenshot = pyautogui.screenshot(region=(x1, y1, x2, y2))
myScreenshot.save('圖片路徑\圖片名稱.png')
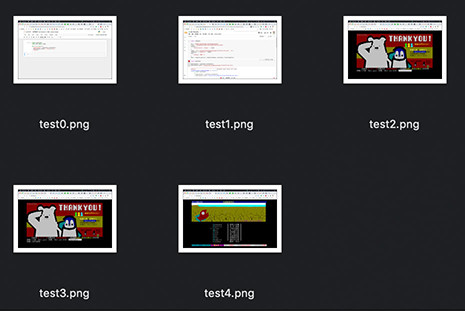
在上述的程式裡,加入 for 迴圈與 sleep 的功能,就能讓程式每隔兩秒擷取一次螢幕畫面,總共截取五次。
import pyautogui
from time import sleep

for i in range(5):
    myScreenshot = pyautogui.screenshot()
    myScreenshot.save(f'./test{i}.png')
    sleep(2)
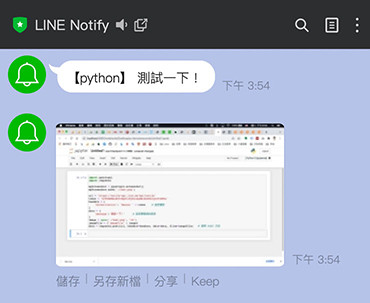
參考「發送 LINE Notify 通知」文章,預先取得 LINE notify 的權杖,使用下方的程式執行後,會使用 pyautogui 函式庫進行截圖並儲存為 test.png,接著使用 requests 函式庫以 POST 的方式,將圖片傳送到指定的 LINE 聊天頻道裡。
import pyautogui
import requests

myScreenshot = pyautogui.screenshot()   # 截圖
myScreenshot.save('./test.png')         # 儲存為 test.png

url = 'https://notify-api.line.me/api/notify'
token = '你的權杖'
headers = {
    'Authorization': 'Bearer ' + token    # 設定 LINE Notify 權杖
}
data = {
    'message':'測試一下!'      # 設定 LINE Notify message ( 不可少 )
}
image = open('./test.png', 'rb')    # 以二進位方式開啟圖片
imageFile = {'imageFile' : image}   # 設定圖片資訊
data = requests.post(url, headers=headers, data=data, files=imageFile)   # 發送 LINE Notify
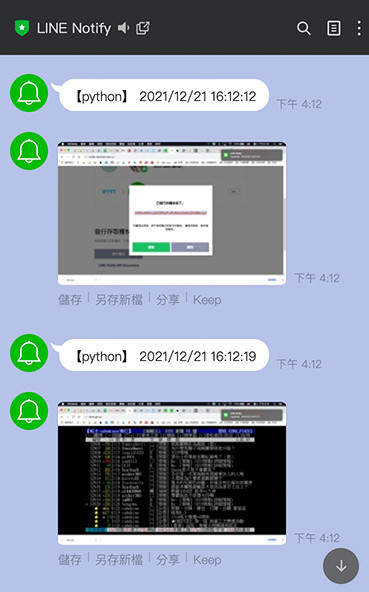
修改上方的程式,加入 time 內建函式庫,將訊息內容更換為截圖當下的時間,使用 sleep 與 for 迴圈搭配,將程式使用「函式」包裝,就能做到定時截圖和發送 LINE Notify 的功能。
import pyautogui
import requests
import time

# 定義截圖的函式
def screenshot():
    myScreenshot = pyautogui.screenshot()
    myScreenshot.save('./test.png')

    t = time.time()           # 取得到目前為止的秒數
    t1 = time.localtime(t)    # 將秒數轉換為 struct_time 格式的時間
    now = time.strftime('%Y/%m/%d %H:%M:%S',t1)  # 輸出為特定格式的文字
    sendLineNotify(now)       # 執行發送 LINE Notify 的函式,發送的訊息為時間

# 定義發送 LINE Notify 的函式
def sendLineNotify(msg):
    url = 'https://notify-api.line.me/api/notify'
    token = '你的權杖'
    headers = {
      'Authorization': 'Bearer ' + token
    }
    data = {
      'message':msg
    }
    image = open('./test.png', 'rb')
    imageFile = {'imageFile' : image}
    data = requests.post(url, headers=headers, data=data, files=imageFile)

# 使用for 迴圈,每隔五秒截圖發送一次
for i in range(5):
    screenshot()
    time.sleep(5)
如果將螢幕截圖搭配自動傳送 email、發送 LINE Notify...等推播通知,就能做到簡單的遠端監控作業?!( 要注意,如果在沒有得到同意的狀況下進行監控,會觸犯刑法第 315 之 1 條呦 )
大家好,我是 OXXO,是個即將邁入中年的斜槓青年,我已經寫了超過 400 篇 Python 的教學,有興趣可以參考下方連結呦~ ^_^


 iThome鐵人賽