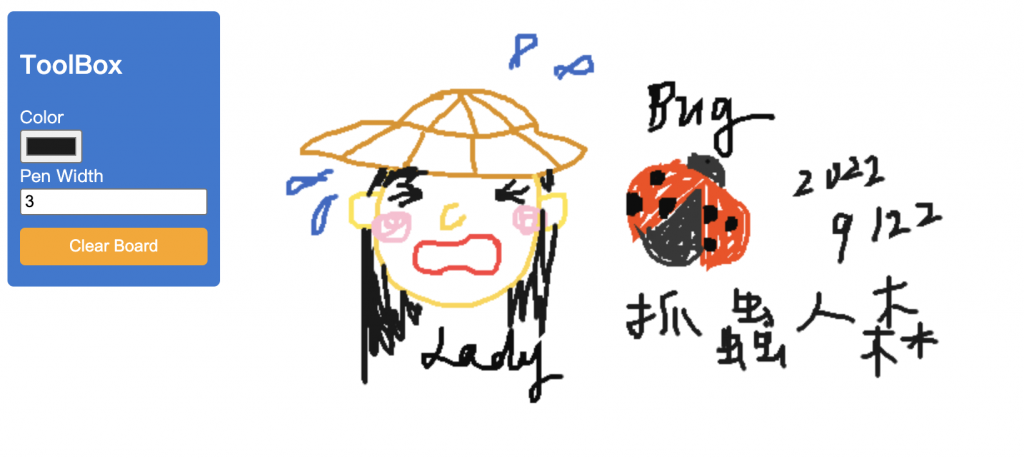
昨天分享了許多監聽的方法,今天就利用這些技能來完成一個畫版。大家還記得昨天的文章最後有問到實作畫版可能會用到幾種監聽?你們覺得呢?其實這次的實作我總共用到了「五種」監聽方法完成下方這個畫版,附上還沒紅的名作 《The Lady Bug》!!!歡迎大家也來玩玩看,截圖跟我分享你的巨作,立刻點我去畫畫

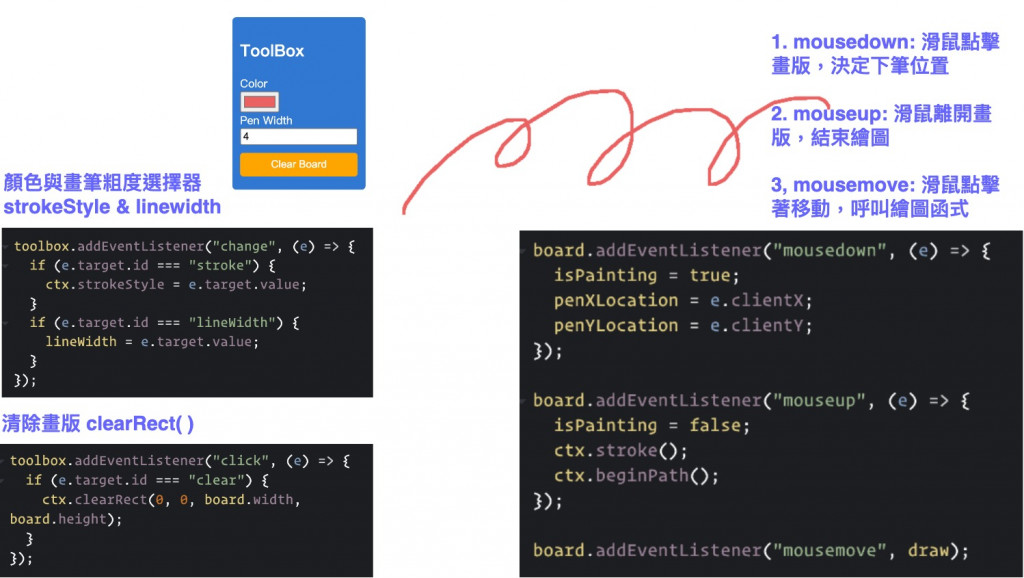
畫版主要可以分為 ToolBox 和 Board 兩個元件,ToolBox 用來控制畫線的顏色與畫筆的粗度,分別對應到 canvas 就是 stroke style 以及 linewidth,我們監聽表單的 Change,選好後可以直接把值 set 給 canvas,這樣 canvas 就會拿到我們設定的畫線樣式囉!
除了畫線之外也別忘了給他清空的功能,清空就相對簡單很多,給清空的按鈕監聽 Click,然後使用 cleanRect (),就可以讓 Canvas 完全被清空。
接著是畫版的部分,畫版主要功能就是畫線,畫線得整個這個行為可以拆分成「點擊下去 mousedown、長按 mousemove、放開點擊 mouseup 」,我們在點擊的時候去抓點擊起始的位置,持續移動滑鼠鼠標的時候呼叫繪圖函式,放掉滑鼠時結束繪畫,加上 ctx.stroke() ctx.beginPath() 的函示把圖完成。

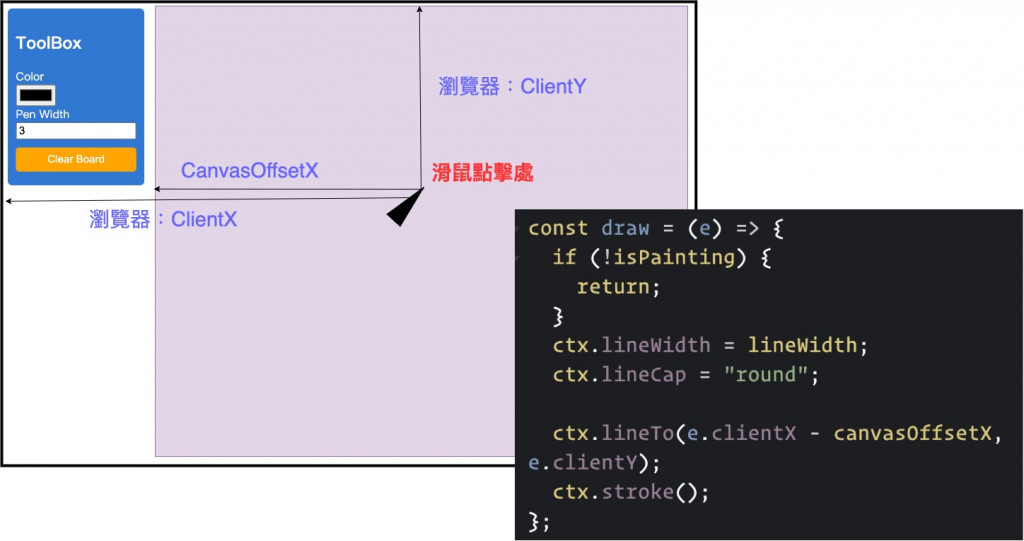
完成五個監聽後,我們來看看繪圖函式做了什麼。先給畫筆設定樣式,然後使用 lineTo() 繪製線條,點的位置是透過與瀏覽器和 Canvas 邊界的距離而定,確認後再以 stroke() 繪製。這樣就能做出看起來很難但實際上很簡單的畫版。

整個繪圖板只有繪圖的區域是用 Canvas Tag,先附上好懂的 html :
// html
<html lang="en">
<head>
  <meta charset="UTF-8">
  <meta http-equiv="X-UA-Compatible" content="IE=edge">
  <meta name="viewport" content="width=device-width, initial-scale=1.0">
  <link rel="stylesheet" href="styles.css">
  <title>網頁互動繪圖板</title>
</head>

<body>
  <section class="container">
    <div id="toolbox">
      <h1>ToolBox</h1>
      <label for="stroke">Color</label>
      <input id="stroke" name='stroke' type="color">
      <label for="lineWidth">Pen Width</label>
      <input id="lineWidth" name='lineWidth' type="number" value="3">
      <button id="clear">Clear Board</button>
    </div>
    <div class="drawing-board">
      <canvas id="drawing-board"></canvas>
    </div>
  </section>
  <script src="./index.js"></script>
</body>
</html>
以及 JavaScript 的程式碼:
// JavaScript

const board = document.getElementById("drawing-board");
const toolbox = document.getElementById("toolbox");
const ctx = board.getContext("2d");

const canvasOffsetX = board.offsetLeft;
const canvasOffsetY = board.offsetTop;

board.width = window.innerWidth - canvasOffsetX;
board.height = window.innerHeight - canvasOffsetY;

let isPainting = false;
let lineWidth = 3;
let penXLocation = 0;
let penYLocation = 0;

toolbox.addEventListener("click", (e) => {
  if (e.target.id === "clear") {
    ctx.clearRect(0, 0, board.width, board.height);
  }
});

toolbox.addEventListener("change", (e) => {
  if (e.target.id === "stroke") {
    ctx.strokeStyle = e.target.value;
  }

  if (e.target.id === "lineWidth") {
    lineWidth = e.target.value;
  }
});

const draw = (e) => {
  if (!isPainting) {
    return;
  }
  ctx.lineWidth = lineWidth;
  ctx.lineCap = "round";

  ctx.lineTo(e.clientX - canvasOffsetX, e.clientY);
  ctx.stroke();
};

board.addEventListener("mousedown", (e) => {
  isPainting = true;
  penXLocation = e.clientX;
  penYLocation = e.clientY;
});

board.addEventListener("mouseup", (e) => {
  isPainting = false;
  ctx.stroke();
  ctx.beginPath();
});

board.addEventListener("mousemove", draw);
以上就是今天的畫版實作,畫版有很多可能性,可以拿來當溝通、發想的產品基礎,也能給小朋友畫畫,或是做成傳情畫意的遊戲(有種史萊姆好玩遊戲區的味道),希望大家喜歡今天的 Canvas 監聽實作分享~非常歡迎畫畫留言給我 <3

嗨嗨謝謝你的教學~
發現不用CODEPEN的話
ctx.lineTo(e.clientX - canvasOffsetX, e.clientY);
改成
ctx.lineTo(e.clientX - canvasOffsetX, e.clientY - canvasOffsetY);
才不會造成偏移
雖然我還不太清楚原因xD