本系列文已改編成書「甚麼?網頁也可以做派對遊戲?使用 Vue 和 babylon.js 打造 3D 派對遊戲吧!」
書中不只重構了程式架構、改善了介面設計,還新增了 2 個新遊戲呦!ˋ( ° ▽、° )
新遊戲分別使用了陀螺儀與震動回饋,趕快買書來研究研究吧!ლ(╹∀╹ლ)
在此感謝深智數位的協助,歡迎大家前往購書,鱈魚感謝大家 (。・∀・)。
助教:「所以到底差在哪啊?沒圖沒真相,被你坑了都不知道。(´。_。`)」
鱈魚:「你對我是不是有甚麼很深的偏見啊 (っ °Д °;)っ,來人啊,上連結!」

現在玩家出現了,訊號也進來了,讓畫面產生互動效果吧!
完派對遊戲的時候,常常發生不知道是誰在選單偷按的問題,現在讓我們在玩家頭像中,新增「說出觸發按鍵」的功能,以後誰偷按都無所遁形啦!╮(´∀` )╭
前往 player-avatar 設計說出對話泡泡的功能,首先設計資料。
src\components\player-avatar.vue
const messageInfo = reactive({
  id: '',
  text: '',
});
接著新增顯示與隱藏泡泡用的 function。
const hideBalloon = debounce(() => {
  messageInfo.text = '';
}, 2000);

function showBalloon(text: string) {
  const id = nanoid();

  messageInfo.id = id;
  messageInfo.text = text;

  hideBalloon();
}
再新增一個映射按鈕名稱與顯示 Icon 的 function。
const keyToIcon = [
  {
    keyName: KeyName.UP,
    icon: 'arrow_drop_up'
  },
  {
    keyName: KeyName.LEFT,
    icon: 'arrow_left'
  },
  {
    keyName: KeyName.RIGHT,
    icon: 'arrow_right'
  },
  {
    keyName: KeyName.DOWN,
    icon: 'arrow_drop_down'
  },
  {
    keyName: KeyName.CONFIRM,
    icon: 'done'
  },
]
function keyNameToIconName(name: string) {
  const target = keyToIcon.find(({ keyName }) => keyName === name);
  return target?.icon ?? 'question_mark';
}
最後透過 defineExpose 提供外部使用。
...
<script setup lang="ts">
import { debounce } from 'lodash-es';
import { nanoid } from 'nanoid';
import { computed, reactive } from 'vue';
...
const messageInfo = reactive(...);

const hideBalloon = debounce(...);

function showBalloon(text: string) {...}

const keyToIcon = [...]
function keyNameToIconName(name: string) {...}

defineExpose({
  playerId: props.playerId,
  showBalloon
});
</script>
...
最後完成 template 與 CSS 內容。
<template>
  <q-avatar
    :color="color"
    text-color="white"
    size="6rem"
  >
    {{ props.codeName }}

    <div class="balloon-box">
      <transition name="balloon">
        <div
          v-if="messageInfo.text !== ''"
          :key="messageInfo.id"
          class="balloon"
        >
          <q-icon
            color="black"
            :name="keyNameToIconName(messageInfo.text)"
          />
        </div>
      </transition>
    </div>
  </q-avatar>
</template>
...
<style scoped lang="sass">
.balloon-enter-active, .balloon-leave-active
  transition-duration: 0.4s
  transition-timing-function: cubic-bezier(0.150, 1.535, 0.625, 1.015)
.balloon-leave-active
  transition-timing-function: cubic-bezier(1.000, 0.005, 0.150, 1.005)
.balloon-enter-from, .balloon-leave-to
  transform: translateY(100%) rotate(-30deg) !important
  opacity: 0 !important
.balloon-leave-to
  transform: translateY(100%) scale(0.4) !important

.balloon-box
  position: absolute
  top: 0
  left: 50%
  transform: translate(-50%, -100%)
  width: 100%
  height: 80%
.balloon
  position: absolute
  background: white
  box-shadow: 5px 5px 10px rgba(#000, 0.1)
  border-radius: 9999px
  padding: 1rem 2rem
  font-size: 2rem
  &::before
    content: ''
    width: 2rem
    height: 2rem
    position: absolute
    left: 30%
    bottom: 0
    transform: translateX(-40%) rotate(30deg)
    background: white
    box-shadow: 5px 5px 10px rgba(#000, 0.01)
</style>
以上準備好對話泡泡的功能了!( ‧ω‧)ノ╰(‧ω‧ )
現在讓我們回到大廳,實際觸發對話泡泡看看,首先透過 ref 取得所有的玩家頭像。
src\views\game-console-lobby.vue
<template>
  ...
  <div class="absolute inset-0 flex">
    <div class="flex w-full h-full">
      <!-- 選單 -->
      <div class="w-1/3 flex flex-col p-12">
        ...
        <!-- 玩家清單 -->
        <transition-group ... >
          <player-avatar
            v-for="player in playersInfo"
            ref="players"
            ...
          />
        </transition-group>
      </div>
      ...
    </div>
  </div>
</template>

<script setup lang="ts">
...

const playersInfo = computed(() => { ... });

const players = ref<InstanceType<typeof PlayerAvatar>[]>([]);
...
</script>
...
接著試試看在 onGamepadData 事件中觸發 player-avatar 的 showBalloon()。
成功讓玩家說話了!◝( •ω• )◟
現在讓我們透過搖桿選擇主選單按鈕,新增 use-gamepad-navigator 用於儲存按紐並觸發相關控制。
首先制定控制元件基本介面,用來說明、限制此功能能夠支援使用的控制元件。
src\composables\use-gamepad-navigator.ts
import { ref } from 'vue';

export interface ControlElement {
  click(): void;
  hover(): void;
  leave(): void;
  isHover(): boolean;
}

export function useGamepadNavigator<T extends ControlElement>() {
  const controlElements = ref<T[]>([]) as Ref<T[]>;

  return {
  }
}
想了解泛型加上限制的說明可以參考此連結:https://ithelp.ithome.com.tw/m/articles/10266542
接著加入各類 function。
import { computed, onMounted, Ref, ref } from 'vue';
...
export function useGamepadNavigator<T extends ControlElement>() {
  ...
  /** hover 指定元件 */
  function hoverElement(index: number) {
    controlElements.value.forEach((el) => el.leave());
    controlElements.value?.[index]?.hover();
  }

  /** 目前 hover 元件的 index */
  const currentIndex = computed(() =>
    controlElements.value.findIndex(({ isHover }) => isHover())
  );

  /** 上一個元件 */
  function prev() {
    if (currentIndex.value < 0) {
      return hoverElement(0);
    }

    let targetIndex = currentIndex.value - 1;
    if (targetIndex < 0) {
      targetIndex += controlElements.value.length;
    }

    return hoverElement(targetIndex);
  }

  /** 下一個元件 */
  function next() {
    if (currentIndex.value < 0) {
      return hoverElement(0);
    }

    const targetIndex = (currentIndex.value + 1) % controlElements.value.length;
    return hoverElement(targetIndex);
  }

  /** 點擊目前 hover 元件 */
  function click() {
    if (currentIndex.value < 0) {
      hoverElement(0);
      return controlElements.value?.[0]?.click();
    }

    const targetIndex = currentIndex.value;
    hoverElement(targetIndex);
    return controlElements.value[targetIndex].click();
  }

  /** 自動 hover 第一個元件 */
  onMounted(() => {
    controlElements.value?.[0]?.hover();
  });

  return {
    mountElement,
    next,
    prev,
    click,
  }
}
回到大廳中引用 use-gamepad-navigator,新增綁定元件用的 function 並綁定至想要被控制元件的 ref 中。
src\views\game-console-lobby.vue
<template>
  ...
  <div class="absolute inset-0 flex">
    <div class="flex w-full h-full">
      <!-- 選單 -->
      <div class="w-1/3 flex flex-col p-12">
        <div class="flex flex-col flex-1 justify-center items-center gap-14">
          ...
          <btn-base
            :ref="mountElement"
            label="開始遊戲"
            ...
          >
            ...
          </btn-base>

          <btn-base
            :ref="mountElement"
            label="結束派對"
            ...
          >
            ...
          </btn-base>
        </div>
        ...
      </div>
      ...
    </div>
  </div>
</template>

<script setup lang="ts">
...
import { useGamepadNavigator } from '../composables/use-gamepad-navigator';
...
function mountElement(el: any) {
  const controlElement = el as InstanceType<typeof BtnBase>;
  gamepadNavigator.mountElement(controlElement)
}
...
</script>
...
會忽然發現 TypeScript 警告引數指派類型錯誤。Σ(ˊДˋ;)
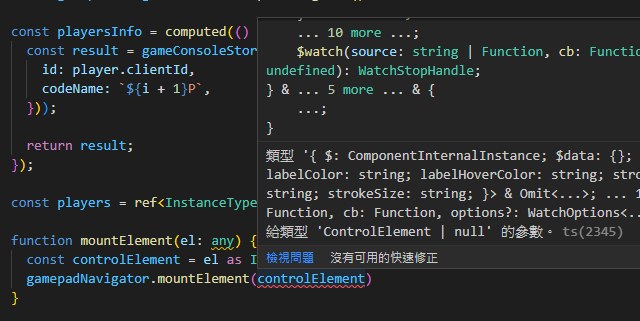
這是因為 btn-base 組件對外提供的介面不符合 use-gamepad-navigator 規定的 ControlElement 介面,現在讓我們新增 btn-base 的 defineExpose,讓介面相符吧。( ´ ▽ ` )ノ
src\components\btn-base.vue
...
<script setup lang="ts">
...
import { ControlElement } from '../composables/use-gamepad-navigator';
...
defineExpose<ControlElement>({
  click: handleClick,
  isHover: () => state.hover,
  hover: handleMouseenter,
  leave: handleMouseleave,
});
</script>
...
現在回到 game-console-lobby,就會發現剛剛的錯誤消失了。ヽ(≧∀≦)ノ
現在讓我們在 onGamepadData 中呼叫 use-gamepad-navigator 的控制功能吧。
src\views\game-console-lobby.vue
...
<script setup lang="ts">
function init() {
  ...
  gameConsole.onGamepadData((data) => {
    ...
    if (action === 'up') {
      gamepadNavigator.prev();
      return;
    }

    if (action === 'down') {
      gamepadNavigator.next();
      return;
    }

    if (action === 'confirm') {
      gamepadNavigator.click();
      return;
    }
  });
}
init();
</script>
...
現在可以透過搖桿控制選單了!ლ(´∀`ლ)
但是有一個小問題,就是觸發 click 沒有觸發 btn-base 點擊動畫,讓我們改進一下 handleClick。
src\components\btn-base.vue
<script setup lang="ts">
...
import { promiseTimeout } from '@vueuse/core';
...
function handleClick(showEffect = false) {
  emit('click');

  if (showEffect) {
    processClick();
  }
}
async function processClick() {
  state.hover = true;
  state.active = true;

  await promiseTimeout(200);

  state.active = false;
}
...
defineExpose<ControlElement>({
  /**
   * @param effect 點擊效果,預設 true
   */
  click(effect = true) {
    handleClick(effect)
  },
  ...
});
</script>
現在可以透過搖桿隔空觸發按鈕點擊動畫了!✧*。٩(ˊᗜˋ*)و✧*。
再來準備讓我們進入重頭戲,開發企鵝遊戲的部分了!( •̀ ω •́ )✧
以上程式碼已同步至 GitLab,大家可以前往下載:


 iThome鐵人賽