將敵人的角色設定設定完畢後就來讓敵人動起來吧!!ヽ(✿゚▽゚)ノ
我們學過角色的操控設定,但遊戲中的敵人都是自己移動的,
所以今天的教學就是要讓敵人自行移動啦~~(≧∇≦)ノ
簡單介紹今天的教學步驟
那我們就開始今天的教學吧(o゚v゚)ノ
敵人方向判斷設定
我們將設定敵人為在一範圍內不停的來回走動,所以首先要設定敵人的方向與其判斷( •̀ ω •́ )y
這邊的程式要寫在敵人的角色設定中喔!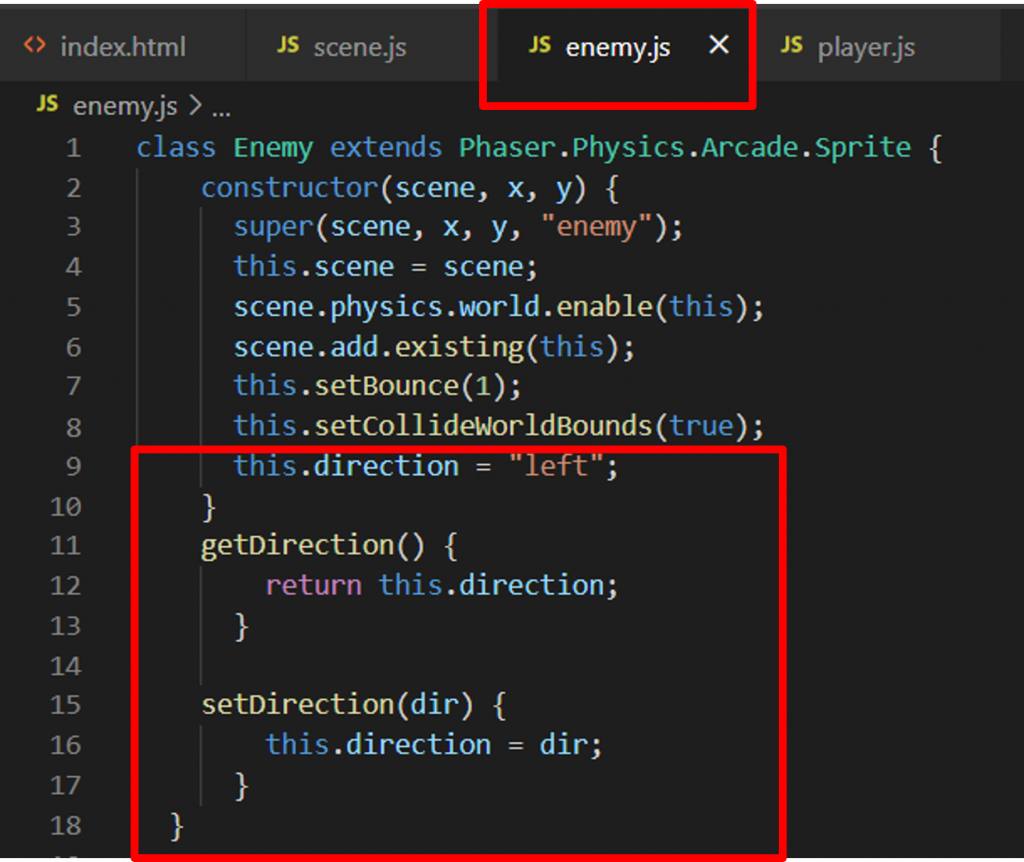
以下為我們將加入的程式架構
constructor(scene, x, y) {
  this.direction = “方向名稱”;
}

getDirection() {
       return this.direction;
     }

setDirection(dir) {
    this.direction = dir;
  }
敵人角色設定的程式碼如下:
(我設定敵人的初始方向為左邊)
    constructor(scene, x, y) {
      super(scene, x, y, "enemy");
      this.scene = scene;
      scene.physics.world.enable(this);
      scene.add.existing(this);
      this.setBounce(1);
      this.setCollideWorldBounds(true);
      this.direction = "left";
    }
    getDirection() {
        return this.direction;
      }

    setDirection(dir) {
        this.direction = dir;
      }
  }
加入換方向指示物
簡單來說就是讓敵人更換方向的物體,敵人"接觸"到物體後將會變更原本的方向往另一邊移動
(我們這邊以匯入過的圖檔"coin"當作方向指示物)
大家有沒有注意到關鍵字"接觸"呢?說到接觸就是要用到我們的
那麼關於敵人與coin的基本重疊事件我們將快速帶過喔(o゜▽゜)o☆
忘記重疊事件的人可以點擊下方連結複習~
==>https://ithelp.ithome.com.tw/articles/10302066
1. 方向指示物顯示&物理群組設定
(我們設定2指示物,一個讓敵人往右一個往左)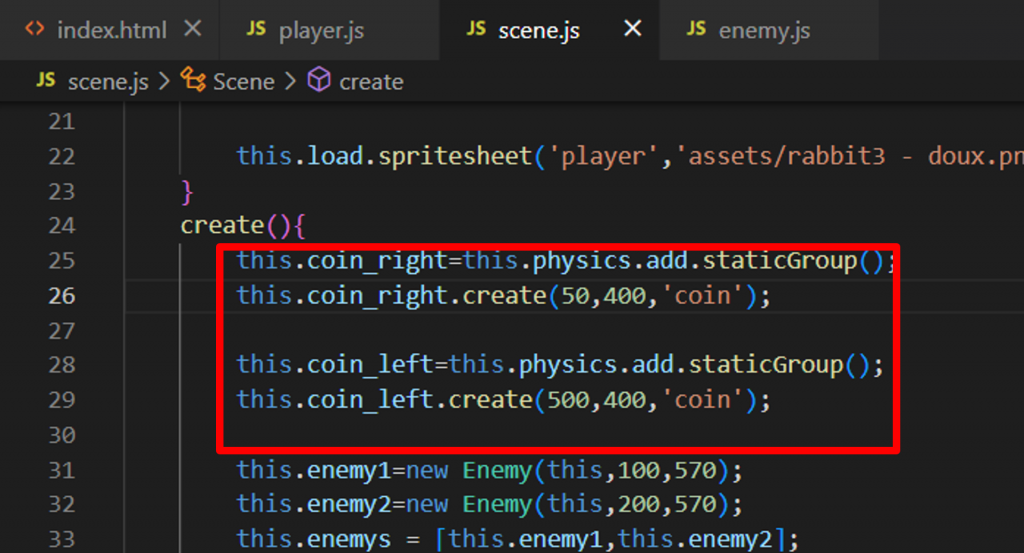
程式碼:
this.coin_right=this.physics.add.staticGroup();
this.coin_right.create(50,400,'coin');

this.coin_left=this.physics.add.staticGroup();
this.coin_left.create(500,400,'coin');
遊戲畫面: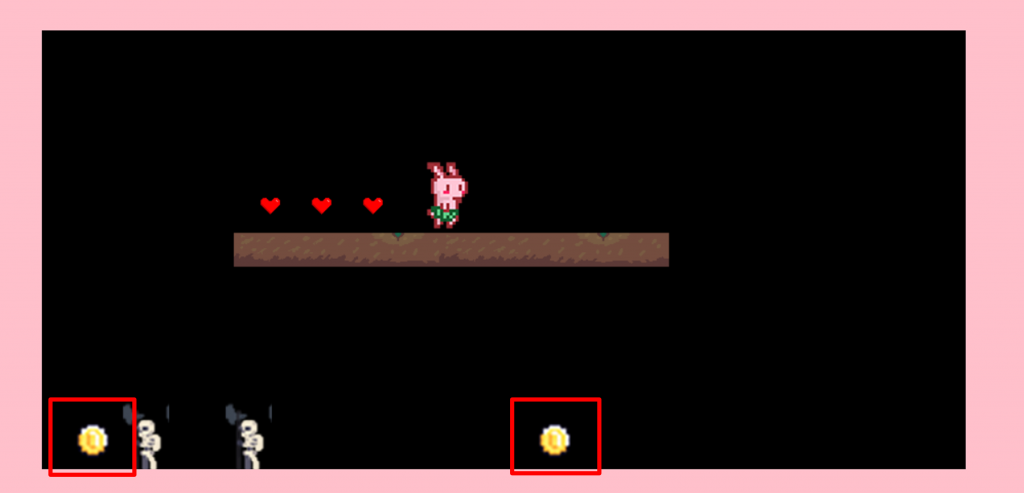
2. 加入變數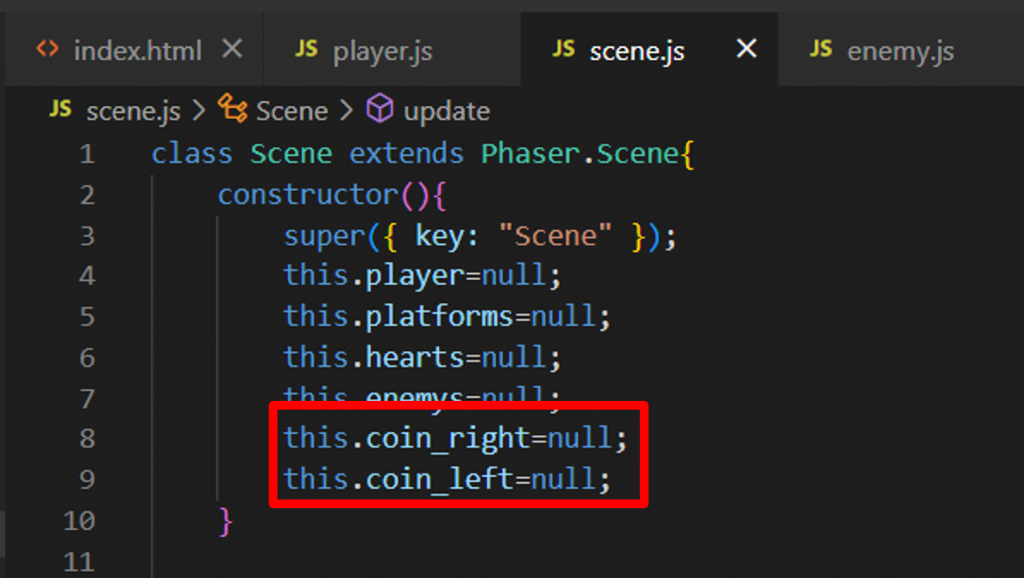
程式碼:
this.coin_right=null;
this.coin_left=null;
3. 重疊事件設定
(我將我要執行的程式名稱取名為"enemy_touch_coin_right"&"enemy_touch_coin_left")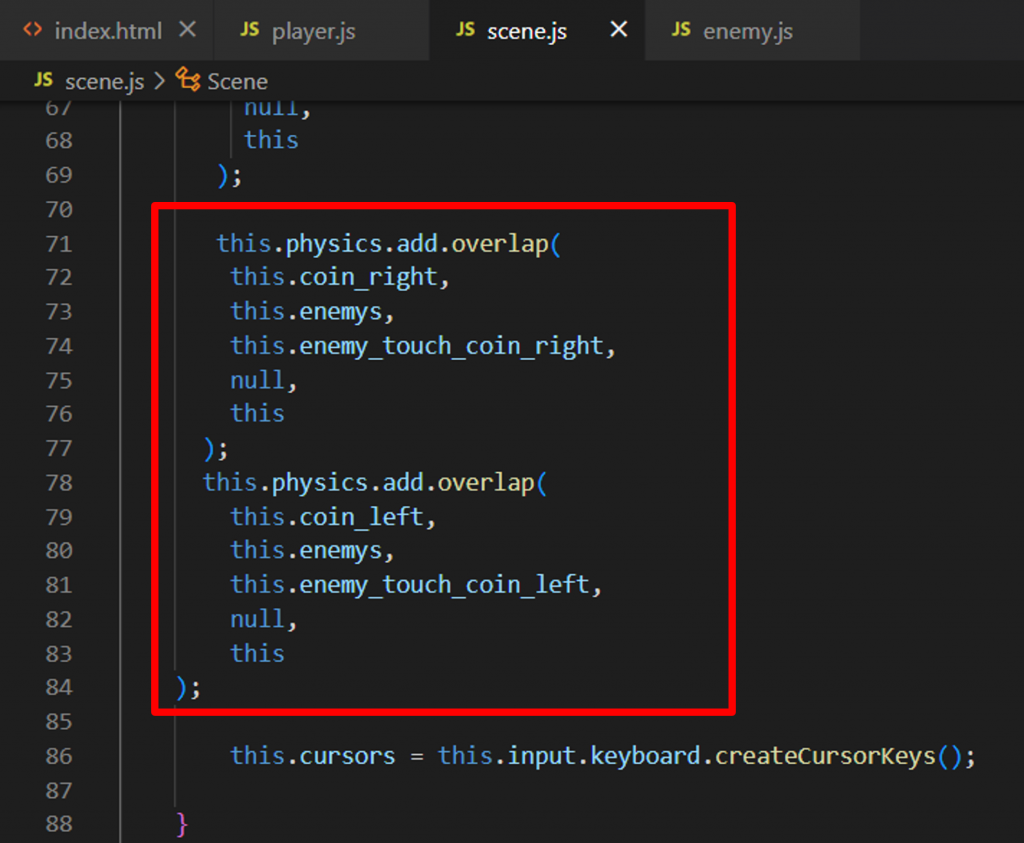
程式碼:
this.physics.add.overlap(
        this.coin_right,
        this.enemys,
        this.enemy_touch_coin_right,
        null,
        this
      );

this.physics.add.overlap(
        this.coin_left,
        this.enemys,
        this.enemy_touch_coin_left,
        null,
        this
      );
4. 變換方向程式設定
介紹一下設定方向程式碼:
setDirection("方向名稱");
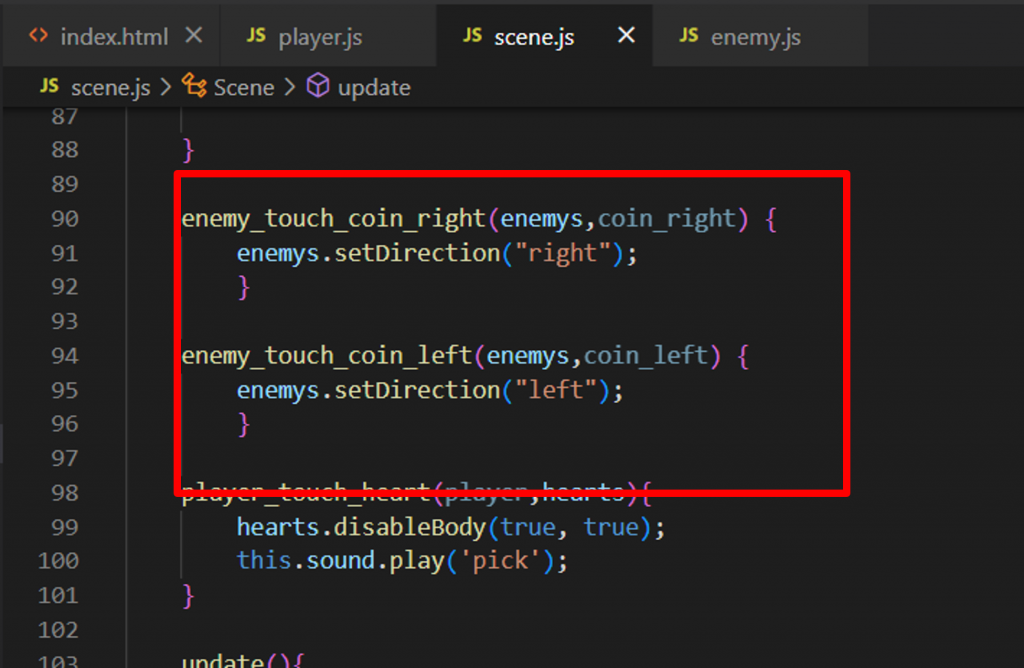
程式碼:
enemy_touch_coin_right(enemys,coin_right) {
    enemys.setDirection("right");
    }

enemy_touch_coin_right(enemys,coin_left) {
    enemys.setDirection("left");
    }
這樣就完成移動前的設定了♪(´▽`)
敵人移動設定
方向設定完畢後,就來套入移動設定程式讓敵人動起來(๑•̀ㅂ•́)و✧
移動設定程式:
for (let "角色名稱") {
            if (角色名稱.getDirection() === "方向名稱") {
              角色名稱.setVelocity("數值", "數值");
            }
            }
那就來設定吧~
(我設定為:當敵人"方向名稱"之方向為"左"則往左(X軸方向)移動-50;"方向名稱"之方向為"右"則往右(X軸方向)移動50)
程式碼:
for (let enemy of this.enemys) {
            if (enemy.getDirection() === "left") {
              enemy.setVelocity(-50, 0);
            } else if(enemy.getDirection() === "right"){
              enemy.setVelocity(50, 0);
            }
            }
輸入完畢後的遊戲畫面如下:
這樣就能讓敵人自己動起來了呢o((>ω< ))o
明天的教學將是敵人設定中的補充調整~
敬請期待~~~