昨天說明了 CircusUart Library 的架構,並且講解了基本用法,今天我們將拿它來實作小專案,這次我們將移植 Day 14、Day 15 FPV Car 小車,改用 RockBot 洛克霸,並且 ESP32 與 ATmega328P 之間使用 CircusUart Library 通訊,並且新增其他做動功能。
我們將 ESP32 code 與 ATmega328P 通訊加上左平移(pan_left)、右平移(pan_right),前方夾子角度(angle)。
if (!strcmp(variable, "forward")) {
    uart.send(ESP32_CMD_FORWARD);
} else if (!strcmp(variable, "left")) {
    uart.send(ESP32_CMD_LEFT);
} else if (!strcmp(variable, "pan_left")) {
    uart.send(ESP32_CMD_PAN_LEFT);
} else if (!strcmp(variable, "right")) {
    uart.send(ESP32_CMD_RIGHT);
} else if (!strcmp(variable, "pan_right")) {
    uart.send(ESP32_CMD_PAN_RIGHT);
} else if (!strcmp(variable, "backward")) {
    uart.send(ESP32_CMD_BACK);
} else if (!strcmp(variable, "stop")) {
    uart.send(ESP32_CMD_STOP);
} else {
    res = -1;
}

if (receive_angle) {
    int servo_angle = atoi(angle);
    uart.send(ESP32_CMD_ANGLE, ':', String(servo_angle).c_str());
}
Web Page 同樣加上左右平移按鈕以及滑桿元件
<tr>
    <td align="center"><button class="button" onmousedown="toggleCheckbox('pan_left');"
            ontouchstart="toggleCheckbox('pan_left');" onmouseup="toggleCheckbox('stop');"
            ontouchend="toggleCheckbox('stop');">Pan Left</button></td>
    <td></td>
    <td align="center"><button class="button" onmousedown="toggleCheckbox('pan_right');"
            ontouchstart="toggleCheckbox('pan_right');" onmouseup="toggleCheckbox('stop');"
            ontouchend="toggleCheckbox('stop');">Pan Right</button></td>
</tr>
<tr>
    <td align="right" valign="bottom" style="width:40px;height:40px"></td>
    <td valign="bottom" style="width:40px;height:40px">
        <center><input type="range" min="0" max="90" step="1" oninput="sliderChange(this.value)"
                onchange="sliderChange(this.value)" /></center>
    </td>
    <td valign="bottom" style="width:40px;height:40px"></td>
</tr>
在 setup 方法註冊將會收到的命令並給定動作
void setup()
{
    Serial.begin(UART_BAUDRATE);
    Wire.begin();

    uart.on(ESP32_CMD_FORWARD, '\0', [](const char *temp) {
        Move_direction(speed, speed, speed, speed);
    });

    uart.on(ESP32_CMD_BACK, '\0', [](const char *temp) {
        Move_direction(-speed, -speed, -speed, -speed);
    });

    uart.on(ESP32_CMD_LEFT, '\0', [](const char *temp) {
        Move_direction(-speed, speed, -speed, speed);
    });

    uart.on(ESP32_CMD_PAN_LEFT, '\0', [](const char *temp) {
        Move_direction(-speed, speed, speed, -speed);
    });

    uart.on(ESP32_CMD_RIGHT, '\0', [](const char *temp) {
        Move_direction(speed, -speed, speed, -speed);
    });

    uart.on(ESP32_CMD_PAN_RIGHT, '\0', [](const char *temp) {
        Move_direction(speed, -speed, -speed, speed);
    });

    uart.on(ESP32_CMD_STOP, '\0', [](const char *temp) {
        Move_direction(0, 0, 0, 0);
    });

    uart.on(ESP32_CMD_ANGLE, ':', [](const char *angle) {
        Servo_angle(1, (uint8_t)atoi(angle));
    });
}
Loop 中檢查資料
void loop()
{
    uart.loop();
}
定義 RockBot 的驅動 Method
void Send_iic(uint8_t Register, uint8_t Speed)
{
    Wire.beginTransmission(0x38);
    Wire.write(Register);
    Wire.write(Speed);
    Wire.endTransmission();
}

void Move_direction(int8_t S1, int8_t S2, int8_t S3, int8_t S4)
{
    Send_iic(0x00, S1);
    Send_iic(0x01, S2);
    Send_iic(0x02, S3);
    Send_iic(0x03, S4);
}

void Servo_angle(uint8_t Servo_ch, uint8_t degree)
{
    Send_iic((Servo_ch - 1) | 0x10, int(degree));
}
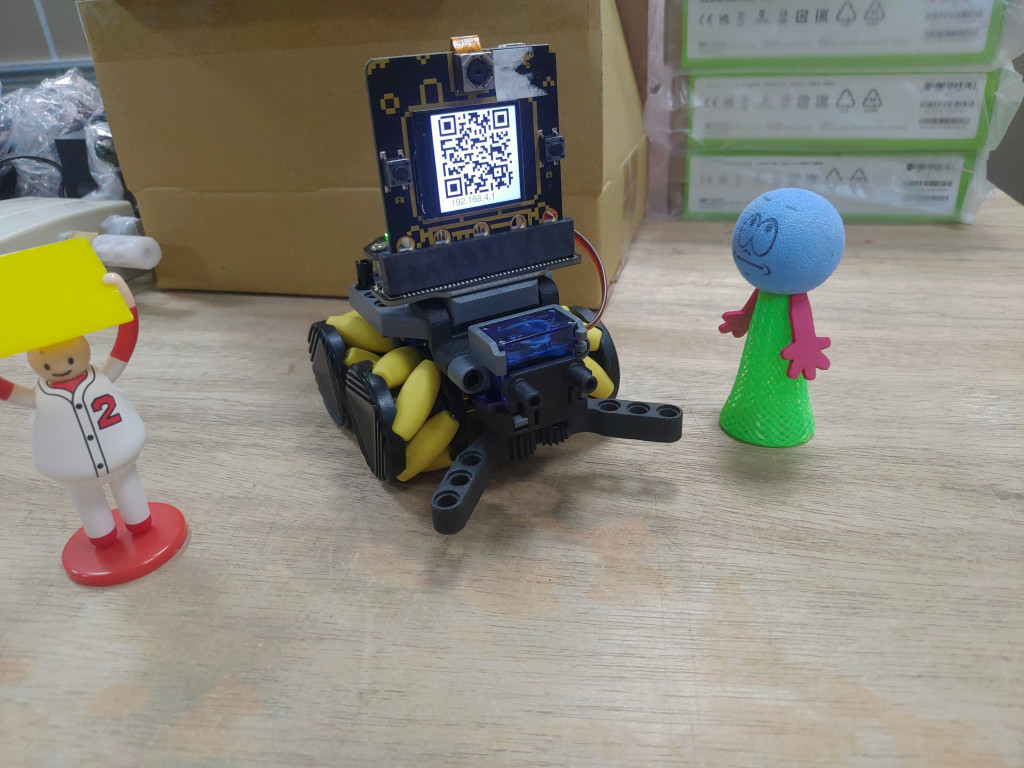
掃描 QR Code 連接 WiFi。
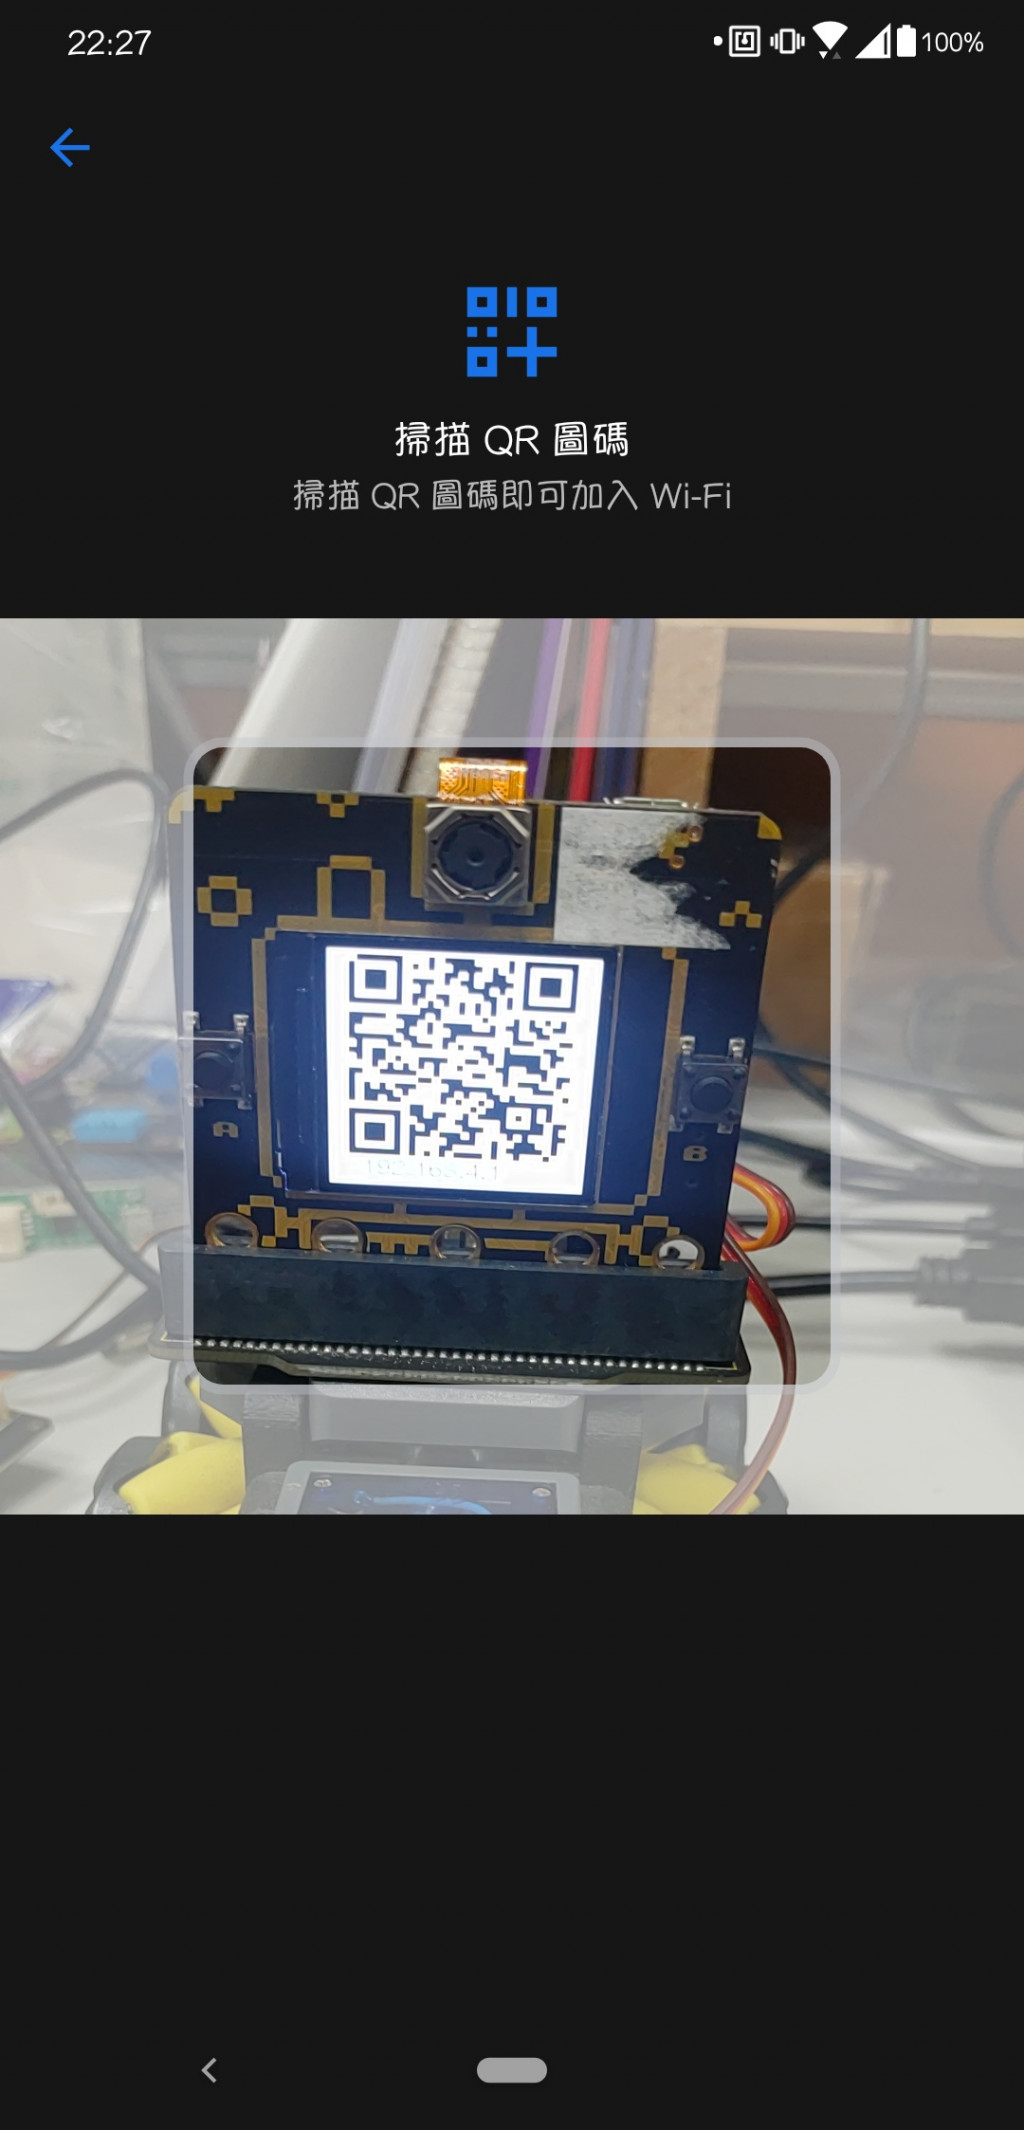
打開瀏覽器輸入 TFT 螢幕上顯示的 IP, 192.168.4.1。
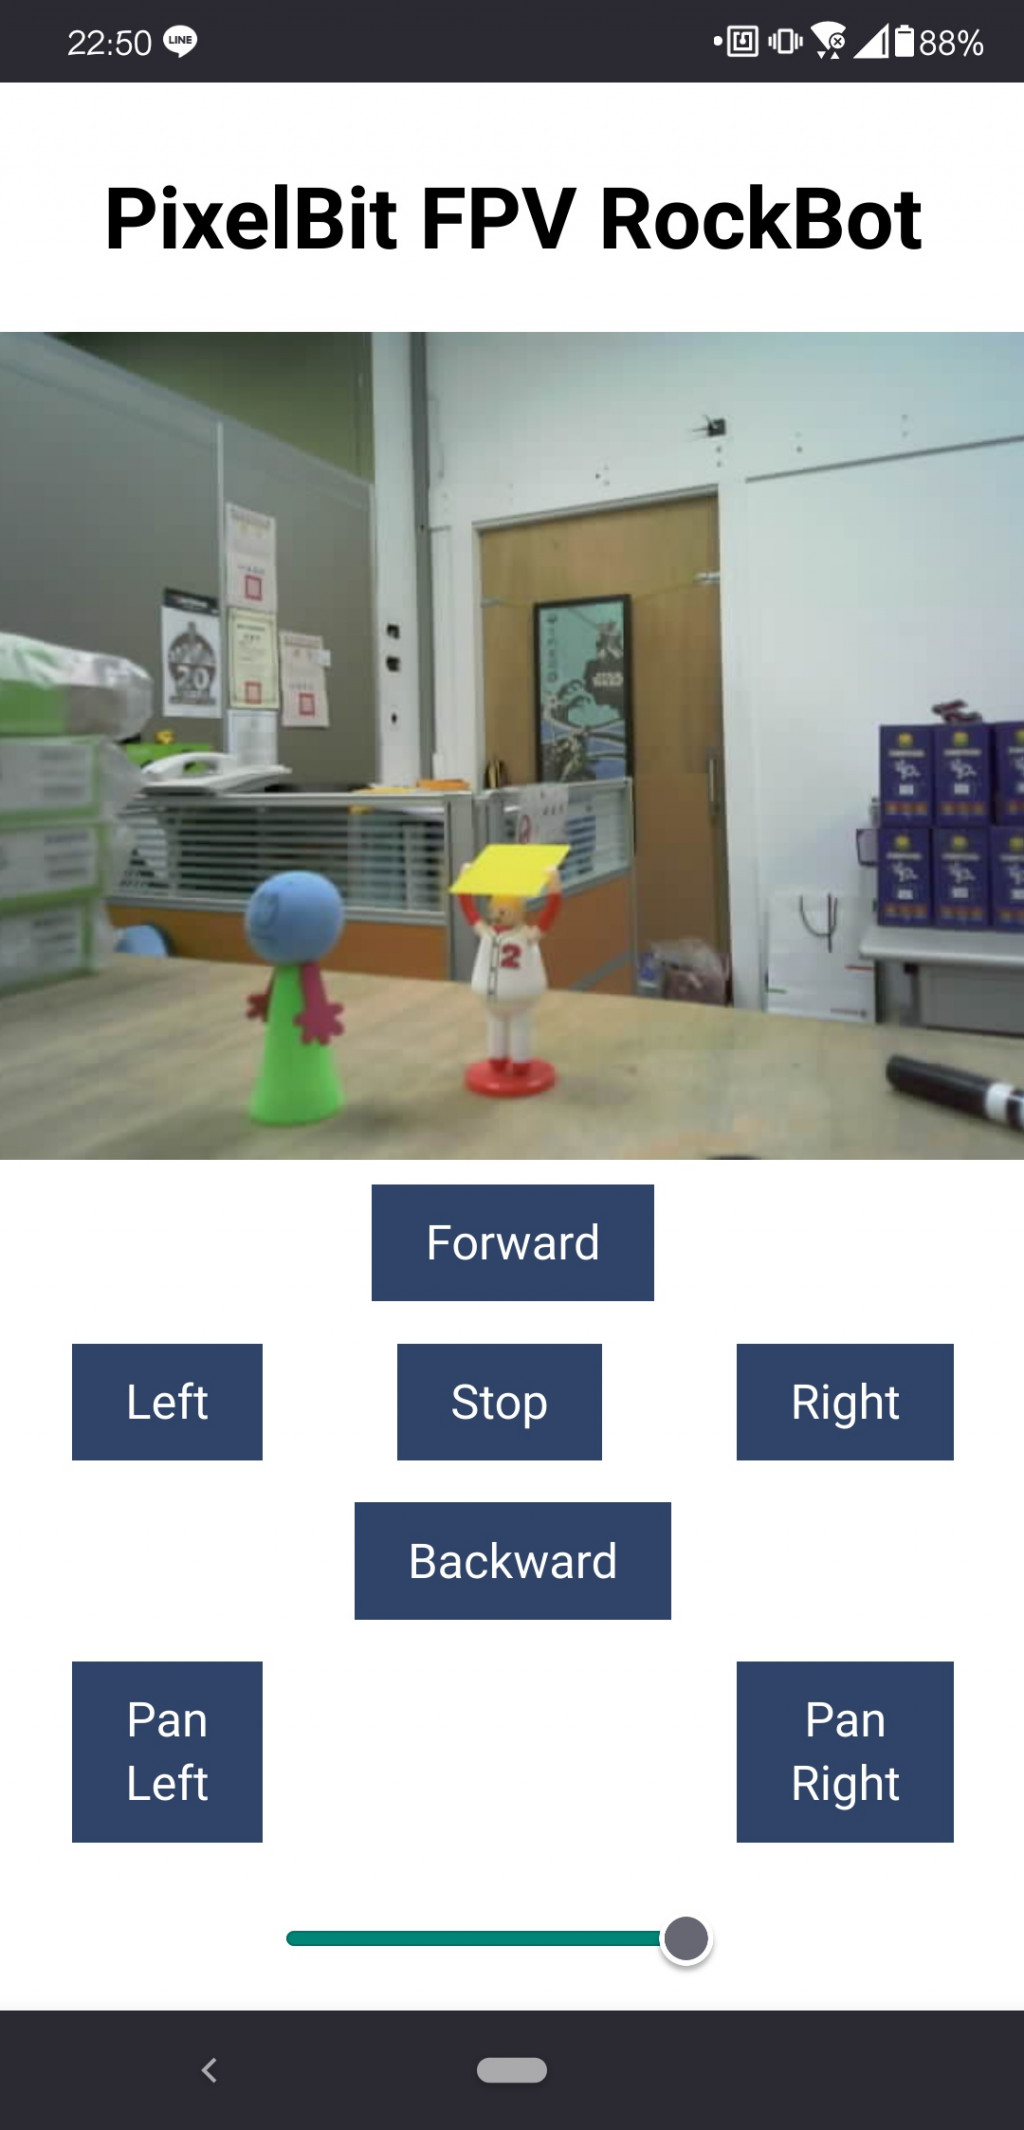
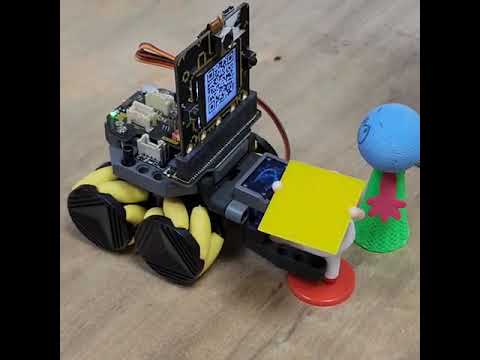
以上就是搭配FPV RockBot 洛克霸,實際使用 CircusUart Library 通訊,讓我們快速做出各種應用,可以看到即時畫面,夾取物品等各種功能,還不手刀帶一台回家一起玩~~!


 iThome鐵人賽