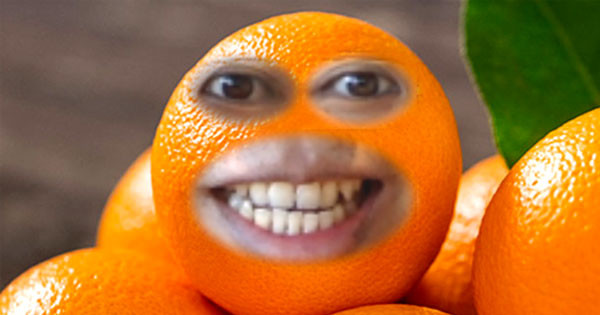
這篇教學會使用「Mediapipe 人臉偵測」搭配「邊緣羽化效果」文章,透過人臉辨識擷取出眼睛和嘴巴,再將眼睛與嘴巴合成到橘子圖片上,做出搞笑橘子臉的效果。
原文參考:Mediapipe 即時合成搞笑橘子臉
因為程式使用 Jupyter 搭配 Tensorflow 進行開發,所以請先閱讀「使用 Anaconda」和「使用 MediaPipe」,安裝對應的套件,如果不要使用 Juputer,也可參考「使用 Python 虛擬環境」,建立虛擬環境進行實作。
因為整體程式碼較多,因此將詳細說明寫在程式碼的註解內,程式碼的重點如下:
- 沿用「Mediapipe 人臉偵測」文章的範例程式。
- 參考「邊緣羽化效果」文章,在指定位置建立遮罩 ( 指定位置需要和擷取出來的眼睛嘴巴對應 )。
- 透過座標和人臉的大小,抓取出眼睛和嘴巴範圍內的影像。
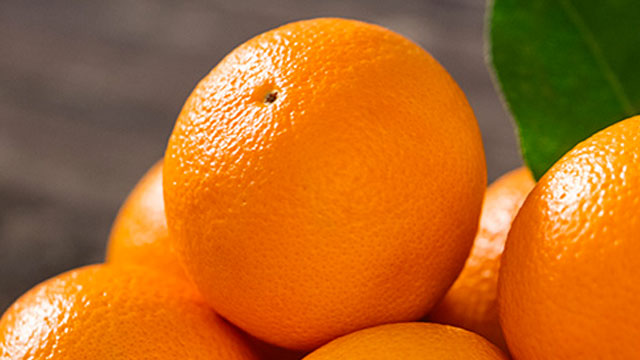
- 將眼睛嘴巴組合成新圖像,套用邊緣羽化的遮罩,和橘子圖片背景合成 ( 圖片下載 )。
import cv2
import mediapipe as mp
import numpy as np

cap = cv2.VideoCapture(0)                          # 讀取攝影鏡頭
mp_face_detection = mp.solutions.face_detection    # 使用人臉偵測方法

h, w = 360, 640                                    # 輸出時的影像長寬
mask = np.zeros((h, w, 3), dtype='uint8')          # 建立遮罩
cv2.ellipse(mask, (260,100),(55,35),0,0,360,(255,255,255),-1)   # 繪製左眼的橢圓形遮罩
cv2.ellipse(mask, (380,100),(55,35),0,0,360,(255,255,255),-1)   # 繪製右眼的橢圓形遮罩
cv2.ellipse(mask, (320,212),(115,66),0,0,360,(255,255,255),-1)  # 繪製嘴巴的橢圓形遮罩
mask = cv2.GaussianBlur(mask,(35,35),0)            # 將遮罩進行高斯模糊
mask = mask/255                                    # 轉換成比例

orange = cv2.imread('orange.jpg')                  # 讀取橘子圖片背景

# 人臉偵測模組啟用成功後,執行相關內容
with mp_face_detection.FaceDetection(
    model_selection=0, min_detection_confidence=0.5) as face_detection:

    if not cap.isOpened():
        print("Cannot open camera")
        exit()
    while True:
        ret, img = cap.read()                        # 讀取攝影機畫面
        if not ret:
            print("Cannot receive frame")
            break
        img = cv2.resize(img, (w, h))                # 縮小尺寸加快速度
        img2 = cv2.cvtColor(img, cv2.COLOR_BGR2RGB)  # 轉換成 RGB 才能夠在 mediapipe 中使用
        results = face_detection.process(img2)       # 讀取人臉偵測資訊

        if results.detections:
            for detection in results.detections:
                s = detection.location_data.relative_bounding_box      # 取得人臉尺寸
                eye_w = int(s.width*w*0.24/2)                          # 計算眼睛寬度 ( 除以 2 計算座標使用 )
                eye_h = int(s.width*w*0.16/2)                          # 計算眼睛高度 ( 除以 2 計算座標使用 )
                mouth_w = int(s.width*w*0.5/2)                         # 計算嘴巴寬度 ( 除以 2 計算座標使用 )
                mouth_h = int(s.width*w*0.3/2)                         # 計算嘴巴高度 ( 除以 2 計算座標使用 )

                eye_r = detection.location_data.relative_keypoints[0]  # 左眼中心點座標
                eye_l = detection.location_data.relative_keypoints[1]  # 右眼中心點座標
                mouth = detection.location_data.relative_keypoints[3]  # 嘴巴中心點座標

                rcx, rcy = int(eye_r.x*w), int(eye_r.y*h)              # 計算左眼真正的座標
                lcx, lcy = int(eye_l.x*w), int(eye_l.y*h)              # 計算右眼真正的座標
                mx, my = int(mouth.x*w), int(mouth.y*h)                # 計算嘴巴真正的座標

                eye_r_img = img[rcy-eye_h:rcy+eye_h, rcx-eye_w:rcx+eye_w]      # 取出右眼的區域
                eye_r_img = cv2.resize(eye_r_img, (120,80))                    # 改變尺寸為 180x120
                eye_l_img = img[lcy-eye_h:lcy+eye_h, lcx-eye_w:lcx+eye_w]      # 取出左眼的區域
                eye_l_img = cv2.resize(eye_l_img, (120,80))                    # 改變尺寸為 180x120
                mouth_img = img[my-mouth_h:my+mouth_h, mx-mouth_w:mx+mouth_w]  # 取出嘴巴的區域
                mouth_img = cv2.resize(mouth_img, (240,144))                   # 改變尺寸為 360x216

                face = np.zeros((h, w, 3), dtype='uint8')  # 建立空白全黑畫布
                bg = orange.copy()                         # 複製 orange 圖片當作背景
                face[60:140, 200:320] =  eye_l_img         # 貼上左眼
                face[60:140, 320:440] =  eye_r_img         # 貼上右眼
                face[140:284, 200:440] =  mouth_img        # 貼上嘴巴
                face = face + 30                           # 增加亮度
                face = face/255                            # 轉換成比例
                bg = bg/255                                # 轉換成比例
                out  = bg * (1 - mask) + face * mask       # 根據比例混合
                out = (out * 255).astype('uint8')          # 轉換成數字

        cv2.imshow('oxxostudio', out)
        if cv2.waitKey(5) == ord('q'):
            break    # 按下 q 鍵停止
cap.release()
cv2.destroyAllWindows()


 iThome鐵人賽