上一篇文章已經簡單的介紹了 OCS Inventory 的基本功能、工作原理以及元件的架構,今天就開始教大家如何在 Ubuntu 20.04 安裝 OCS Inventory 資產管理系統吧。
首先我們到 OCS Inventory 的下載網址
https://ocsinventory-ng.org/?page_id=1548&lang=en
官方提供的資訊 OCS Inventory 伺服器只支援 Linux 作業系統。
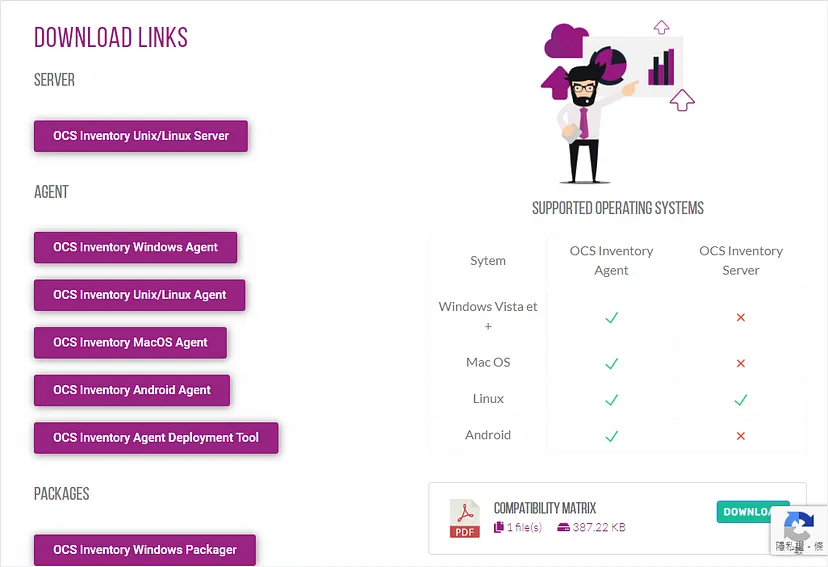
根據伺服器相容性的建議,我們選擇 Ubuntu 20.04 進行安裝。
由於當時的 Compatibility Matrix 文件尚未更新,所以才選擇 Ubuntu 20.04 進行安裝。
最新釋出的文件已說明 Ubuntu 22.04 也是相容的,大家可以放心使用。

Download Links 選擇 OCS Inventory Unix / Linux Server
填寫電子郵件送出後,應該就會收到所有的下載連結如下。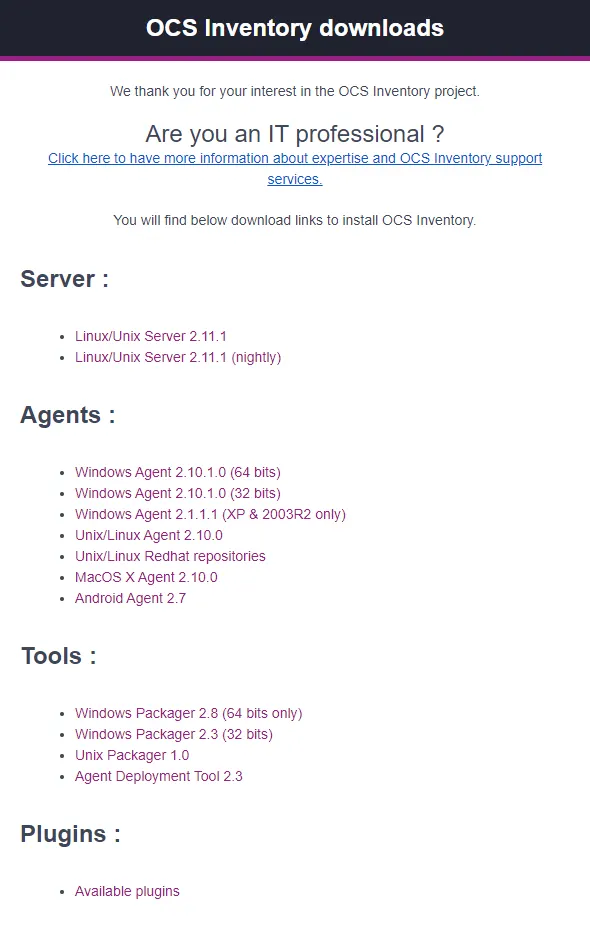
硬體需求
官方提供的伺服器硬體調教,請參考下列連結。
https://wiki.ocsinventory-ng.org/09.Extras/Management-server-tuning/
如果伺服器需要管理 70,000 多個客戶端設備,建議運行 3 台 Linux 伺服器,分別安裝元件如下:
每台的硬體規格皆為單顆 2.8 GHz 的 CPU 與 4 GB 的記憶體
虛擬機器建立
由於我們的設備預估不會超過 1 千台,因此 Azure 虛擬機器的規格使用 Standard B1s (1 vcpu,1 GiB 記憶體) 應該就足以應付。
需要納管的設備不多,OCS Inventory 將採取 All-in-One 的安裝方式。
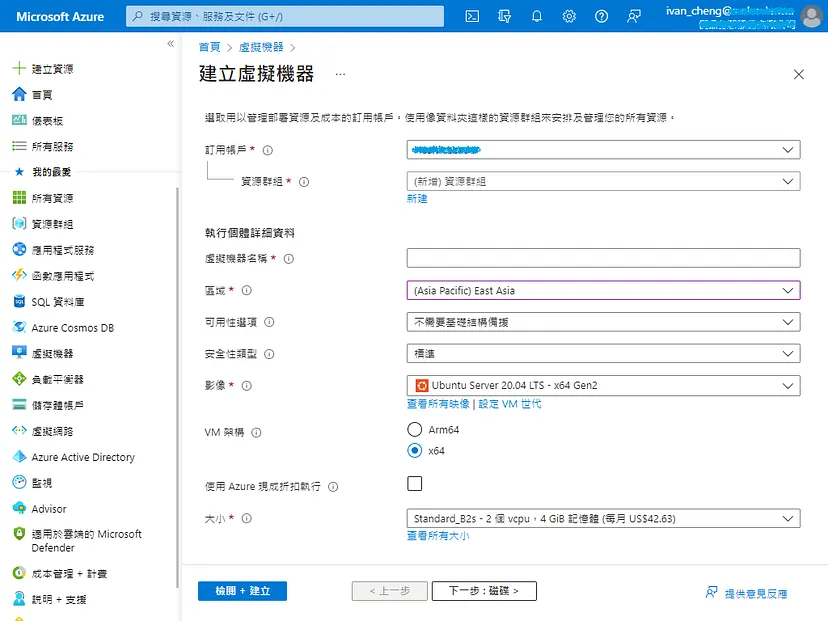
如何設定 Azure 虛擬機器自動開關機,請參考此篇文章。
若只在上班時間運行資產盤點系統,每月的 Azure 費用只需約台幣 120元。
設定虛擬機器時區
sudo timedatectl set-timezone Asia/Taipei
安裝資料庫伺服器
OCS Inventory 需要一個資料庫來存儲庫存的資訊,目前支援 MySQL 5.4 或 MariaDB 4.1.0 或更高版本並啟用 InnoDB 引擎。
官方強烈推薦使用 MariaDB,不支援高於 MySQL 5.5 的版本。
https://wiki.ocsinventory-ng.org/03.Basic-documentation/Deploying-database-server/
透過下列指令進行安裝並啟用服務
sudo apt install mariadb-server mariadb-common mariadb-client
sudo systemctl enable mariadb
sudo systemctl start mariadb
啟動 MariaDB
sudo mysql -u root
如果你沒有為 root 設置密碼,你可以透過以下命令設置它
SET PASSWORD FOR 'root'@'localhost' = PASSWORD('your_root_password');
在 All-in-One 伺服器中配置資料庫伺服器,管理伺服器和通訊伺服器將使用此用戶連接到資料庫。
CREATE DATABASE ocsweb;
CREATE USER 'ocs'@'%' IDENTIFIED BY 'your_ocs_password';
GRANT ALL PRIVILEGES ON ocsweb.* TO 'ocs'@'%' WITH GRANT OPTION;
FLUSH PRIVILEGES;
確認 MariaDB 是否啟用 InnoDB 引擎,檢查組態設定沒有 skip-innodb 或者已經被註解掉。
sudo cat /etc/mysql/mariadb.conf.d/50-server.cnf | grep skip-innodb
使用 APT 安裝 OCS Inventory
在基於 Debian 的發行版上,您可以使用 APT 安裝伺服器。
https://wiki.ocsinventory-ng.org/03.Basic-documentation/Setting-up-a-OCS-Inventory-Server-with-rpm/
您需要使用以下命令添加 OCS Inventory 的存儲庫
curl -sS http://deb.ocsinventory-ng.org/pubkey.gpg | sudo apt-key add -
看起來 deb.ocsinventory-ng.org 有特意阻擋 Azure 的 IP
curl: (28) Failed to connect to deb.ocsinventory-ng.org port 80: Connection timed out
gpg: no valid OpenPGP data found.
即使手動將 GPG 密鑰添加到 apt 源密鑰環,再更新存儲庫也是一樣。
sudo echo "deb http://deb.ocsinventory-ng.org/ubuntu/ focal  main" | sudo tee /etc/apt/sources.list.d/ocsinventory.list
sudo apt update
Err:5 http://deb.ocsinventory-ng.org/ubuntu focal InRelease
  Could not connect to deb.ocsinventory-ng.org:80 (137.74.216.245), connection timed out
看來只好放棄在 Azure VM 使用 APT 安裝 OCS Inventory
使用 Source 安裝 OCS Inventory
坦白說,想要使用 Source 安裝 OCS Inventory 並不容易,主要是官方的安裝文件在 Prerequisites 僅透過文字描述,新手不是沒看就是漏裝需要的函式庫。
OCS Inventory 伺服器所需要的函式庫與模塊及其版本的列表。
https://wiki.ocsinventory-ng.org/01.Prerequisites/Libraries-version/
安裝通訊伺服器
通訊伺服器需要 Apache 網頁伺服器與 Perl 5 腳本語言以及一些額外的 Perl 5 模組,它負責處理 OCS Inventory Agent 對虛擬目錄 /ocsinventory 的 HTTP 請求。
sudo apt install apache2
sudo apt install mariadb-client
透過下列指令安裝所需的模組
sudo apt install libxml-simple-perl libdbi-perl libdbd-mysql-perl libapache-dbi-perl libnet-ip-perl libsoap-lite-perl libarchive-zip-perl make build-essential
sudo cpan install XML::Entities
安裝管理控制台伺服器
管理控制台伺服器需要 Apache 網頁伺服器和 PHP 7 腳本語言以及一些額外的 PHP 模塊。
由於我們是 All-in-One,已安裝過的套件可以跳過。
sudo apt install apache2
sudo apt install mariadb-client
安裝 PHP 支援 Zip 和依賴項
sudo apt install php-pclzip make build-essential libdbd-mysql-perl libnet-ip-perl libxml-simple-perl php php-mbstring php-soap php-mysql php-curl php-xml php-zip
您還需要安裝 PHP 支援 GD
sudo apt install php-gd
設置 PHP 時區
sudo vi /etc/php/7.4/apache2/php.ini
[Date]
; Defines the default timezone used by the date functions
; http://php.net/date.timezone
date.timezone = Asia/Taipei
安裝管理伺服器
安裝管理伺服器之前,我們假設您的環境已經如下
先決條件需要安裝 PERL 5.6 or higher
透過下列指令依序進行安裝,這邊需要一點時間喔。
sudo cpan install XML::Simple
sudo cpan install Compress::Zlib
sudo cpan install DBI
sudo cpan install DBD::mysql
sudo apt install libmysqlclient-dev
sudo cpan install Apache::DBI
sudo cpan install Net::IP
sudo cpan install SOAP::Lite
sudo cpan install Mojolicious::Lite
sudo cpan install Plack::Handler
sudo cpan install Archive::Zip
sudo cpan install YAML
sudo cpan install XML::Entities
sudo cpan install Switch
下載 OCS Inventory 最新版本的安裝來源
wget https://github.com/OCSInventory-NG/OCSInventory-ocsreports/releases/download/2.11.1/OCSNG_UNIX_SERVER-2.11.1.tar.gz
您必須具有 root 權限才能設置 OCS Inventory
tar -xvzf OCSNG_UNIX_SERVER-2.11.1.tar.gz
cd OCSNG_UNIX_SERVER-2.11.1/
sudo ./setup.sh
安裝程序若檢查有遺漏任何的模組,則會退出安裝。
+----------------------------------------------------------+
|                                                          |
|  Welcome to OCS Inventory NG Management server setup !   |
|                                                          |
+----------------------------------------------------------+

Trying to determine which OS or Linux distribution you use
+----------------------------------------------------------+
| Checking for Apache web server binaries !                |
+----------------------------------------------------------+

CAUTION: If upgrading Communication server from OCS Inventory NG 1.0 RC2 and
previous, please remove any Apache configuration for Communication Server!

Do you wish to continue ([y]/n)?

Assuming Communication server 1.0 RC2 or previous is not installed
on this computer.

Starting OCS Inventory NG Management server setup from folder /home/azureadmin/OCSNG_UNIX_SERVER-2.11.1
Storing log in file /home/azureadmin/OCSNG_UNIX_SERVER-2.11.1/ocs_server_setup.log
檢查資料庫伺服器屬性,輸入 enter 繼續安裝即可。
+----------------------------------------------------------+
| Checking for database server properties...               |
+----------------------------------------------------------+

Your MySQL client seems to be part of MySQL version 10.3.
Your computer seems to be running MySQL 4.1 or higher, good ;-)

Which host is running database server [localhost] ?
OK, database server is running on host localhost ;-)

On which port is running database server [3306] ?
OK, database server is running on port 3306 ;-)
檢查 Apache 網頁伺服器屬性,輸入 enter 繼續安裝即可。
+----------------------------------------------------------+
| Checking for Apache web server daemon...                 |
+----------------------------------------------------------+

Where is Apache daemon binary [/usr/sbin/apache2ctl] ?
OK, using Apache daemon /usr/sbin/apache2ctl ;-)

+----------------------------------------------------------+
| Checking for Apache main configuration file...           |
+----------------------------------------------------------+

Where is Apache main configuration file [/etc/apache2/apache2.conf] ?
OK, using Apache main configuration file /etc/apache2/apache2.conf ;-)

+----------------------------------------------------------+
| Checking for Apache user account...                      |
+----------------------------------------------------------+

Which user account is running Apache web server [www-data] ?
OK, Apache is running under user account www-data ;-)

+----------------------------------------------------------+
| Checking for Apache group...                             |
+----------------------------------------------------------+

Which user group is running Apache web server [www-data] ?
OK, Apache is running under users group www-data ;-)

+----------------------------------------------------------+
| Checking for Apache Include configuration directory...   |
+----------------------------------------------------------+

Setup found Apache Include configuration directory in
/etc/apache2/conf-available.
Setup will put OCS Inventory NG Apache configuration in this directory.
Where is Apache Include configuration directory [/etc/apache2/conf-available] ?
OK, Apache Include configuration directory /etc/apache2/conf-available found ;-)
檢查 PERL 直譯器,輸入 enter 繼續安裝即可。
+----------------------------------------------------------+
| Checking for PERL Interpreter...                         |
+----------------------------------------------------------+

Found PERL interpreter at </usr/bin/perl> ;-)
Where is PERL interpreter binary [/usr/bin/perl] ?
OK, using PERL interpreter /usr/bin/perl ;-)
檢查通訊伺服器配置,輸入 enter 繼續安裝即可。
Do you wish to setup Communication server on this computer ([y]/n)?

+----------------------------------------------------------+
|             Checking for Make utility...                 |
+----------------------------------------------------------+

OK, Make utility found at </usr/bin/make> ;-)

+----------------------------------------------------------+
|        Checking for Apache mod_perl version...           |
+----------------------------------------------------------+

Checking for Apache mod_perl version 1.99_22 or higher
Found that mod_perl version 1.99_22 or higher is available.
OK, Apache is using mod_perl version 1.99_22 or higher ;-)

+----------------------------------------------------------+
|    Checking for Communication server log directory...    |
+----------------------------------------------------------+

Communication server can create detailed logs. This logs can be enabled
by setting integer value of LOGLEVEL to 1 in Administration console
menu Configuration.
Where to put Communication server log directory [/var/log/ocsinventory-server] ?
OK, Communication server will put logs into directory /var/log/ocsinventory-server ;-)

+----------------------------------------------------------------------------+
|    Checking for Communication server plugins configuration directory...    |
+----------------------------------------------------------------------------+

Communication server need a directory for plugins configuration files.
Where to put Communication server plugins configuration files [/etc/ocsinventory-server/plugins] ?
OK, Communication server will put plugins configuration files into directory /etc/ocsinventory-server/plugins ;-)

+-------------------------------------------------------------------+
|   Checking for Communication server plugins perl directory...     |
+-------------------------------------------------------------------+

Communication server need a directory for plugins Perl modules files.
Where to put Communication server plugins Perl modules files [/etc/ocsinventory-server/perl] ?
OK, Communication server will put plugins Perl modules files into directory /etc/ocsinventory-server/perl ;-)
檢查所需的 Perl 模組
+----------------------------------------------------------+
| Checking for required Perl Modules...                    |
+----------------------------------------------------------+

Checking for DBI PERL module...
Found that PERL module DBI is available.
Checking for Apache::DBI PERL module...
Found that PERL module Apache::DBI is available.
Checking for DBD::mysql PERL module...
Found that PERL module DBD::mysql is available.
Checking for Compress::Zlib PERL module...
Found that PERL module Compress::Zlib is available.
Checking for XML::Simple PERL module...
Found that PERL module XML::Simple is available.
Checking for Net::IP PERL module...
Found that PERL module Net::IP is available.
Checking for Archive::Zip Perl module...
Found that PERL module Archive::Zip is available.
檢查 Rest API 伺服器配置,輸入 enter 繼續安裝即可。
Do you wish to setup Rest API server on this computer ([y]/n)?

+----------------------------------------------------------+
| Checking for REST API Dependencies ...                   |
+----------------------------------------------------------+

Found that PERL module Mojolicious::Lite is available.
Found that PERL module Switch is available.
Found that PERL module Plack::Handler is available.

+----------------------------------------------------------+
| Configuring REST API Server files ...                    |
+----------------------------------------------------------+

Where do you want the API code to be store [/usr/local/share/perl/5.30.0] ?
Copying files to /usr/local/share/perl/5.30.0

+----------------------------------------------------------+
| Configuring REST API Server configuration files ...      |
+----------------------------------------------------------+
如果一切正常,安裝程序將安裝通訊伺服器。
+----------------------------------------------------------+
|                 OK, looks good ;-)                       |
|                                                          |
|     Configuring Communication server Perl modules...     |
+----------------------------------------------------------+

Checking if your kit is complete...
Looks good
Generating a Unix-style Makefile
Writing Makefile for Apache::Ocsinventory
Writing MYMETA.yml and MYMETA.json

+----------------------------------------------------------+
|                 OK, looks good ;-)                       |
|                                                          |
|      Preparing Communication server Perl modules...      |
+----------------------------------------------------------+

+----------------------------------------------------------+
|                 OK, prepare finshed ;-)                  |
|                                                          |
|     Installing Communication server Perl modules...      |
+----------------------------------------------------------+

+----------------------------------------------------------+
| OK, Communication server Perl modules install finished;-)|
|                                                          |
|     Creating Communication server log directory...       |
+----------------------------------------------------------+

Creating Communication server log directory /var/log/ocsinventory-server.

Fixing Communication server log directory files permissions.
Configuring logrotate for Communication server.
Removing old communication server logrotate file /etc/logrotate.d/ocsinventory-NG
Writing communication server logrotate to file /etc/logrotate.d/ocsinventory-server

+----------------------------------------------------------------------+
|        OK, Communication server log directory created ;-)            |
|                                                                      |
|   Creating Communication server plugins configuration directory...   |
+----------------------------------------------------------------------+

Creating Communication server plugins configuration directory /etc/ocsinventory-server/plugins.

+----------------------------------------------------------------------+
| OK, Communication server plugins configuration directory created ;-) |
|                                                                      |
|        Creating Communication server plugins Perl directory...       |
+----------------------------------------------------------------------+

Creating Communication server plugins Perl directory /etc/ocsinventory-server/perl.

+----------------------------------------------------------------------+
|     OK, Communication server plugins Perl directory created ;-)      |
|                                                                      |
|               Now configuring Apache web server...                   |
+----------------------------------------------------------------------+
將通訊伺服器的 Apache 配置文件命名為 z-ocsinventory-server.conf,輸入 enter 繼續安裝即可。
To ensure Apache loads mod_perl before OCS Inventory NG Communication Server,
Setup can name Communication Server Apache configuration file
'z-ocsinventory-server.conf' instead of 'ocsinventory-server.conf'.
Do you allow Setup renaming Communication Server Apache configuration file
to 'z-ocsinventory-server.conf' ([y]/n) ?
OK, using 'z-ocsinventory-server.conf' as Communication Server Apache configuration file
Removing old communication server configuration to file /etc/apache2/conf-available/ocsinventory.conf
Writing communication server configuration to file /etc/apache2/conf-available/z-ocsinventory-server.conf

+----------------------------------------------------------------------+
|       OK, Communication server setup successfully finished ;-)       |
|                                                                      |
| Please, review /etc/apache2/conf-available/z-ocsinventory-server.conf|
|         to ensure all is good. Then restart Apache daemon.           |
+----------------------------------------------------------------------+
檢查管理伺服器配置,輸入 enter 繼續安裝即可。
Do you wish to setup Administration Server (Web Administration Console)
on this computer ([y]/n)?

+----------------------------------------------------------+
|    Checking for Administration Server directories...     |
+----------------------------------------------------------+

CAUTION: Setup now install files in accordance with Filesystem Hierarchy
Standard. So, no file is installed under Apache root document directory
(Refer to Apache configuration files to locate it).
If you're upgrading from OCS Inventory NG Server 1.01 and previous, YOU
MUST REMOVE (or move) directories 'ocsreports' and 'download' from Apache
root document directory.
If you choose to move directory, YOU MUST MOVE 'download' directory to
Administration Server writable/cache directory (by default
/var/lib/ocsinventory-reports), especially if you use deployment feature.

Do you wish to continue ([y]/n)?
Assuming directories 'ocsreports' and 'download' removed from
Apache root document directory.

Where to copy Administration Server static files for PHP Web Console
[/usr/share/ocsinventory-reports] ?
OK, using directory /usr/share/ocsinventory-reports to install static files ;-)

Where to create writable/cache directories for deployment packages,
administration console logs, IPDiscover and SNMP [/var/lib/ocsinventory-reports] ?
OK, writable/cache directory is /var/lib/ocsinventory-reports ;-)

+----------------------------------------------------------+
|         Checking for required Perl Modules...            |
+----------------------------------------------------------+

Checking for DBI PERL module...
Found that PERL module DBI is available.
Checking for DBD::mysql PERL module...
Found that PERL module DBD::mysql is available.
Checking for XML::Simple PERL module...
Found that PERL module XML::Simple is available.
Checking for Net::IP PERL module...
Found that PERL module Net::IP is available.

+----------------------------------------------------------+
|      Installing files for Administration server...       |
+----------------------------------------------------------+

Creating PHP directory /usr/share/ocsinventory-reports/ocsreports.
Copying PHP files to /usr/share/ocsinventory-reports/ocsreports.
Fixing permissions on directory /usr/share/ocsinventory-reports/ocsreports.
Creating database configuration file /usr/share/ocsinventory-reports/ocsreports/dbconfig.inc.php.
Creating IPDiscover directory /var/lib/ocsinventory-reports/ipd.
Fixing permissions on directory /var/lib/ocsinventory-reports/ipd.
Creating packages directory /var/lib/ocsinventory-reports/download.
Fixing permissions on directory /var/lib/ocsinventory-reports/download.
Creating snmp mibs directory /var/lib/ocsinventory-reports/snmp.
Fixing permissions on directory /var/lib/ocsinventory-reports/snmp.
Creating Administration server log files directory /var/lib/ocsinventory-reports/logs.
Fixing permissions on directory /var/lib/ocsinventory-reports/logs.
Creating Administration server temporary files directory /var/lib/ocsinventory-reports/tmp_dir.
Fixing permissions on directory /var/lib/ocsinventory-reports/tmp_dir.
Creating Administration server scripts log files directory /var/lib/ocsinventory-reports/scripts.
Fixing permissions on directory /var/lib/ocsinventory-reports/scripts.
Configuring IPDISCOVER-UTIL Perl script.
Installing IPDISCOVER-UTIL Perl script.
Fixing permissions on IPDISCOVER-UTIL Perl script.
Writing Administration server configuration to file /etc/apache2/conf-available/ocsinventory-reports.conf

+----------------------------------------------------------------------+
|        OK, Administration server installation finished ;-)           |
|                                                                      |
| Please, review /etc/apache2/conf-available/ocsinventory-reports.conf
|          to ensure all is good and restart Apache daemon.            |
|                                                                      |
| Then, point your browser to http://server//ocsreports
|        to configure database server and create/update schema.        |
+----------------------------------------------------------------------+

Setup has created a log file /home/azureadmin/OCSNG_UNIX_SERVER-2.11.1/ocs_server_setup.log. Please, save this file.
If you encounter error while running OCS Inventory NG Management server,
we can ask you to show us its content !

DON'T FORGET TO RESTART APACHE DAEMON !

Enjoy OCS Inventory NG ;-)
成功安裝 OCS Inventory 伺服器之後,它會為您生成 Apache 配置文件。
ls /etc/apache2/conf-available
透過下列指令啟用它們,這很重要官方竟然沒寫。
sudo a2enconf ocsinventory-reports
sudo a2enconf z-ocsinventory-server.conf
sudo a2enconf zz-ocsinventory-restapi
sudo systemctl reload apache2
記得到安全性規則開放 HTTP 服務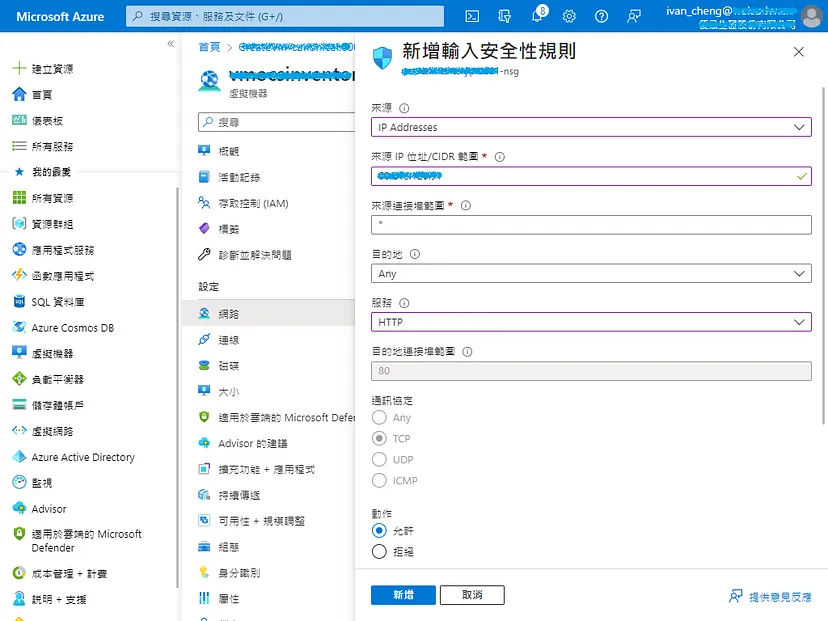
瀏覽 http://your_host_ip/ocsreports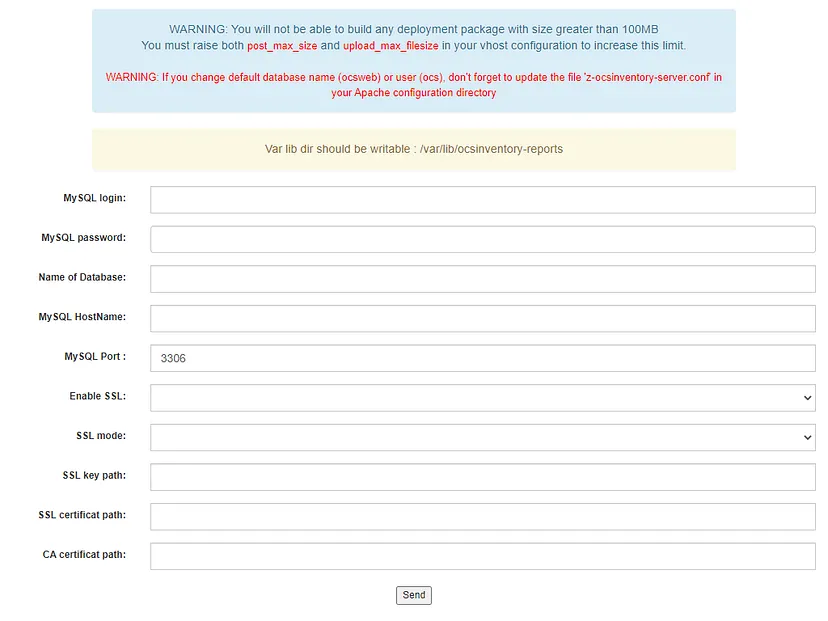
提示 Var lib dir should be writable : /var/lib/ocsinventory-reports
sudo chown -R www-data:www-data /var/lib/ocsinventory-reports
sudo systemctl restart apache2
填寫資料庫連線資訊,送出。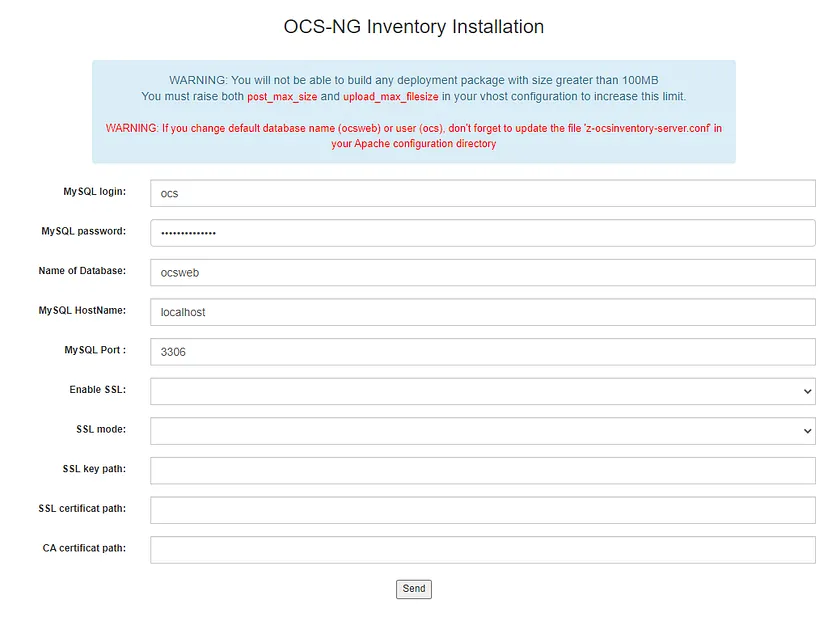
安裝完之後按下 Click here to enter OCS-NG GUI,或者透過 http://your_hostname/ocsreports/index.php。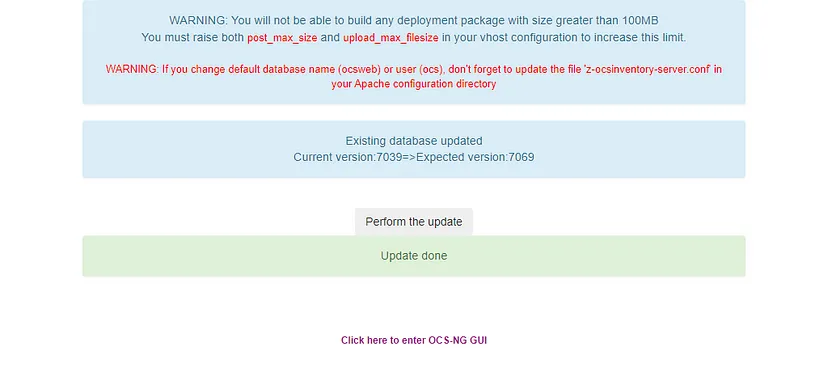
點擊 Perform the update 更新資料庫版本,重新進入管理平台。
出於安全原因,請把 install.php 移除或者修改名稱
sudo mv /usr/share/ocsinventory-reports/ocsreports/install.php{,.bak}
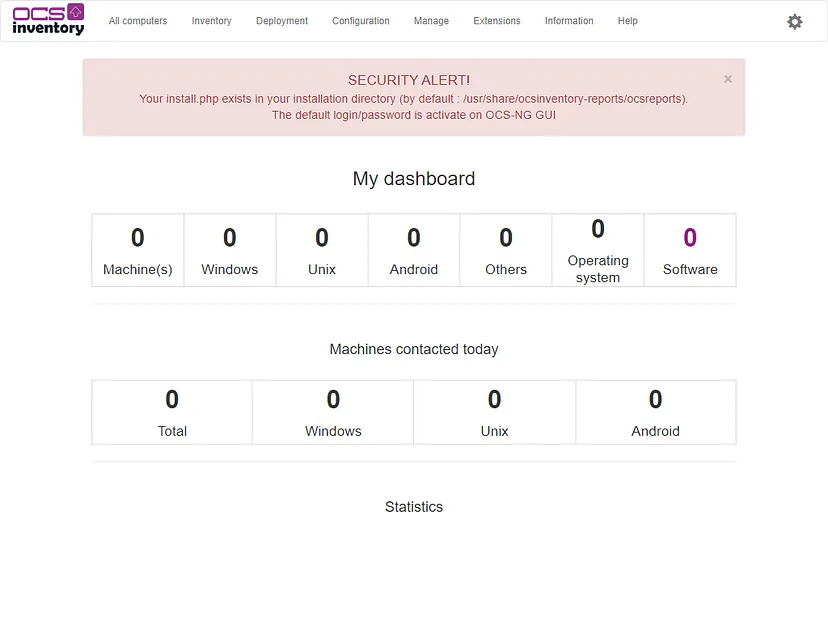
記得到帳號管理把 admin 預設的密碼改掉才不會出現安全性警告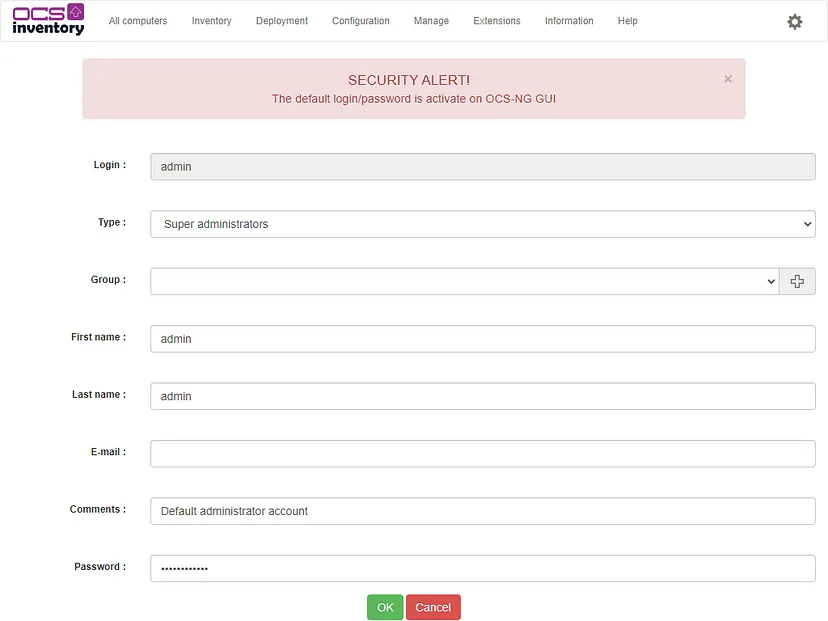
我們終於安裝完畢,灑花。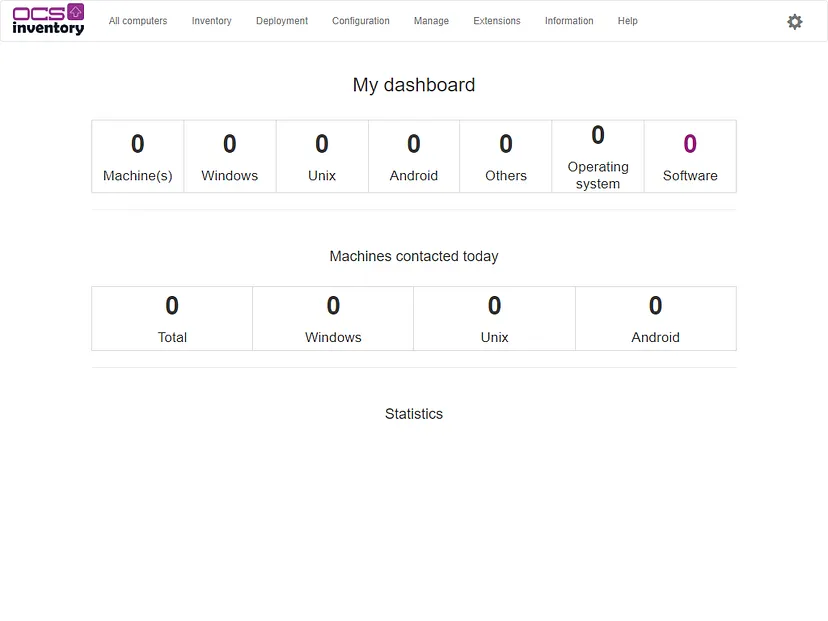
由於我們在安裝資料庫的時候沒有使用預設的密碼,導致通訊伺服器在接收到代理程式的資料時無法寫入資料庫。
Service encounter error <OCS Inventory Agent encounter an error (exit code is 4 => Failed to talk with Communication Server)>.
編輯 z-ocsinventory-server.conf
sudo vi /etc/apache2/conf-enabled/z-ocsinventory-server.conf
把 OCS_DB_PWD 改成您建立用戶時所填寫的密碼
<IfModule mod_perl.c>

  # Which version of mod_perl we are using
  # For mod_perl <= 1.999_21, replace 2 by 1
  # For mod_perl > 1.999_21, replace 2 by 2
  PerlSetEnv OCS_MODPERL_VERSION 2

  # Master Database settings
  # Replace localhost by hostname or ip of MySQL server for WRITE
  PerlSetEnv OCS_DB_HOST localhost
  # Replace 3306 by port where running MySQL server, generally 3306
  PerlSetEnv OCS_DB_PORT 3306
  # Name of database
  PerlSetEnv OCS_DB_NAME ocsweb
  PerlSetEnv OCS_DB_LOCAL ocsweb
  # User allowed to connect to database
  PerlSetEnv OCS_DB_USER ocs
  # Password for user
  PerlSetVar OCS_DB_PWD ocs
記得重啟 Apache 伺服器
sudo systemctl reload apache2
可以到 dbconfig.inc.php 查看是否生效
cat /usr/share/ocsinventory-reports/ocsreports/dbconfig.inc.php
<?php
define("DB_NAME", "ocsweb");
define("SERVER_READ","localhost");
define("SERVER_WRITE","localhost");
define("SERVER_PORT","3306");
define("COMPTE_BASE","ocs");
define("PSWD_BASE","your_ocs_password");
define("ENABLE_SSL","");
define("SSL_MODE","");
define("SSL_KEY","");
define("SSL_CERT","");
define("CA_CERT","");
?>
今天已經教大家如何在 Ubuntu 20.04 安裝 OCS Inventory 資產管理系統,雖然使用 Source 的安裝過程比較繁瑣,我們還是比較推薦使用 Source 來進行安裝,將來進行系統升級會比較方便。
下一篇將教大家在 Windows 作業系統安裝 OCS Inventory 代理程式來蒐集電腦的軟硬體相關資訊,敬請期待。
參考文件
