結束了1A2B的遊戲製作,接著我們一樣透過小專案,去結合更多的Vue.js中的各種指令,讓我們更熟悉各個指令的搭配使用!
這次的專案我們做的是Todo List ,一樣分為上下兩篇,上篇我們主要會講到:
那我們就馬上開始吧!
<template>
<el-row id="header">
<el-col :span="4" :offset="8">
<el-input v-model="newTodo" placeholder="Ex:Anything" maxlength="10" @keyup.enter="addTodo" class="newTodo"></el-input>
</el-col>
<el-col :span="12" >
<el-button :disabled="!isValidTodo" @click="addTodo" id="enterBtn">add Todo</el-button>
</el-col>
</el-row>
<el-col>
<li v-for="(todo, index) in toDos" :key="index">
<el-checkbox v-model="todo.finished" name="finishCheck"></el-checkbox>
<label :class="{'line': todo.finished, 'noLine': !todo.finished}" name="tasks">{{ todo.task }}</label>
<label class="changeText">{{ todo.day }}</label>
<el-button @click="cancel(index)" class="btn" circle>X</el-button>
</li>
</el-col>
</template>
設置畫面的排列樣式
<script>
	import dayjs from 'dayjs';
	import { ElButton, ElInput, ElCheckbox, ElMessageBox } from 'element-plus';
	export default {
	  components: {
	      ElButton,
	      ElInput,
	      ElCheckbox,
	  },
	data() {
	  return {
			//設置所需資料的格式
	    newTodo: '',
	    toDos: [
			{
				//預設有一筆資料
	      task: 'aaaa',
	      day :dayjs(new Date).format('YYYY/MM/DD')
	    }],
	    isValidTodo : false,
	  };
	},
	watch: {
	  // 長度檢查
	  newTodo(newItem) {
	    this.isValidTodo = newItem.length >= 1;
	  },
	},
};
</script>
接著設定資料格式和預設的範例樣式值,在watch我放的function是用來檢查輸入框的長度,當使用者有輸入任何內容時才啟用。
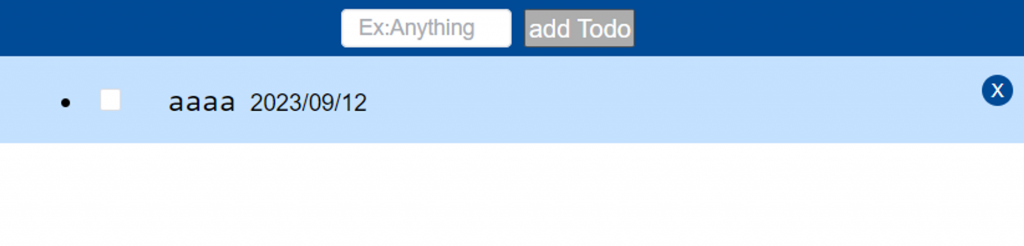
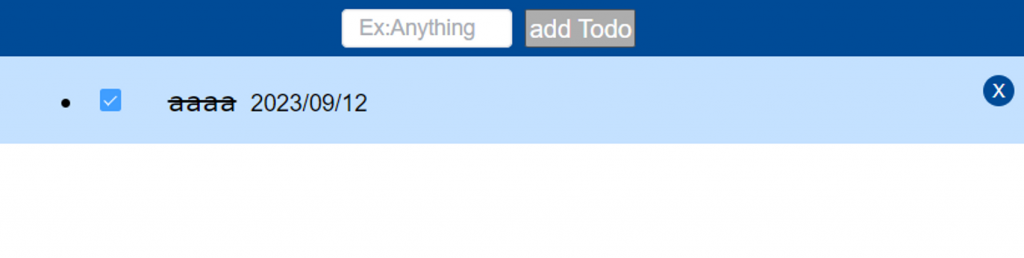
現在畫面已經生成!而且已經可以透過css樣式的設計,讓完成的項目有不一樣的樣式做區分
<label :class="{'line': todo.finished, 'noLine': !todo.finished}" name="tasks">{{ todo.task }}</label>
addTodo() {
      if (this.newTodo.trim() === "") {
        ElMessageBox.alert("Write Something!", "Error", {
          confirmButtonText: "OK",
          callback: (action) => {
            console.log(action);
          },
          type: "error",
        });
        this.newTodo = "";
        return;
      }
      this.toDos.push({
        task: this.newTodo.trim(),
        hided: false,
        editing: false,
        day: dayjs(new Date()).format("YYYY/MM/DD"),
      });
      this.newTodo = "";
    }
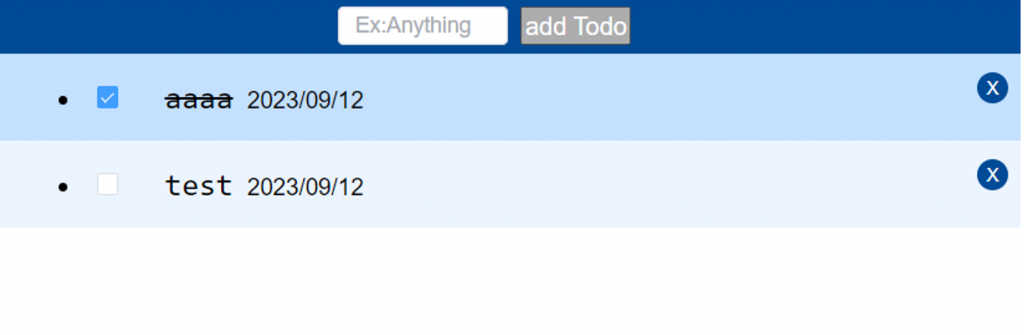
透過trim()我們可以將使用者輸入時字串前後多餘的空白去除,讓版面更整齊,並且在使用者只輸入空白就送出時,利用彈跳視窗去做提醒。
cancel(index) {
    ElMessageBox.confirm('Are you sure to delete this item?', 'Delete', {
        confirmButtonText: 'Confirm',
        cancelButtonText: 'Cancel',
        type: 'warning'
    })
    .then(() => {
        console.log('Item deleted.');
        this.toDos.splice(index, 1); //確認刪除後將此項目從toDos中移除
    })
    .catch(() => {
        console.log('Item deletion canceled.');
    });
}
透過索引值(index)可以清楚的分辨要刪除的項目是哪個。而且在刪除前,也可以透過彈跳視窗詢問,避免誤刪!
今天已經把Todo List的樣式還有新增、刪除的功能完成了!明天會繼續把Todo List中不可或缺的編輯和隱藏的功能給補上,讓整個專案更完整!