要使用圖片壓縮工具來處理網頁時,一種是打包後處理圖片,像是Webpack 插件image-webpack-loader ,另一種則是幫助您在瀏覽器中進行圖片壓縮(簡單說就是會讓使用者在網頁就上傳照片的情況),像是今天要介紹的 compressorjs工具,讀者可根據具體情況來決定最適合您的圖片壓縮工具。
Compressor.js 是一個用於在前端網頁應用程序中壓縮圖像的 JavaScript 庫。它可以幫助您減小圖像文件的大小,從而加快網站的加載速度,提高用戶體驗。並具有許多配置選項,可根據需求再進行調整。
npm install compressorjs
前往 >> 官方範例
那我們今天一樣將程式碼改為vue3實作吧!
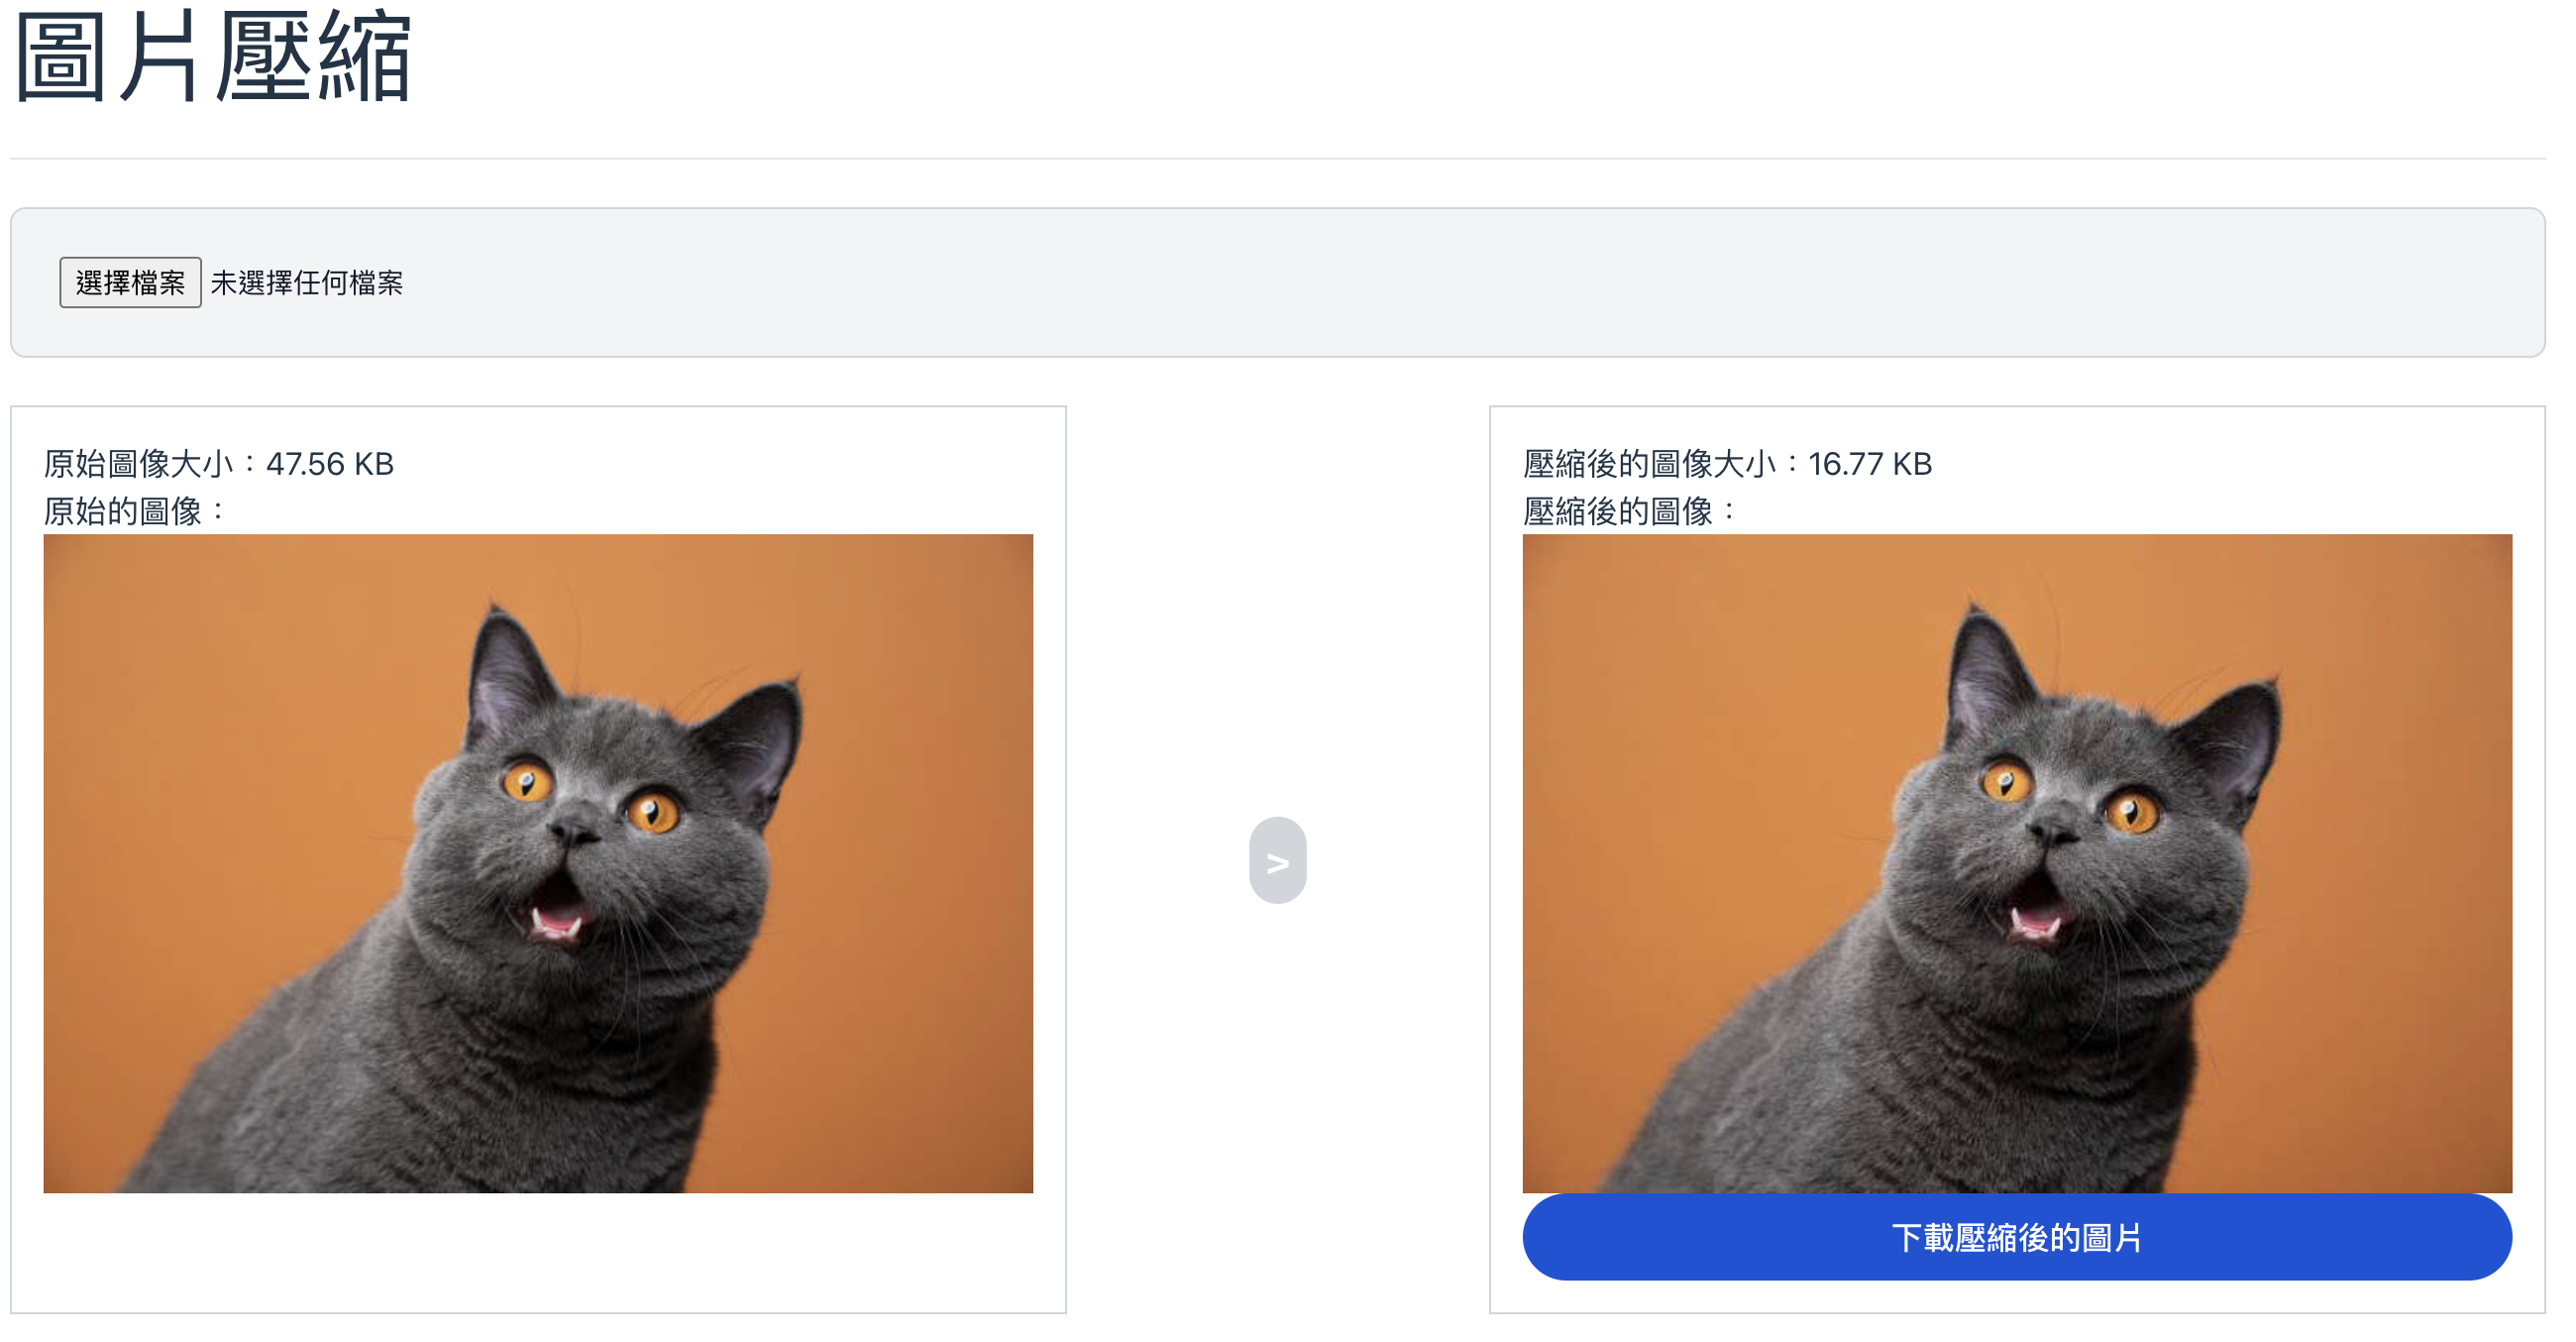
Demo網址:https://hahasister-ironman-project.netlify.app/#/compressorImg
功能大綱
<template>
  <div class="container">
    <input
      type="file"
      class="block w-full mb-5 text-sm text-gray-900 border border-gray-300 rounded-lg cursor-pointer bg-gray-100 first-line:focus:outline-none"
      id="default_size"
      accept="image/*"
      @change="handleImageUpload"
    />

    <div v-if="originalSize && compressedImage">
      <h2>原始圖像大小:{{ originalSize }}</h2>
      <h2>壓縮後的圖像大小:{{ compressedSize }}</h2>
      <h2>壓縮後的圖像:</h2>
      <img :src="compressedImage" alt="壓縮後的圖像" />
    </div>
  </div>
</template>

<script setup>
import Compressor from 'compressorjs';
import { ref } from 'vue';

// 原始圖像大小和壓縮後的圖像大小
const originalSize = ref(null);
const compressedSize = ref(null);
const compressedImage = ref(null);

// 處理圖像上傳事件
const handleImageUpload = event => {
  const file = event.target.files[0];

  // 記錄原始圖像大小
  originalSize.value = `${(file.size / 1024).toFixed(2)} KB`;

  // 創建圖像壓縮器實例
  const imageCompressor = new Compressor(file, {
    quality: 0.6, // 設置圖像質量(0.6 表示 60% 的質量)
    maxWidth: 800, // 最大寬度
    maxHeight: 800, // 最大高度
    success(result) {
      // result 是壓縮後的圖像文件,您可以將其上傳到服務器或進一步處理

      // 記錄壓縮後的圖像大小
      compressedSize = `${(result.size / 1024).toFixed(2)} KB`;

      const reader = new FileReader();
      reader.readAsDataURL(result);
      reader.onload = () => {
        // 將壓縮後的圖像數據設置到 compressedImage 變數中,以在模板中顯示
        compressedImage.value = reader.result;
      };
    },
    error(err) {
      console.error('圖像壓縮錯誤:', err.message);
    }
  });

  event.target.value = '';
};
</script>
那接著我們將壓縮的程式 及 取得圖片url的程式拉出來共用
並優化一下版面,就可以變成
(結構)
project-root/
├─ src/
│ ├─ views/
│ │ ├─ YourComponent.vue
│ │
│ ├─ utils/
│ │ ├─ fileUtils.js
│ │ ├─ compressorUtils.js
│
└─ ...
<template>
  <div class="container">
    <h1>圖片壓縮</h1>
    <p></p>
    <hr class="my-6" />
    <div>
      <input
        type="file"
        class="block w-full p-6 text-sm text-gray-900 border border-gray-300 rounded-lg cursor-pointer bg-gray-100 first-line:focus:outline-none"
        id="file"
        accept="image/*"
        @change="handleImageUpload"
      />
    </div>

    <div
      v-if="originalSize && compressedImage"
      class="flex flex-wrap justify-center my-6"
    >
      <div class="w-5/12 p-4 border border-gray-300">
        <h2>原始圖像大小:{{ originalSize }}</h2>
        <h2>原始的圖像:</h2>
        <div>
          <img :src="originalImage" alt="原始的圖像" class="max-w-full" />
        </div>
      </div>
      <div class="w-2/12 flex items-center justify-center">
        <p class="text-white text-xl font-bold bg-gray-300 p-2 rounded-3xl">
          >
        </p>
      </div>

      <div class="w-5/12 p-4 border border-gray-300">
        <h2>壓縮後的圖像大小:{{ compressedSize }}</h2>
        <h2>壓縮後的圖像:</h2>
        <div>
          <img :src="compressedImage" alt="壓縮後的圖像" class="max-w-full" />
        </div>
        <a
          :href="compressedImage"
          download="compressed_image.jpg"
          class="block text-white bg-blue-700 hover:bg-blue-800 rounded-full px-5 py-2.5 text-center"
        >
          下載壓縮後的圖片
        </a>
      </div>
    </div>
  </div>
</template>
<script setup>
import { ref } from 'vue';
import { compressImage } from '@/utils/compressorUtils.js';
import { readDataURL } from '@/utils/fileUtils.js';

const originalSize = ref(null);
const compressedSize = ref(null);
const originalImage = ref(null);
const compressedImage = ref(null);

// 處理圖像上傳事件
const handleImageUpload = async event => {
  const file = event.target.files[0];
  originalSize.value = `${(file.size / 1024).toFixed(2)} KB`;

  try {
    const result = await compressImage(file);
    compressedSize.value = `${(result.size / 1024).toFixed(2)} KB`;

    // 使用Promise.all等待兩個readDataURL函數完成
    const [originalDataUrl, compressedDataUrl] = await Promise.all([
      readDataURL(file), // 讀取原始圖像的數據URL
      readDataURL(result) // 讀取壓縮後的圖像的數據URL
    ]);

    originalImage.value = originalDataUrl; // 設置原始圖像的數據URL
    compressedImage.value = compressedDataUrl; // 設置壓縮後的圖像的數據URL
  } catch (error) {
    console.error('error:', error.message);
  } finally {
    event.target.value = ''; // 無論成功或失敗都會清空文件輸入元素的值
  }
};
</script>
// utils/compressorUtils.js
import Compressor from 'compressorjs';

export const compressImage = (
  file,
  quality = 0.6,
  maxWidth = 800,
  maxHeight = 800
) => {
  return new Promise((resolve, reject) => {
    new Compressor(file, {
      quality: quality, // 設置圖像質量
      maxWidth: maxWidth, // 最大寬度
      maxHeight: maxHeight, // 最大高度
      success(result) {
        resolve(result);
      },
      error(error) {
        reject(error);
      }
    });
  });
};
// utils/fileUtils.js
export const readDataURL = file => {
  return new Promise((resolve, reject) => {
    const reader = new FileReader();
    reader.readAsDataURL(file);
    reader.onload = () => {
      resolve(reader.result);
    };
    reader.onerror = error => {
      reject(error);
    };
  });
};
在前端預覽上傳圖片檔案的方法 分為兩種,createObjectURL及FileReader
使用方式:你可以使用URL.createObjectURL 函数創建一個Blob URL,然後將其分配給圖像元素的src屬性。性能:通常來說,createObjectURL 的性能稍微優於FileReader,因為它不需要將整個檔案內容讀入內存。它僅創建一個URL引用原始檔案。用途:createObjectURL 主要用於簡單的圖片預覽場景,其中你只需要顯示圖片而不需要進一步處理圖片數據。資源釋放:使用createObjectURL 創建的Blob URL在不再需要時應該被釋放,以避免內存洩漏。
使用方式:你可以使用FileReader API來讀取本地檔案並將其轉換為Data URL,然後將Data URL 分配給圖像元素的src屬性。性能:FileReader 的 Data URL 較createObjectURL 慢一些,因為它需要將整個檔案內容讀入內存,然後轉換為Base64編碼的Data URL。用途:FileReader 的 Data URL 可以用於需要對圖片檔案進行更多處理的場景,例如縮放、裁剪、壓縮等操作。你可以在圖片數據讀入後進一步處理它。不需要釋放資源:你無需釋放FileReader 的 Data URL,因為它只是在內存中的一個數據URL,不需要手動釋放。
總之,選擇使用createObjectURL 還是 FileReader 的 Data URL 取決於你的應用需求。如果你只需要簡單的圖片預覽,並且關心性能,則createObjectURL 可能是更好的選擇。如果你需要對圖片數據進行進一步處理,則FileReader 的 Data URL 可能更適合。
那我們明天再見了~