前言介紹
MVP(Model-View-Presenter)是一種常見的軟體架構模式,通常用於開發Android應用程序以及其他GUI(圖形用戶界面)應用程序。MVP的目標是分離應用程序的不同部分,以提高可維護性、可測試性和代碼的清晰性。以下是MVP架構的簡介:
(M)Model(模型):模型代表應用程序的數據和業務邏輯。它負責數據的獲取、處理和管理,以及應用程序的規則。 模型通常包括數據庫、網絡請求、文件操作等數據處理任務。
(V)View(視圖):視圖是用戶界面的呈現和顯示部分。它負責展示數據給用戶,並捕獲用戶的輸入操作。視圖通常 包括XML布局文件和與用戶交互的UI元素。
(P)Presenter(主持人):Presenter充當模型和視圖之間的中介。它負責處理用戶輸入,協調模型和視圖之間的 交互,並根據業務邏輯來更新視圖。Presenter不直接操作UI元素,而是通過視圖接口來操作,這使得視圖可以 更加獨立於具體的業務邏輯。
功能
這裡我製作一個帳密登入的MVP架構來來幫助你實作MVP架構的部分功能入下,雖然直接寫在Activtiy功能會是一樣的,但是分割好架構在維護管理上會更有優勢。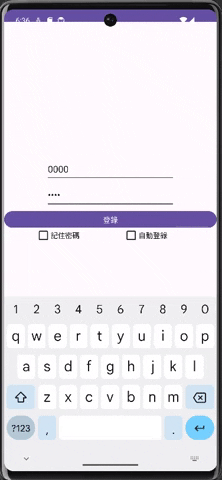
圖片解說
在我們帳密登入時資料會先從View傳送到Presenter,如果登入正確就從Modle抓取資給Presnter,在從Presenter回傳給View做通知介面更新
<?xml version="1.0" encoding="utf-8"?>
<androidx.constraintlayout.widget.ConstraintLayout
    xmlns:android="http://schemas.android.com/apk/res/android"
    xmlns:tools="http://schemas.android.com/tools"
    xmlns:app="http://schemas.android.com/apk/res-auto"
    android:layout_width="match_parent"
    android:layout_height="match_parent"
    tools:context=".MainActivity">

    <RelativeLayout
        android:id="@+id/relativeLayout"
        android:layout_width="match_parent"
        android:layout_height="wrap_content"
        android:layout_gravity="center"
        android:layout_marginTop="200dp"
        android:gravity="center"
        app:layout_constraintBottom_toTopOf="@+id/relativeLayout2"
        app:layout_constraintEnd_toEndOf="parent"
        app:layout_constraintHorizontal_bias="0.0"
        app:layout_constraintStart_toStartOf="parent"
        app:layout_constraintTop_toTopOf="parent"
        app:layout_constraintVertical_bias="1.0"
        tools:ignore="MissingConstraints">

        <EditText
            android:id="@+id/edit_username"
            android:layout_width="250dp"
            android:layout_height="50dp"
            android:layout_gravity="center"
            android:hint="輸入帳號" />

    </RelativeLayout>

    <RelativeLayout
        android:id="@+id/relativeLayout2"
        android:layout_width="match_parent"
        android:layout_height="wrap_content"
        android:layout_gravity="center"
        android:layout_marginTop="292dp"
        android:gravity="center"
        app:layout_constraintEnd_toEndOf="parent"
        app:layout_constraintStart_toStartOf="parent"
        app:layout_constraintTop_toTopOf="parent"
        tools:ignore="MissingConstraints">

        <EditText
            android:id="@+id/edit_password"
            android:layout_width="250dp"
            android:layout_height="50dp"
            android:layout_gravity="center"
            android:hint="輸入密碼"
            android:password="true" />

    </RelativeLayout>

    <Button
        android:id="@+id/main_button"
        android:layout_width="match_parent"
        android:layout_height="40dp"
        android:layout_marginTop="344dp"
        android:text="登錄"
        app:layout_constraintEnd_toEndOf="parent"
        app:layout_constraintStart_toStartOf="parent"
        app:layout_constraintTop_toTopOf="parent"
        tools:ignore="MissingConstraints" />

    <LinearLayout
        android:layout_width="match_parent"
        android:layout_height="40dp"
        android:layout_marginTop="384dp"
        android:orientation="horizontal"
        app:layout_constraintEnd_toEndOf="parent"
        app:layout_constraintHorizontal_bias="0.0"
        app:layout_constraintStart_toStartOf="parent"
        app:layout_constraintTop_toTopOf="parent">

        <CheckBox
            android:id="@+id/Cb"
            android:layout_width="30dp"
            android:layout_height="20dp"
            android:layout_marginLeft="60dp" />

        <TextView
            android:layout_width="80dp"
            android:layout_height="30dp"
            android:text="記住密碼"
            android:textColor="#000000" />

        <CheckBox
            android:id="@+id/zidong_check"
            android:layout_width="30dp"
            android:layout_height="20dp"
            android:layout_marginLeft="60dp" />

        <TextView
            android:layout_width="80dp"
            android:layout_height="30dp"
            android:text="自動登錄"
            android:textColor="#000000" />
    </LinearLayout>


</androidx.constraintlayout.widget.ConstraintLayout>
注意:這裡是是用interface而不是Class,這兩是不一樣的,一個是寫方法的框架,一個是實作方法本身。
package com.example.login_mvp;

// myService is Contract
//在 interface myService 是用來讓Presenter,View,Modle互相溝通。
//並在 interface myService新增三個interface,並新增他們的方法。
public interface Contract {
    interface view{
        void loginError();
        void showUserName(String username);
    }
    interface presenter{
        void getLoginData(String password,String account);
    }
    interface modle{
        String getUserName();
    }
}
要注意MainActivity必須implements剛剛寫的Contract裡View的部分
public class MainActivity extends AppCompatActivity implements Contract.view
package com.example.login_mvp;

import androidx.appcompat.app.AppCompatActivity;

import android.content.Context;
import android.os.Bundle;
import android.view.View;
import android.widget.Button;
import android.widget.EditText;
import android.widget.Toast;

//在後面加入implements 繼承myService的方法
//這裡是MVP架構裡 View的部分
public class MainActivity extends AppCompatActivity implements Contract.view{
    //設定變數
    private EditText account_edittext;
    private EditText password_edittext;
    private Button sent_button;
    private Context context = this;
    private Presenter presenter;
    @Override
    protected void onCreate(Bundle savedInstanceState) {
        super.onCreate(savedInstanceState);
        setContentView(R.layout.activity_main);
        ById(); //綁定元件
        sentOnClick(); //按下登入按鈕做動作
    }
    //當按下送出按鈕,拿取password和account給presente。
    public void sentOnClick(){
        sent_button.setOnClickListener(new View.OnClickListener() {
            @Override
            public void onClick(View view) {
                String account = account_edittext.getText().toString();
                String password = password_edittext.getText().toString();
                presenter.getLoginData(password,account);
            }
        });

    }
    //當presente判斷帳密輸入錯誤,呼叫此方法。
    @Override
    public void loginError(){
        Toast.makeText(context,"帳密錯誤",Toast.LENGTH_LONG).show();
    }
    //當presente判斷帳密輸入正確,呼叫此方法。
    @Override
    public void showUserName(String userName){
        Toast.makeText(context,"歡迎登入"+userName,Toast.LENGTH_LONG).show();
    }
    //綁定元件
    public void ById(){
        account_edittext = (EditText) findViewById(R.id.edit_username);
        password_edittext = (EditText) findViewById(R.id.edit_password);
        sent_button = (Button) findViewById(R.id.main_button);
        //New出Presenter,並把自己丟入。
        presenter = new Presenter(this);
    }

}
注意:這裡必須implements Contract裡的Presnter的部分
public class Presenter implements Contract.presenter
package com.example.login_mvp;

import android.util.Log;

//這裡是MVP架構裡 Presenter的部分
public class Presenter implements  Contract.presenter{
    //設定變數
    private Contract.view callBake;
    private String userName;
    private Modle modle;
    public Presenter(Contract.view view){
        //接收view
        this.callBake = view;
        //New出Modle,並把自己丟入。
        modle = new Modle(this);
    }
    @Override
    public void getLoginData(String password, String account){
        //登入正確,
        if(password.equals("0000") && account.equals("0000")) {
            //到Modle拿取登入人員資料。
            userName = modle.getUserName();
            //再傳回view,叫view更新畫面。
            callBake.showUserName(userName);
        }
        //登入錯誤。
        else
            callBake.loginError();
    }
}
注意:這裡一樣要implements Contract.modle
public class Modle implements Contract.modle
package com.example.login_mvp;

//這裡是MVP架構裡 modle的部分
public class Modle implements Contract.modle{
    private Contract.presenter callBake;
    //建立建構元
    public Modle(Contract.presenter presenter){
        //接收presenter
        this.callBake = presenter;
    }
    //回傳登入人員資料
    @Override
    public String getUserName(){
        return "BingBing";
    }
}
總結
MVP的關鍵概念是,視圖和模型之間的通信通過Presenter進行,這種分離允許開發人員更容易進行單元測試,因為業務邏輯與UI分開。此外,MVP還具有以下優點:
易於維護:模型、視圖和Presenter之間的分離使代碼更容易維護和理解。每個部分的職責清晰明確。
可測試性:由於業務邏輯與UI分開,因此可以更容易編寫單元測試來驗證Presenter和模型的行為。
可重用性:Presenter通常不依賴於特定的UI框架或庫,因此可以在不同的項目中重複使用。
支持多平台開發:MVP不僅適用於Android應用程序開發,還可以用於其他GUI應用程序,如桌面應用程序和Web應用程序。
總之,MVP是一種有助於提高代碼結構和可維護性的軟體架構模式,特別適用於需要清晰分離UI和業務邏輯的應用程序。它將應用程序分為三個主要組件:Model、View和Presenter,以支持更好的代碼組織和可測試性。


 iThome鐵人賽