承接上篇,今天我們繼續來抓取氣象資料。
我們進入一般氣象資料的詳細頁面,會看到下圖,點選我們要的API。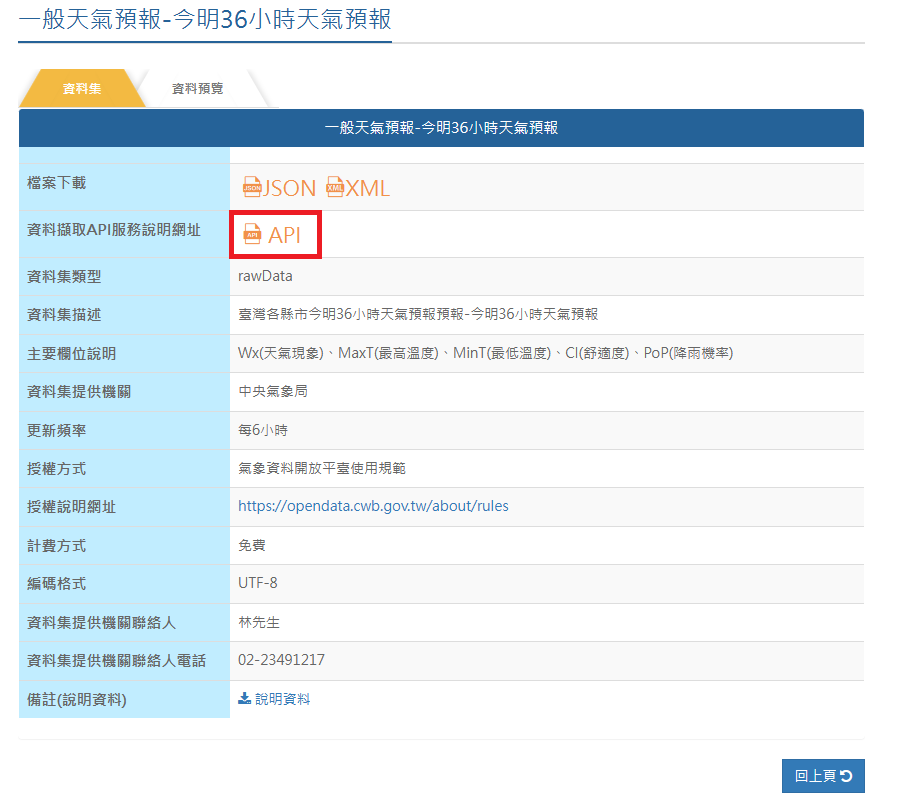
再來會到這個頁面,點選try it out後就可以填入訊息了。這裡紅框的部分就是自己的金鑰。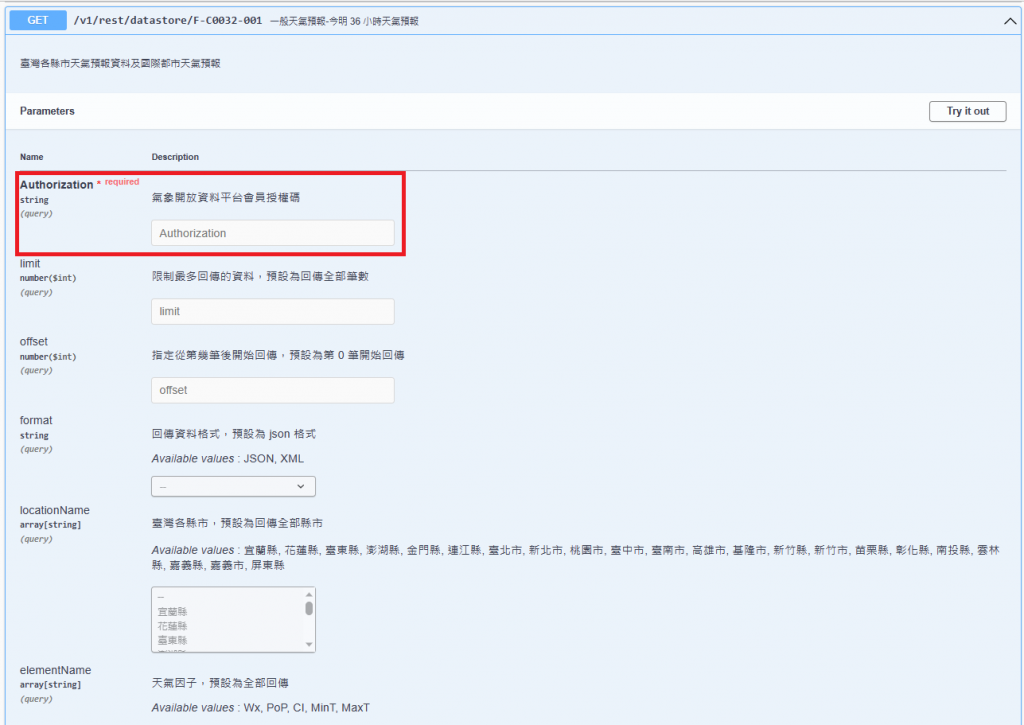
再來會用到的就是locationName,因為我們希望可以選擇查閱哪個城市。還有elementName,主要用到MinT和MaxT兩個天氣因子。都先不用選擇,按下Execute。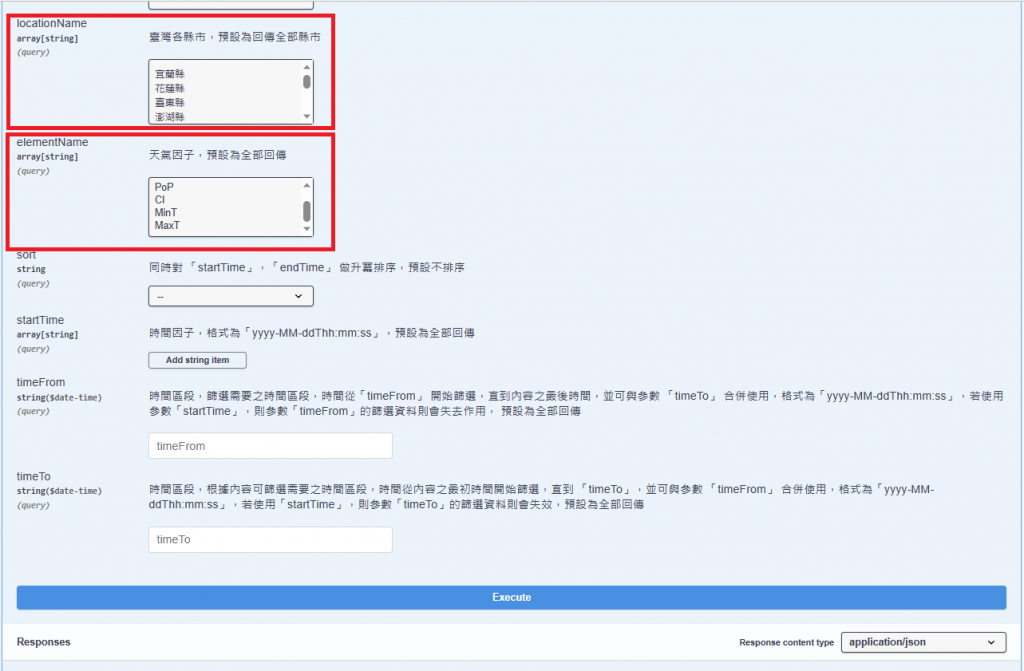
我們會看到如下的json檔,待會要從其中抓取我們需要的資訊。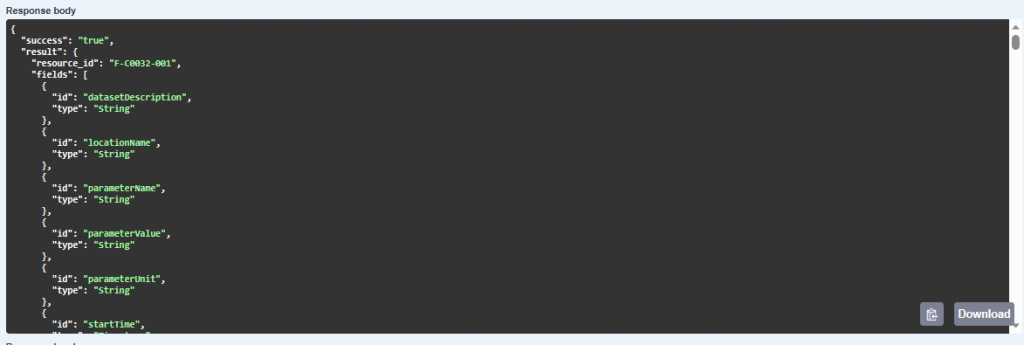
至於抓取的方法,我們先創建一個class,它定義我們所需要的各種數據的名稱,目的是為了連線後從氣象網站接收資訊存入這個class的變數,至於如何定義,這裡就不再贅述。下面我們看看例子:
MyResponse.class:
public class MyResponse {
    public Records records;
    public class Records
    {
        public List<Location> location;

        public class Location
        {
            public List<WeatherElement> weatherElement;

            public class WeatherElement
            {
                public List<Time> time;
                public class Time
                {
                    public Parameter parameter;
                    public class Parameter
                    {
                        public String parameterName;
                        public String parameterUnit;
                    }
                }
            }
        }
    }
}
這裡我們抓取Records中的Location,以及WeatherElement中的Time中的Parameter中的parameterName及parameterUnit,共三個數據。
主程式的部分,分為填入元素為MaxT,與MinT時的情況。
MainActivity:
public class MainActivity extends AppCompatActivity {

    //基底網址
    private static final String base="https://opendata.cwb.gov.tw/api/v1/rest/datastore/";
    //金鑰
    private static final String author="填入金鑰";
    //想要抓取的元素名稱
    private static final String element1="MaxT",element2="MinT";
    //定義變數
    private Button bts;
    private TextView tvMax,tvMin;
    private String location=city[0];
    //定義下拉式選單的內容
    static final String[] city=
            {"宜蘭縣","花蓮縣","臺東縣","澎湖縣","金門縣","連江縣","臺北市","新北市","桃園市","臺中市","臺南市",
                    "高雄市","基隆市","新竹縣","新竹市","苗栗縣","彰化縣","南投縣","雲林縣","嘉義縣","嘉義市","屏東縣"};
    static final String[] array1= {element1,element2};
    @Override
    protected void onCreate(Bundle savedInstanceState) {
        super.onCreate(savedInstanceState);
        setContentView(R.layout.activity_main);

        //請求資料前置
        Retrofit retrofit = new Retrofit.Builder()
                .baseUrl(base)
                .addConverterFactory(GsonConverterFactory.create())
                .build();

        //連接weather接口
        weather myAPIService = retrofit.create(weather.class);

        //下拉式選單設定
        Spinner spinner1;
        spinner1 = (Spinner) findViewById(R.id.spinner);
        ArrayAdapter<CharSequence> adapter = new ArrayAdapter(this,android.R.layout.simple_spinner_item,city);
        spinner1.setAdapter(adapter);

        //定義button,textview
        bts=findViewById(R.id.search);
        tvMax=findViewById(R.id.tvMax);
        tvMin=findViewById(R.id.tvMin);

        //下拉式選單監聽器
        spinner1.setOnItemSelectedListener(new AdapterView.OnItemSelectedListener() {
            @Override
            public void onItemSelected(AdapterView<?> adapterView, View view, int i, long l) {
                location=city[i];
            }

            @Override
            public void onNothingSelected(AdapterView<?> adapterView) {
            }
        });

        //請求資料,button按下時分別印出MaxT時,與MinT時MyResponse定義的變數
        bts.setOnClickListener(new View.OnClickListener() {
            @Override
            public void onClick(View view) {
                for(int j=0;j<2;j++)
                {
                    if(j==0)
                    {
                        myAPIService.getweather(author, location, array1[j]).enqueue(new Callback<MyResponse>() {
                            @Override
                            public void onResponse(Call<MyResponse> call, Response<MyResponse> response) {
                                Log.d("title", "請求成功");

                                tvMax.setText(location + "今日最高溫度:" + response.body().records.location.get(0).weatherElement.get(0).time.get(0).parameter.parameterName
                                        + '°' + response.body().records.location.get(0).weatherElement.get(0).time.get(0).parameter.parameterUnit);
                            }

                            @Override
                            public void onFailure(Call<MyResponse> call, Throwable t) {
                                Log.d("title", "請求失敗");
                            }
                        });
                    }
                    else if(j==1)
                    {
                        myAPIService.getweather(author, location, array1[j]).enqueue(new Callback<MyResponse>() {
                            @Override
                            public void onResponse(Call<MyResponse> call, Response<MyResponse> response) {
                                tvMin.setText(location + "今日最低溫度:" + response.body().records.location.get(0).weatherElement.get(0).time.get(0).parameter.parameterName
                                        + '°' + response.body().records.location.get(0).weatherElement.get(0).time.get(0).parameter.parameterUnit);
                            }

                            @Override
                            public void onFailure(Call<MyResponse> call, Throwable t) {
                            }
                        });
                    }
                }
            }
        });
    }
}
接下來,我們要設定weather接口,直接創建一個interface,裡面分別存放三種主要元素。有沒有發現,這三種元素就是之前用紅框標起來的三格,也就是說,這個interface會代替我們將資料填入網站。
weather:
public interface weather {
    @GET("F-C0032-001")
    Call<MyResponse> getweather(
            @Query("Authorization") String myauthorization,
            @Query("locationName") String mylocationName,
            @Query("elementName") String myelementName);
}
最後就剩下layout介面了,簡單設計一下,記得元件id要配合主程式。
activity_main.xml:
<?xml version="1.0" encoding="utf-8"?>
<androidx.constraintlayout.widget.ConstraintLayout xmlns:android="http://schemas.android.com/apk/res/android"
    xmlns:app="http://schemas.android.com/apk/res-auto"
    xmlns:tools="http://schemas.android.com/tools"
    android:layout_width="match_parent"
    android:layout_height="match_parent"
    android:orientation="vertical"
    tools:context=".MainActivity">

    <TextView
        android:id="@+id/tvMax"
        android:layout_width="200dp"
        android:layout_height="50dp"
        android:text=""
        app:autoSizeTextType="none"
        app:layout_constraintBottom_toBottomOf="parent"
        app:layout_constraintEnd_toEndOf="parent"
        app:layout_constraintHorizontal_bias="0.498"
        app:layout_constraintStart_toStartOf="parent"
        app:layout_constraintTop_toTopOf="parent"
        app:layout_constraintVertical_bias="0.335" />

    <TextView
        android:id="@+id/tvMin"
        android:layout_width="200dp"
        android:layout_height="50dp"
        android:text=""
        app:autoSizeTextType="none"
        app:layout_constraintBottom_toBottomOf="parent"
        app:layout_constraintEnd_toEndOf="parent"
        app:layout_constraintHorizontal_bias="0.497"
        app:layout_constraintStart_toStartOf="parent"
        app:layout_constraintTop_toTopOf="parent"
        app:layout_constraintVertical_bias="0.424" />

    <Spinner
        android:id="@+id/spinner"
        android:layout_width="150dp"
        android:layout_height="50dp"
        app:layout_constraintBottom_toBottomOf="parent"
        app:layout_constraintEnd_toEndOf="parent"
        app:layout_constraintHorizontal_bias="0.498"
        app:layout_constraintStart_toStartOf="parent"
        app:layout_constraintTop_toTopOf="parent"
        app:layout_constraintVertical_bias="0.547" />

    <Button
        android:id="@+id/search"
        android:layout_width="100dp"
        android:layout_height="50dp"
        android:text="搜尋"
        app:layout_constraintBottom_toBottomOf="parent"
        app:layout_constraintEnd_toEndOf="parent"
        app:layout_constraintHorizontal_bias="0.498"
        app:layout_constraintStart_toStartOf="parent"
        app:layout_constraintTop_toTopOf="parent"
        app:layout_constraintVertical_bias="0.65" />
</androidx.constraintlayout.widget.ConstraintLayout>
成品如下: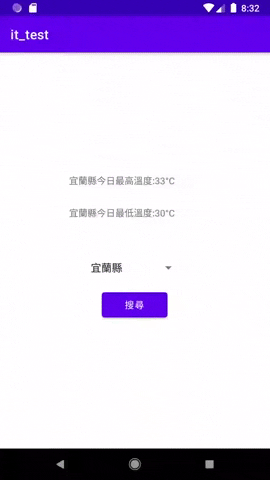
API和retrofit2的應用就到這裡,下一篇文章見~~


 iThome鐵人賽