昨天的文章實作了簡單的 Simple 與 Worker 模式。而接下來將加入「交換機」(exchange)這項元素,讓 producer 在發送訊息到多個 queue 時更方便。本文會介紹 exchange,並進行 queue 的綁定,再實作出「Fanout」與「Direct」模式。
此篇亦轉載到個人部落格。
回顧一下昨天介紹的 Simple 模式。情境是把留言後所發送的「站內通知」與「Email 通知」之功能,切分為一個新服務。其 producer 的程式片段如下。
@Component
public class MessageProducer {

    @Autowired
    private RabbitTemplate rabbitTemplate;

    public void sendNewCommentNotification(CommentMsg comment) {
        rabbitTemplate.convertAndSend("Comment Notification Queue", comment);
    }
}

public class CommentMsg implements Serializable {
    private int postId; // 文章 id
    private int creatorId; // 留言建立者 id
    private String content; // 留言內容

    // getter, setter ...
}
我們使用 RabbitTemplate,將訊息(CommentMsg)直接送至特定名稱的 queue。
假設今天產品功能變多了,並非每個使用情境,都要發送站內通知與 Email 通知這兩種。且團隊因此決定將這兩種通知的功能,細分為兩臺 server(一臺送站內,一臺送 Email)。那就代表這兩個服務各自的 queue,都要接收 CommentMsg 的訊息。
以直覺來想,producer 的程式碼會該寫成如下。
public void sendNewCommentNotification(CommentMsg comment) {
    rabbitTemplate.convertAndSend("Comment Internal Notification Queue", comment);
    rabbitTemplate.convertAndSend("Comment Email Notification Queue", comment);
}
如此一來,我們可察覺一個問題。每個服務都有自己的 queue,如果有多個服務想接收同樣的訊息,則 producer 就要為了它們,撰寫出數行 RabbitTemplate.convertAndSend 的程式,以傳送訊息到不同 queue。
交換機能夠消除 producer 與 queue 之間的依賴。將 exchange 加入 MQ 的架構後,producer 只要傳送訊息到 exchange,它就會幫忙轉發到 queue。而 queue 必須事先與 exchange 綁定好。官方教學的架構圖如下。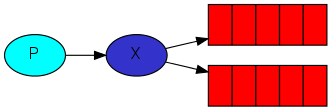
以生活情境來比喻。學校有重要事項傳遞給同學們,若召集所有相關的同學到現場,會很麻煩。於是校方選擇將公告送至各科系的辦公室。而系辦再依據公告內容的適用對象,放到「班級櫃」。班級幹部有空會來領取公告,並協助執行。
從這個情境來看,校方是 producer,而「召集相關的同學」相當於寫出好幾行發送訊息到 queue 的程式。至於系辦則是 exchange,會負責轉發訊息,看是要給特定班級、年級,還是整個科系都要通知。而存放公告的班級櫃是 queue;拿取公告的班級幹部是 consumer。
本文範例程式的情境是,系統在發送「文章 / 商品有新留言」的通知給使用者時,可分為「站內通知」與「Email 通知」。且這兩項功能被切分為兩個服務,運行在不同 server 上。
當業務邏輯要發送通知時,會將需要的資料包裝成訊息(message),讓 producer 送往 MQ,由 consumer 接收後處理,達到非同步工作的效果。
為避免打錯字,以下先準備一些常數,用來代表 Spring bean、queue 與 exchange 的名稱。
public class Constants {
    public static final String BEAN_INTERNAL_NOTIFICATION_QUEUE = "internalNotification";
    public static final String BEAN_EMAIL_NOTIFICATION_QUEUE = "emailNotification";
    public static final String BEAN_COMMENT_NOTIFICATION_FANOUT_EXCHANGE = "commentNotificationFanoutExchange";
    public static final String BEAN_COMMENT_NOTIFICATION_DIRECT_EXCHANGE = "commentNotificationDirectExchange";

    public static final String NAME_INTERNAL_NOTIFICATION_QUEUE = "Comment Internal Notification Queue";
    public static final String NAME_EMAIL_NOTIFICATION_QUEUE = "Comment Email Notification Queue";
    public static final String NAME_COMMENT_NOTIFICATION_FANOUT_EXCHANGE = "Comment Notification Fanout Exchange";
    public static final String NAME_COMMENT_NOTIFICATION_DIRECT_EXCHANGE = "Comment Notification Direct Exchange";
}
以下是在程式中進行 queue 的配置。
@Configuration
public class RabbitConfig {

    @Bean(name = BEAN_INTERNAL_NOTIFICATION_QUEUE)
    public Queue internalNotificationQueue() {
        return new Queue(NAME_INTERNAL_NOTIFICATION_QUEUE);
    }

    @Bean(name = BEAN_EMAIL_NOTIFICATION_QUEUE)
    public Queue emailNotificationQueue() {
        return new Queue(NAME_EMAIL_NOTIFICATION_QUEUE);
    }
}
由於本文加入了「exchange」與「routingKey」的概念,因此請先在訊息的 model 類別添加對應的欄位。還可攜帶其他想傳給 consumer 的資料。
public class CommentMsg implements Serializable {
    private String content;
    private String mode; // fanout | direct
    private String routingKey;

    // getter, setter ...
}
其中 mode 欄位代表 producer 要以何種模式執行(Fanout 或 Direct),用來判斷要將訊息送給哪一個 exchange。而 rountingKey 欄位則是讓 exchange 判斷要送到哪些 queue。
關於 consumer 的邏輯,筆者只取用 CommentMsg 訊息的其中一個欄位,印出簡單的 log。
@Component
public class InternalNotificationConsumer {
    private static final Logger LOGGER =
            LoggerFactory.getLogger(InternalNotificationConsumer.class);

    @RabbitListener(queues = NAME_INTERNAL_NOTIFICATION_QUEUE)
    public void processMsg(@Payload CommentMsg comment) {
        LOGGER.info("站內通知:{}", comment.getContent());
    }
}

@Component
public class EmailNotificationConsumer {
    private static final Logger LOGGER =
            LoggerFactory.getLogger(EmailNotificationConsumer.class);

    @RabbitListener(queues = NAME_EMAIL_NOTIFICATION_QUEUE)
    public void processMsg(@Payload CommentMsg comment) {
        LOGGER.info("Email 通知:{}", comment.getContent());
    }
}
在 producer 呼叫 RabbitTemplate.convertAndSend 方法時,請選用正確的 overloading 方法。第一個參數是指定 exchange 名稱;第二個參數叫做 routingKey,在 Direct 模式中會用來指定 queue,而 Fanout 模式不會用到。
@Component
public class MessageProducer {

    @Autowired
    private RabbitTemplate rabbitTemplate;

    public void sendNewCommentNotification(CommentMsg comment) {
        String exchange;
        String routingKey;
        if ("direct".equalsIgnoreCase(comment.getMode())) {
            exchange = NAME_COMMENT_NOTIFICATION_DIRECT_EXCHANGE;
            routingKey = comment.getRoutingKey();
        } else {
            exchange = NAME_COMMENT_NOTIFICATION_FANOUT_EXCHANGE;
            routingKey = "";
        }

        rabbitTemplate.convertAndSend(exchange, routingKey, comment);
    }
}
為了進行測試,請在 controller 準備 API,藉此呼叫 producer 發送訊息。
@RestController
public class MessageController {

    @Autowired
    private MessageProducer producer;

    @PostMapping("/comment")
    public void notifyNewComment(@RequestBody CommentMsg comment) {
        producer.sendNewCommentNotification(comment);
    }
}
以上就是練習本文兩個模式的前置作業了。
了解 exchange 的概念後,讓我們繼續以「發送通知」的情境為例子,認識「Fanout」模式。該模式是指將訊息發送給所有與該 exchange 綁定的 queue,也就是「廣播」。
Fanout 這個單字,有「發散」的意思。
請建立 exchange,只要在 FanoutExchange 的建構子傳入名稱即可。此名稱將會在 producer 傳送訊息時被指定。
以下是配置程式,綁定時需要建立 Binding 元件。
@Configuration
public class RabbitConfig {
    // ...

    @Bean(name = BEAN_COMMENT_NOTIFICATION_FANOUT_EXCHANGE)
    public FanoutExchange commentNotificationFanoutExchange() {
        return new FanoutExchange(NAME_COMMENT_NOTIFICATION_FANOUT_EXCHANGE);
    }

    @Bean
    public Binding bindInternalNotificationQueueToFanoutExchange(
            @Qualifier(BEAN_INTERNAL_NOTIFICATION_QUEUE) Queue queue,
            @Qualifier(BEAN_COMMENT_NOTIFICATION_FANOUT_EXCHANGE) FanoutExchange exchange
    ) {
        return BindingBuilder.bind(queue).to(exchange);
    }

    @Bean
    public Binding bindEmailNotificationQueueToFanoutExchange(
            @Qualifier(BEAN_EMAIL_NOTIFICATION_QUEUE) Queue queue,
            @Qualifier(BEAN_COMMENT_NOTIFICATION_FANOUT_EXCHANGE) FanoutExchange exchange
    ) {
        return BindingBuilder.bind(queue).to(exchange);
    }
}
過程中注入了剛剛建立的 queue 與 exchange 元件,並透過 BindingBuilder 分別完成兩個 queue 的綁定。
這些「元件」並不是要拿來注入到其他地方的,而是會被 RabbitMQ 的 library 讀取,所以在 RabbitMQ 的服務中才能完成 queue 和 exchange 的建立與綁定。
可發送請求到第二節準備的 API。
POST http://localhost:8080/comment
{
    "content": "這是 Fanout 模式,訊息會送給所有 queue!",
    "mode": "fanout",
    "routingKey": null
}
以上面的請求為例,每個綁定在 exchange 的 queue,其對應的 consumer 都能收到訊息,這就是 Fanout 模式。
前面的 Fanout 模式會將訊息傳送給所有綁定的 queue。而本節的「Direct」模式則是選擇其中一個 queue。
在 Direct 模式,producer 會在發送訊息給 exchange 時,指定一個代表 queue 的 key。該 key 會在 queue 一開始綁定到 exchange 時設定好。
以生活情境來比喻,就像向郵局申請的「郵政信箱」。如果自己或家人有服兵役,可能會有點印象,寄信到所屬單位時,收件地址會寫「XX郵政幾號」,例如「桃園龍潭郵政91004號」。而這個郵政信箱的代號,就相當於 queue 的 key。
這麼做的好處是,當 queue 的名稱改變了,producer 的程式並不需要做調整,因為它是對著 key 發送訊息。
請建立 exchange,只要在 DirectExchange 的建構子傳入名稱即可。以下是配置程式。
@Configuration
public class RabbitConfig {
    // ...

    @Bean(name = BEAN_COMMENT_NOTIFICATION_DIRECT_EXCHANGE)
    public DirectExchange commentNotificationDirectExchange() {
        return new DirectExchange(NAME_COMMENT_NOTIFICATION_DIRECT_EXCHANGE);
    }

    @Bean
    public Binding bindInternalNotificationQueueToDirectExchange(
            @Qualifier(BEAN_INTERNAL_NOTIFICATION_QUEUE) Queue queue,
            @Qualifier(BEAN_COMMENT_NOTIFICATION_DIRECT_EXCHANGE) DirectExchange exchange
    ) {
        return BindingBuilder.bind(queue).to(exchange).with("Internal");
    }

    @Bean
    public Binding bindEmailNotificationQueueToDirectExchange(
            @Qualifier(BEAN_EMAIL_NOTIFICATION_QUEUE) Queue queue,
            @Qualifier(BEAN_COMMENT_NOTIFICATION_DIRECT_EXCHANGE) DirectExchange exchange
    ) {
        return BindingBuilder.bind(queue).to(exchange).with("Email");
    }
}
由於使用的是 DirectExchange,因此 BindingBuilder 會要求我們提供叫做 routingKey 的參數。於是這裡將 queue 的 key 給傳入。
可發送請求到第二節準備的 API。
POST http://localhost:8080/comment
{
    "content": "這是 Direct 模式,只會發送站內通知!",
    "mode": "direct",
    "routingKey": "Internal"
}
以上面的請求為例,會發送訊息給 key 為「Internal」的 queue。也就是只有「Comment Internal Notification Queue」這個 queue 會收到訊息,並由 InternalNotificationConsumer 印出 log。
Ref:
[DATA] 訊息佇列 02 - RabbitMQ 簡介與 5 種設計模式
SpringBoot RabbitMQ 七種工作模式入門
本文的完成專案:
https://github.com/ntub46010/SpringBootUsingRabbitMQ/tree/fanout-and-direct-pattern
今日文章到此結束!
最後推廣一下自己的部落格,我是「新手工程師的程式教室」的作者,請多指教