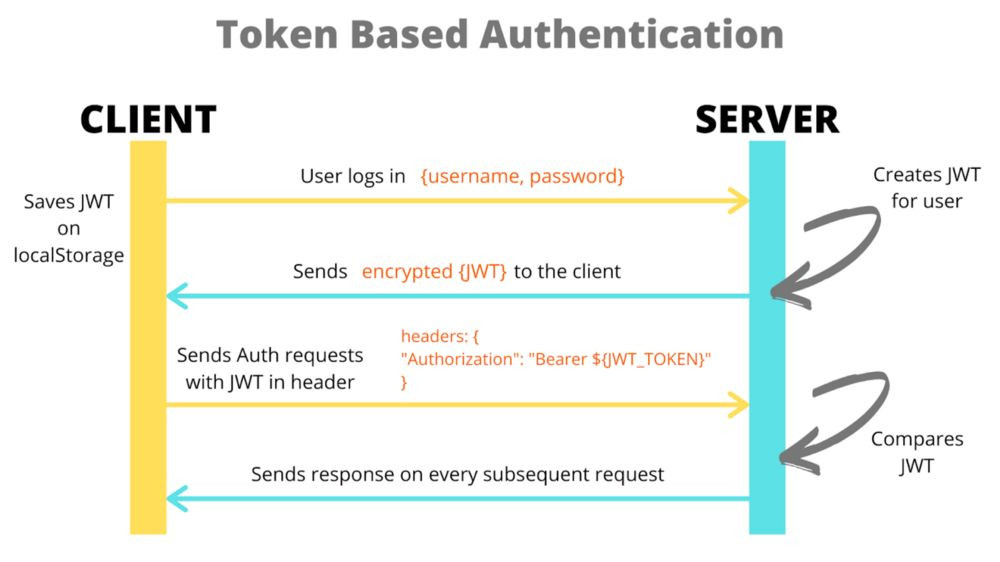
還記得我們在[Day11] 登入、註冊API開發和HTTP Authentication(JWT)有介紹過整個登入到授權的流程。
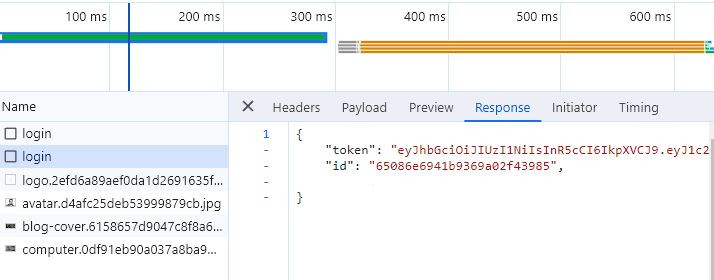
先前已經開發完登入的功能,當呼叫login api成功後,會收到使用者的資訊。

在開發儲存前,先簡單說一下我們要把JWT存放在哪個web storage(cookie、localstorage、sessionstorage)裡。
考慮到安全性會建議存放在
Cookie內(因為Cookie可以控制過期時間),詳情請見Token 放 localStorage?sessionStorage?還是 Cookie?
但由於這裡想快速實作出功能,所以先存放至localstorage中。
在把JWT儲存到localstorage裡前,因為回傳的是一個JSON,Web Storage 只能儲存字串,所以要透過JSON.stringfy來轉換。
回傳資料:
{
   "token": 'eyJhbGciOiJIUzI1NiIsInR5cCI6IkpXVCJ9...',
   "id": '6512e8482186f21378ab5d34'
}
//Login.js

 const handleSubmit = (event) => {
    if (!formIsValid) return;

    event.preventDefault();

    const userData = {
      email,
      password,
    };

    api
      .post("/auth/login", userData)
      .then((result) => {
        //將回傳的token存放到localstorage
        localStorage.setItem("user", JSON.stringify(result));
      })
      .catch((error) => {
        setErrorMsg('Login failed. Your email or password is incorrect.')
        console.error(error);
      });
  };
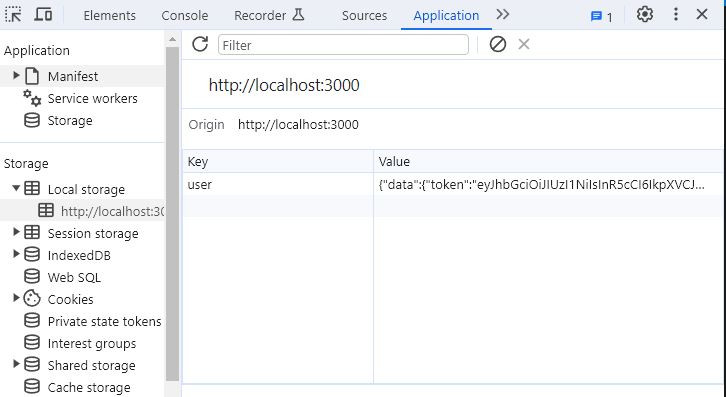
當我們完成登入後就能在localstorage裡面看到儲存的使用者資訊了
當使用者想要訪問一個受到保護的資源(例如API端點)時,他們必須在其請求中帶上JWT,通常是放在HTTP的Authorization標頭中。
我們要在每次呼叫API時在Authorization header都加上JWT,讓後端確認是不是有被授權存取資料。
回到api.js,加上攔截器axios的interceptor
//api.js
import axios from 'axios';

const api = axios.create({
  baseURL: 'http://localhost:5200/api',
});

//因為登入和註冊路由不需要攜帶jwt,所以將他們排除
const EXCLUDED_URLS = ['/auth/login', '/auth/register'];


// 使用request攔截器(interceptor)為每個request 加上 token
api.interceptors.request.use((config) => {

  if (!EXCLUDED_URLS.includes(config.url)) {
    // 從 localStorage 中獲取使用者資訊
    const user = JSON.parse(localStorage.getItem('user'));
    // 使用 && 運算符,檢查 user 和 user.data 是否存在
    const token = user && user.data && user.data.token;
    // 如果 token 存在,
    // 則將他加到到request header的 Authorization 屬性中
    if (token) {
      config.headers['Authorization'] = 'Bearer ' + token;
    }
  }
  // 回傳更新後的配置
  return config;
}, (error) => {
  return Promise.reject(error);
});

export default api;
經過這樣處理後,當我們之後呼叫api時就能自動帶上JWT了。
本次程式碼我放在這github
