本次的程式碼與目錄結構可以參考 FastAPI Tutorial : Day21 branch
我們從 Day17 到 Day20 完成整個 Oauth2 實例的實作
今天會進入 測試 的章節
我們會使用與 FastAPI 整合很好的 pytest 來進行測試
我們先為專案安裝 pytest 與 pytest-sugar 這兩個套件
前者是測試框架,後者是讓測試結果更好閱讀的套件。
再加上 pytest-asyncio 這個套件,讓我們可以在測試中使用 async function
而 httpx 則是用來模擬 http request 的套件
poetry add pytest
poetry add pytest-asyncio
poetry add httpx
poetry add pytest-sugar
先建立一個 tests 目錄
並加上一下初始檔案
mkdir tests
touch tests/__init__.py
touch tests/pytest.ini
touch tests/conftest.py
touch tests/app.py
touch tests/test_user.py
pytest.ini 是 pytest 的設定檔
可以讓我們在執行 pytest 時,自動帶入一些參數
[pytest]
addopts = -v --disable-warnings
-v : 顯示詳細的測試結果--disable-warnings : 關閉警告訊息conftest.py 是 pytest 中一個特殊的檔案
可以讓我們在測試中使用一些共用的設定
我們原先跑 server 的 run.py 中
有加上 argparse 的設定來選擇要跑哪個環境、PORT、DB 等等
在 conftest.py 中,我們也可以加上 arguments 的設定
tests/conftest.py
def pytest_addoption(parser):
    parser.addoption("--prod",action="store_true", help="Run the server in production mode.")
    parser.addoption("--test",action="store_true", help="Run the server in test mode.")
    parser.addoption("--dev",action="store_true", help="Run the server in development mode.")
    parser.addoption("--sync",action="store_true", help="Run the server in Sync mode.")
    parser.addoption("--db", help="Run the server in database type.",choices=["mysql","postgresql"], default="postgresql")
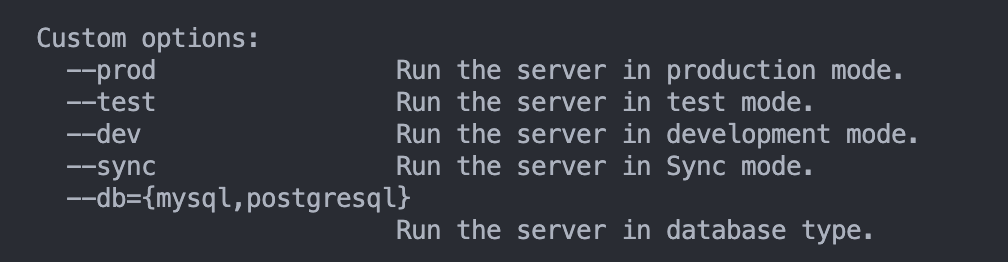
只需要在 conftest.py 中的 pytest_addoption 中
為 parser 加上我們需要的 arguments
就可以透過 pytest 的 --help 來看到這些 arguments
poetry run pytest --help
因為我們原先的 FastAPI app 是在 main.py 中
不是在 tests 目錄中
如果照樣 import main.py 來使用 FastAPI app
會跳出
ImportError: attempted relative import beyond top-level package
的錯誤
所以我們需要在 tests 目錄中建立一個 app.py
作為測試用的 FastAPI app
與原本 main.py 一樣,我們需要載入環境變數
剛剛我們在 conftest.py 中加入了 --prod、--test、--dev 這三個 arguments
那我們要如何在 pytest 中使用這些 arguments 呢?
我們可以透過 pytest 的 request 來取得這些 arguments
並使用 request.config.getoption 來取得 arguments 的值
tests/conftest.py
import os
import pytest_asyncio
from dotenv import load_dotenv

@pytest_asyncio.fixture(scope="session")
async def dependencies(request):
    args = request.config

    if args.getoption("prod"):
        load_dotenv("../setting/.env.prod")
    elif args.getoption("test"):
        load_dotenv("../setting/.env.test")
    else:
        load_dotenv("../setting/.env.dev")

    if args.getoption("sync"):
            os.environ["RUN_MODE"] = "SYNC"
    else:
        os.environ["RUN_MODE"] = "ASYNC"

    os.environ["DB_TYPE"] = args.getoption("db")
    print("DB_TYPE",os.getenv("DB_TYPE"))
這邊因為是使用 async function
所以需要使用 pytest_asyncio 來建立 fixture
pytest 中的 fixturepytest 中的 fixture 可以讓我們在測試中共用一些資源
有點像是 FastAPI 中的
Depends
都有一點 Dependency Injection 的感覺pytest:fixturequick example
pytest 中的 fixture 有這幾種 scope
function : 每個測試都會執行一次class : 每個測試類別都會執行一次module : 每個測試 module 都會執行一次session : 整個測試會執行一次而剛剛的 dependencies 就是一個 session scope 的 fixture 例子
因為只會在 建立測試 FastAPI App 實例的時候才會載入環境變數
要在其他 fixture 中使用 dependencies
只需要在 function 的參數中加入 dependencies 就可以了
@pytest_asyncio.fixture(scope="session")
async def dependencies(request):
    # ...


async def test_that_require_dependencies(dependencies):
    # ...
    os.getenv("DB_TYPE")
以這個例子來說
在 test_that_require_dependencies 這個測試
使用 os.getenv("DB_TYPE") 就可以取得 dependencies 中載入的環境變數 !
pytest 中使用 async function但是如果直接跑剛剛的測試
會跳出以下的錯誤
Failed: ScopeMismatch: You tried to access the function scoped fixture event_loop with a session scoped request object, involved factories:
在 pytest 中,如果要支援 async function
除了要使用 pytest_asyncio 來建立 fixture
如果 pytest_asyncio.fixture 的 scope 是 session
還需要在 conftest.py 中加上以下的設定
tests/conftest.py
# ...
import pytest
import asyncio


# ...

@pytest.fixture(scope="session")
def event_loop():
    loop = asyncio.get_event_loop()
    yield loop
    loop.close()
pytest 入門在 pytest 中
如果要建立一個測試
必須將:
test_ 開頭test_ 開頭Test 開頭在 test function 中
以 assert 來判斷測試是否通過
tests/test_user.py
def user():
    assert 1 == 1

def test_user():
    assert 1 == 1
用 pytest 執行這個測試
poetry run pytest
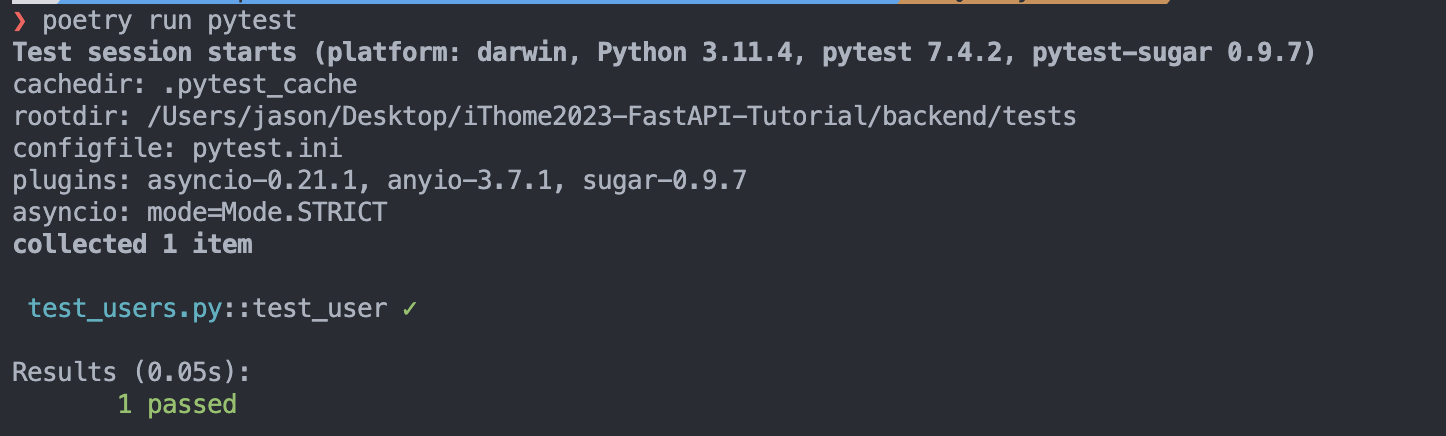
會看到 pytest 會自動找到 tests 目錄中以 test_ 開頭的 .py 檔
並執行這些檔案中以 test_ 開頭的 function
pytest 中共享 fixture接著我們要先建立測試用的 FastAPI app 的 module level fixture
並且要先載入 dependencies fixture
可以把會使用的 fixture 都定義在 conftest.py 中
tests/conftest.py
# ...
from httpx import AsyncClient

# ...

@pytest_asyncio.fixture(scope="module")
async def async_client(dependencies) -> AsyncClient:
    from .app import app
    async with AsyncClient(app=app,base_url="http://test") as client:
        yield client
而特別將 import .app 放在 async_client 的 function body 中
是因為要先等 dependencies 這個 fixture 先載入環境變數後
才能正確的建立 FastAPI app 實例
async_client fixture接著就可以在 test_user.py 中使用 async_client 這個 fixture
tests/test_user.py
async def test_get_users(async_client):
    response = await async_client.get("api/users")
    assert response.status_code == 200
但是會發現顯示 skipped 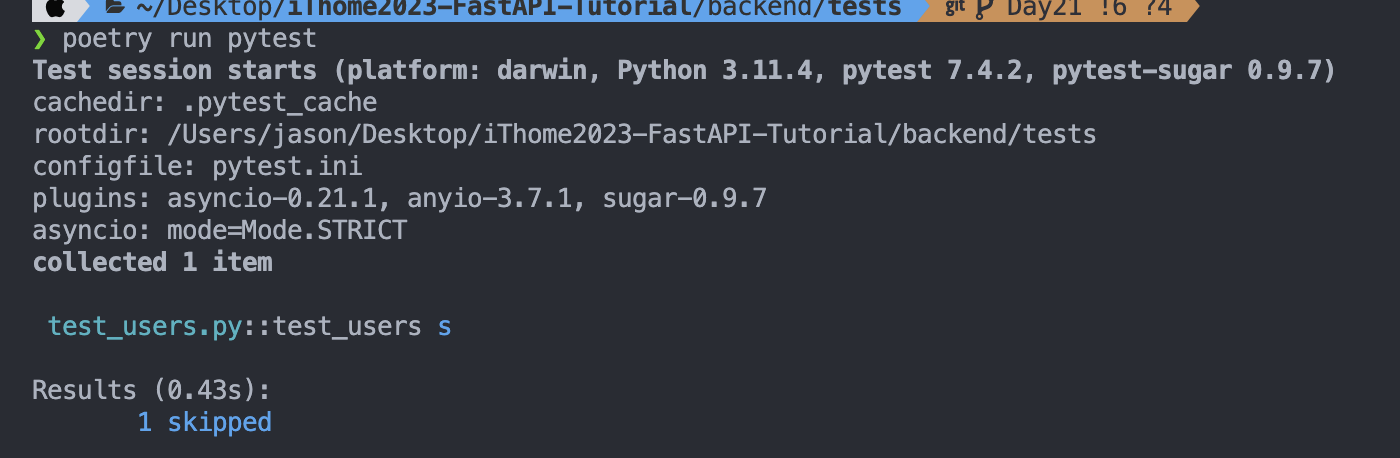
mark.asyncio decorator這是因為 pytest 預設是不支援 async function 的
如過要使用 async test function
必須使用 @pytest.mark.asyncio 來特別標記
tests/test_user.py
@pytest.mark.asyncio
async def test_users(async_client):
    response = await async_client.get("/api/users")
    assert response.status_code == 200
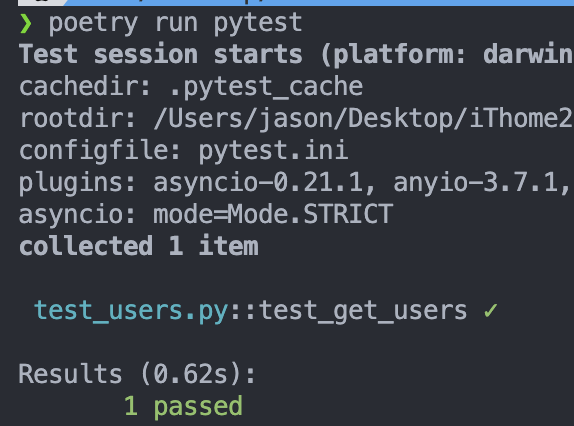
可以看到 test_users.py 中的 test_get_users 通過了測試!
今天我們學習了如何使用 pytest 來進行測試
也學習了如何在 pytest 中使用 async function
以及如何在 pytest 中使用 fixture
明天我們會建立 mock user 來進行測試
並學習如何使用 parametrize 來帶入不同測試資料
pytest by command line ?
pytest : Quick start fixture & fixture scope