今天是開發的Day6,開發重點為:
v-show進行實時確認密碼認證firestore的資料庫
圖片來源:Vue.js + Firebase: Role-Based Authentication & Authorization
這次參考了文章內的流程圖,做出註冊後將使用者資料加進firebase的代碼。
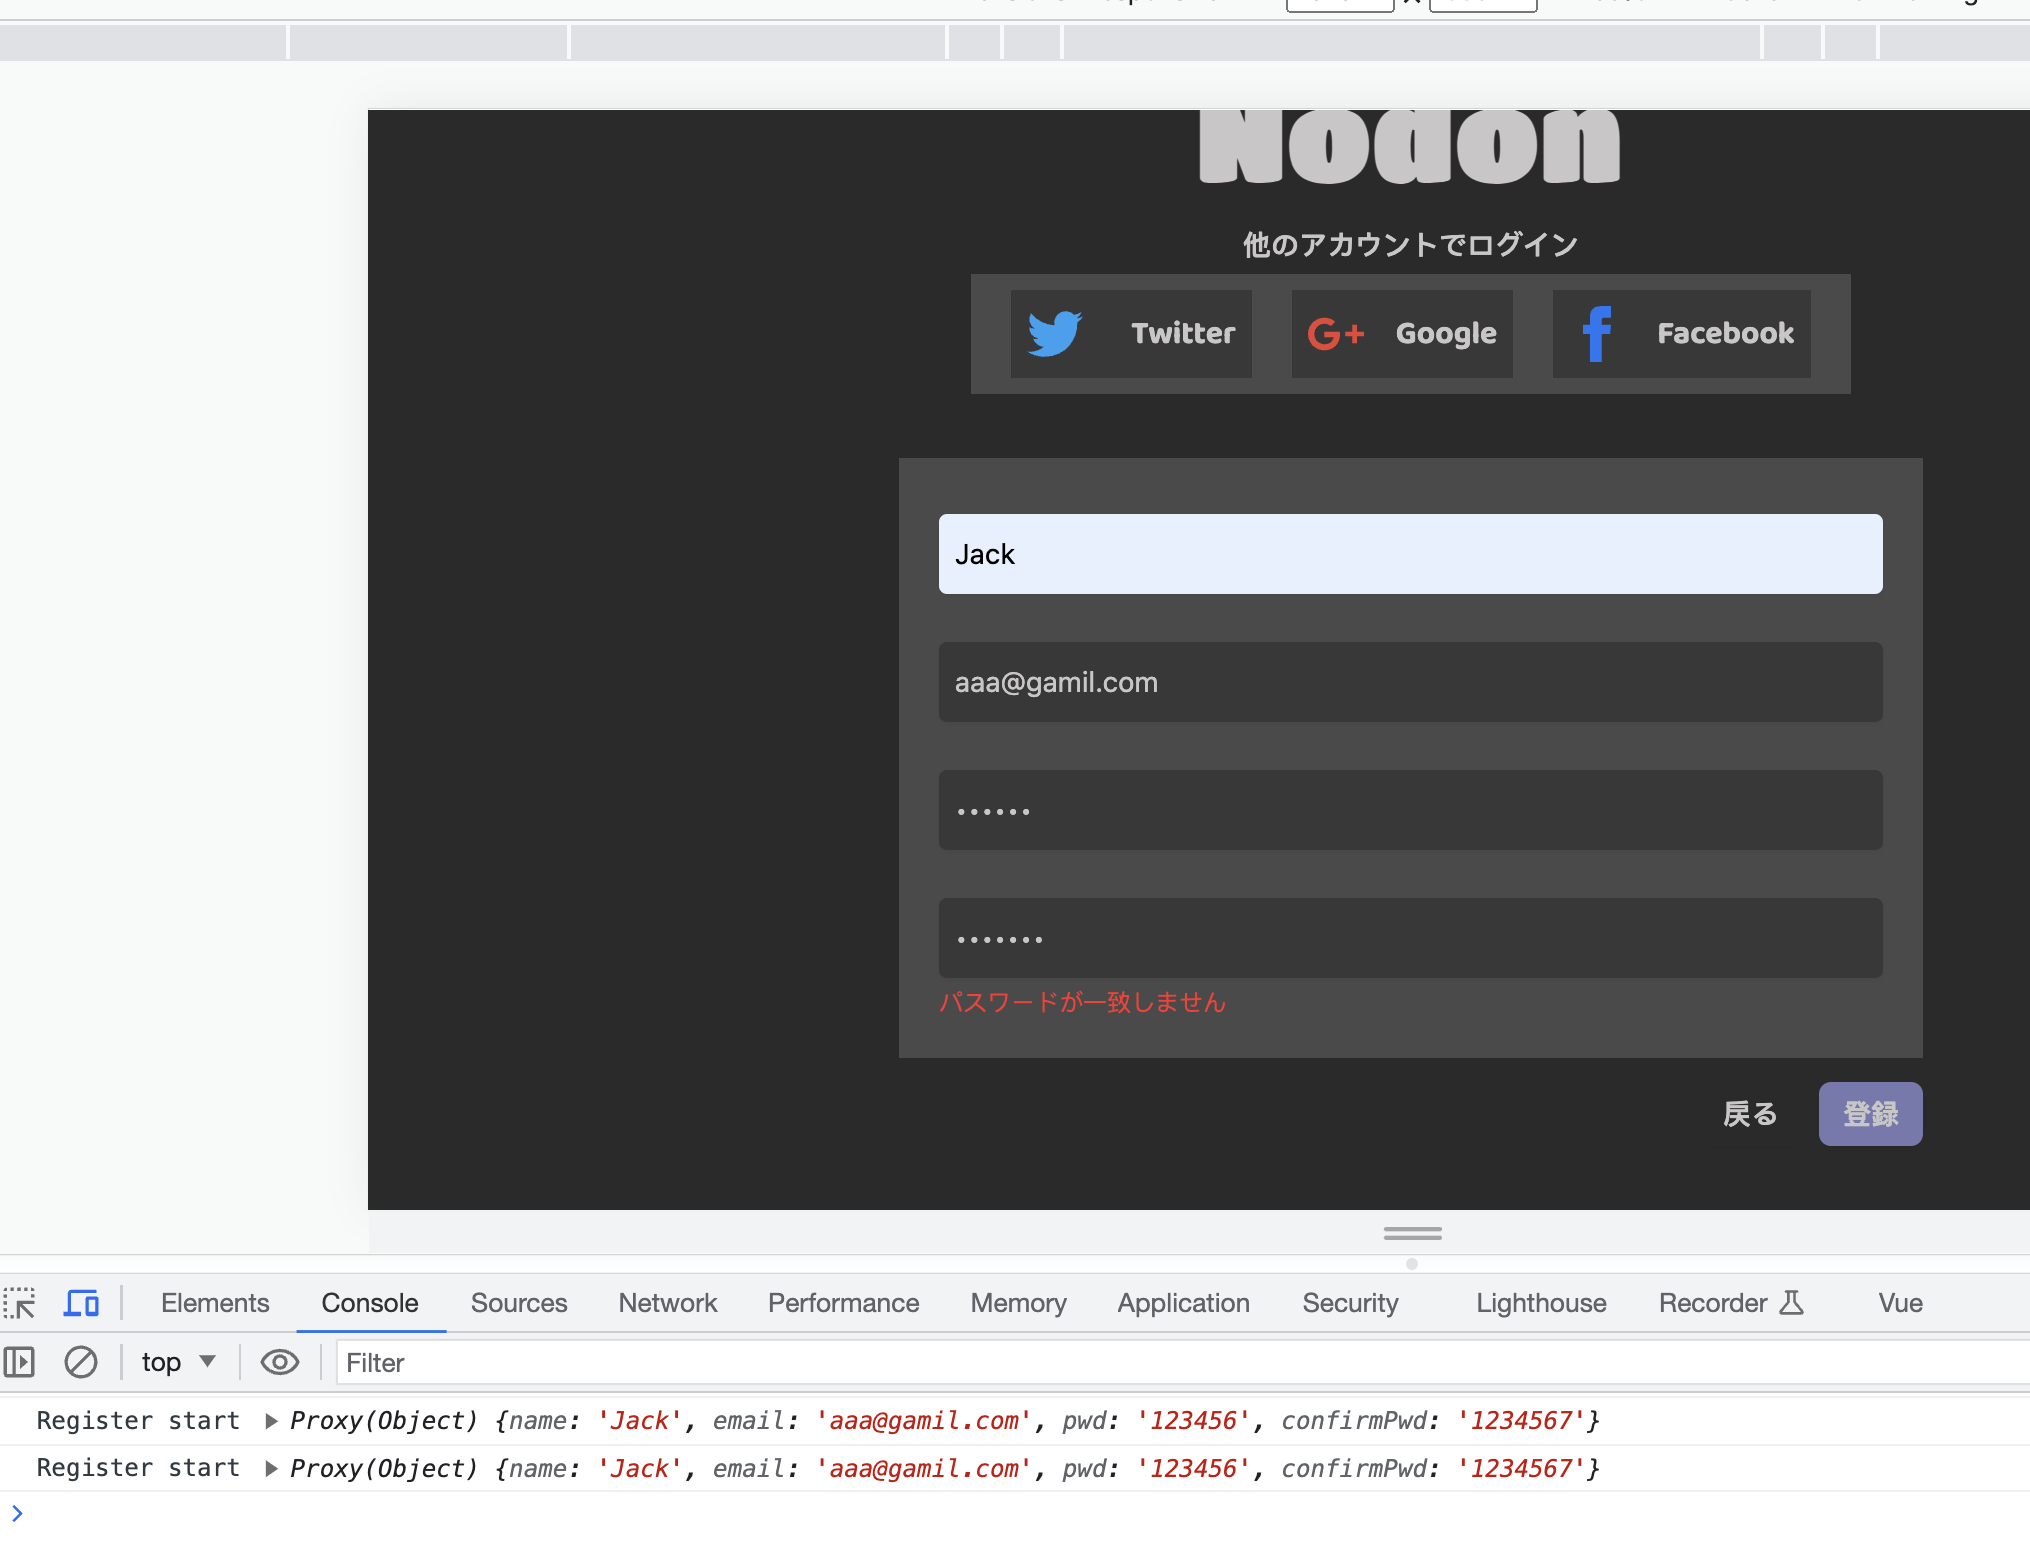
v-show進行實時密碼確認
在兩欄密碼不相同的情況下,會馬上跳出紅字警語提醒者使用者密碼不一致。

輸入相同的情況下,就不會跳出警語。
<template>
    <div class="mt-2">
      <input
        placeholder="パスワード(確認用)"
        v-model="userInfo.confirmPwd"
     <!-- 其他代碼 -->
      />
      <p v-show="!isPasswordMatch" class="mt-1 text-xs text-red-500">パスワードが一致しません(密碼並不一致)</p>
    </div>
</template>

<script setup>
// 其他代碼
const isPasswordMatch = computed(() => {
  return userInfo.value.pwd === userInfo.value.confirmPwd
})
</script>
使用v-show(根據條件顯示或隱藏某個元素)
和computed實時監聽第一次輸入的密碼與第二次的密碼。
v-show?不同之处在于 v-show 会在 DOM 渲染中保留该元素;v-show 仅切换了该元素上名为 display 的 CSS 属性。
v-if 也是惰性的:如果在初次渲染时条件值为 false,则不会做任何事。条件区块只有当条件首次变为 true 时才被渲染。
參考來源:官方文件-條件渲染
v-if:當條件為假時,v-if 會完全從 DOM 中移除元素,而在條件為真時,它會將元素重新插入 DOM。
這意味著如果條件切換頻繁,元素會被多次創建和銷毀,可能會引起性能開銷。
較適合元素在大部分時間都是隱藏的,而且切換時開銷較大的時候。
v-show: 與 v-if 不同,v-show 不會在條件為假時將元素從 DOM 中移除,而是通過 CSS 的 display 屬性來控制元素的可見性。
當條件為真時,元素顯示;當條件為假時,元素隱藏。因此,v-show 在切換時沒有創建和銷毀元素的開銷,但可能會導致在 DOM 中保留較多的元素。
小結:因為錯誤消息的顯示和隱藏是頻繁的操作,故在這個代碼中我使用了v-show。
computed()?讓我們先看官方文件的例子:
<script setup>
import { reactive, computed } from 'vue'

const author = reactive({
  name: 'John Doe',
  books: [
    'Vue 2 - Advanced Guide',
    'Vue 3 - Basic Guide',
    'Vue 4 - The Mystery'
  ]
})

// 一个计算属性 ref
const publishedBooksMessage = computed(() => {
  return author.books.length > 0 ? 'Yes' : 'No'
})
</script>

<template>
  <p>Has published books:</p>
  <span>{{ publishedBooksMessage }}</span>
</template>
我们在这里定义了一个计算属性 publishedBooksMessage。computed() 方法期望接收一个 getter 函数,返回值为一个计算属性 ref。
Vue 的计算属性会自动追踪响应式依赖。它会检测到 publishedBooksMessage 依赖于 author.books,所以当 author.books 改变时,任何依赖于 publishedBooksMessage 的绑定都会同时更新。
來源:官方文件-計算屬性
故為了自動更新與即時性,以及適合衍生屬性的特性,減少手動的代碼和提高代碼的可讀性,在這裡使用了computed()方法。
參考文章:
官方文件-計算屬性
Vue computed 運作原理:何謂綁定資料、getter、與methods和watch的分別
[Vue] 還是不懂 Computed ?
firestore資料庫
先創建一筆使用者資料。

可以看見已經被成功創建與加入資料庫。

在資料庫內,我們可以看見拿到了使用者的UID、email,以及name。
<script setup>
// 其他代碼

const register = () => {
    // 列出userInfo的值方便debug
  console.log("Register start", userInfo.value);

  if (
     // 檔使用者空白輸入
    confirmPassword() &&
    userInfo.value.email !== "" &&
    userInfo.value.name !== "" &&
    userInfo.value.pwd !== "" &&
    userInfo.value.confirmPwd !== ""
  ) {
      // 昨天的創建使用者資料
    createUserWithEmailAndPassword(auth, userInfo.value.email, userInfo.value.pwd)
      .then((data) => {
        // 列出成功註冊以及代碼(方便拿取資料放進firebase)
        console.log("successfully registered", data);

        // 將使用者資料加進firestore
        const userRef = collection(db, "users");
        const userDoc = {
          UID: data.user.uid,
            // 取得authentication自動生成的uid
          name: userInfo.value.name,
          email: userInfo.value.email
        };

        addDoc(userRef, userDoc)
        //用addDoc函數,將使用者信息添加到 "users" 集合中
          .then(() => {
            console.log("User added to Firestore");
          })
          .catch((error) => {
            console.error("Error adding user to Firestore:", error);
          });

        // 回到HomePage
        router.push({ name: "HomePage" });
      })
      .catch((error) => {
        console.error("Register Fail: ", error.code);
      });
  }
};

// 其他代碼
</script>
要記得import所需的firebase函數
import { addDoc, collection } from "firebase/firestore";
目前成功將資料加入進firestore內,但覺得firebase相關代碼應該要拆分至另一個資料夾內,維持代碼的簡潔性。
