iT邦幫忙

2023 iThome 鐵人賽

DAY 29
0
Modern Web

手動測試好累喔!一起來寫前端自動化測試吧~系列 第 29

[Day 29] 使用 Jenkins 達成前端自動化測試(二)

  • 分享至 

  • xImage
  •  

設定 NodeJS 版本

昨天有說明可以在 Plugins 中下載 NodeJS,那麼今天要講解如何設定對應的 NodeJS 版本。

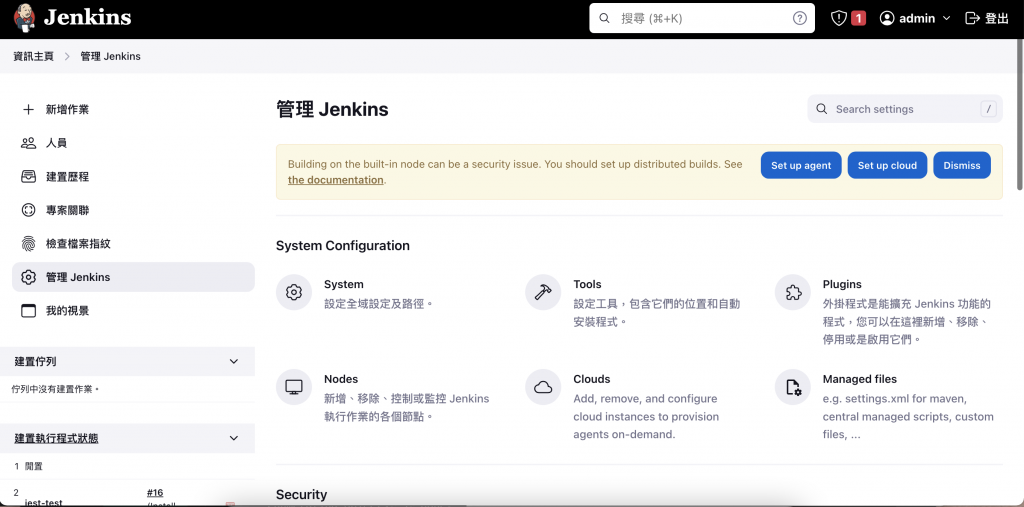
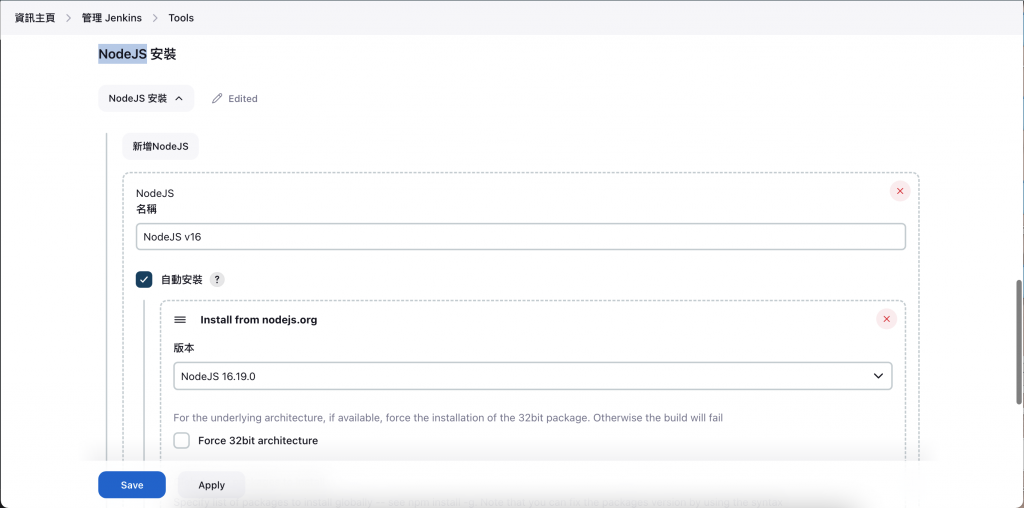
同樣在「資訊主頁」左側的「管理 Jenkins」,但需點擊「Tools」:

https://ithelp.ithome.com.tw/upload/images/20231013/20161783k8tgssNZ2h.png

進來「Tools」後可以看到我們昨天安裝的「NodeJS」,並可以在此設定想要使用的版本囉!我這邊設定的是NodeJS 16.19.0,並給他一個「NodeJS v16」的名稱(這邊可自行定義)。此名稱於 Project、Pipeline 引用時,會作為辨識。

https://ithelp.ithome.com.tw/upload/images/20231013/201617837nnuNhB4ks.png

設定 Credentials

設定 Credentials 可以讓 Jenkins 有權限能拉取 github 上的專案。
我們同樣須至「資訊主頁」左側的「管理 Jenkins」,然後點擊「Credentials」
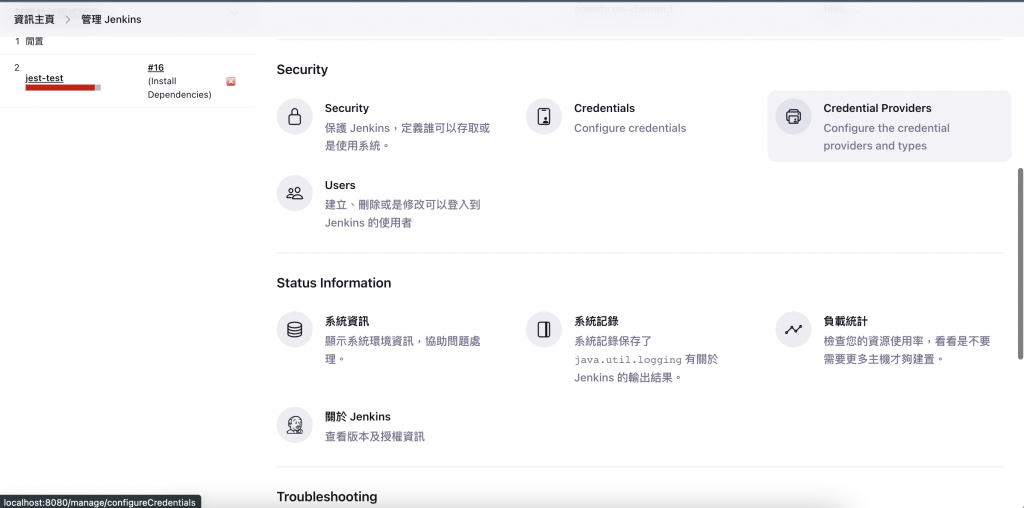
https://ithelp.ithome.com.tw/upload/images/20231013/20161783F6atB9kbVs.png

點擊 System:
https://ithelp.ithome.com.tw/upload/images/20231013/20161783BEC8OaPLtO.png

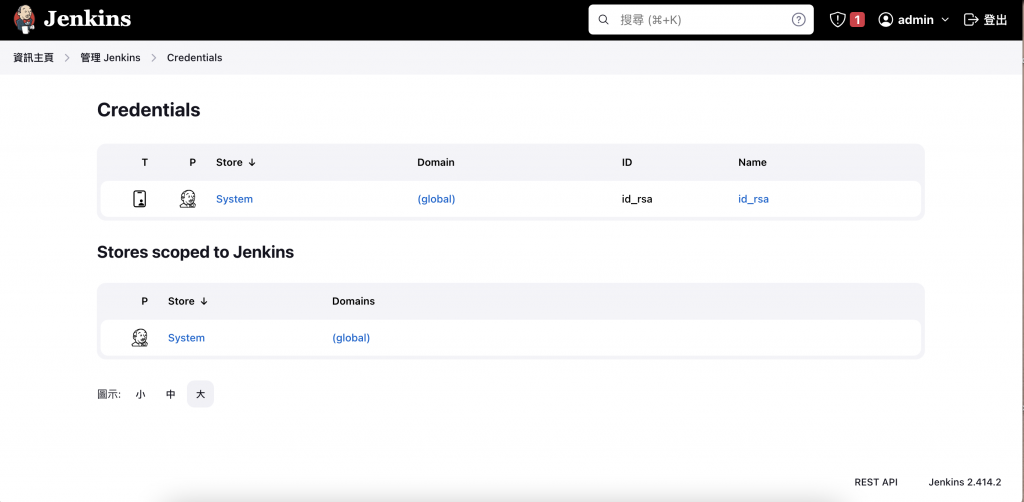
再點擊 Global credentials
https://ithelp.ithome.com.tw/upload/images/20231013/20161783VDmJ1zwMya.png

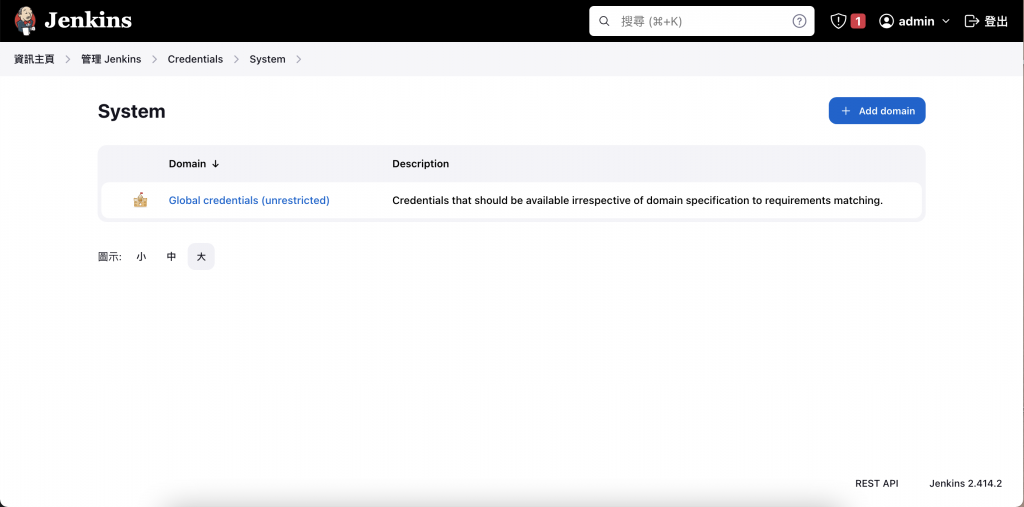
然後看到此畫面後,即可點擊右上角的「Add credentials」
https://ithelp.ithome.com.tw/upload/images/20231013/20161783oCom7FA1Fh.png

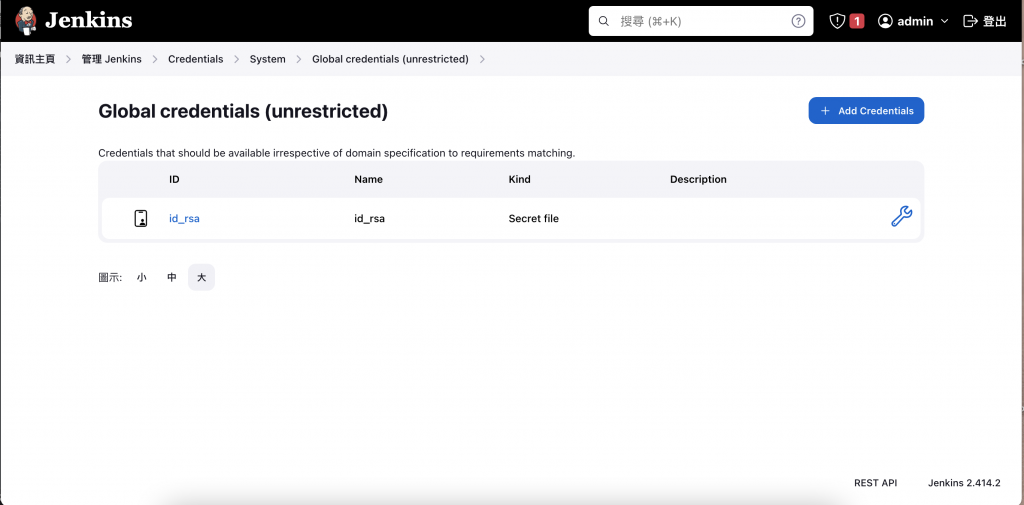
在此,我選擇「Secret File」,並將本機上的私鑰(id_rsa)放入,然後命名為 id_rsa_unique。點擊 Create 後,及建立好 Credential,之後可以在 Project/Pipeline 使用此 id_rsa_unique。

建立 Pipeline 執行自動化測試

因為此章節重點在講解 Jenkins 流程中的測試(test),所以會以 Pipeline 進行說明。

1.於新增專案中,新增一個名為「jest-test」的 Pipeline
https://ithelp.ithome.com.tw/upload/images/20231013/20161783b8flJMUf0H.png

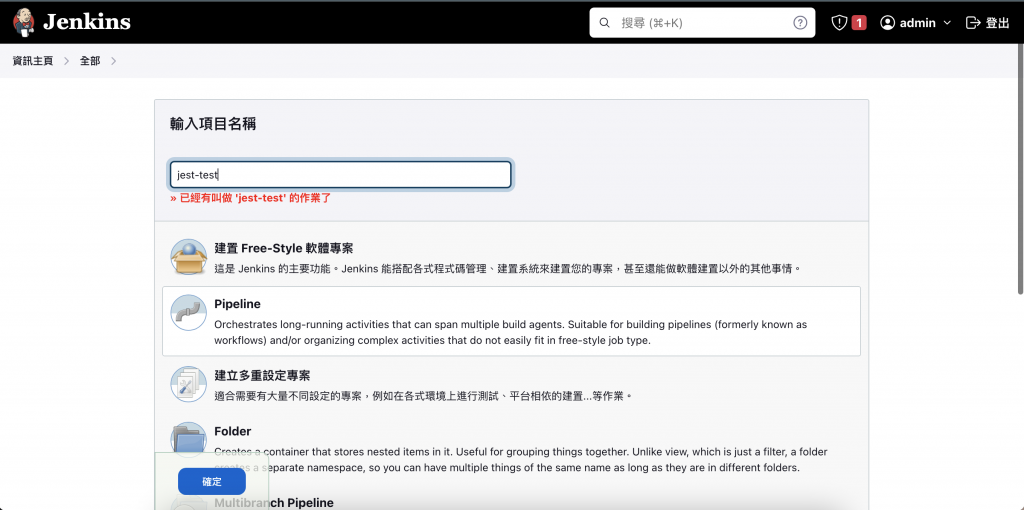
2.點擊進入專案,可寫希望執行的 Scripts
https://ithelp.ithome.com.tw/upload/images/20231013/201617833dJGGnpKk2.png

3.因此我先使用 credentials;選擇設定好的 Node 版本;clone 專案下來;並執行npm installnpm run test;最後再使用 publishHTML 套件語法產生測試報告

pipeline {
	agent any
	  
	environment {
	  // 使用名稱為 id_rsa_unique 的 credentials
	  GIT_SSH_KEY = credentials('id_rsa_unique')
	}
	  
	tools {
	  // 使用名稱為 NodeJS v16 的 Node 版號
	  nodejs 'NodeJS v16' 
	}
  
  
	stages {
	  stage('Checkout') {
        steps {
          script {
            withCredentials([file(credentialsId: 'id_rsa_unique', variable: 'GIT_SSH_KEY')]) {
            sh "git clone https://github.com/yu19941994/ithome-jenkins.git"
          }
        }
      }
    }
  
    stage('Install Dependencies') {
      steps {
        sh 'npm install'
      }
    }
  
    stage('Run Jest Tests') {
      steps {
        sh 'npm run test'
      }
    }
  
	stage('Publish HTML Report') {
      steps {
        publishHTML(target: [
          allowMissing: false,
          alwaysLinkToLastBuild: true,
          keepAll: true,
          reportDir: './otherfile',
          reportFiles: 'test-report.html',
          reportName: 'Jest Test Report'
        ])
      }
	}
  }
}

4.設定好後,回到 Pipeline 中,按下「馬上建置」的按鈕,即可看到開始建置的畫面囉!
https://ithelp.ithome.com.tw/upload/images/20231013/20161783vtsiE4SFtx.png

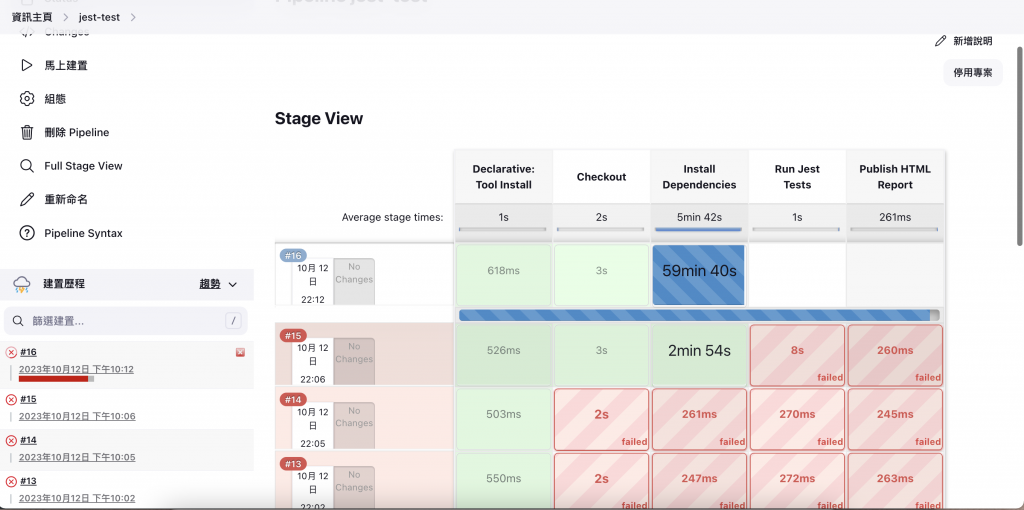
5.建置完後,可看到畫面的顏色塗滿,並且於左側產生建置的版號(ex.Build#16),可點擊進去
https://ithelp.ithome.com.tw/upload/images/20231013/20161783xbVoSePlx0.png

即可看到剛剛建立的 Jest Test Report 囉!
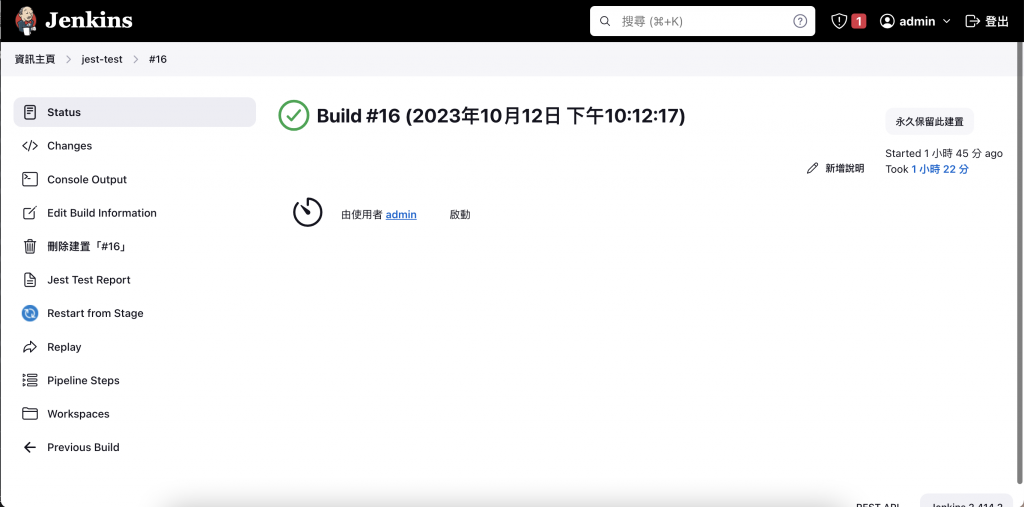
https://ithelp.ithome.com.tw/upload/images/20231013/2016178380rdgcXDjS.png

Test Report!
https://ithelp.ithome.com.tw/upload/images/20231013/20161783T8PZtniD8B.png

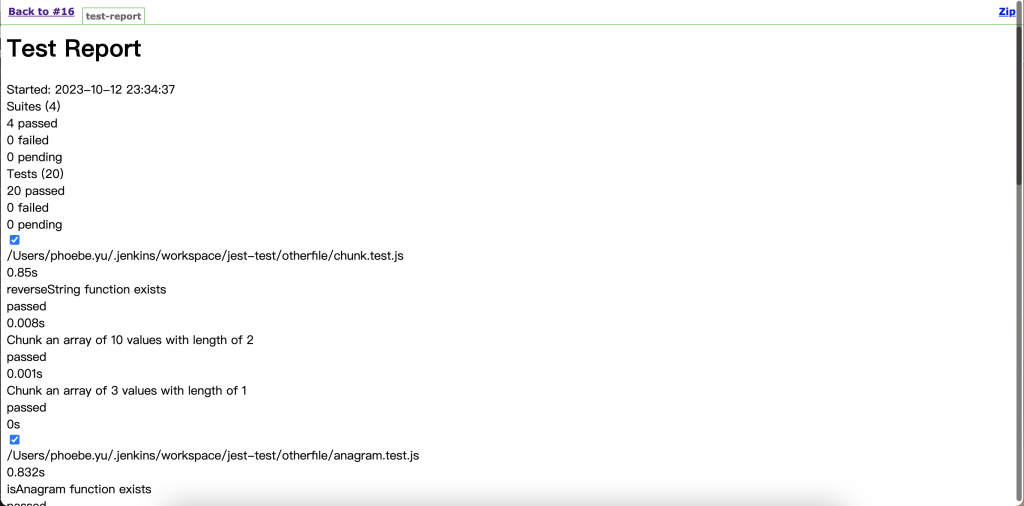
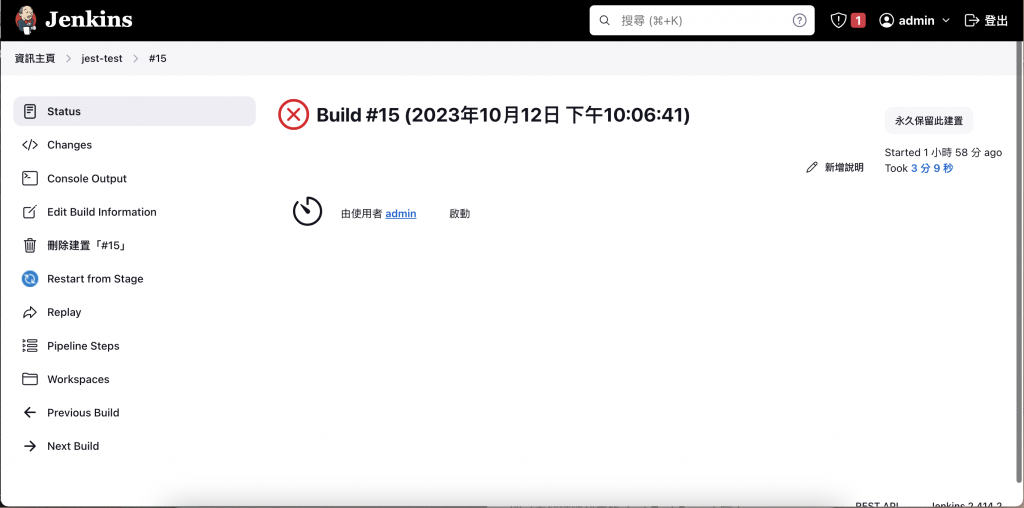
6.而倘若建置過程中發生錯誤,也一樣可以點版號進去

https://ithelp.ithome.com.tw/upload/images/20231013/20161783hgOtWuDo6m.png

並於 Console Output 中,看到錯誤發生在哪,非常的便於排錯!
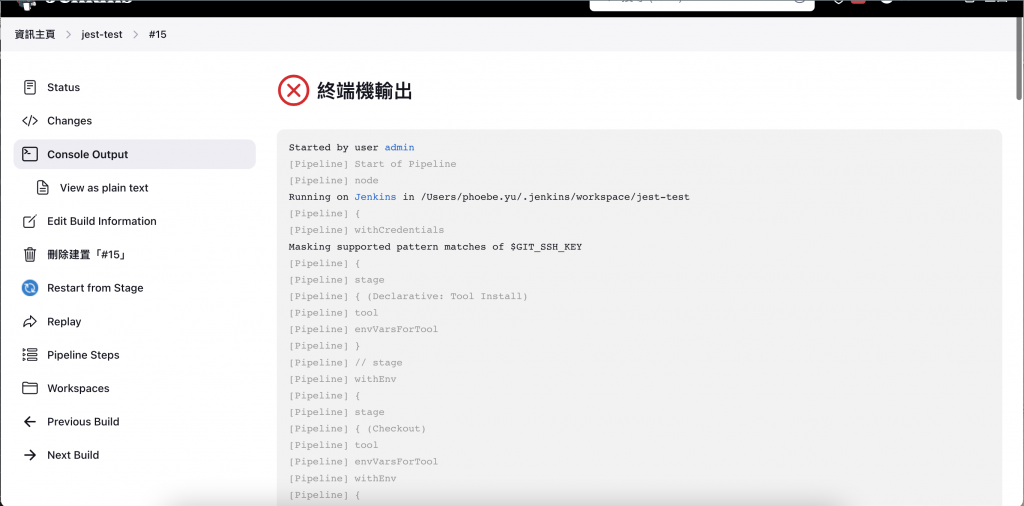
https://ithelp.ithome.com.tw/upload/images/20231013/20161783015OvIw9qY.png


上一篇
[Day 28] 使用 Jenkins 達成前端自動化測試(ㄧ)
下一篇
[Day 30] 系列文彙整 X 完賽感言
系列文
手動測試好累喔!一起來寫前端自動化測試吧~30
圖片
  直播研討會
圖片
{{ item.channelVendor }} {{ item.webinarstarted }} |
{{ formatDate(item.duration) }}
直播中

尚未有邦友留言

立即登入留言