
因為這種寫法已經過時了,接下來的教學會採用符合6.1新規範的格式。
雖然程式可以運作,但是有紅線,寫著csrf() is deprecated since version 6.1 and marked for removal。

沒有紅線

黃線代表寫法有改良的空間。
不採用改良的原因是:我認為對於新手來說cors → cors.disable()比較好,可以通用於其他情形。
例如:我們要設定.authorizeHttpRequests,就能舉一反三,推理出
.authorizeHttpRequests(authorizeHttpRequests -> authorizeHttpRequests.一些設定)
剩餘的Spring Security部分將在Day14繼續。
下一個專案是會員註冊登入系統,使用者可以透過網頁註冊和登入,我們會使用Spring Security框架來驗證會員的email和密碼,正確才能登入,也會使用Spring Security管控頁面的讀取權限,在沒登入時無法進入特定的頁面。
在這個專案不會像之前一樣,一次提供完整的Controller、Service、Repository。
我認為Spring Security對於初學者來說是有點困難的內容,希望能夠把步驟拆解成大家都能理解的程度,讓大家能夠循序漸進。
User
| 欄位名稱 | 資料形態 | 說明 |
|---|---|---|
| id | Long | 唯一的id |
| String | 電子郵件 | |
| password | String | 密碼 |
功能
| 路徑 | HTTP request method | 說明 |
|---|---|---|
| / | GET | 顯示首頁 |
| /register | GET | 註冊頁面 |
| /register | POST | 新增用戶 |
| /users | GET | 顯示註冊用戶的email列表 |
| /login | GET | 登入頁面 |
| /login | POST | 處理登入程序 |
| /logout | GET | 登出 |
按照以下設定建立專案,下載並解壓縮。
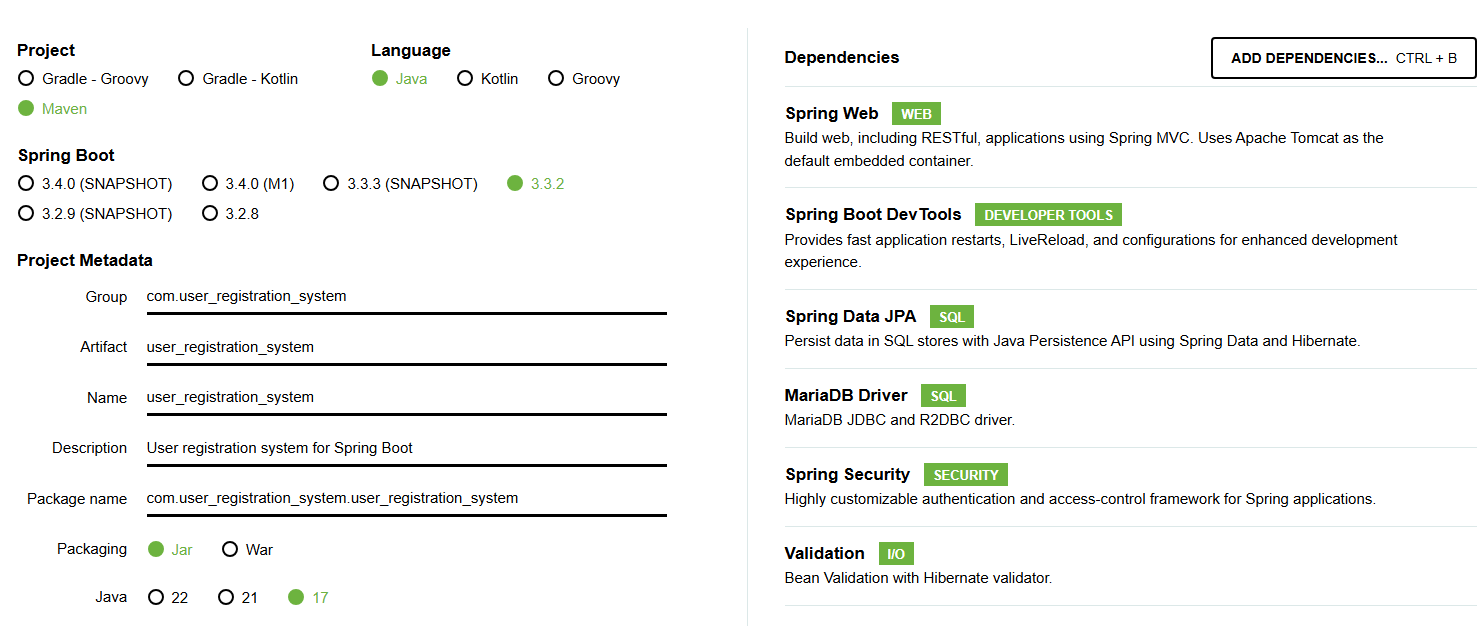
接下來我們要新增專案使用的資料庫。
我們在開始功能表找到「MySQL Client (MariaDB (x64))」打開,輸入密碼後按Enter,輸入以下指令創建資料庫
CREATE DATABASE user_db;
接著關閉視窗,開啟專案,修改application.properties
spring.application.name=user_registration_system

spring.datasource.url=jdbc:mariadb://localhost:3306/user_db
spring.datasource.username=root
spring.datasource.password=填入密碼
spring.datasource.driver-class-name=org.mariadb.jdbc.Driver

spring.jpa.hibernate.ddl-auto=update
spring.jpa.show-sql=true
現在啟動專案,看資料庫是否能夠成功連接,如果沒有錯誤發生就成功了。
我們來設定User,安裝專案架構的內容做。
自訂自動建立的資料表名稱為users
//User.java

@Entity
@Table(name = "users")
public class User {
    @Id
    @GeneratedValue(strategy = GenerationType.IDENTITY)
    private Long id;
unique代表這個欄位的內容不能重複,nullable表示不能留空
unique的設定讓一個email只能申請一個會員帳號
@Column(unique = true, nullable = false)
當留空時會出現錯誤,message是提供給前端顯示的訊息
    @NotEmpty(message = "email為必填項目")
    @Email(message = "請填入正確的Email")
    private String email;
    @Column(nullable = false)
    @NotEmpty(message = "密碼為必填項目")
    private String password;

    public User() {

    }

    public User(Long id, String email, String password) {
        this.id = id;
        this.email = email;
        this.password = password;
    }

    public Long getId() {
        return id;
    }

    public void setId(Long id) {
        this.id = id;
    }

    public String getEmail() {
        return email;
    }

    public void setEmail(String email) {
        this.email = email;
    }

    public String getPassword() {
        return password;
    }

    public void setPassword(String password) {
        this.password = password;
    }
}
啟動專案,看看資料表有沒有建立。
//UserRepository.java

public interface UserRepository extends JpaRepository<User, Long> {
}
AuthController的目的是用來完成註冊和登入的功能,專案完成後,在未登入只能讀取AuthController的內容,其餘Controller未登入不準進。
我們幫AuthController弄個基礎的架構,讓人能夠進入首頁。
//AuthController.java

@Controller
public class AuthController {
		//顯示首頁
    @GetMapping("/")
    public String index() {
        return "index";
    }
}
index.html用來進入註冊和登入表單,目前只有前往首頁和註冊頁面(還沒做,點了會顯示404)的功能。
//index.html

<!DOCTYPE html>
<html lang="en" xmlns:th="http://www.thymeleaf.org">
<head>
    <meta charset="UTF-8">
    <title>User Registration System</title>
</head>
<body>
<div>
    <div>
        <a th:href="@{/}">Home</a>
        <a th:href="@{/register}">Register</a>
    </div>
    <div>

    </div>

</div>
</body>
</html>
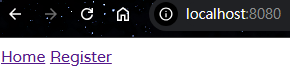
啟動專案,試著進入首頁http://localhost:8080/ ,可以看到網頁上只有Home和Register。

 iThome鐵人賽