我們現在已經了解了Django內置的User model他是怎麼應用了,並且也學到透過繼承AbstractUser來更靈活的滿足開發需求。不過我們回到使用者本身,現在每一個網站的服務都需要先登入會員,看文章想留言?請先登入會員;想下載套件?請登入會員;甚至還有更絕的,想複製內容?請登入會員!經過這樣的摧殘下來,如果現在一個服務沒有第三方登入,恐怕會流失大量的使用者
雖然我們現在的重點還是在後台,理論上第三方登入不會是重點也不是必須(如果當作產品後台的角度)。但是身為一個全端框架,如果是像SaaS或是微服務的角度來說,我們甚至可能是讓使用者擁有自己的後台,這時候第三方登入就顯得更平易近人一點
我們今天會介紹如何在後台完成第三方登入,並且以google登入當作範例
程式碼:https://github.com/class83108/django_auth/tree/allauth
今天的重點如下:
如果今天需要從頭開始做OAuth2.0的流程,我們需要處理以下流程:
但是如果使用了django-allauth,拿到客戶端ID與密鑰後,剩下的流程都經過大幅度的簡化,幫助我們更快完成第三方登入。此外除了提供相關視圖外,也有默認的登入、註冊等模板可以使用
官方文檔:https://docs.allauth.org/en/latest/
根據官方文檔,需要安裝的條件如下,並且注意Django的版本需要大於等於4.2版
This package has the following external dependencies:

Python 3.8, 3.9, or 3.10, 3.11, 3.12.

Django (4.2+)
poetry add "django-allauth[socialaccount]"
poetry add django-crispy-forms # 這部分是方便我們之後寫表格時好整理
INSTALLED_APPS = [
    "django.contrib.admin",
    "django.contrib.auth",
    "django.contrib.contenttypes",
    "django.contrib.sessions",
    "django.contrib.messages",
    "django.contrib.staticfiles",
    # 自定義的 app
    "user",
    # allauth app
    "allauth",
    "allauth.account",
    "allauth.socialaccount",
    "allauth.socialaccount.providers.google", # 看你想要使用什麼樣的第三方登入
]

MIDDLEWARE = [
    "django.middleware.security.SecurityMiddleware",
    "django.contrib.sessions.middleware.SessionMiddleware",
    "django.middleware.common.CommonMiddleware",
    "django.middleware.csrf.CsrfViewMiddleware",
    "django.contrib.auth.middleware.AuthenticationMiddleware",
    "django.contrib.messages.middleware.MessageMiddleware",
    "django.middleware.clickjacking.XFrameOptionsMiddleware",
    # Add the account middleware:
    "allauth.account.middleware.AccountMiddleware",
]

AUTHENTICATION_BACKENDS = [
    # Needed to login by username in Django admin, regardless of `allauth`
    "django.contrib.auth.backends.ModelBackend",
    # `allauth` specific authentication methods, such as login by email
    "allauth.account.auth_backends.AuthenticationBackend",
]

ACCOUNT_USER_MODEL_USERNAME_FIELD = "username" # 這裡指定用戶模型中作為用戶名的欄位
ACCOUNT_EMAIL_REQUIRED = True # 需要用戶在註冊時提供信箱
ACCOUNT_USERNAME_REQUIRED = False # 不要求用戶在註冊時提供用戶名
ACCOUNT_AUTHENTICATION_METHOD = "email" # 這裡表示是用信箱來登入

ACCOUNT_EMAIL_VERIFICATION = "none" # 可以不用信箱做身份驗證
ACCOUNT_LOGOUT_ON_GET = True # 可以使用get來做到登出

# Redirect to home URL after login (Default redirects to /accounts/profile/)
LOGIN_REDIRECT_URL = "/"
其中AUTHENTICATION_BACKENDS 是配置認證的後台,要登入時,如果是使用django-allauth的方式,需要使用perform_login的方法,在這些後台進行登入,單純使用login只會針對原本的後台有用
python3 manage.py makemigrations
python3 manage.py migrate
然後我們去後台就能看到django allauth應用下的相關表格
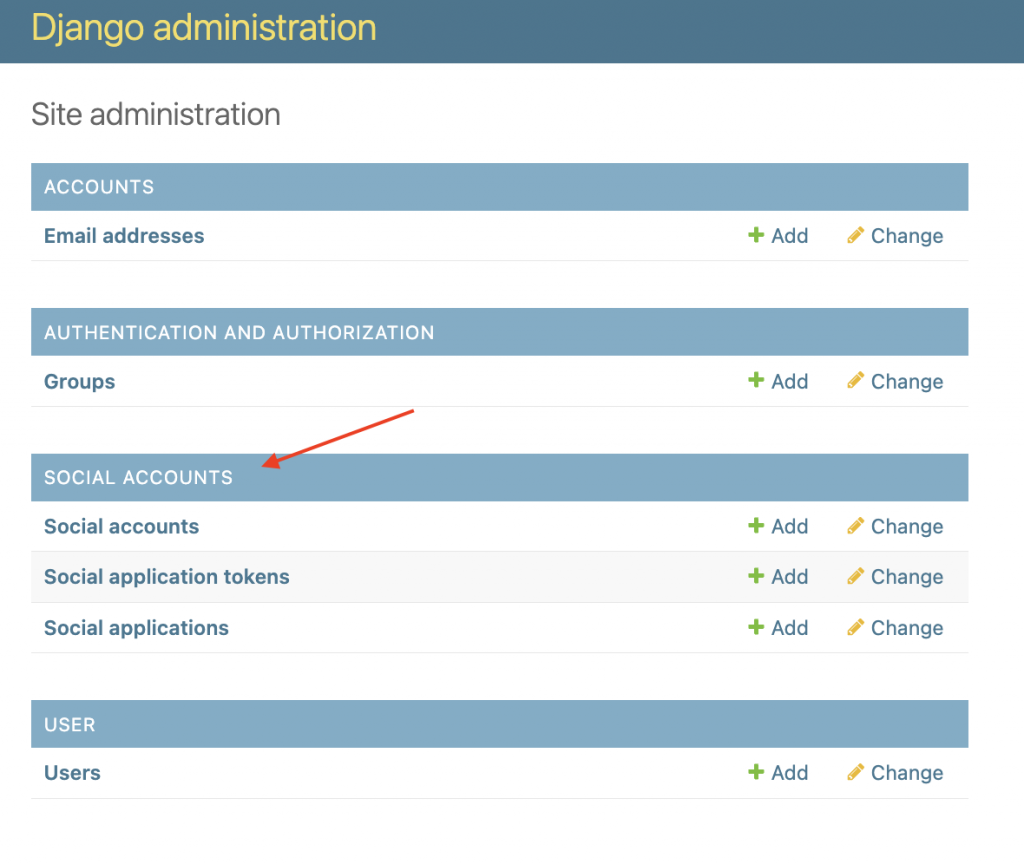
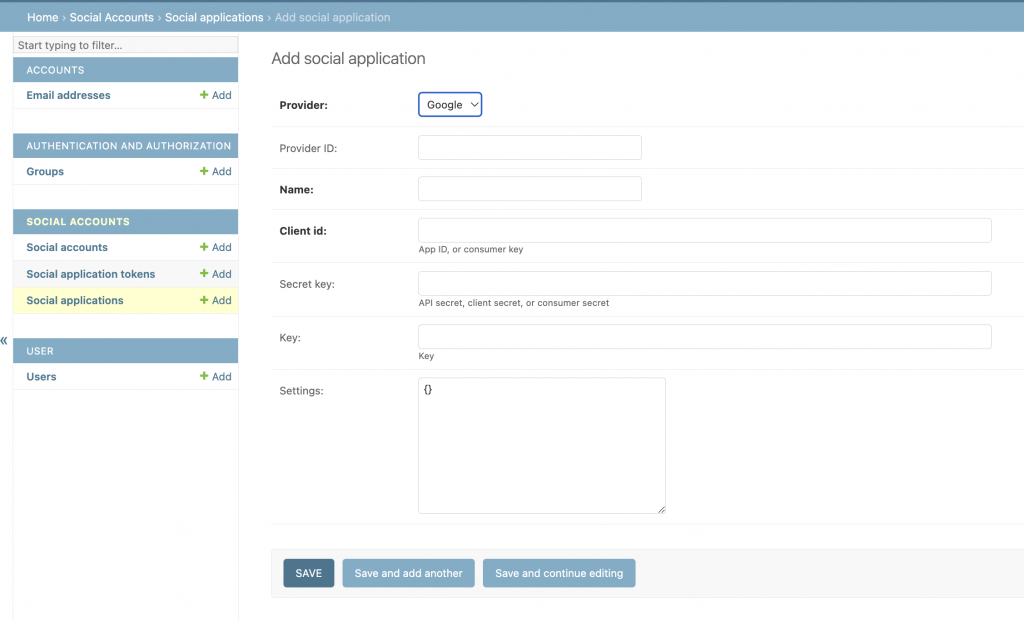
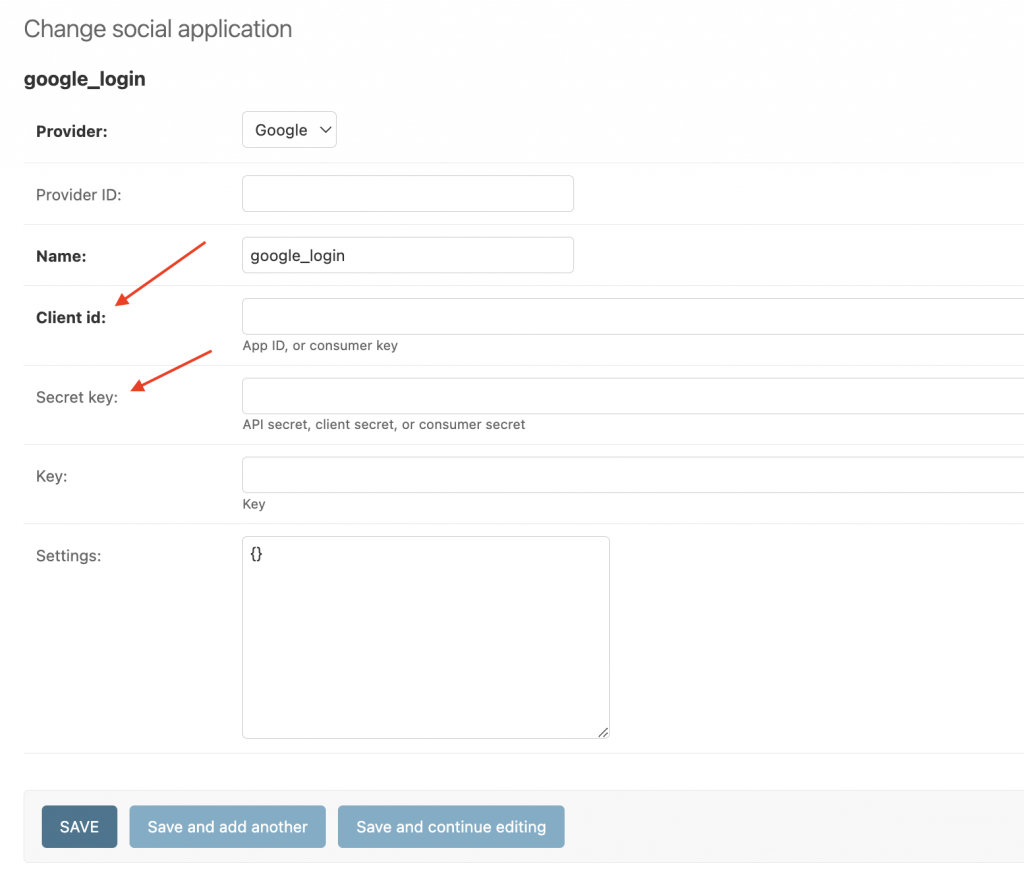
因為今天的主題是要用google登入,需要增加有關google的social application,會需要Client id 以及Secret Key
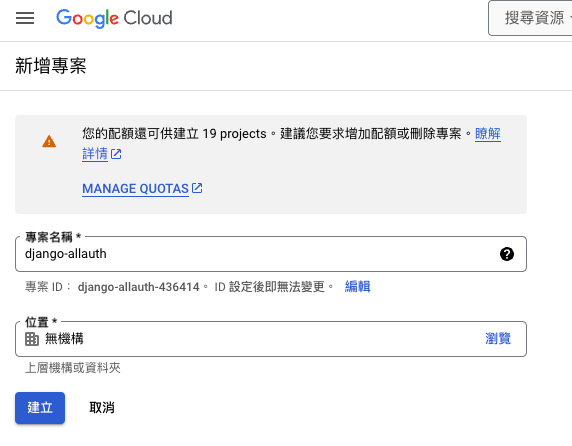
為了拿到Client id 以及Secret Key,去google的開發者平台申請相關的資料
點擊下方連結後,選擇新增專案
https://console.cloud.google.com/projectcreate
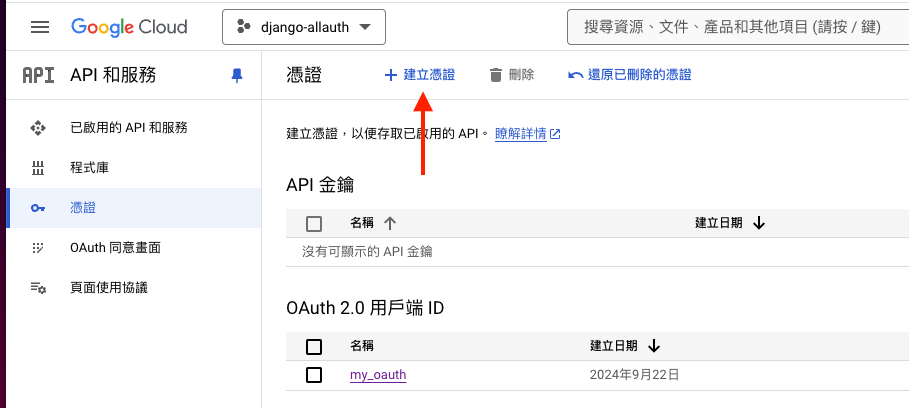
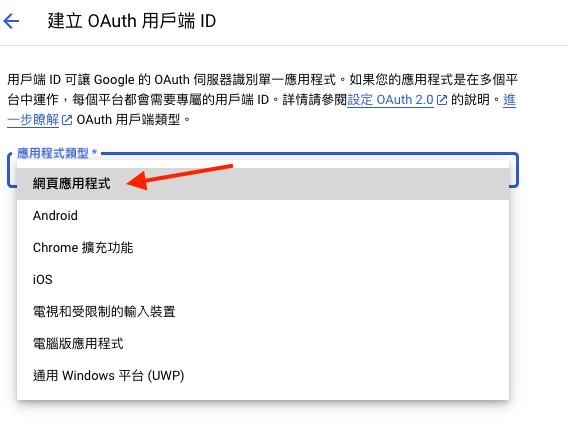
然後都點選確認,就等他跑完後,我們進入該專案,選擇憑證後,點選建立憑證,接著選擇建立 OAuth 用戶端 ID
選擇網頁應用程式
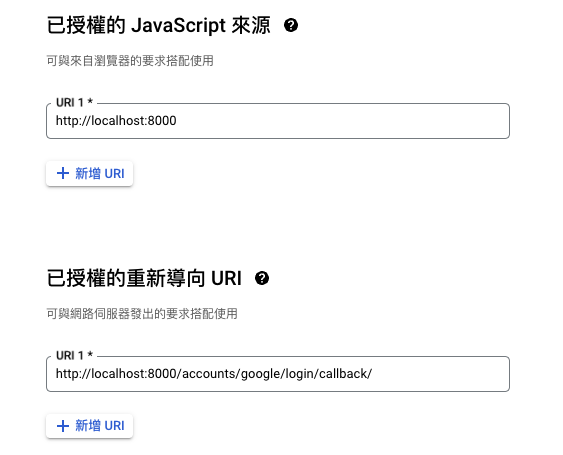
並且輸入相關的網域,在重導向的部分,不是設置你最後成功登入的路徑,而是allauth幫我們設置的這個路徑,不然會授權失敗
好了之後,頁面會顯示相關的Client id 以及Secret Key 將它們輸入到後台中,並且建立
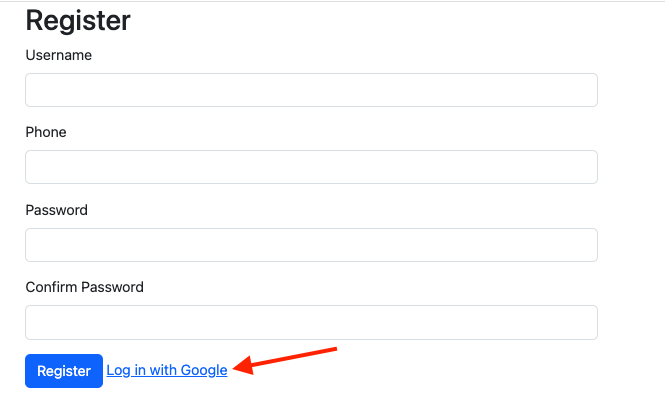
templates/user/register.html中{% load socialaccount %} # 放在extends下方
# 連結就放你想要登入的地方
{% get_providers as socialaccount_providers %}
{% for provider in socialaccount_providers %}
<a href="{% provider_login_url provider.id %}">Log in with {{ provider.name }}</a>
{% endfor %}
額外注意:
官方文檔中有提到,如果我們使用這種方式來建立social application,那我們不能在settings.py中建立同樣的provider,會造成衝突
SOCIALACCOUNT_PROVIDERS = {
    "github": {
        # For each provider, you can choose whether or not the
        # email address(es) retrieved from the provider are to be
        # interpreted as verified.
        "VERIFIED_EMAIL": True
    },
    "google": {
        # For each OAuth based provider, either add a ``SocialApp``
        # (``socialaccount`` app) containing the required client
        # credentials, or list them here:
        "APPS": [
            {
                "client_id": "123",
                "secret": "456",
                "key": ""
            },
        ],
        # These are provider-specific settings that can only be
        # listed here:
        "SCOPE": [
            "profile",
            "email",
        ],
        "AUTH_PARAMS": {
            "access_type": "online",
        },
    }
}
https://docs.allauth.org/en/latest/socialaccount/provider_configuration.html
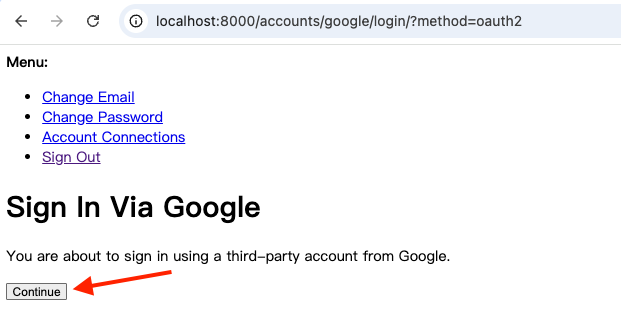
選擇你要的帳號進行登入後,我們會返回剛剛的首頁,此時我們去admin看
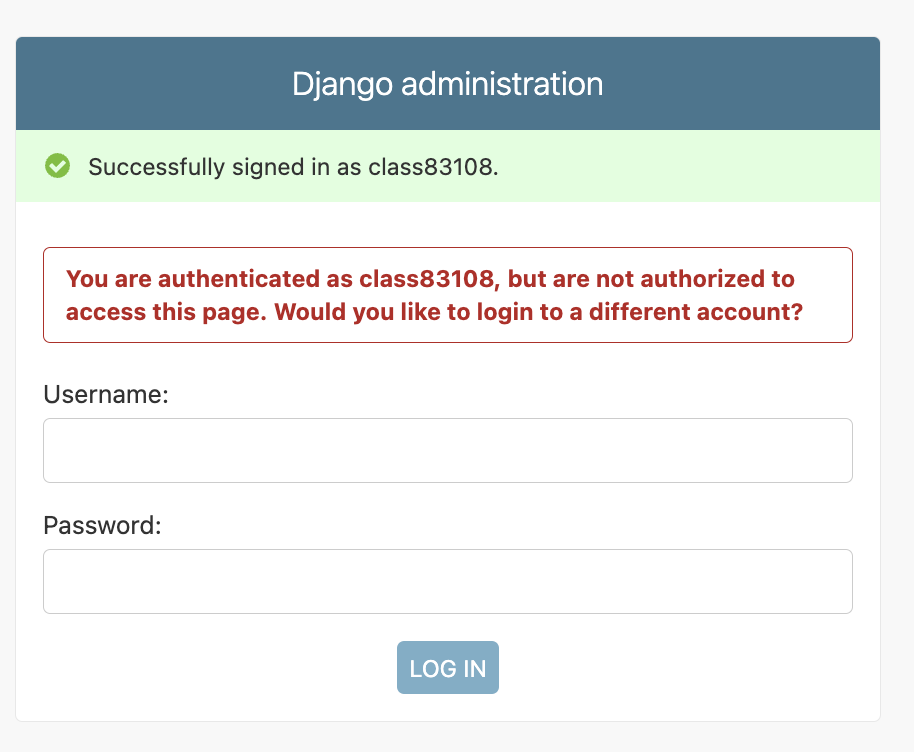
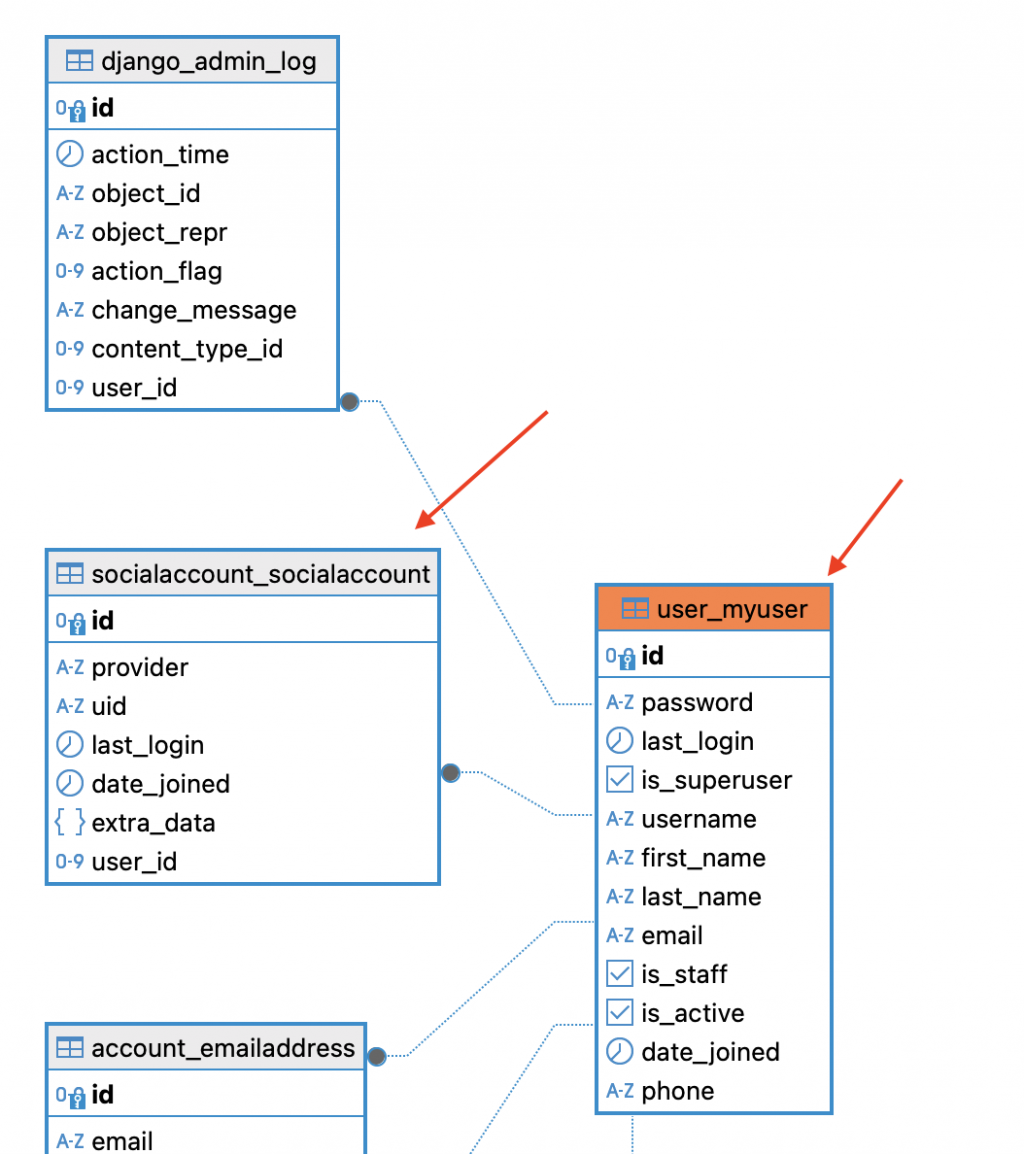
可以看到我們雖然登入了,卻沒有辦法有後台的功能,但是此時可以用另外一個超級用戶去後台看,可以看到我們已經成功建立用戶了,並且該用戶是不需要密碼就能進行驗證,但是我們根本沒有透過表格建立MyUser model的資料呀?但是我們可以從資料庫看到每個SocialAccount都有指向內建User(我們改成MyUser了)的外鍵,因此既然用戶都建立了,剩下的部分就單純了
為了要讓第三方登入所產生的用戶能夠成功進入後台,我們有幾點需要進行調整
我們可以透過觀察源碼來了解到我們要怎麼改寫
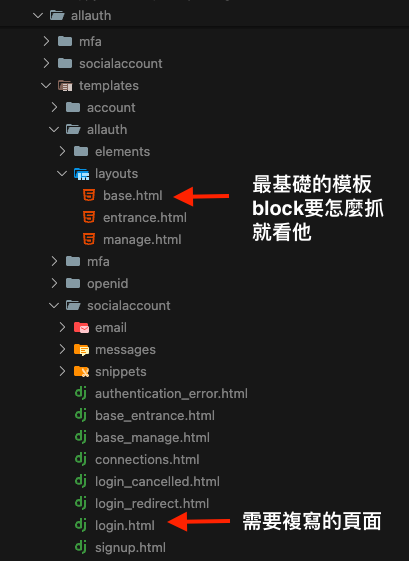
因此我們也在我們的templates資料夾下建立socialaccount資料夾,並且建立login.html
直接複製源碼,然後再刪除掉一些我們不需要的資訊,其中我們可以看到他有自己註冊許多頁面標籤,所以在表格的部分就不多做改寫了
{% extends "socialaccount/base_entrance.html" %}
{% load i18n %}
{% load allauth %}
{% block extra_head %}
<link rel="stylesheet" href="https://cdn.jsdelivr.net/npm/bootstrap@5.3.3/dist/css/bootstrap.min.css">
{% endblock extra_head %}
{% block head_title %}
{% trans "Sign In" %}
{% endblock head_title %}
{% block body %}
<div class="bg-light vh-100 d-flex justify-content-center align-items-center">
<section class="container bg-white">
<div class="row">
<div class="col">
<div class="p-5">
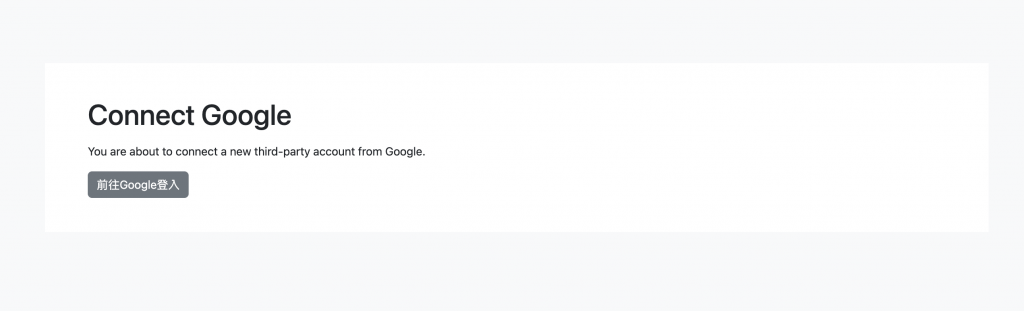
<h1 class="mb-3">
{% blocktrans with provider.name as provider %}Connect {{ provider }}{% endblocktrans %}
</h1>
<p>
{% blocktrans with provider.name as provider %}You are about to connect a new third-party account from {{ provider }}.{% endblocktrans %}
</p>
{% element form method="post" no_visible_fields=True %}
{% slot actions %}
{% csrf_token %}
<button type="submit" class="btn btn-secondary">前往Google登入</button>
{% endslot %}
{% endelement %}
</div>
</div>
</div>
</section>
</div>
{% endblock body %}
{% block extra_body %}
<script src="https://cdn.jsdelivr.net/npm/bootstrap@5.3.3/dist/js/bootstrap.bundle.min.js"></script>
{% endblock extra_body %}
至少我們的頁面現在正常許多
LOGIN_REDIRECT_URL
LOGIN_REDIRECT_URL = "/auth-success/"
# user.urls.py
urlpatterns = [
    path("auth-success/", auth_success, name="auth_success"),
    ...
]
我們這邊另起一個表格是因為,有可能我們需要第三方登入的用戶填寫更多的資料,所以額外建立一個,並且使用get_user_model ,該方法是返回當前預設的用戶模型。這樣寫的好處就是當我們又自定義一個新的用戶模型,並且將它設為默認時,就不用回來改寫套用的model
# user.forms.py
from django import forms
from django.contrib.auth.forms import UserCreationForm

from django.contrib.auth import get_user_model
from .models import MyUser

class MyUserCreationForm(UserCreationForm):
    class Meta(UserCreationForm.Meta):
        model = MyUser
        # 這裡加上我們自定義的 phone 欄位
        fields = UserCreationForm.Meta.fields + ("phone",)

User = get_user_model()

class AlluthUserProfileForm(forms.ModelForm):
    class Meta:
        model = User
        fields = ["phone"]
@login_required
def auth_success(request):
form = MyUserCreationForm(instance=request.user)
user = request.user
if user.socialaccount_set.exists():
# 先確認是否已經註冊過了
if user.is_staff and user.phone:
messages.success(request, "歡迎回來!")
# 不需要登入,直接導向首頁 因為裝飾器有login_required
return redirect("admin:index")
# 如果還不是staff 將其設定為staff
if not user.is_staff:
user.is_staff = True
user.save()
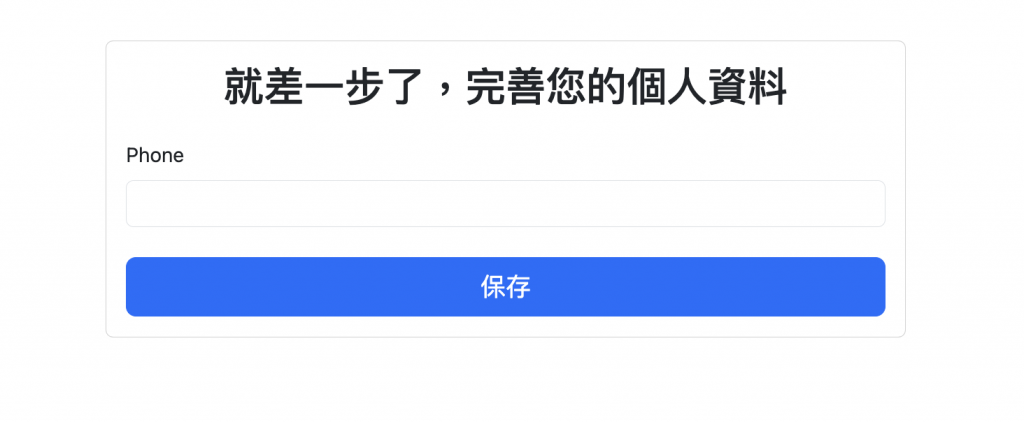
# 如果沒有填寫 phone 資料,則導向填寫 phone 資料的頁面
if not user.phone:
if request.method == "POST":
form = AlluthUserProfileForm(request.POST, instance=user)
if form.is_valid():
form.save()
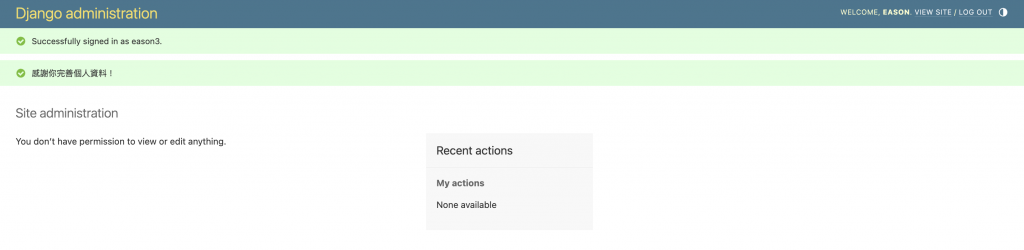
messages.success(request, "感謝你完善個人資料!")
return redirect("admin:index")
else:
form = AlluthUserProfileForm(instance=user)
return render(request, "complete_profile.html", {"form": form})
else:
login(request, user)
messages.success(request, "歡迎回來!")
return redirect("admin:index")
else:
return redirect(reverse("user:register"))
{% extends 'base.html' %}
{% load crispy_forms_tags %}

{% block content %}
<div class="container mt-5">
    <div class="row justify-content-center">
        <div class="col-md-6">
            <div class="card">
                <div class="card-body">
                    <h2 class="card-title text-center mb-4">就差一步了,完善您的個人資料</h2>
                    <form method="post" action="{% url 'user:auth_success' %}">
                        {% csrf_token %}
                        {{ form|crispy }}
                        <div class="d-grid gap-2 mt-4">
                            <button type="submit" class="btn btn-primary btn-lg">保存</button>
                        </div>
                    </form>
                </div>
            </div>
        </div>
    </div>
</div>
{% endblock content %}
這邊我使用了**django-crispy-forms** (需要再安裝),單純只是讓我的表格更美觀一點,最基礎的用法就是載入
{% load crispy_forms_tags %}後,將form的部分寫成{{ form|crispy }}
詳細用法可以參考:https://blog.csdn.net/weixin_42134789/article/details/108353889
輸入資料保存後,就能看到我們成功進入後台了,而如果現在去註冊頁再點擊一次google登入,就可以看到不用再輸入電話號碼就能驗證成功進行登入了
我們今天使用django-allauth來快速的完成第三方登入,我們只需要在我們想要實施的開發者平台上拿到客戶端ID與密鑰,就能迅速建立出一個Socialaccount。
同時因為該Socialaccount具備我們預設的User model的外鍵,因此我們就等與在註冊的同時建立了一個User model的新用戶。幫助我們省下大量的開發時間
官方文檔:https://docs.allauth.org/en/latest/