每天實作、生文章遇到撞牆就有點糗。
這篇目標是把硬碟櫃的硬碟組成 ZFS RAID ,測看看讀寫效能
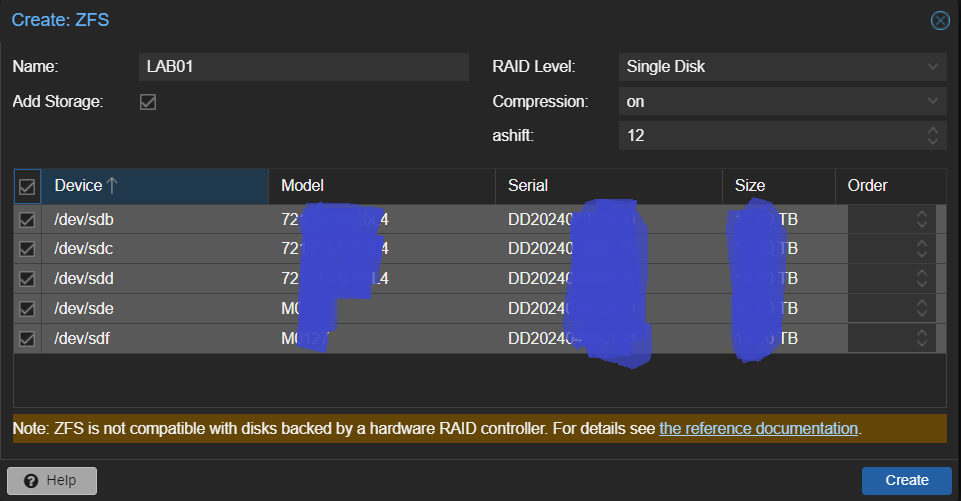
Proxmox 在 Web UI 點選功能: Disk -> ZFS -> Create ZFS

因為 節儉 分散風險用了不同廠商不同大小的硬碟,
直接顯示錯誤

參考一些文章的作法,要先分割硬碟、切出同大小的來組 RAID
看來做分割後再並整的考量沒做進去。
(對應不同容量硬碟要組起來用的產物是 Unraid、mergerfs )
Debian 體系下常用的有 fdisk、sfdisk
過去維運時的情境會是換一顆新磁碟,所以:
sfdisk -d /dev/sdX > parttable
sfdisk /dev/sdY < parttable
這次練習找到其它作法來處理多顆硬碟的新分割 (這也可用VM加掛多個虛擬磁碟練習)
Help:

  GPT
   M   enter protective/hybrid MBR

  Generic
   d   delete a partition
   F   list free unpartitioned space
   l   list known partition types
   n   add a new partition
   p   print the partition table
   t   change a partition type
   v   verify the partition table
   i   print information about a partition

  Misc
   m   print this menu
   x   extra functionality (experts only)

  Script
   I   load disk layout from sfdisk script file
   O   dump disk layout to sfdisk script file

  Save & Exit
   w   write table to disk and exit
   q   quit without saving changes

  Create a new label
   g   create a new empty GPT partition table
   G   create a new empty SGI (IRIX) partition table
   o   create a new empty MBR (DOS) partition table
   s   create a new empty Sun partition table
echo -e "g\nn\np\n1\n\n\nw" | fdisk /dev/sdX
echo -e "n\n1\n\n+1000G\nn\n\n\n+10G\n\nw" | fdisk /dev/sdX
for disk in `fdisk -l | grep "^Disk \/dev\/sd[W-Z]" | awk '{print $2}' | cut -d: -f1`;do echo $disk ; done;
for disk in `fdisk -l | grep "^Disk \/dev\/sd[W-Z]" | awk '{print $2}' | cut -d: -f1`;do echo -e "n\n1\n\n+1000G\nn\n\n\n+10G\n\nw" | fdisk $disk ;done;
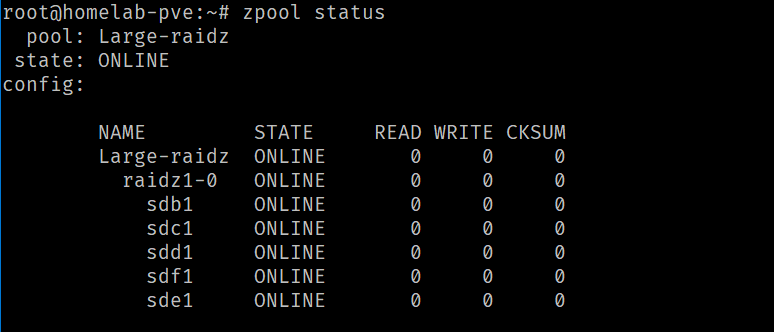
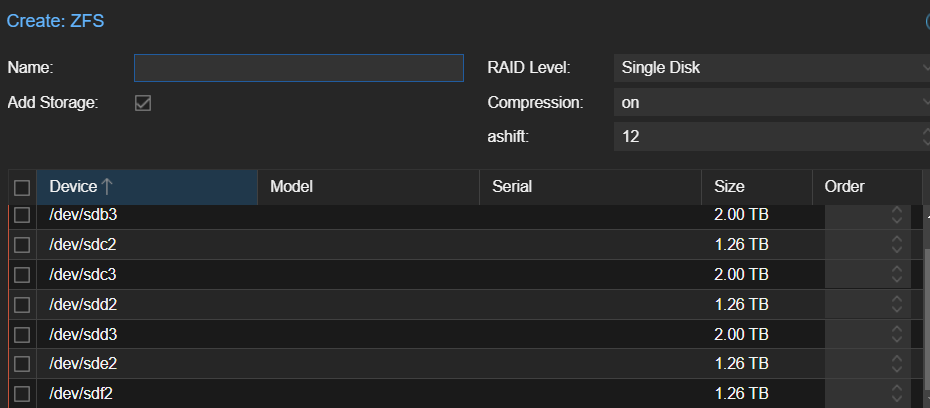
然後 Proxmox 在 Web UI 點選功能: Disk -> ZFS -> Create ZFS
就可以看到切出來的分割區、並且可以成功組出 RAID
餘下的其它空間也切出來,可以另外再組 RAID
RAID Level、Compression、ashift 可選。