 #
#
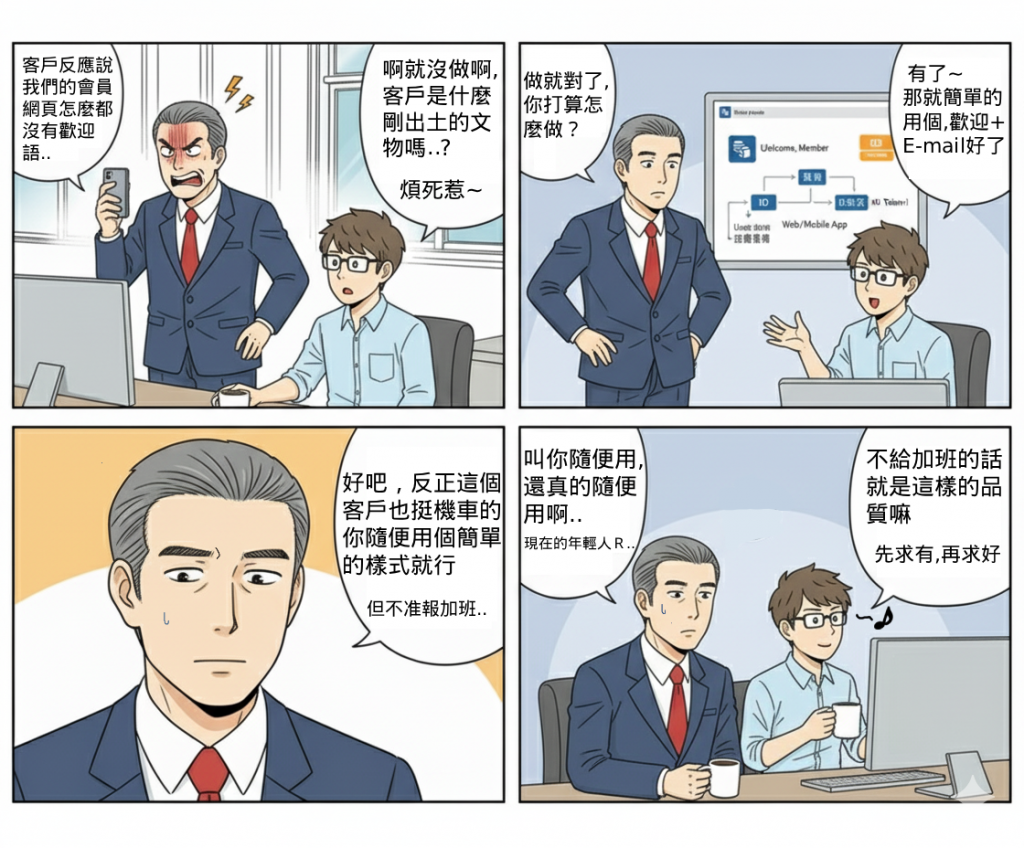
在會員系統中,僅僅完成登入驗證還不夠,若能根據使用者的身份、屬性或偏好,動態顯示不同的內容,才能真正提升使用體驗。
透過將 Cognito 權杖(JWT Token)與使用者屬性呈現在前端頁面,我們可以實現基礎的個人化功能,讓會員專屬頁面不再只是「登入後的畫面」,而是「屬於我的服務介面」。
此 Lab 是 從身份驗證走向個人化內容 的起點,透過 Token 與 Profile 的呈現,開發者能清楚理解 JWT 權杖中的資訊,並將 Cognito 使用者屬性與前端綁定。這不僅能讓使用者看到專屬資訊,也為未來的差異化服務(例如 VIP 權限、專屬優惠、群組導向內容)打下基礎。
(1) 讓 Cognito 的 User Pool 回傳 ID Token。
(2) 前端解析 Token,顯示個人化內容(如暱稱、Email、自訂屬性)。
(3) 奠定未來做 VIP 會員、專屬優惠的基礎。
舊的描述
(1) 前端需解析 JWT 權杖,讀取內含的使用者資訊(sub、email、groups 等)。
(2) Cognito 可設定 Custom Attributes,將個人化屬性帶入 Token。
(3) 前端安全性需注意,避免直接暴露敏感資訊。
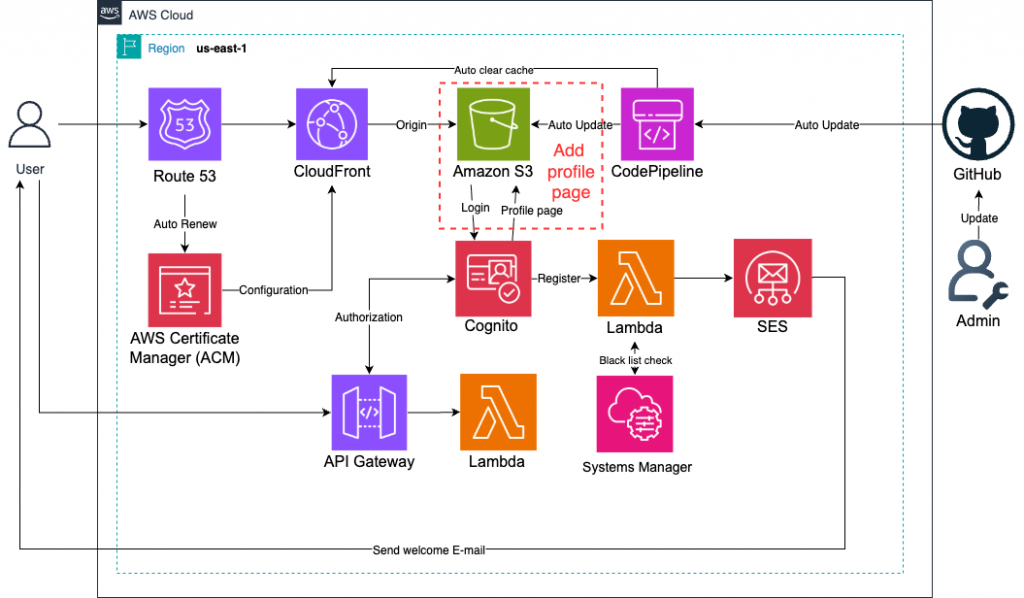
(1) 不要在前端頁面直接顯示 Access Token,僅用於 API 認證,避免資訊外洩。
(2) 使用 ID Token 來顯示 profile,並透過 HTTPS 傳輸。
(3) Custom Attributes 建議僅存放與前端展示相關的資訊,敏感資料應放在後端。
(4) Token 驗證與個人化邏輯,長期建議透過 API Gateway + Lambda 完成,而非完全在前端處理。
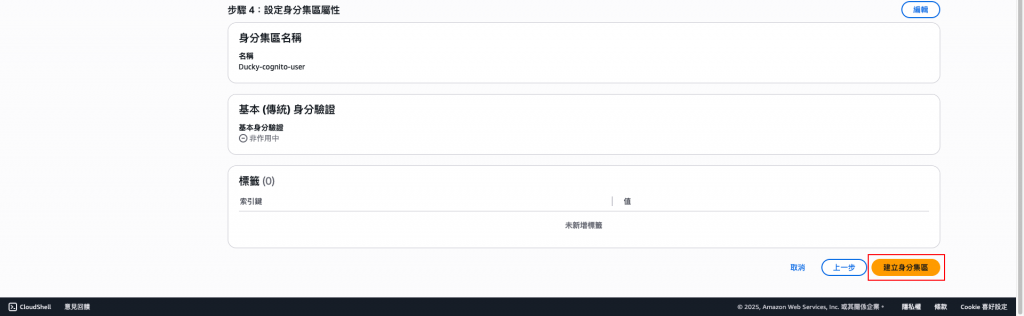
進入Cognito的「身分集區」分頁。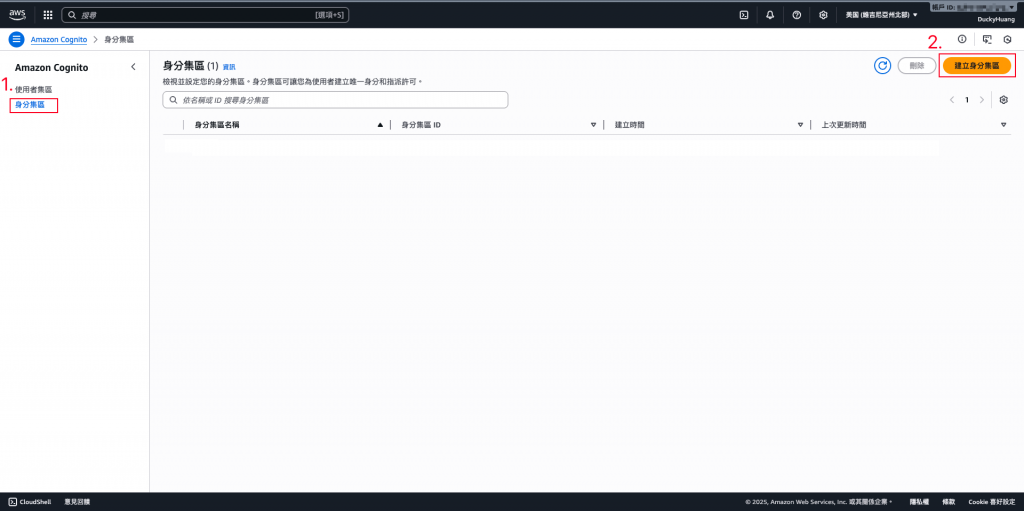
創建一個Cognito用的身分集區。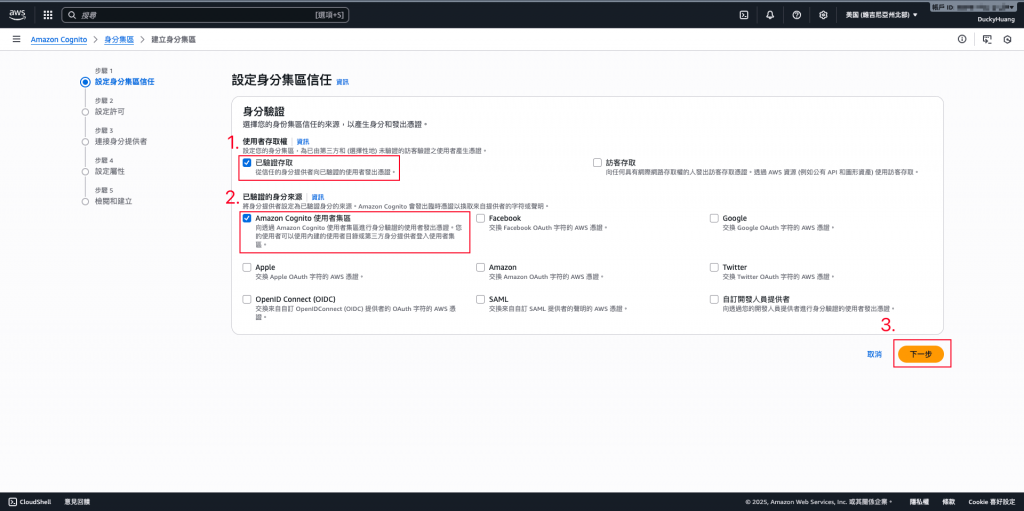
命名集區。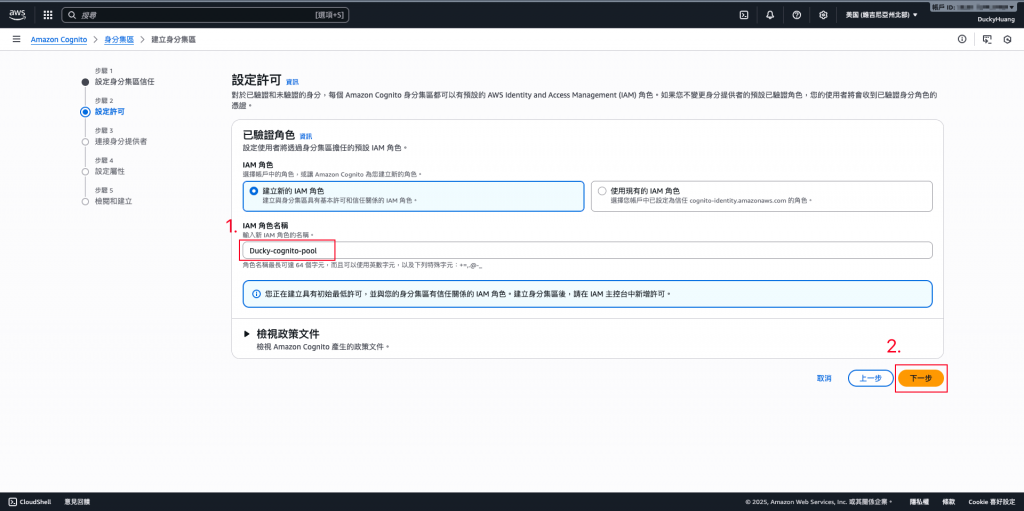
選擇要使用的「使用者集區」及「應用程式用戶端」。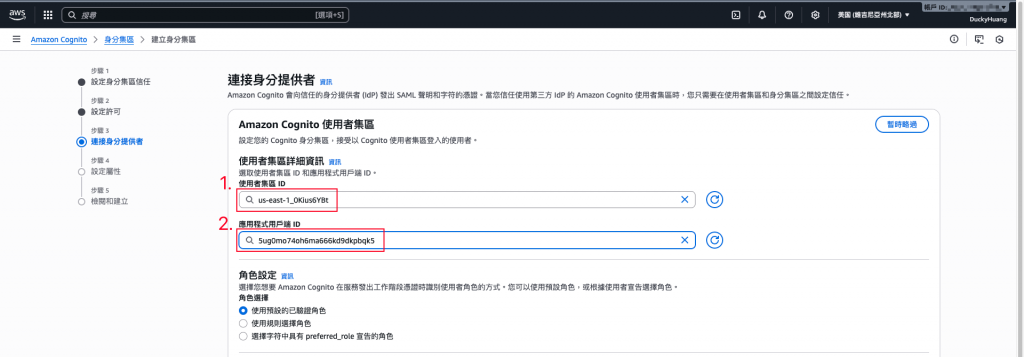
輸入「身分集區」名稱。
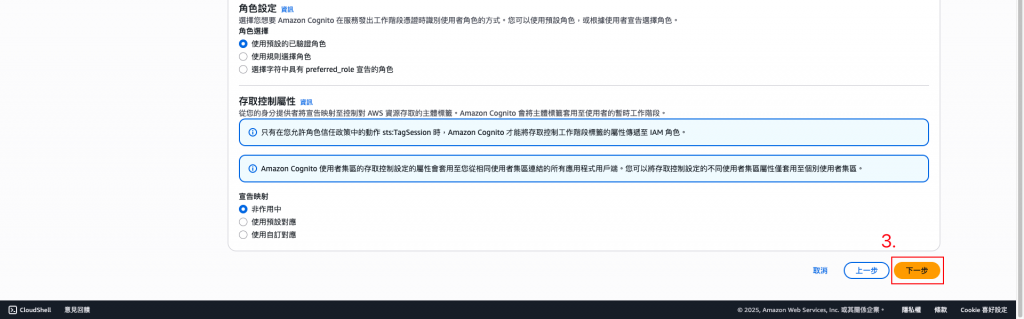
確認創建。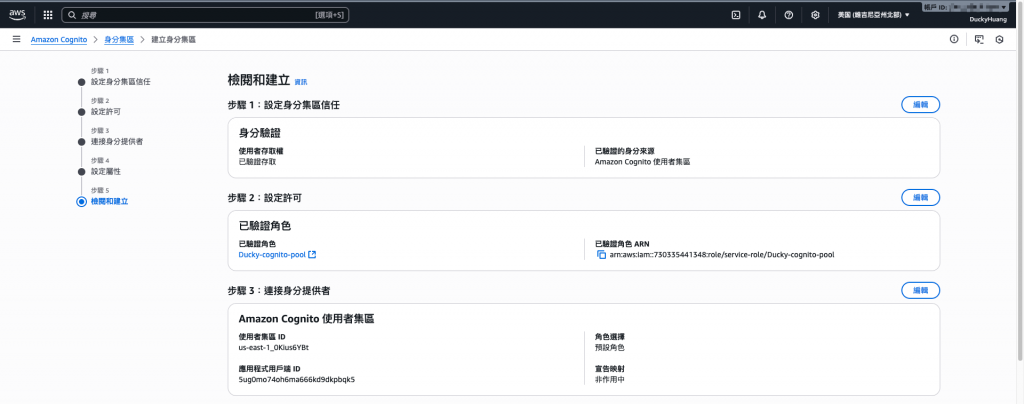
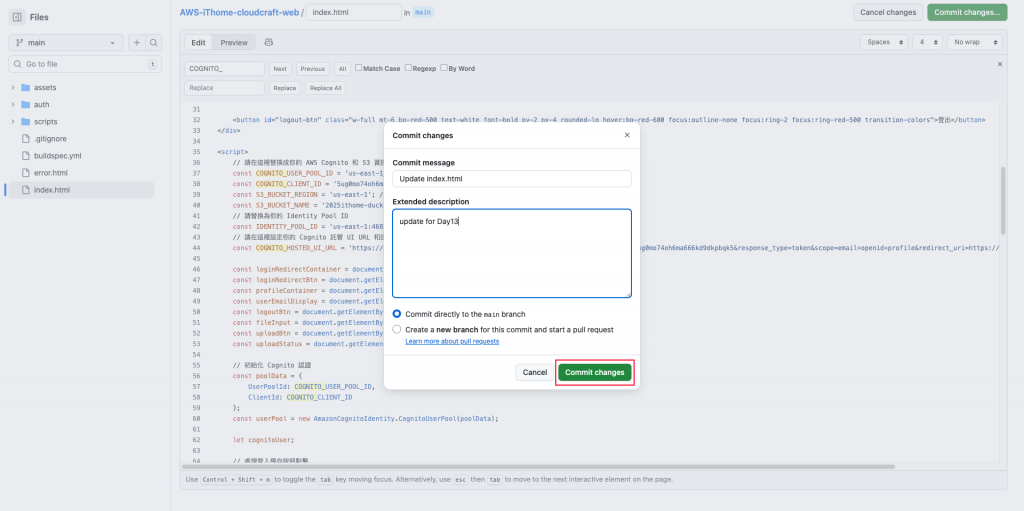
程式碼範例:
<!DOCTYPE html>
<html lang="zh-Hant">
<head>
    <meta charset="UTF-8">
    <meta name="viewport" content="width=device-width, initial-scale=1.0">
    <title>使用者中心與S3檔案上傳</title>
    <script src="https://cdn.tailwindcss.com"></script>
    <script src="https://cdnjs.cloudflare.com/ajax/libs/aws-sdk/2.1121.0/aws-sdk.min.js"></script>
    <script src="https://cdn.jsdelivr.net/npm/amazon-cognito-identity-js@6.3.0/dist/amazon-cognito-identity.min.js"></script>
</head>
<body class="bg-gray-100 flex items-center justify-center min-h-screen p-4 font-sans">

<div id="login-redirect-container" class="bg-white p-8 rounded-lg shadow-lg max-w-md w-full transition-all duration-300 transform text-center">
    <h2 class="text-2xl font-bold text-gray-800 mb-6">歡迎來到使用者中心</h2>
    <p class="text-gray-600 mb-4">請登入以繼續</p>
    <button id="login-redirect-btn" class="w-full bg-blue-500 text-white font-bold py-2 px-4 rounded-lg hover:bg-blue-600 focus:outline-none focus:ring-2 focus:ring-blue-500 transition-colors">登入會員</button>
</div>

<div id="profile-container" class="hidden bg-white p-8 rounded-lg shadow-lg max-w-md w-full transition-all duration-300 transform">
    <h2 class="text-2xl font-bold text-gray-800 text-center mb-6">使用者中心</h2>
    <div class="text-center mb-4">
        <p class="text-gray-600">歡迎,<span id="user-email-display" class="font-bold text-blue-600"></span></p>
    </div>

    <div class="border-t border-gray-200 pt-4 mt-4">
        <h3 class="text-xl font-bold text-gray-800 mb-4">檔案上傳</h3>
        <input type="file" id="file-input" class="w-full border border-gray-300 p-2 rounded-lg mb-4 cursor-pointer">
        <button id="upload-btn" class="w-full bg-green-500 text-white font-bold py-2 px-4 rounded-lg hover:bg-green-600 focus:outline-none focus:ring-2 focus:ring-green-500 transition-colors">上傳檔案</button>
        <p id="upload-status" class="mt-4 text-center text-sm"></p>
    </div>

    <button id="logout-btn" class="w-full mt-6 bg-red-500 text-white font-bold py-2 px-4 rounded-lg hover:bg-red-600 focus:outline-none focus:ring-2 focus:ring-red-500 transition-colors">登出</button>
</div>

<script>
    // 請在這裡替換成你的 AWS Cognito 和 S3 資訊
    const COGNITO_USER_POOL_ID = 'us-east-1_0Kius6YBt'; // 你的 User Pool ID
    const COGNITO_CLIENT_ID = '5ug0mo74oh6ma666kd9dkpbqk5'; // 你的 App Client ID
    const S3_BUCKET_REGION = 'us-east-1'; // 你的 S3 儲存桶所在的區域
    const S3_BUCKET_NAME = '2025ithome-ducky '; // 你的 S3 儲存桶名稱
    // 請替換為你的 Identity Pool ID
    const IDENTITY_POOL_ID = 'us-east-1:4682c527-47ae-4357-b444-bdec69d3f4e2';
    // 請在這裡設定你的 Cognito 託管 UI URL 和回呼 URL
    const COGNITO_HOSTED_UI_URL = 'https://ducky-unique123.auth.us-east-1.amazoncognito.com/login?client_id=5ug0mo74oh6ma666kd9dkpbqk5&response_type=token&scope=email+openid+profile&redirect_uri=https://www.ducky-test.tw/index.html';

    const loginRedirectContainer = document.getElementById('login-redirect-container');
    const loginRedirectBtn = document.getElementById('login-redirect-btn');
    const profileContainer = document.getElementById('profile-container');
    const userEmailDisplay = document.getElementById('user-email-display');
    const logoutBtn = document.getElementById('logout-btn');
    const fileInput = document.getElementById('file-input');
    const uploadBtn = document.getElementById('upload-btn');
    const uploadStatus = document.getElementById('upload-status');

    // 初始化 Cognito 認證
    const poolData = {
        UserPoolId: COGNITO_USER_POOL_ID,
        ClientId: COGNITO_CLIENT_ID
    };
    const userPool = new AmazonCognitoIdentity.CognitoUserPool(poolData);

    let cognitoUser;

    // 處理登入導向按鈕點擊
    loginRedirectBtn.addEventListener('click', () => {
        window.location.href = COGNITO_HOSTED_UI_URL;
    });

    // 檢查 URL 中的 JWT Token
    const urlParams = new URLSearchParams(window.location.hash.substring(1));
    const accessToken = urlParams.get('access_token');
    const idToken = urlParams.get('id_token');

    if (accessToken && idToken) {
        // 使用 JWT Token 獲取使用者資訊
        const userPayload = JSON.parse(atob(idToken.split('.')[1]));
        console.log("ID Token Payload:", userPayload);

        let userEmail = userPayload.email || userPayload["cognito:username"] || "未知使用者";
        userEmailDisplay.textContent = userEmail;

        // 更新 AWS 憑證
        AWS.config.credentials = new AWS.CognitoIdentityCredentials({
            IdentityPoolId: IDENTITY_POOL_ID,
            Logins: {
                [`cognito-idp.${S3_BUCKET_REGION}.amazonaws.com/${COGNITO_USER_POOL_ID}`]: idToken
            }
        });

        // 確保 AWS 憑證已更新
        AWS.config.credentials.get((err) => {
            if (err) {
                console.error("無法取得 AWS 憑證:", err);
                alert("登入失敗,請檢查你的設定。");
                return;
            }

            console.log("登入成功!");
            cognitoUser = userPool.getCurrentUser(); // 取得當前使用者
            userEmailDisplay.textContent = userEmail;
            showProfilePage();
        });
    }

    // 處理檔案上傳
    uploadBtn.addEventListener('click', async () => {
        const file = fileInput.files[0];
        if (!file) {
            uploadStatus.textContent = '請先選擇一個檔案!';
            uploadStatus.className = 'mt-4 text-center text-red-500 text-sm';
            return;
        }

        uploadStatus.textContent = '上傳中,請稍候...';
        uploadStatus.className = 'mt-4 text-center text-gray-600 text-sm';

        // 創建使用者專屬的資料夾名稱
        const userEmail = userEmailDisplay.textContent;
        const folderName = userEmail.split('@')[0]; // 移除 @ 和後面的網域
        const fileName = file.name;

        // 檔案上傳參數
        const uploadParams = {
            Bucket: S3_BUCKET_NAME,
            Key: `${folderName}/${fileName}`,
            Body: file,
            ACL: 'private' // 確保檔案為私有,只有擁有權限的人能存取
        };

        const s3 = new AWS.S3({
            params: { Bucket: S3_BUCKET_NAME },
            region: S3_BUCKET_REGION
        });

        try {
            await s3.upload(uploadParams).promise();
            uploadStatus.textContent = '檔案上傳成功!';
            uploadStatus.className = 'mt-4 text-center text-green-500 text-sm';
        } catch (err) {
            console.error("上傳失敗:", err);
            uploadStatus.textContent = '檔案上傳失敗: ' + err.message;
            uploadStatus.className = 'mt-4 text-center text-red-500 text-sm';
        }
    });

    // 處理登出
    logoutBtn.addEventListener('click', () => {
        if (cognitoUser) {
            cognitoUser.signOut();
            window.location.href = 'https://www.ducky-test.tw/'; // 替換為你的登入頁面 URL
        }
    });

    // 檢查是否有有效的登入會話
    const checkSession = () => {
        if (!accessToken && !idToken) {
            // 沒有找到 Token,顯示登入頁面
            loginRedirectContainer.classList.remove('hidden');
            profileContainer.classList.add('hidden');
        } else {
            // 找到 Token,顯示個人資料頁面
            loginRedirectContainer.classList.add('hidden');
            profileContainer.classList.remove('hidden');
        }
    };

    // 在頁面載入時檢查登入狀態
    checkSession();

</script>

</body>
</html>
進入Cognito的「使用者集區」內。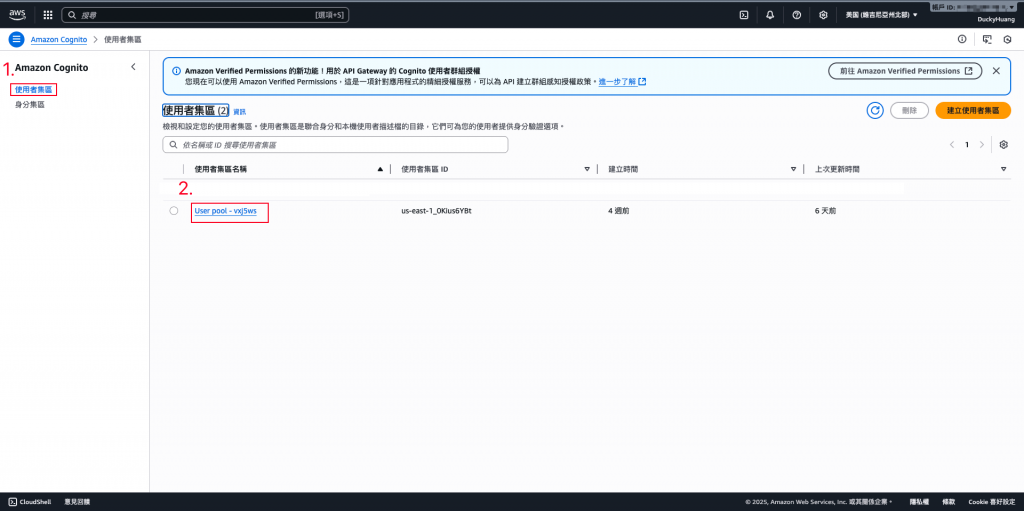
進入「應用程式用戶端」,並選擇。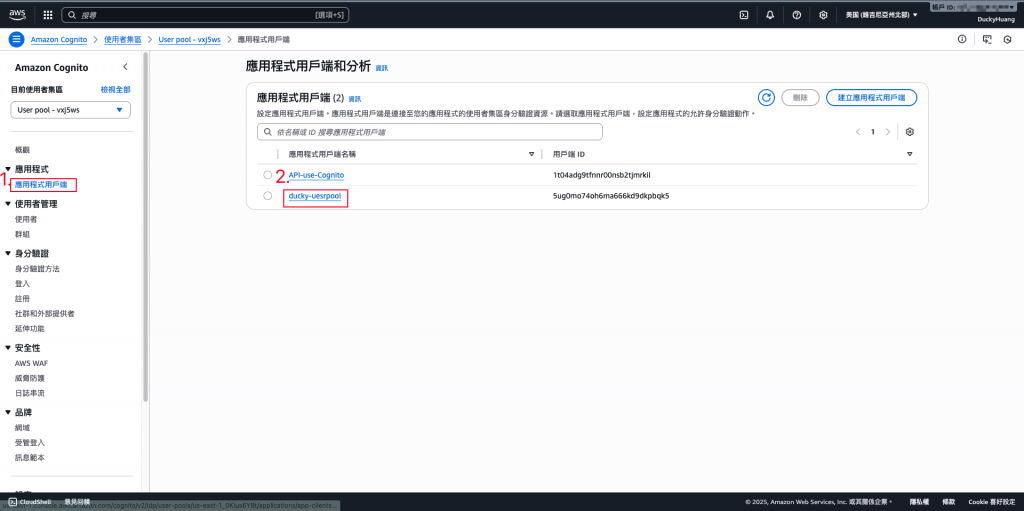
編輯「登入頁面」。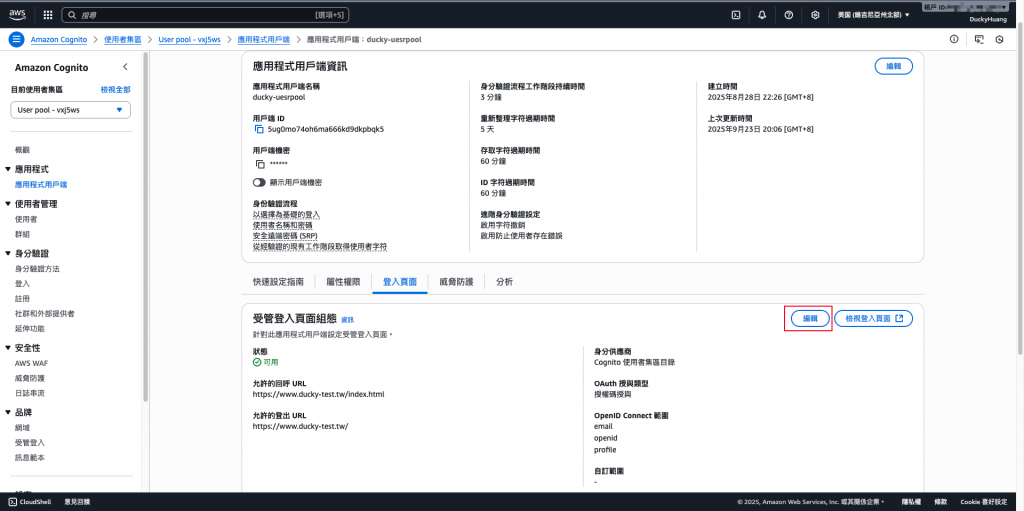
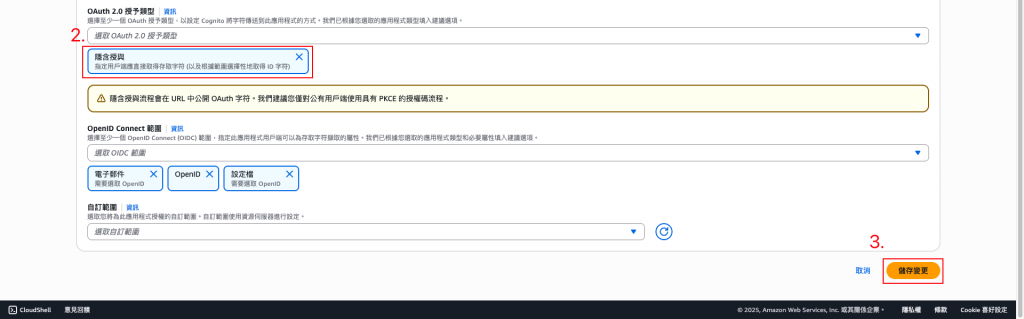
修改「Callback頁面URL」及「OAuth2.0授予類型」。
💡OAuth 2.0 授予類型 調整成「隱含授與」時,「AccessToken」和「IdToken」會顯示在URL內。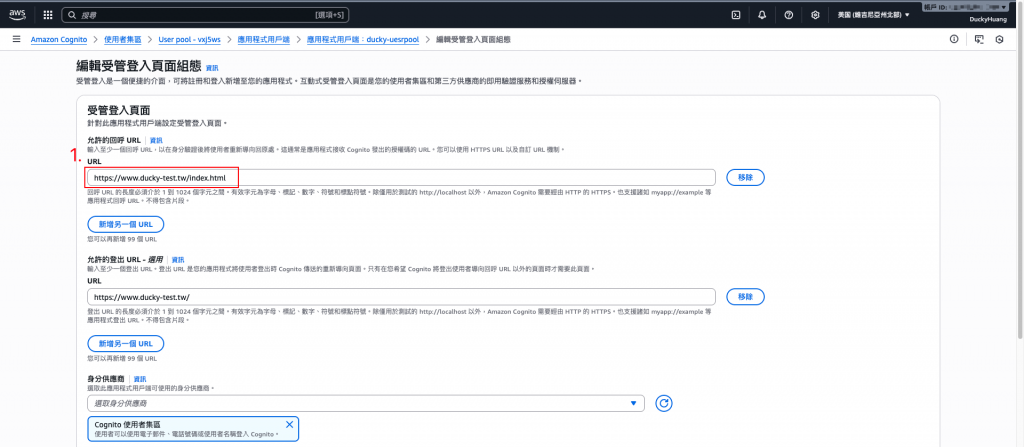
點選登入會員。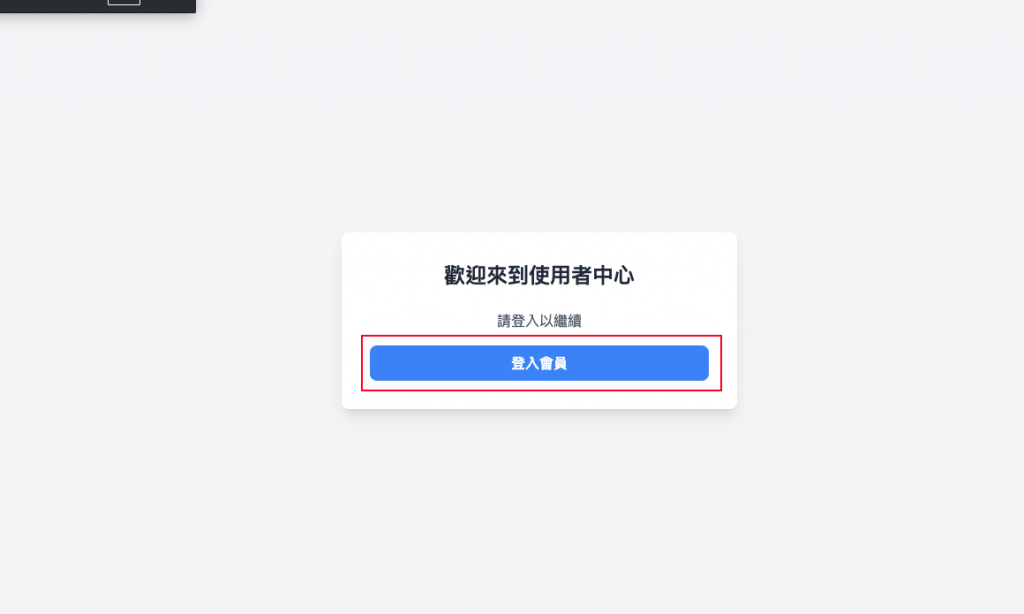
登入後,會出現帶有會員E-mail的歡迎語。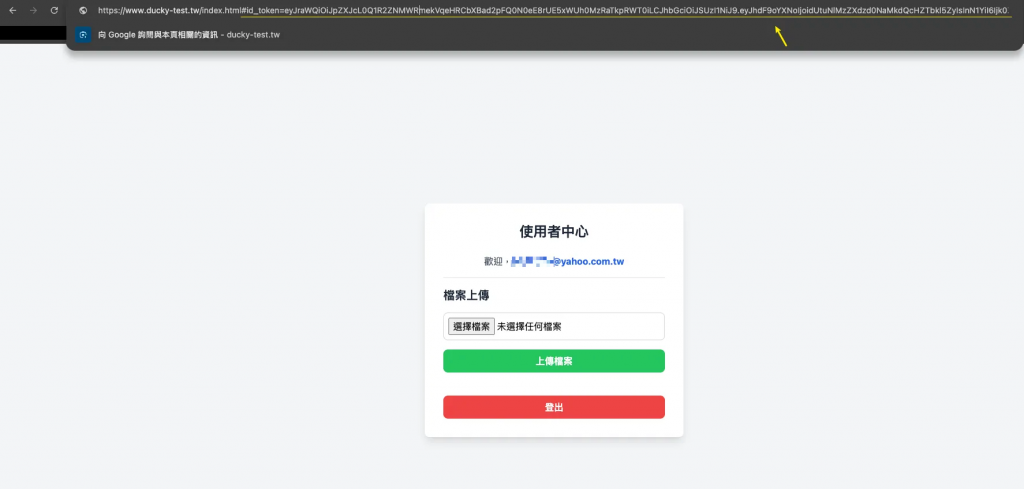
本 Lab 示範了如何將 Cognito 權杖與使用者屬性呈現在前端,打造基礎的會員專屬頁面。這讓登入後的體驗不再只是通過驗證,而是能夠看到屬於自己的內容,為未來進一步的個人化設計與角色權限管控鋪路。
[1] AWS Cognito - 重新導向和授權端點 範例:授權碼授予:

