
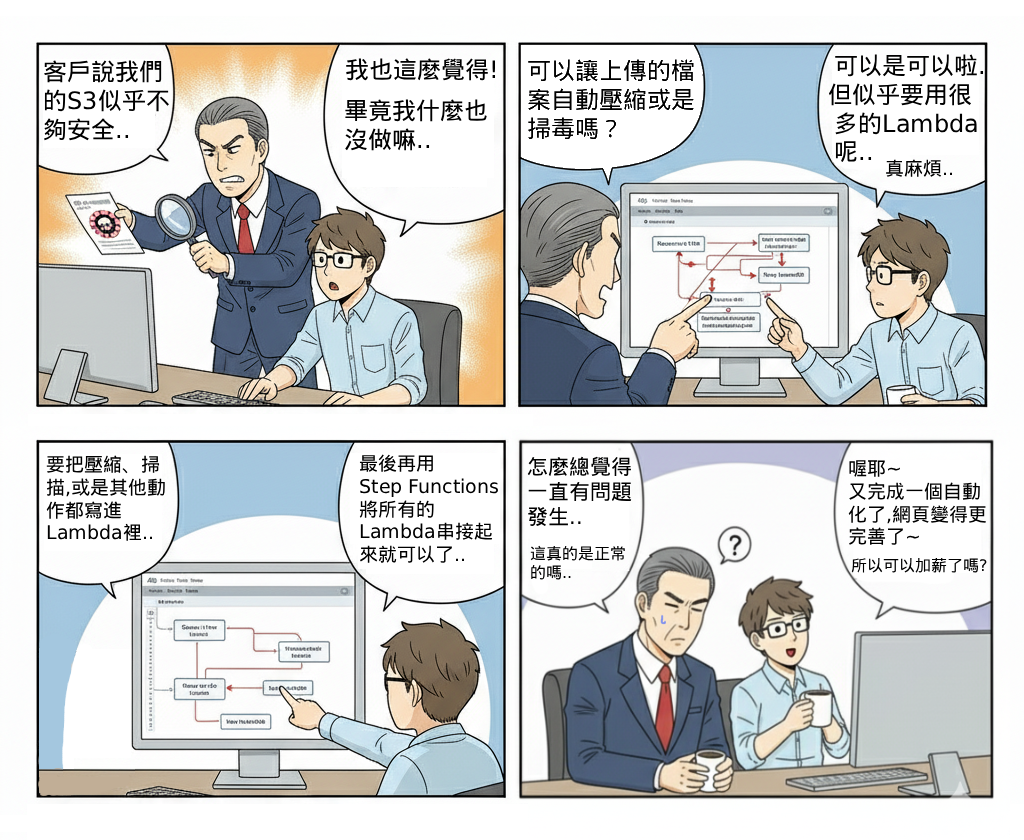
使用者上傳檔案到雲端後,若沒有進一步的處理,會帶來安全風險與儲存成本壓力。透過自動化流程,我們可以在檔案進入 S3 後即時進行 壓縮(節省儲存空間與傳輸頻寬)以及 掃毒(避免惡意檔案進入系統),確保檔案安全且具備最佳化的儲存效率。
在無伺服器架構中,檔案存取是常見需求,但隨之而來的挑戰是:
(1) 大量檔案累積導致儲存與傳輸成本上升。
(2) 檔案來源多元,若沒有檢測,惡意程式可能透過檔案傳播。
(3) 傳統人工檢查與壓縮流程效率低落,難以應付大規模上傳需求。
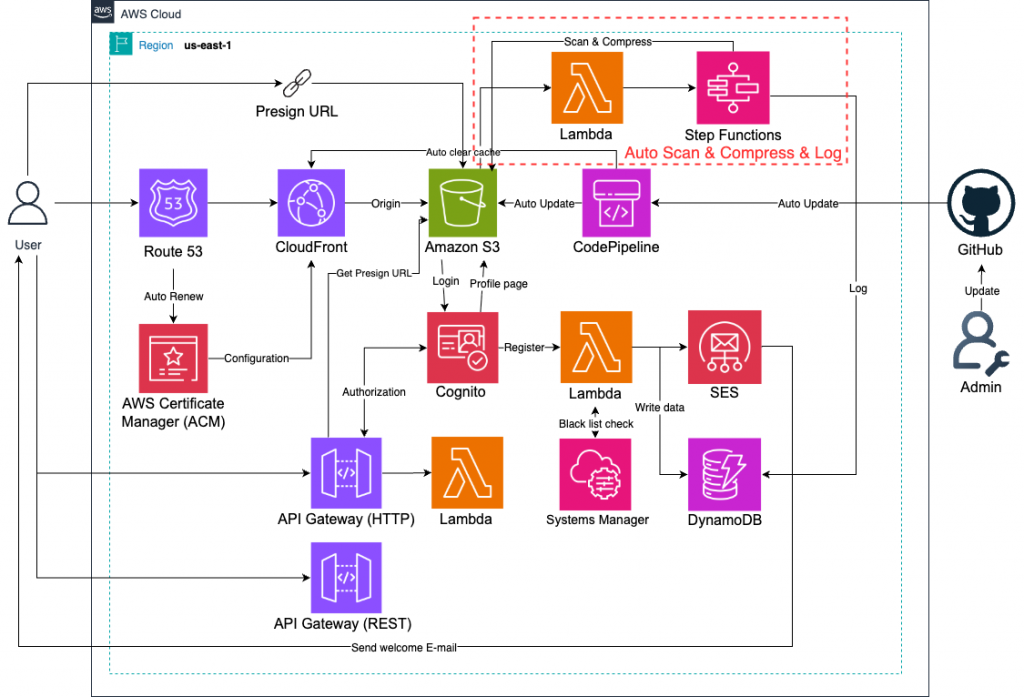
本 Lab 透過 S3 事件觸發 Lambda,並藉由 Step Functions 串接壓縮、掃毒、標記等多步驟處理,建立 全自動檔案後處理管線,在整體 Serverless 架構中擔任「檔案安全與最佳化守門員」的角色。
(1) 使用 多 Bucket 架構(原始/處理後/隔離)避免污染。
(2) Lambda 掃毒建議使用 Layer 部署 ClamAV,定期更新病毒碼。
(3) 壓縮與掃毒建議分離 Lambda,降低單一函數複雜度,便於維護。
(4) 對於大檔案,建議使用 S3 Multipart Upload 搭配 Step Functions 並行處理。
(5) 針對異常狀況(如掃毒失敗)設計 Dead Letter Queue(DLQ),確保不遺漏檔案。(此次沒有做這塊)
到自己的GitHub中,並點選創建檔案。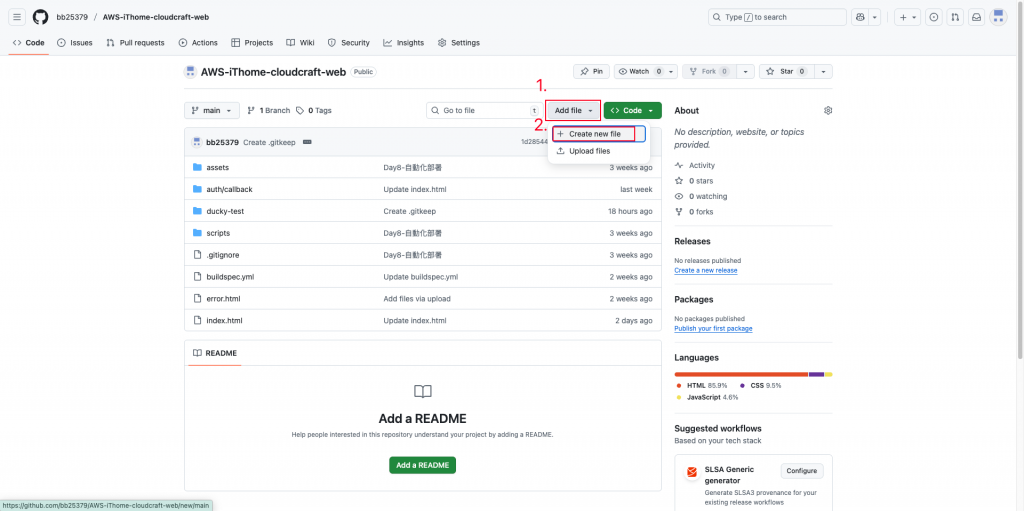
創建資料夾及佔位檔案「.gitkeep」。
上傳並推送。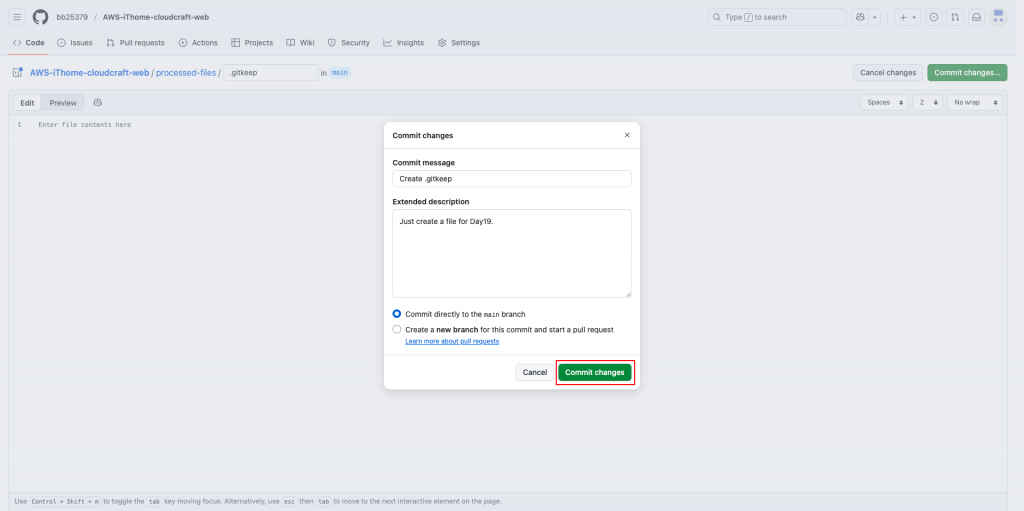
進到「DynamoDB」頁面。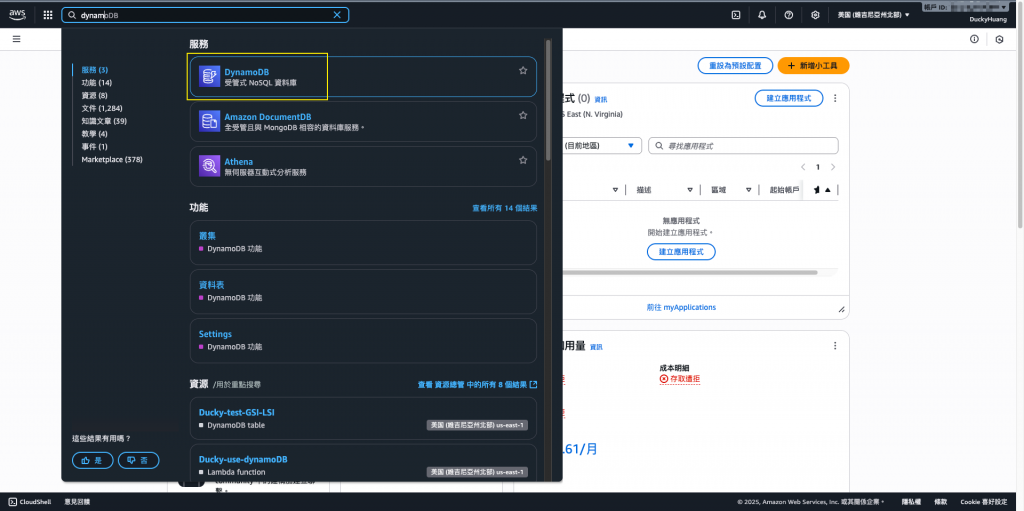
創建一個新的資料表。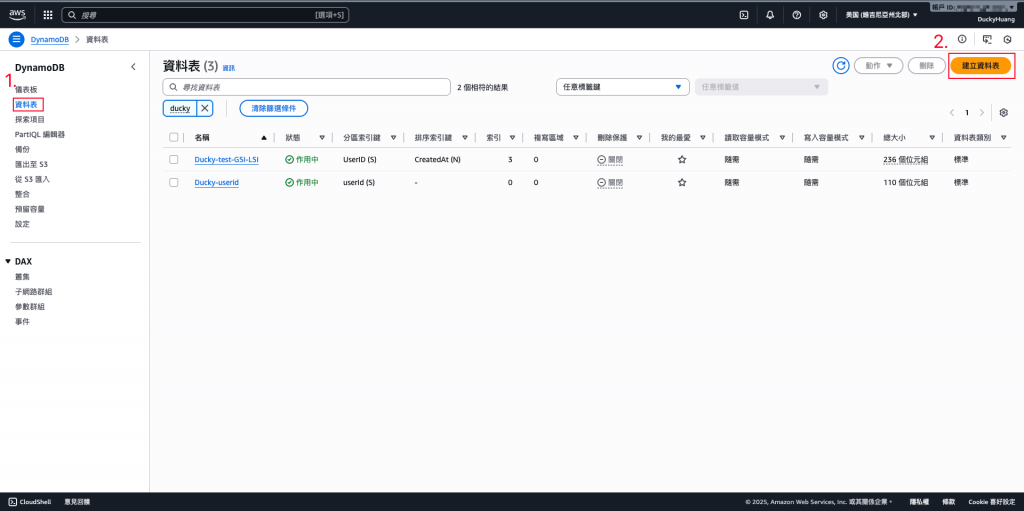
命名並設定分割索引。(FileKey)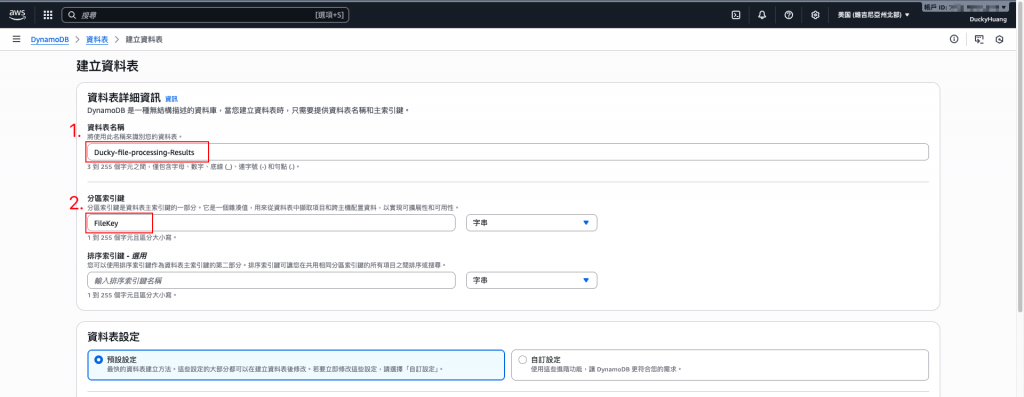
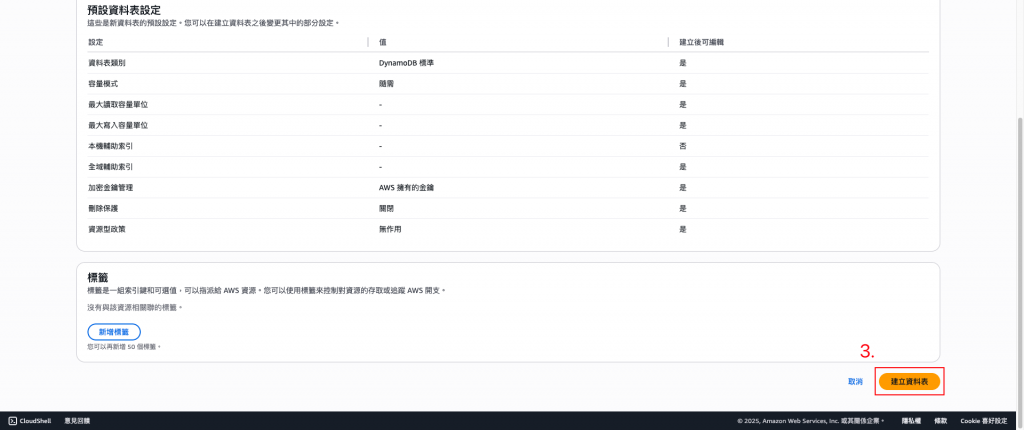
完成畫面。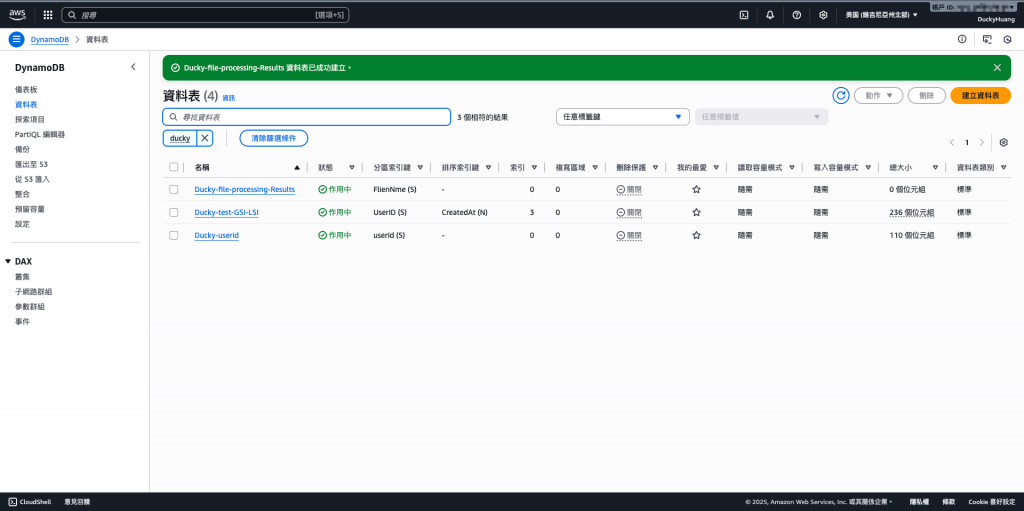
進入「Lambda」頁面。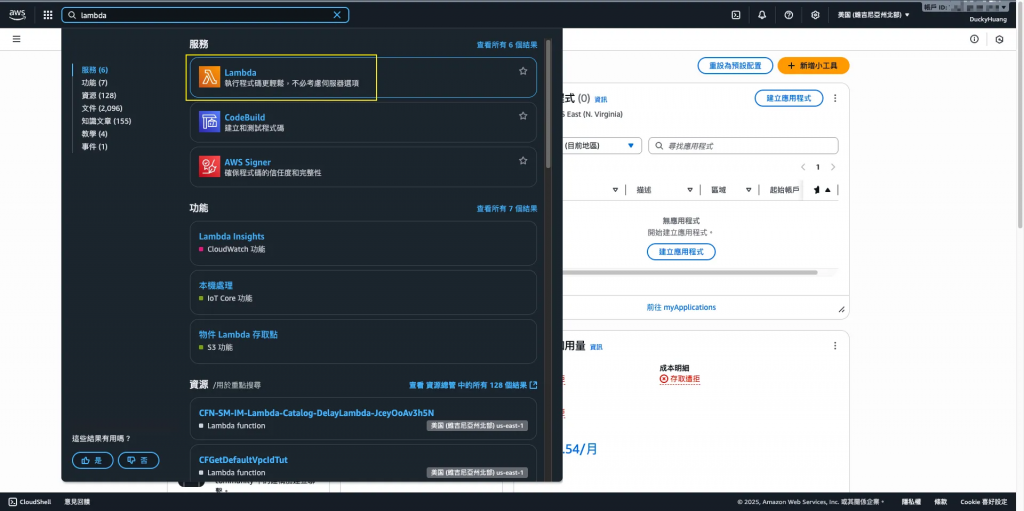
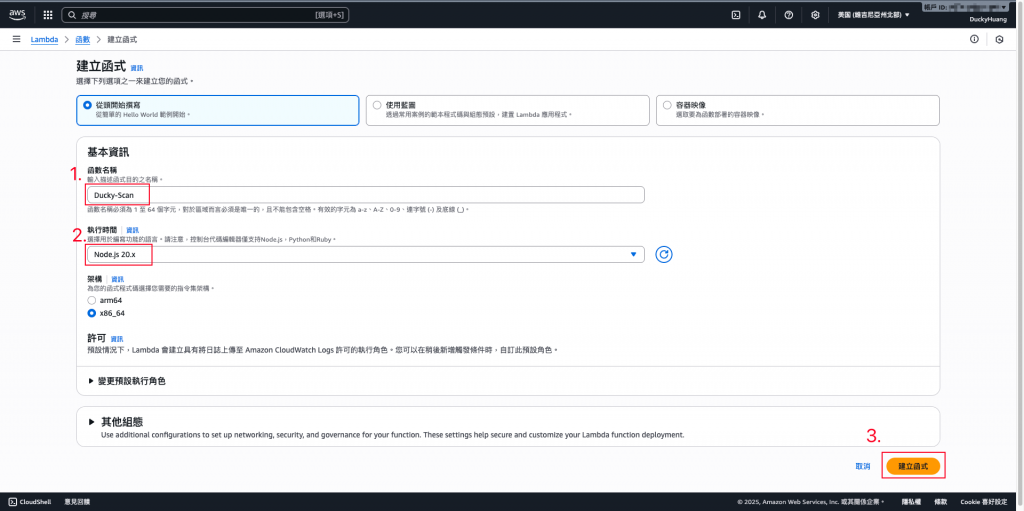
創建3個新的函數。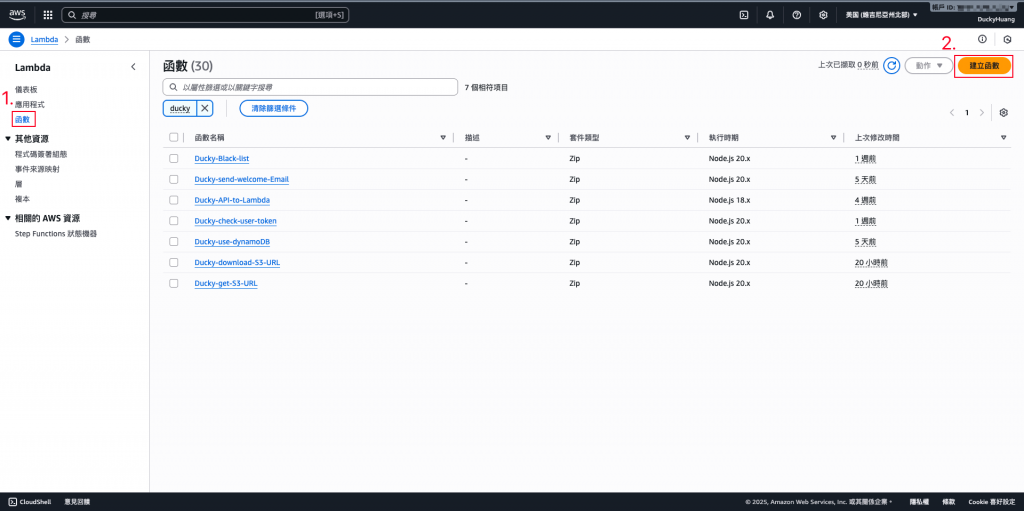
輸入函數名稱,並選擇編撰語言。(名稱:Ducky-Scan、Ducky-Compress、Ducky-Update)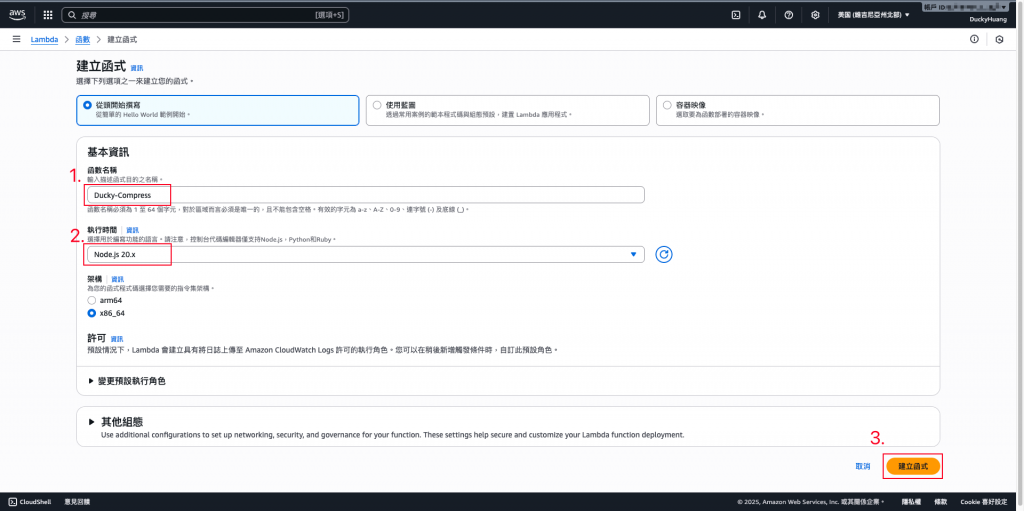

跳過建議畫面。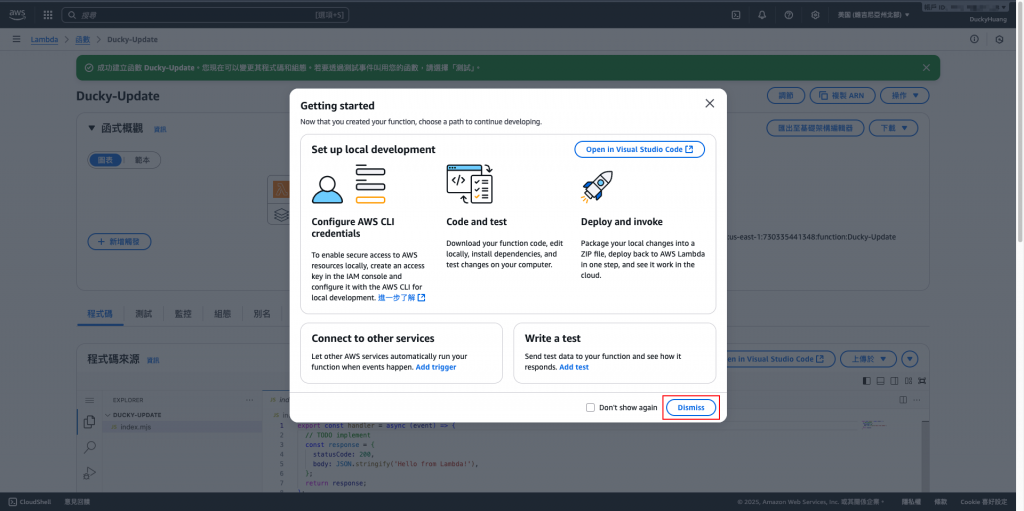
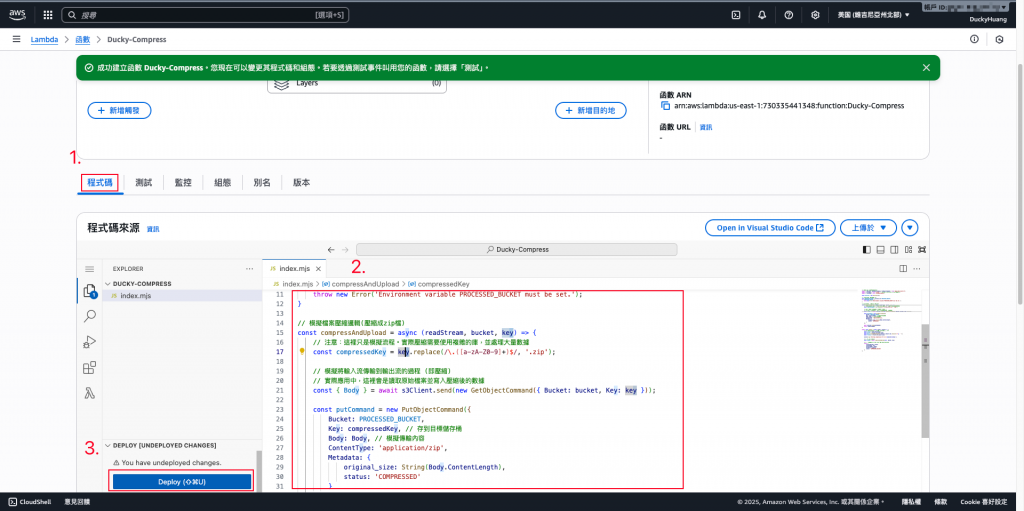
寫入程式碼,並部署。
**(1)**範例程式碼(Scan)檔案掃描病毒用
// index.mjs (ScanLambda)
export const handler = async (event) => {
  const { bucket, key } = event; // 接收 S3 資訊

  console.log(`Starting virus scan for s3://${bucket}/${key}`);

  // ⚠️ 模擬掃描邏輯:如果檔名包含 'virus' 或 'eicar',則視為感染
  const fileName = key.split('/').pop();
  const scanResult = (fileName.toLowerCase().includes('virus') || fileName.toLowerCase().includes('eicar'))
                     ? "INFECTED"
                     : "CLEAN";

  if (scanResult === "INFECTED") {
      console.log(`❌ File ${key} is INFECTED. Throwing error for quarantine.`);
      // 丟出錯誤,讓 Step Functions 轉到錯誤/隔離處理
      throw new Error("FileScanFailed");
  }

  console.log(`✅ File ${key} is CLEAN.`);

  // 將結果傳遞給下一個步驟 (CompressLambda)
  return {
      ...event, // 帶上原始 bucket 和 key
      scanStatus: scanResult,
      scanTimestamp: new Date().toISOString()
  };
};
**(2)**範例程式碼(Compress)檔案壓縮,放到S3內的路徑用
// index.mjs (CompressLambda)
import { S3Client, GetObjectCommand, PutObjectCommand } from "@aws-sdk/client-s3";
import { Buffer } from 'buffer'; // 確保 Buffer 類別可用

const s3Client = new S3Client({ region: process.env.AWS_REGION });
const PROCESSED_FOLDER = process.env.PROCESSED_FOLDER;

// 輔助函數:將 Stream 完整讀取到 Buffer 中 (這是解決錯誤的關鍵)
const streamToBuffer = (stream) =>
  new Promise((resolve, reject) => {
    const chunks = [];
    stream.on('data', (chunk) => chunks.push(chunk));
    stream.on('error', reject);
    stream.on('end', () => resolve(Buffer.concat(chunks)));
  });

export const handler = async (event) => {
    const { bucket, key } = event; // 接收上一步的輸出

    // 1. 下載原始檔案,獲取 Stream
    const getCommand = new GetObjectCommand({ Bucket: bucket, Key: key });
    const fileGetResponse = await s3Client.send(getCommand);

    // 2. 將 Stream 完整讀取到 Buffer 中
    // 解決錯誤: fileGetResponse.Body 是 Stream,必須完整讀取
    const originalFileBuffer = await streamToBuffer(fileGetResponse.Body);

    // 3. 決定新的檔案路徑和名稱
    const originalFilename = key.split('/').pop();
    const compressedKey = PROCESSED_FOLDER + originalFilename + ".zip";

    // 4. 執行壓縮和上傳
    // ⚠️ 實際壓縮程式碼會在這裡執行,並生成 compressedBuffer
    // 這裡我們只是模擬,直接使用原始 Buffer 作為壓縮後的內容
    const compressedBuffer = originalFileBuffer;

    const putCommand = new PutObjectCommand({
        Bucket: bucket, // 寫回同一個 Bucket
        Key: compressedKey, // 寫入新的資料夾
        Body: compressedBuffer, // 傳遞完整的 Buffer
        ContentLength: compressedBuffer.length, // 雖然 SDK 會自動計算,但明確傳遞更安全
        ContentType: 'application/zip',
        Metadata: {
            'scan-status': event.scanStatus
        }
    });

    await s3Client.send(putCommand);

    console.log(`✅ File compressed (simulated) and moved to s3://${bucket}/${compressedKey}`);

    // 傳遞給下一個步驟 (UpdateDDBLambda)
    return {
        ...event,
        processedKey: compressedKey
    };
};
**(3)**範例程式碼(Update)檔案上傳寫入DynamoDB用
// index.mjs (UpdateDDBLambda)
import { DynamoDBClient } from "@aws-sdk/client-dynamodb";
import { DynamoDBDocumentClient, PutCommand } from "@aws-sdk/lib-dynamodb";

const ddbClient = new DynamoDBClient({});
const ddbDocClient = DynamoDBDocumentClient.from(ddbClient);

const DDB_TABLE = process.env.DDB_TABLE;

// 檢查表格名稱是否設定
if (!DDB_TABLE) {
    throw new Error("DDB_TABLE environment variable is not set.");
}

export const handler = async (event) => {
    const { key, processedKey, scanStatus, scanTimestamp } = event;

    // 檢查 Step Functions 的輸入是否包含主鍵所需的值
    if (!key) {
        throw new Error("Missing key (original file path) from workflow input.");
    }

    // 🎯 最終修正:將屬性名稱從 FlienNme 修正為 FileKey
    const item = {
        FileKey: key, // <-- 使用 DynamoDB 實際要求的主鍵名稱
        ScanStatus: scanStatus,
        ProcessedPath: processedKey,
        ProcessedAt: scanTimestamp,
        Status: 'COMPLETED_SUCCESS'
    };

    const putItemParams = {
        TableName: DDB_TABLE,
        Item: item
    };

    try {
        await ddbDocClient.send(new PutCommand(putItemParams));

        console.log(`✅ Result saved for file: ${key}`);
        return { status: "Success", file: key };
    } catch (e) {
        // 輸出詳細錯誤,以便追蹤
        console.error("❌ DynamoDB PutCommand Failed:", e);
        // 拋出錯誤,讓 Step Functions 知道
        throw new Error(`DynamoDB PutCommand Failed: ${e.message}`);
    }
};
新增Lambda「Ducky-Compress」變數key:
「PROCESSED_FOLDER」,Value為你在 S3 中要將處理完的檔案丟入的路徑(如:步驟一的「processed-files/」)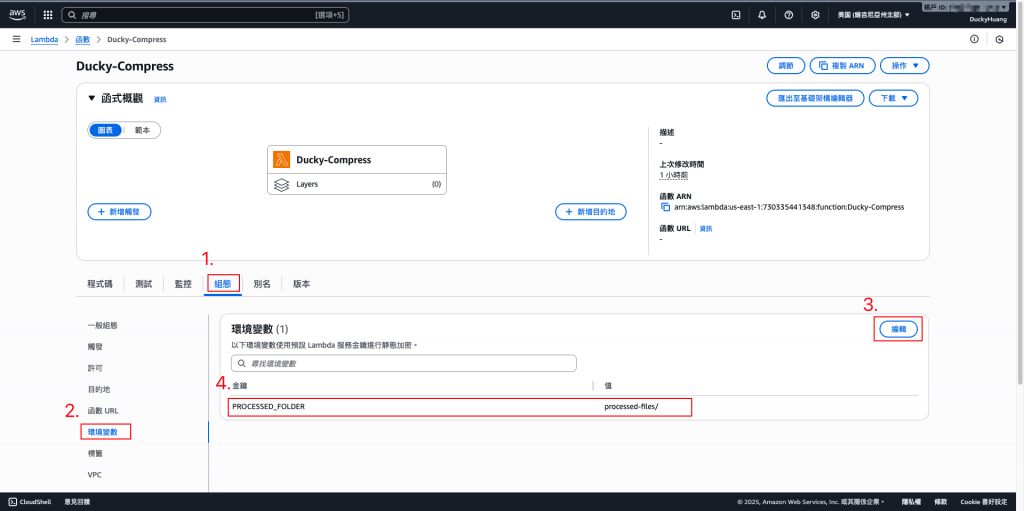
新增Lambda「Ducky-Update」變數key:
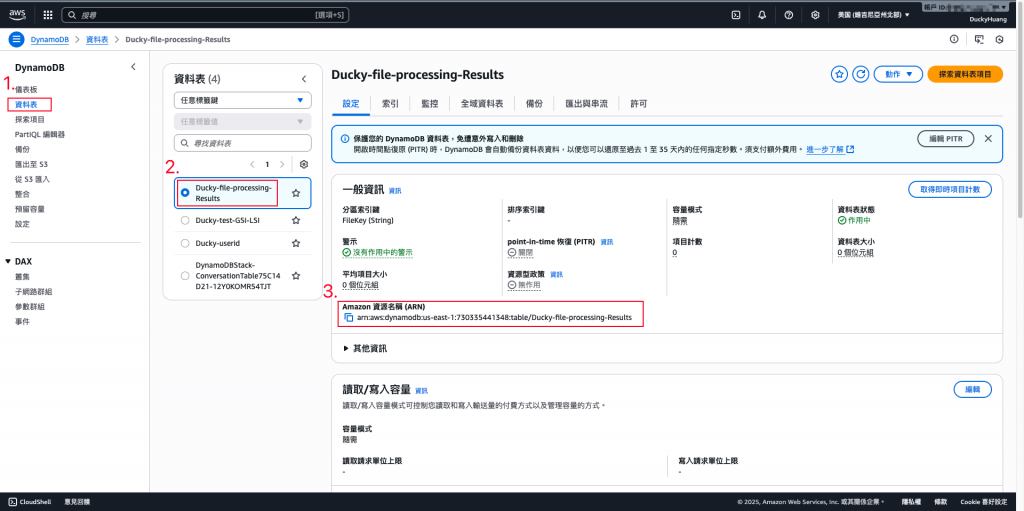
「DDB_TABLE」,Value為你在 DynamoDB 中,要儲存處理紀錄的資料庫名稱(如:步驟二的「Ducky-file-processing-Results」)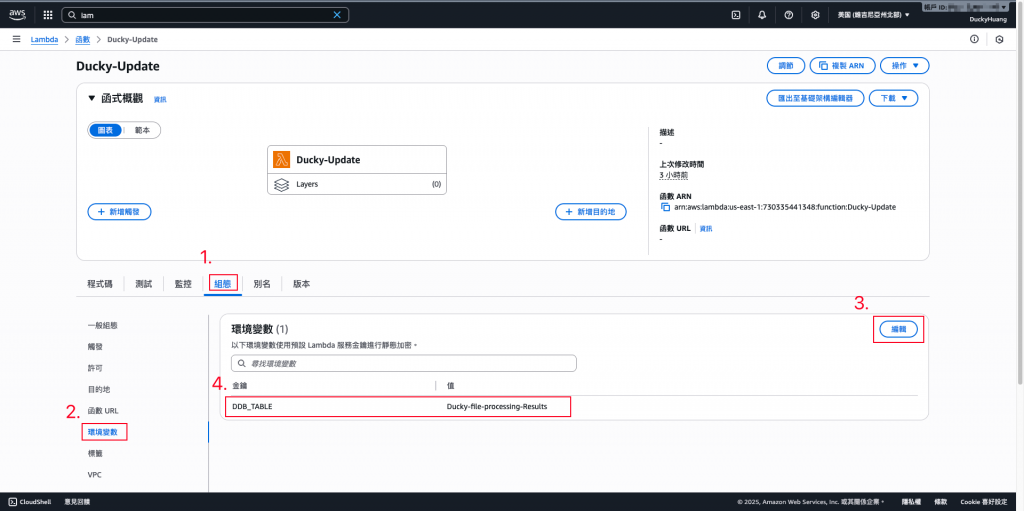
進入「Step Functions」頁面。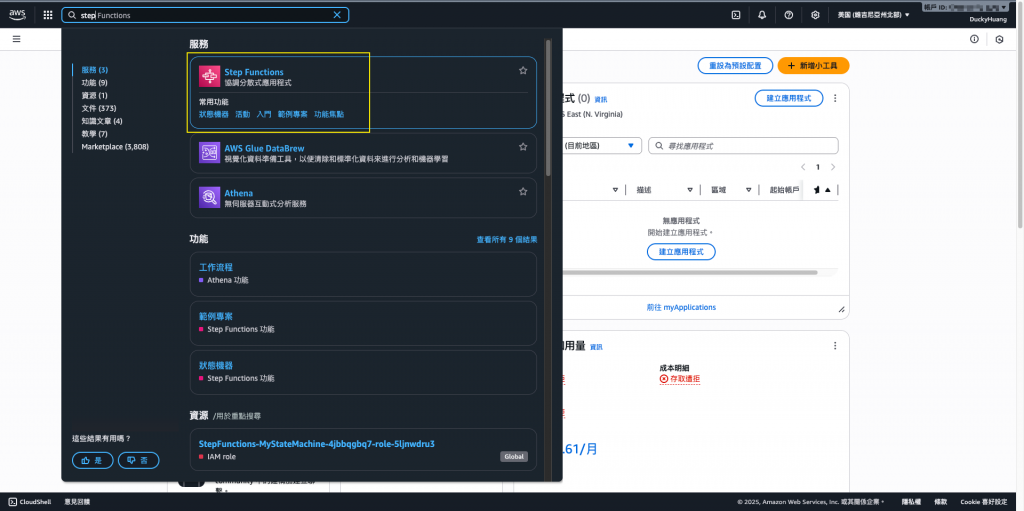
新增一個狀態機器。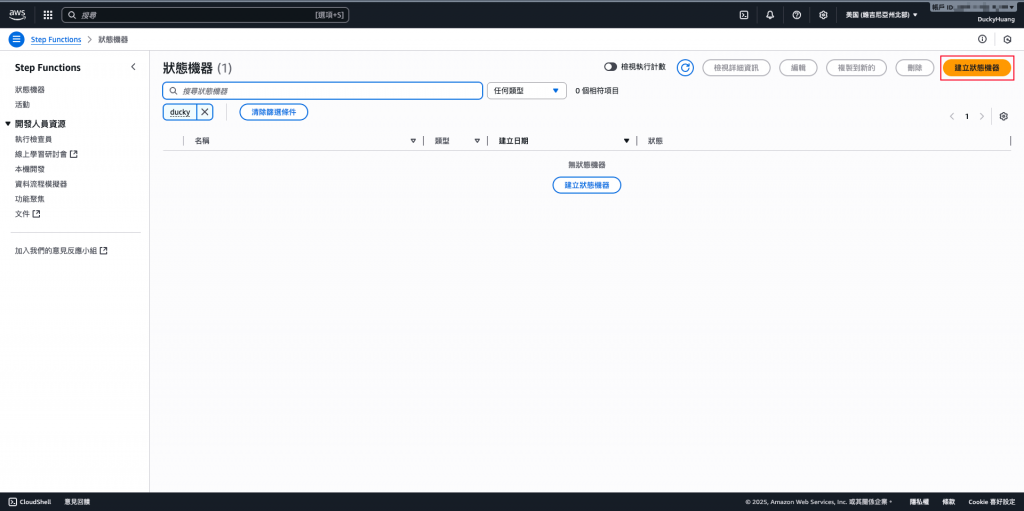
命名,並選「空白範本」及「標準」的模式做創建。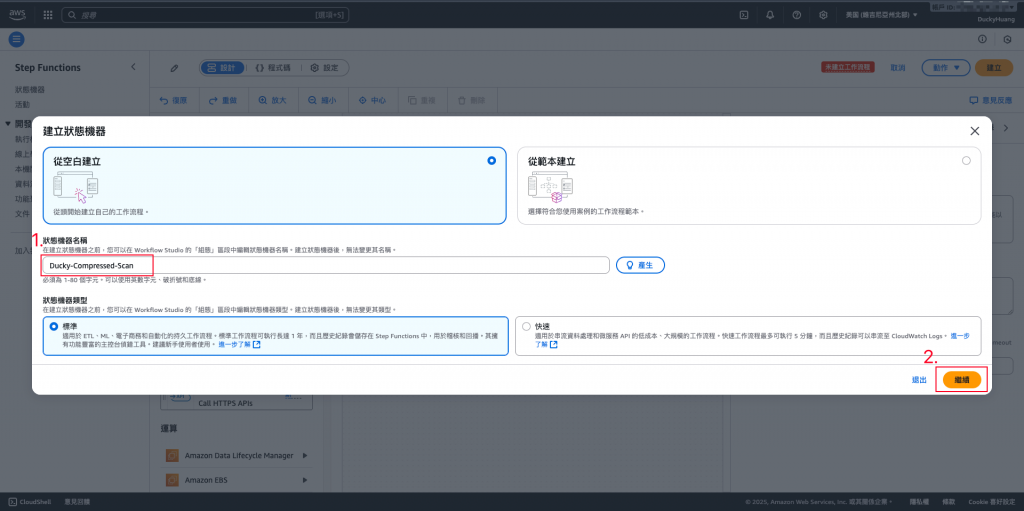
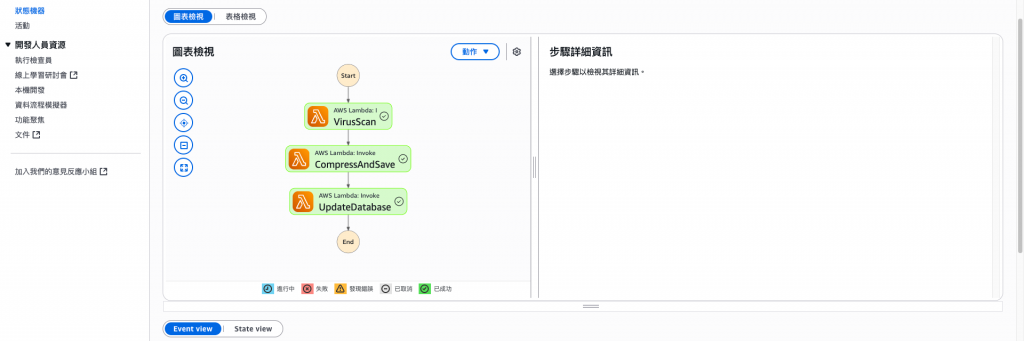
設定Step Functions的工作流程。
程式碼範例(ARN要替換)
{
  "Comment": "File Processing Pipeline: Scan -> Compress -> Database Update",
  "StartAt": "VirusScan",
  "States": {
    "VirusScan": {
      "Type": "Task",
      "Resource": "arn:aws:lambda:us-east-1:730335441348:function:Ducky-Scan",
      "Catch": [],
      "Next": "CompressAndSave"
    },
    "CompressAndSave": {
      "Type": "Task",
      "Resource": "arn:aws:lambda:us-east-1:730335441348:function:Ducky-Compress",
      "Next": "UpdateDatabase"
    },
    "UpdateDatabase": {
      "Type": "Task",
      "Resource": "arn:aws:lambda:us-east-1:730335441348:function:Ducky-Update",
      "End": true
    }
  }
}
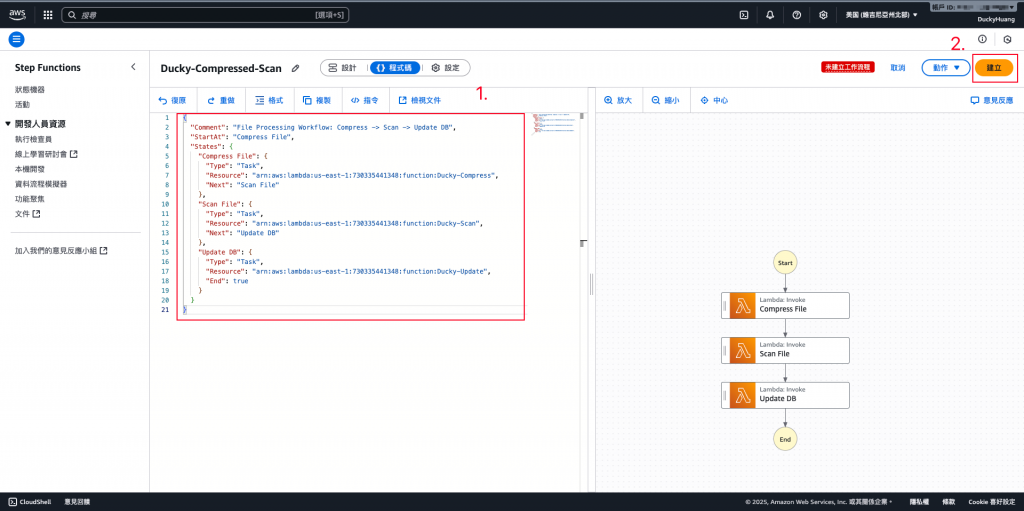

確認建立並存檔。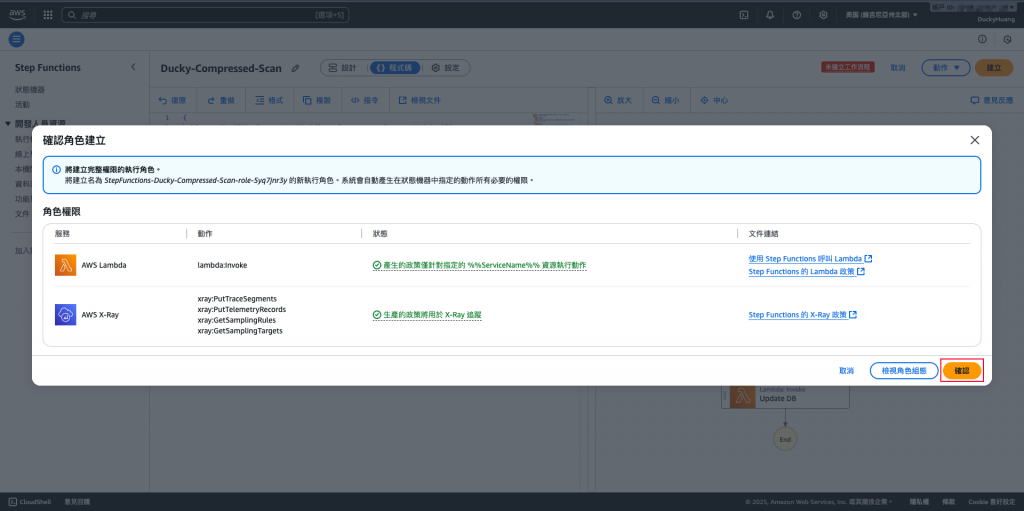
完成畫面。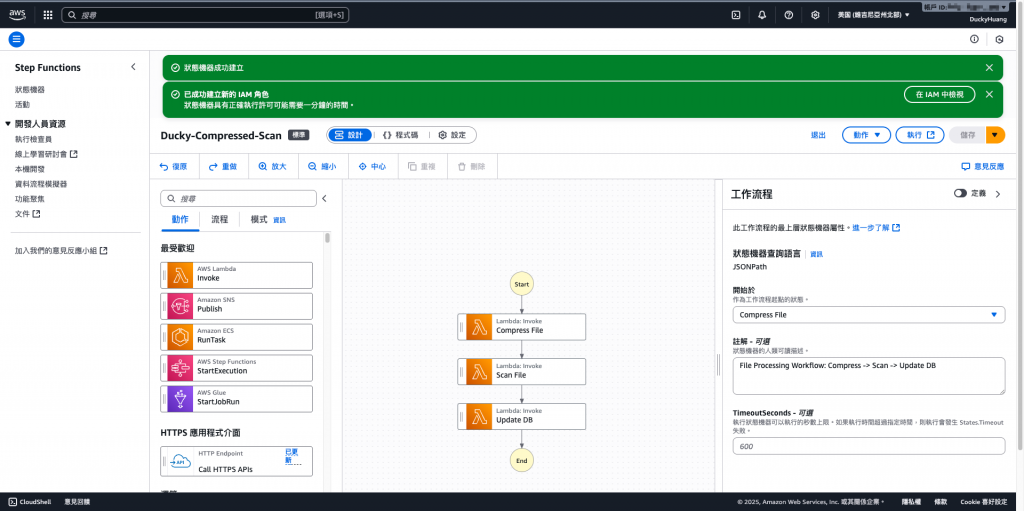
進入「IAM」頁面。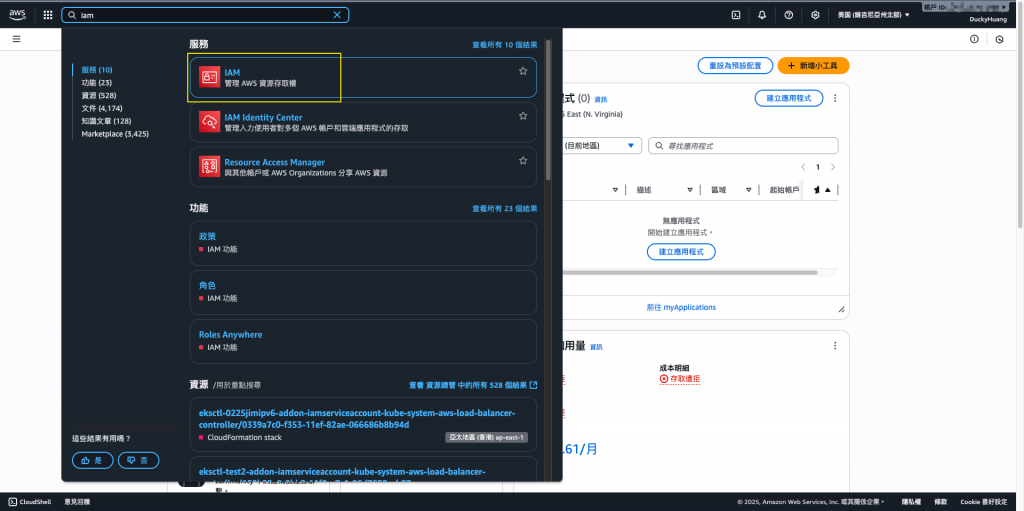
進入IAM role的頁面,點選該Lambda自動創建的IAM role。(有3個Lambda IAM role要做調整)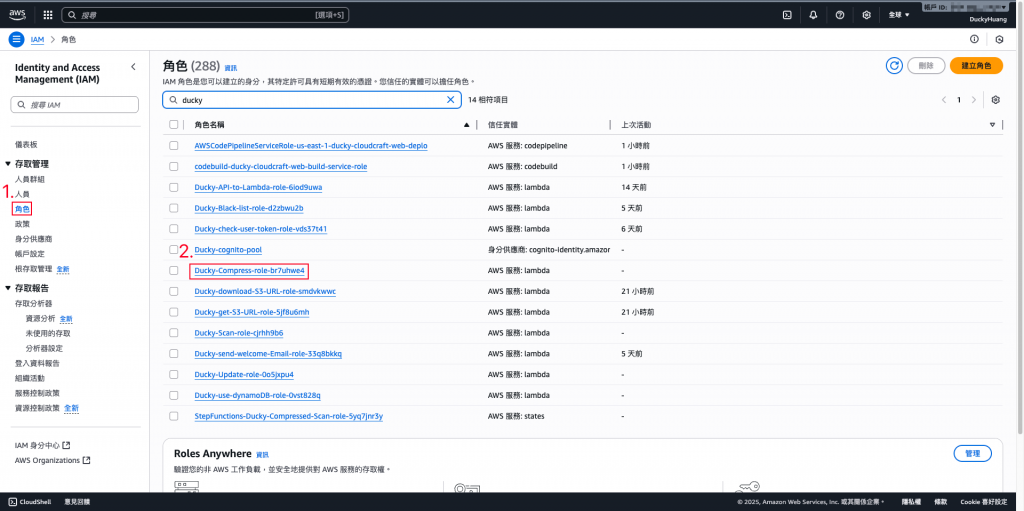
新增「許可政策」。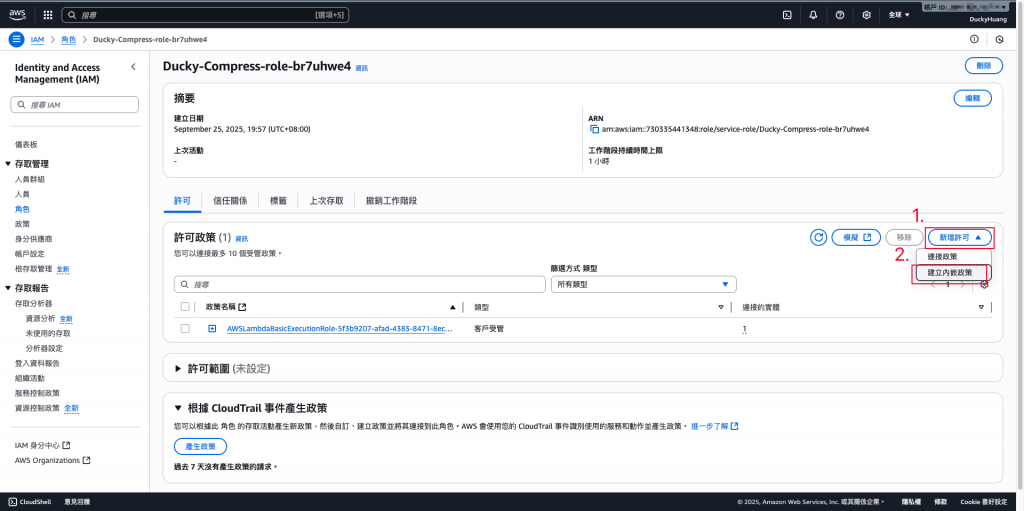
調整一下對應的IAM Role :
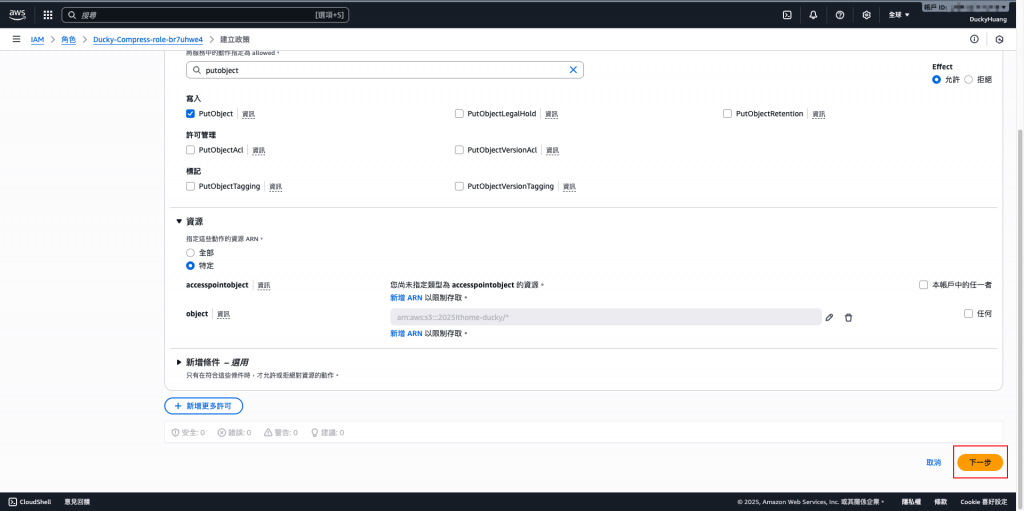
**(1)**Ducky-Scan:增加S3的「GetObject」、「PutObject」權限,授權範圍為「指定的S3桶」。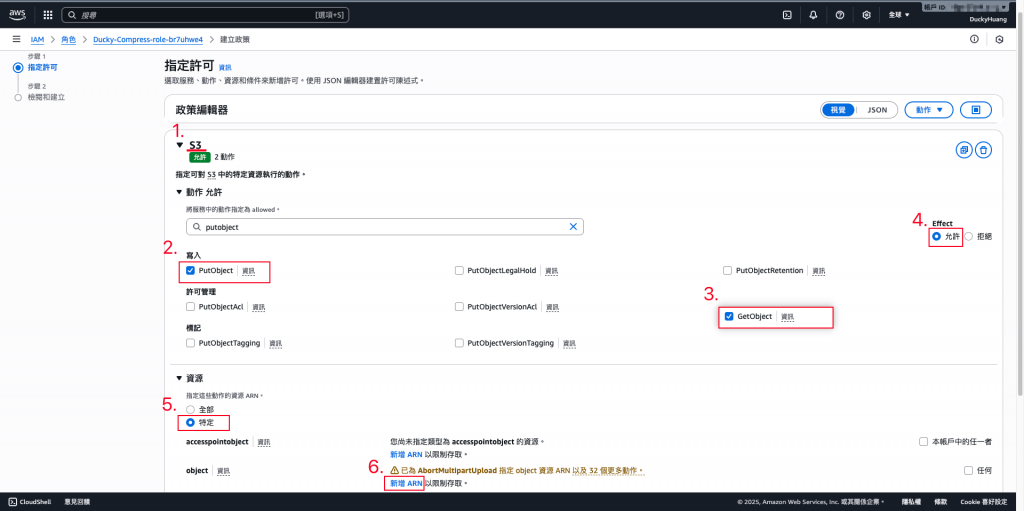
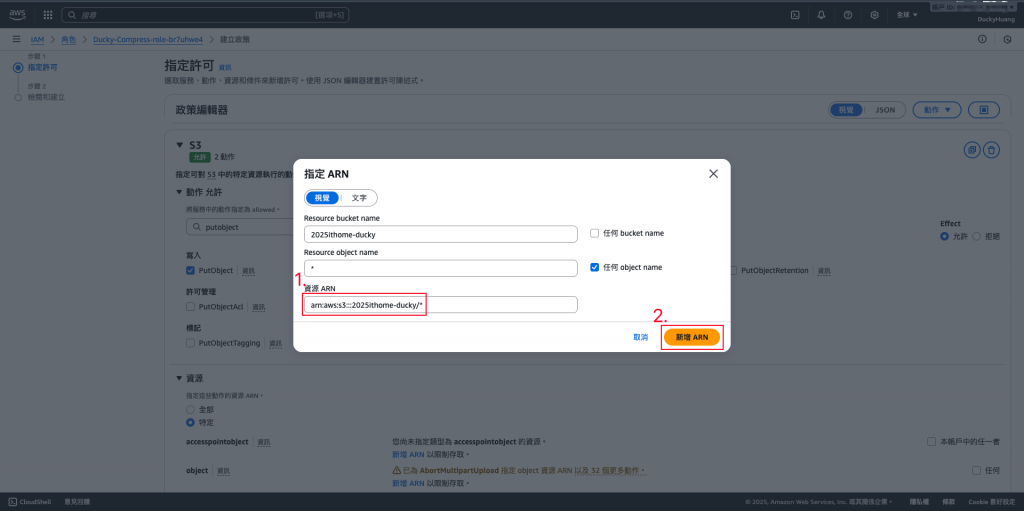
設定「許可政策」名稱。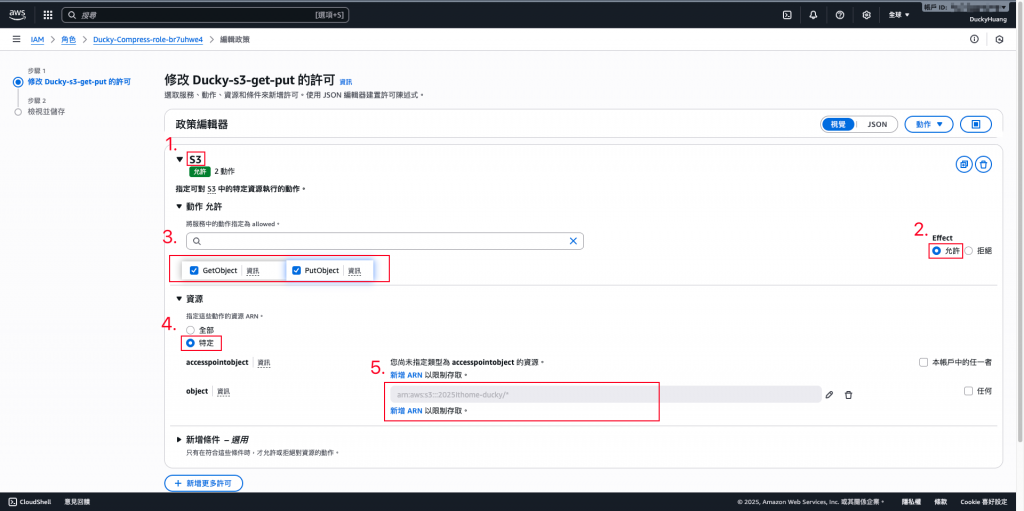
**(2)**Ducky-Compress:增加S3的「GetObject」、「PutObject」權限,授權範圍為「指定的S3桶」。
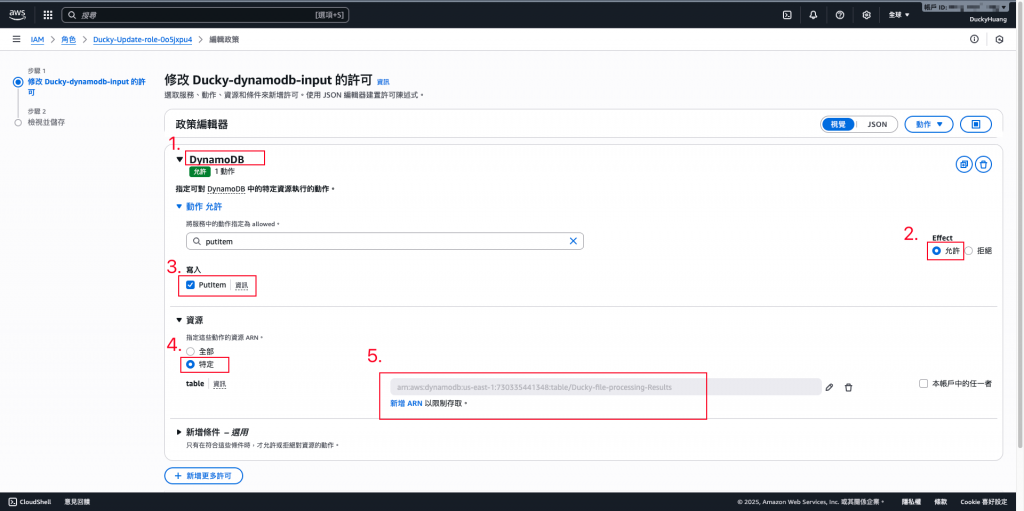
- Ducky-Update:增加DynamoDB的「PutItem」權限,授權範圍為「指定的DynamoDB」。
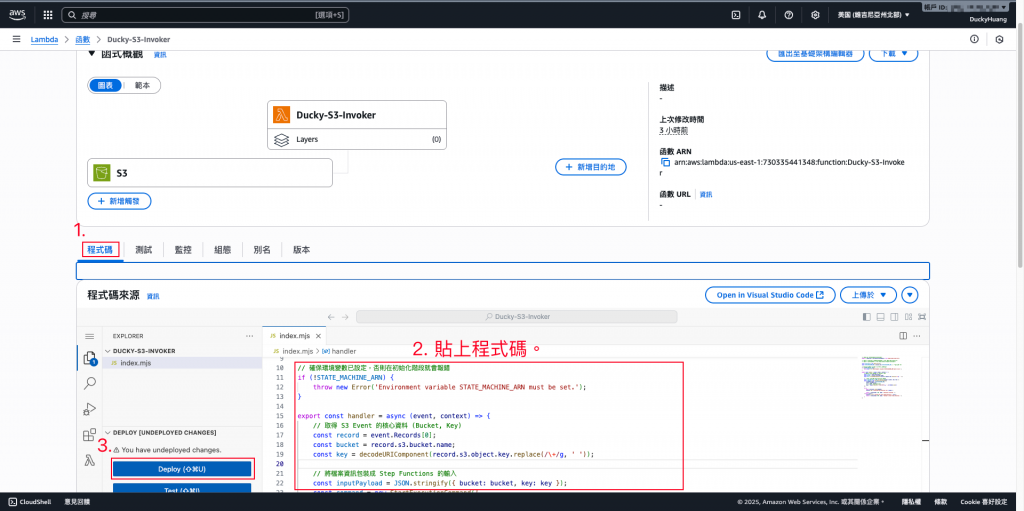
進入「Lambda」頁面。
創建一個新的函數。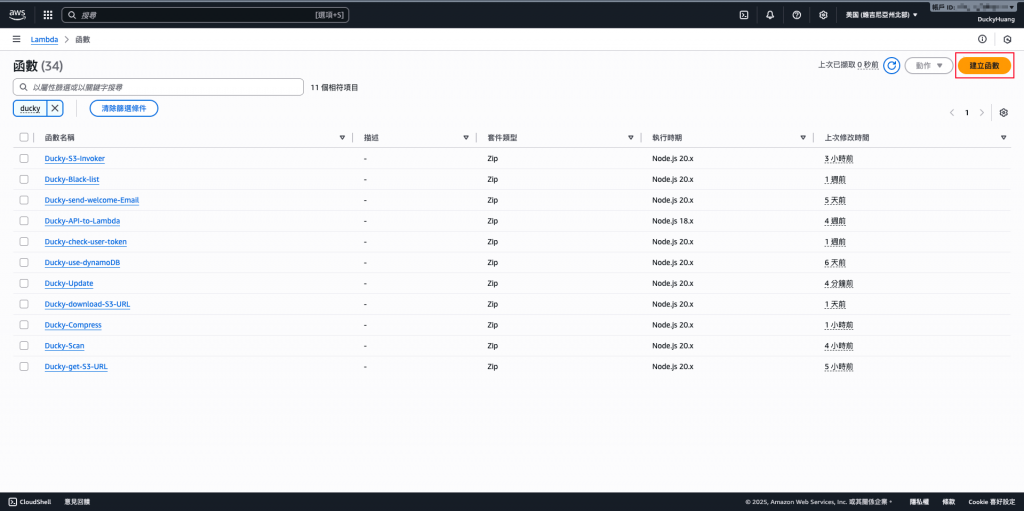
輸入函數名稱,並選擇編撰語言。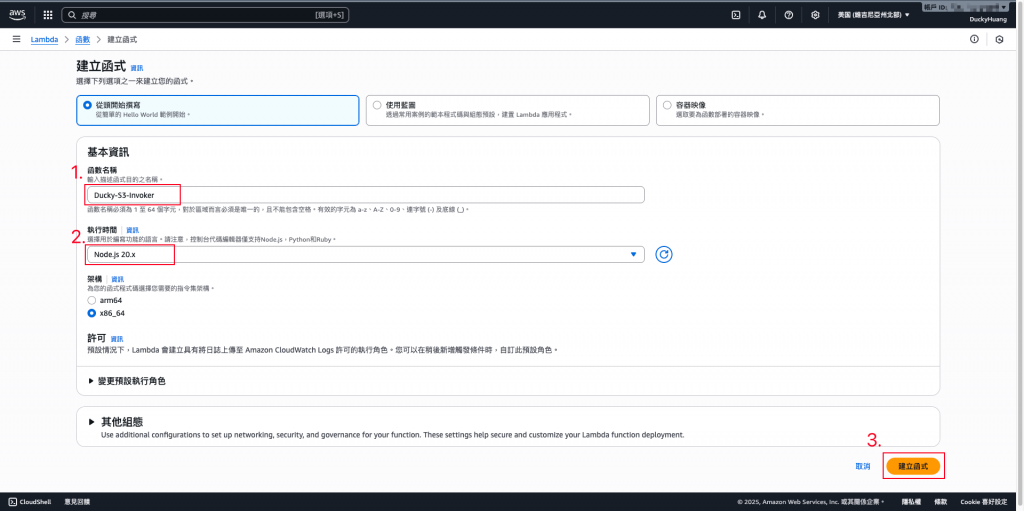
寫入程式碼,並部署。
範例程式碼:
// index.mjs (S3ToStepFunctionInvoker)
import { SFNClient, StartExecutionCommand } from "@aws-sdk/client-sfn";

// import { S3Client, GetObjectCommand } from "@aws-sdk/client-s3";
// import { getSignedUrl } from "@aws-sdk/s3-request-presigner";

const sfnClient = new SFNClient({});
const STATE_MACHINE_ARN = process.env.STATE_MACHINE_ARN; // 從環境變數讀取

// 確保環境變數已設定,否則在初始化階段就會報錯
if (!STATE_MACHINE_ARN) {
    throw new Error('Environment variable STATE_MACHINE_ARN must be set.');
}

export const handler = async (event, context) => {
    // 取得 S3 Event 的核心資料 (Bucket, Key)
    const record = event.Records[0];
    const bucket = record.s3.bucket.name;
    const key = decodeURIComponent(record.s3.object.key.replace(/\+/g, ' '));

    // 將檔案資訊包裝成 Step Functions 的輸入
    const inputPayload = JSON.stringify({ bucket: bucket, key: key });
    const command = new StartExecutionCommand({
        stateMachineArn: STATE_MACHINE_ARN,
        input: inputPayload,
        // 為每次執行命名,方便追蹤
        name: `${key.replace(/[^a-zA-Z0-9]/g, '_')}-${Date.now()}`
    });

    try {
        await sfnClient.send(command);
        console.log(`✅ Started Step Function for: ${key}`);

        return { statusCode: 200, body: 'Execution started.' };
    } catch (error) {
        console.error("❌ Failed to start Step Function:", error);
        return { statusCode: 500, body: 'Failed to start Step Function.' };
    }
};
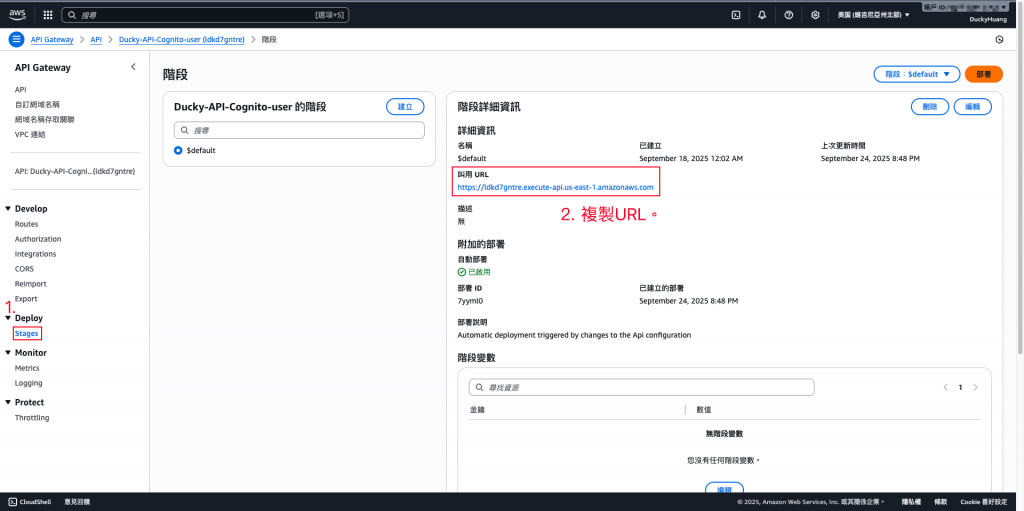
設定環境變數「STATE_MACHINE_ARN」為「Step Functions的ARN」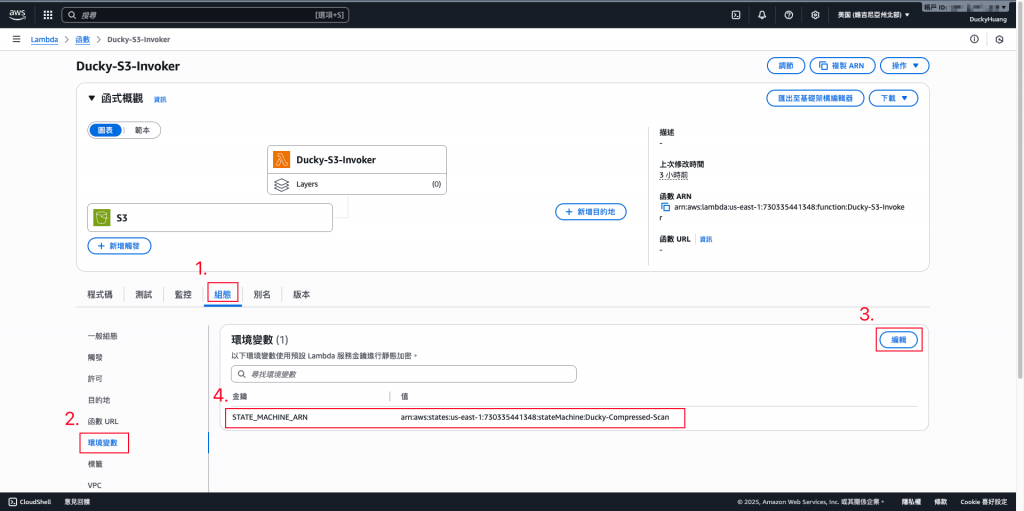
- Step Functions的ARN在哪?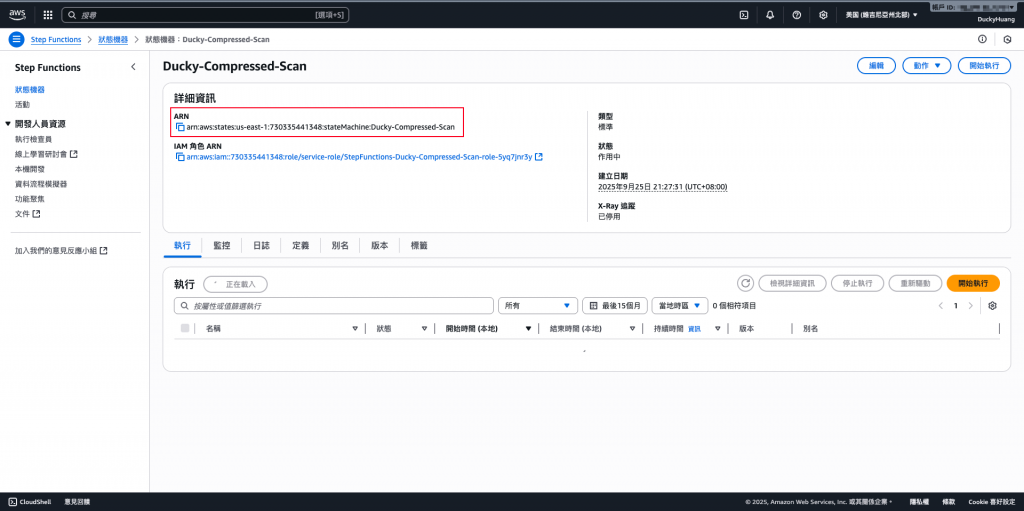

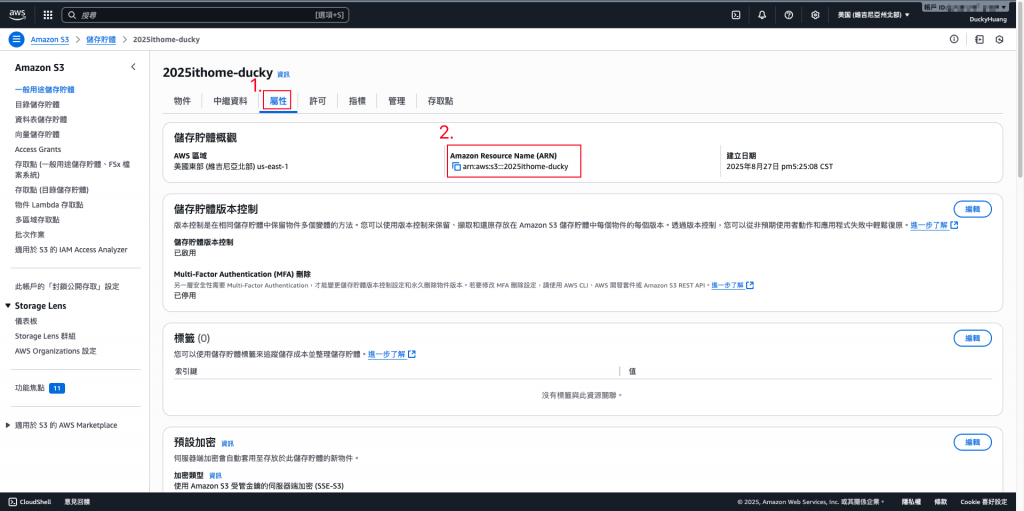
進入「S3」頁面。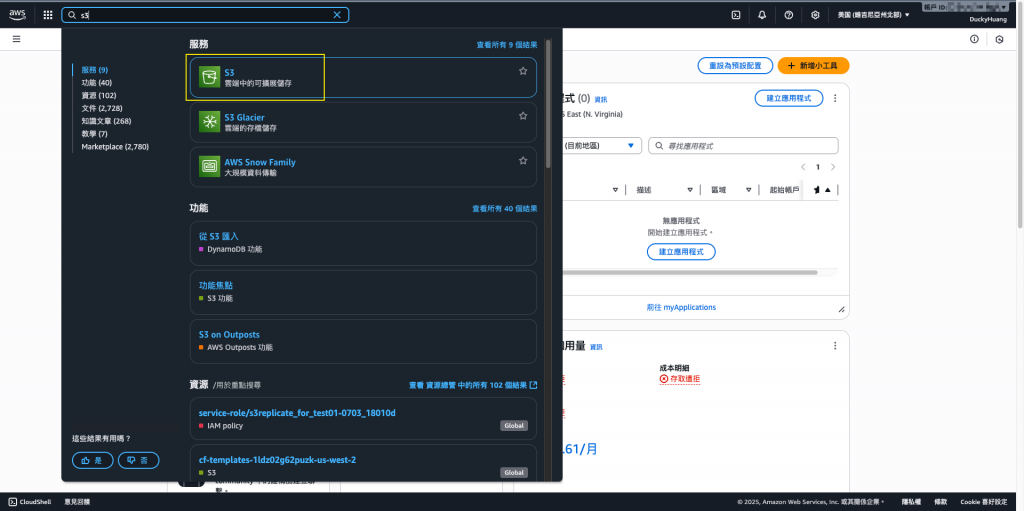
點選Day6創建的S3。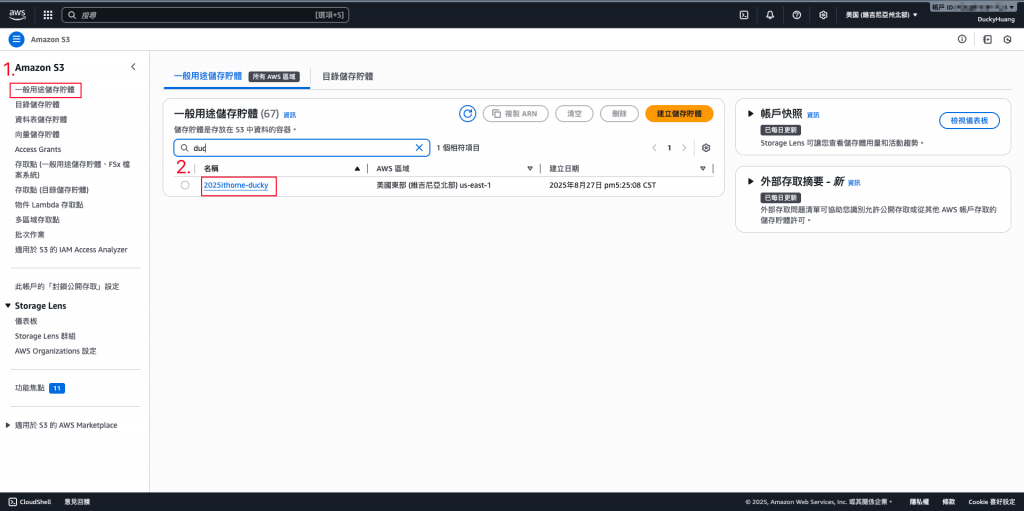
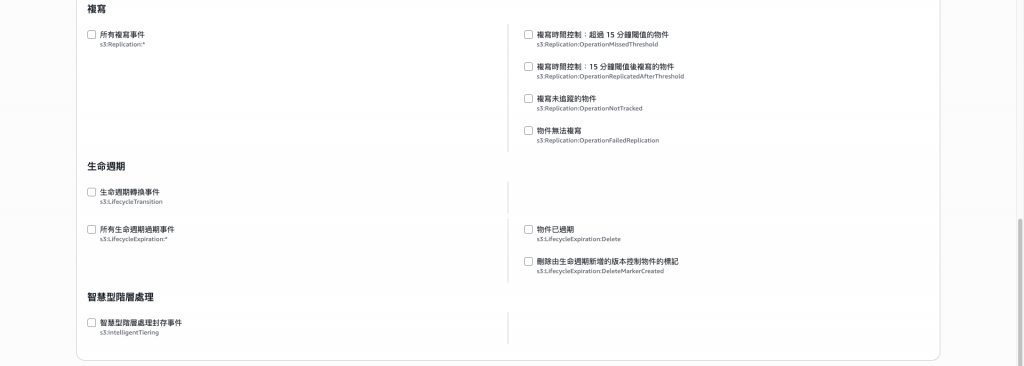
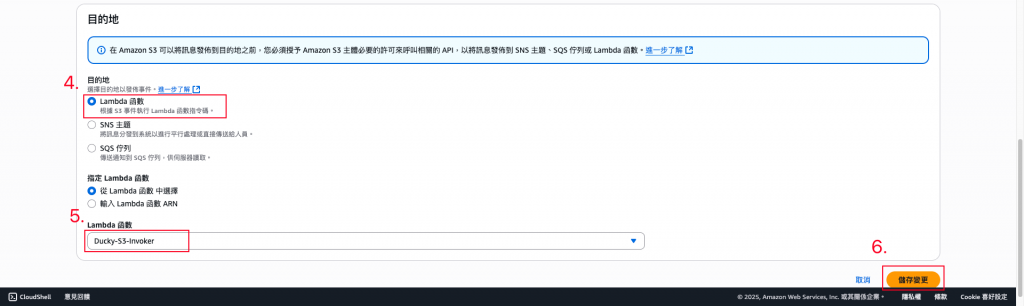
進入「屬性」頁面,並新增一個「事件通知」。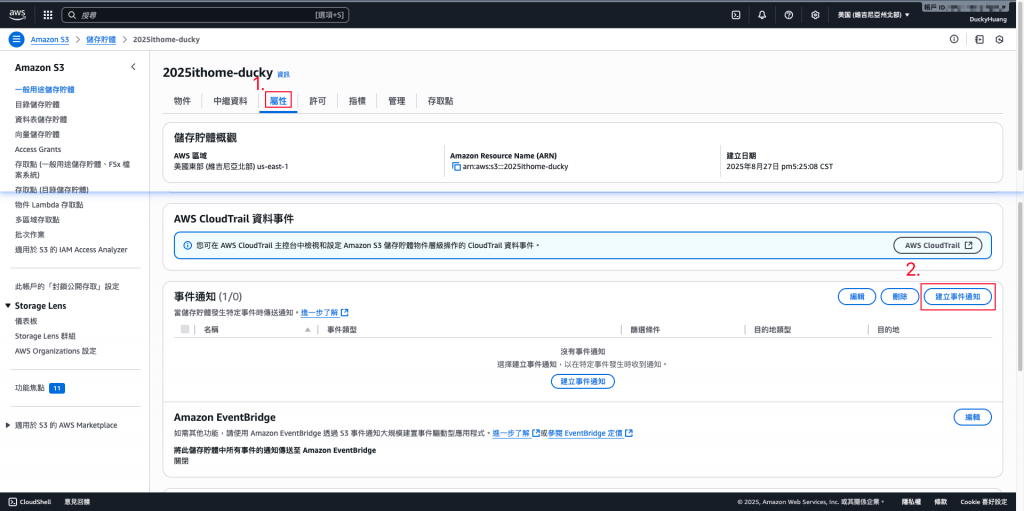
設定「當指定的路徑創建事件時,會通知Lambda函數」。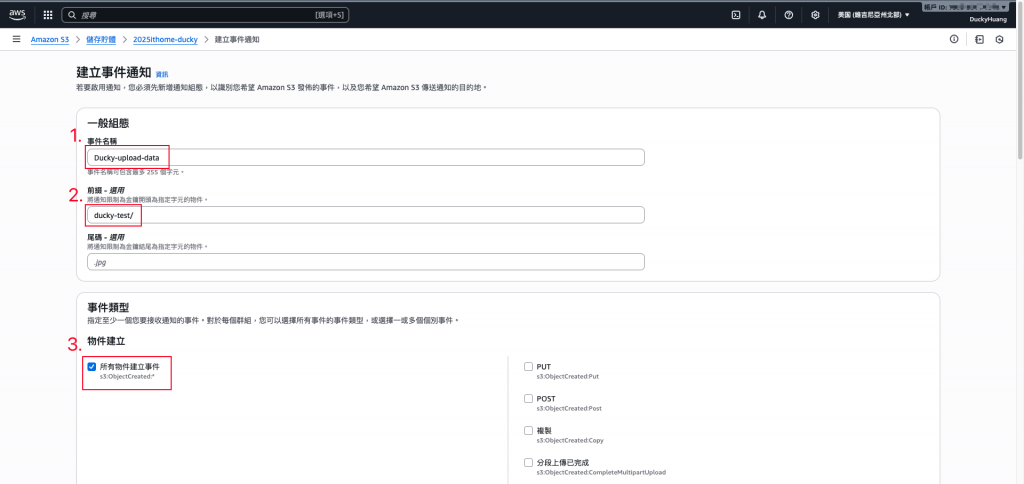
指令範例
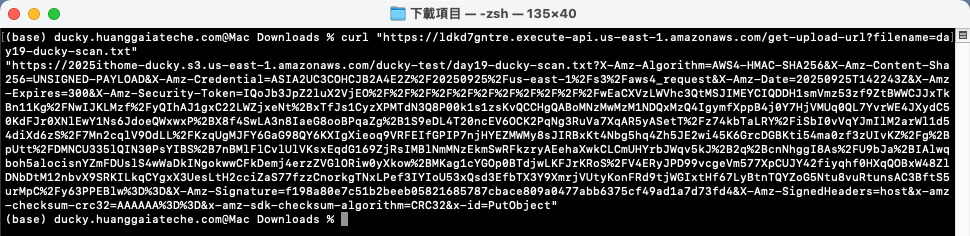
curl "<YOUR_API_GATEWAY_URL>/get-upload-url?filename=<上傳後的檔案名稱>"
指令範例
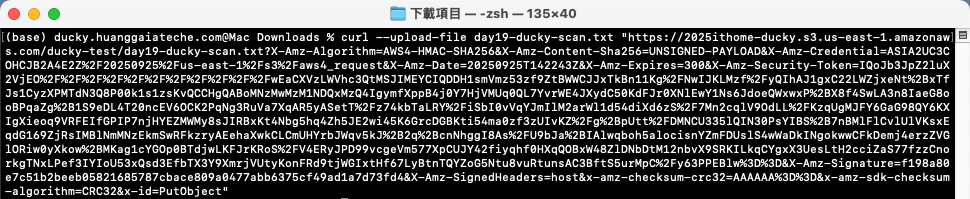
curl --upload-file <本地檔案路徑.格式> "<YOUR_PRESIGNED_URL>"
上傳的檔案: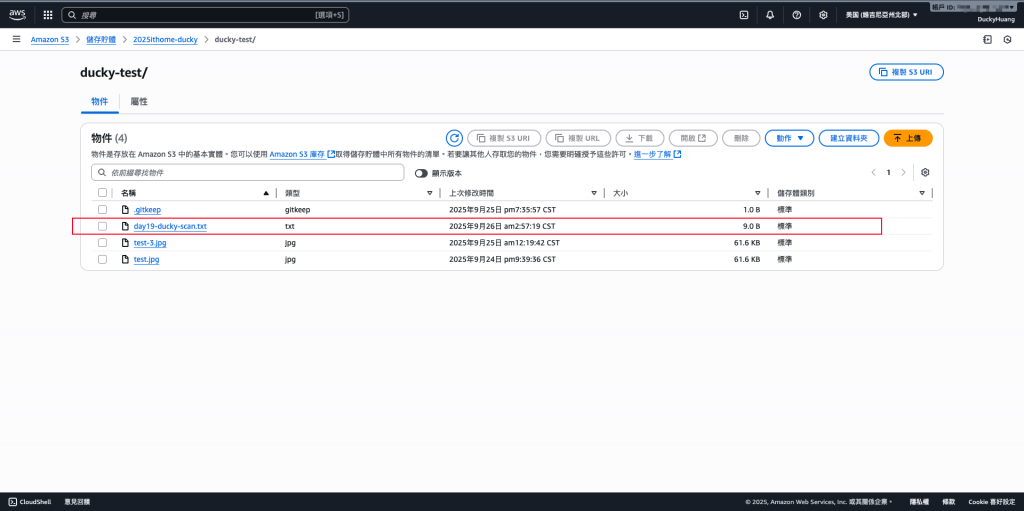
壓縮過的檔案: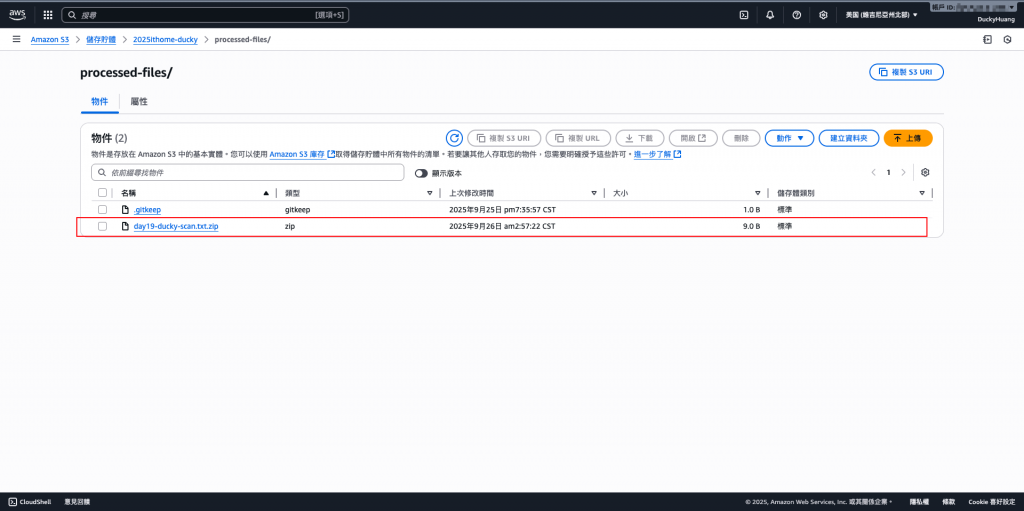
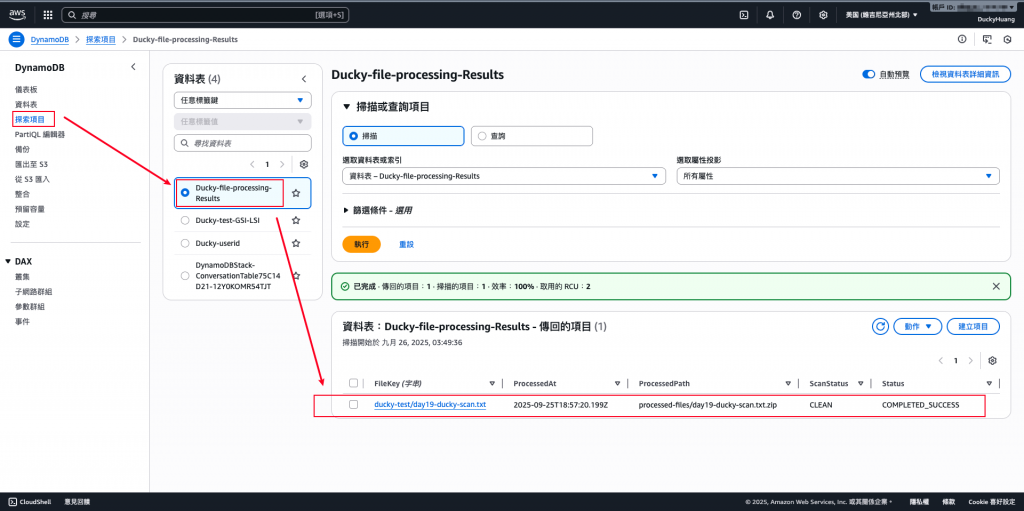
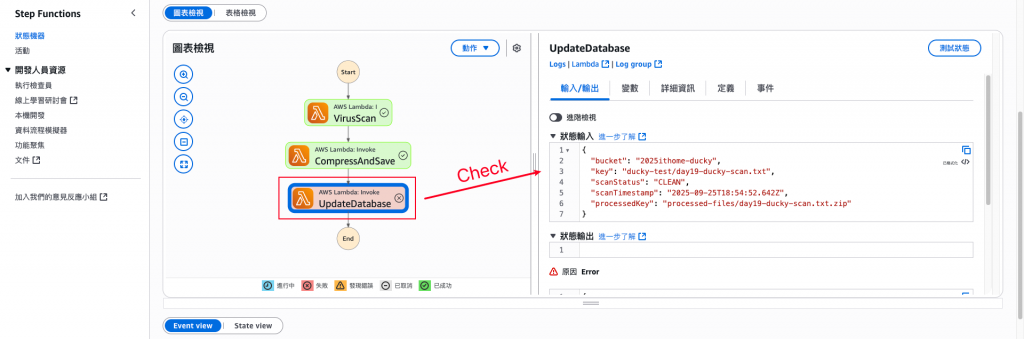
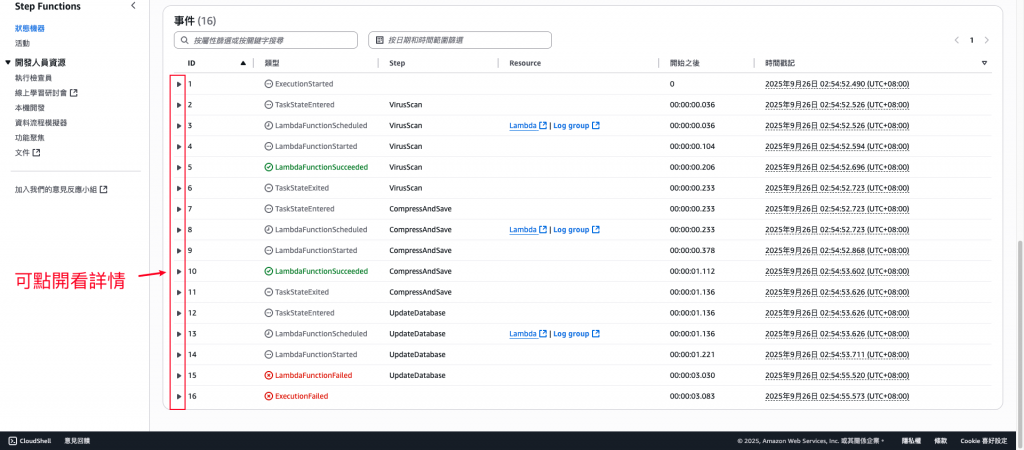
確認Step Functions有正常執行。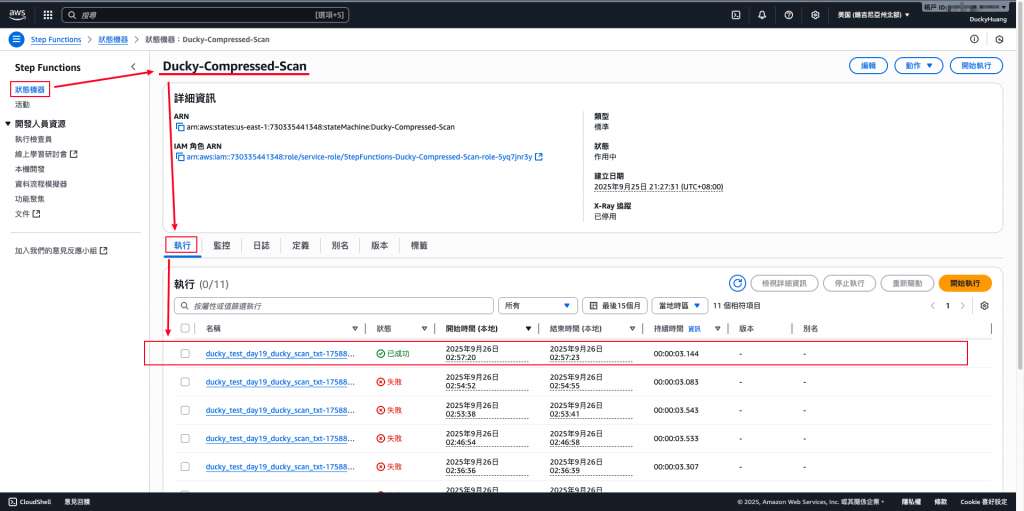
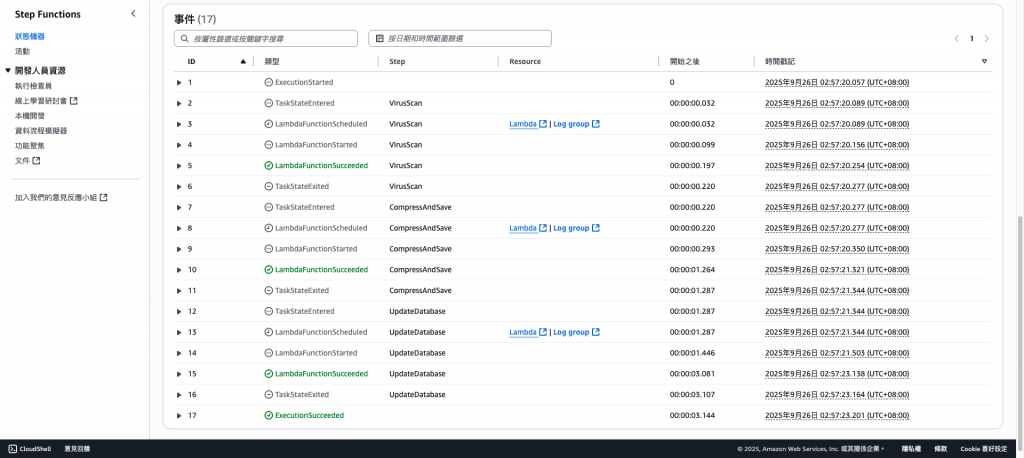
正確內容範例。
錯誤內容範例。(可以確認是哪個環節有誤)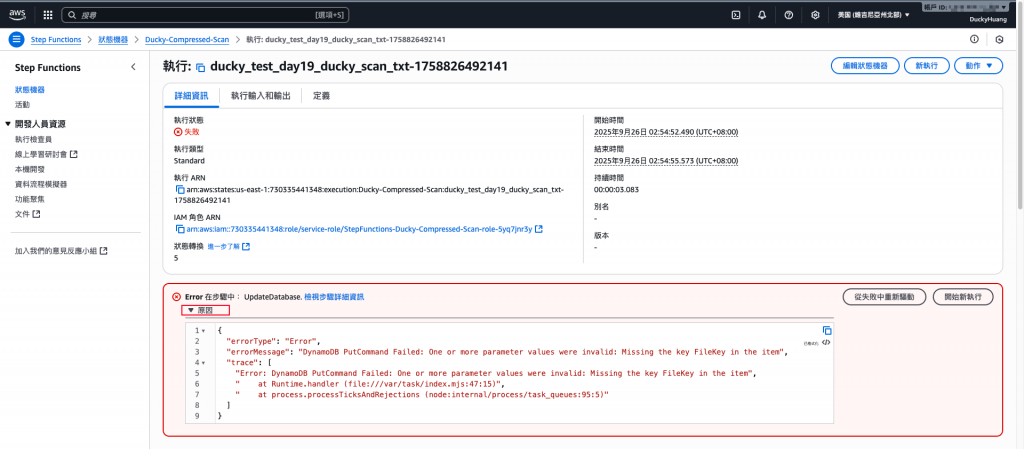
本 Lab 展示如何利用 S3 x Lambda x Step Functions 建立一個全自動檔案後處理管線,包含壓縮與掃毒功能。
這不僅能降低儲存成本,也能強化系統安全性,避免惡意檔案入侵。在 Serverless 架構中,這樣的流程讓檔案管理更高效、更安全、更自動化。
