
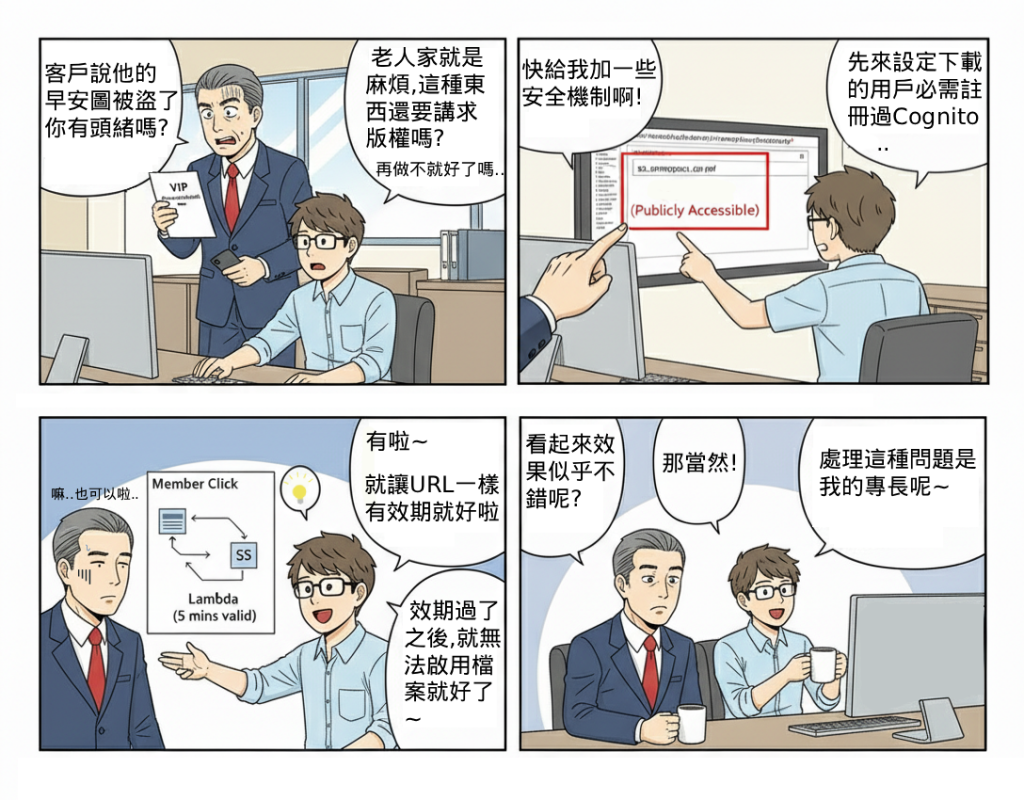
在系統中,檔案上傳後往往需要提供使用者下載或預覽功能。若直接將 S3 Bucket 設為公開,會導致資料外洩與濫用風險;若透過後端 Proxy 回傳檔案,會增加系統負擔與成本。
Presigned URL 提供一種安全的方式,讓使用者在短時間內取得檔案存取權限,達到「授權即時、存取限時」的效果。
(1) 痛點在於如何讓不同權限的使用者下載或預覽檔案,但不影響資料隱私與安全性。
(2) 傳統做法若開放 S3 公開讀取,容易被爬蟲或惡意分享。
(3) Presigned URL 搭配 API Gateway 與 Cognito,可依使用者身分動態產生下載連結,並限制有效時間,確保只有合法用戶能在有效期間存取檔案。
在 Serverless 架構中,此模式通常作為檔案存取控制的最佳實踐,並可延伸到會員專屬內容或報表下載功能。
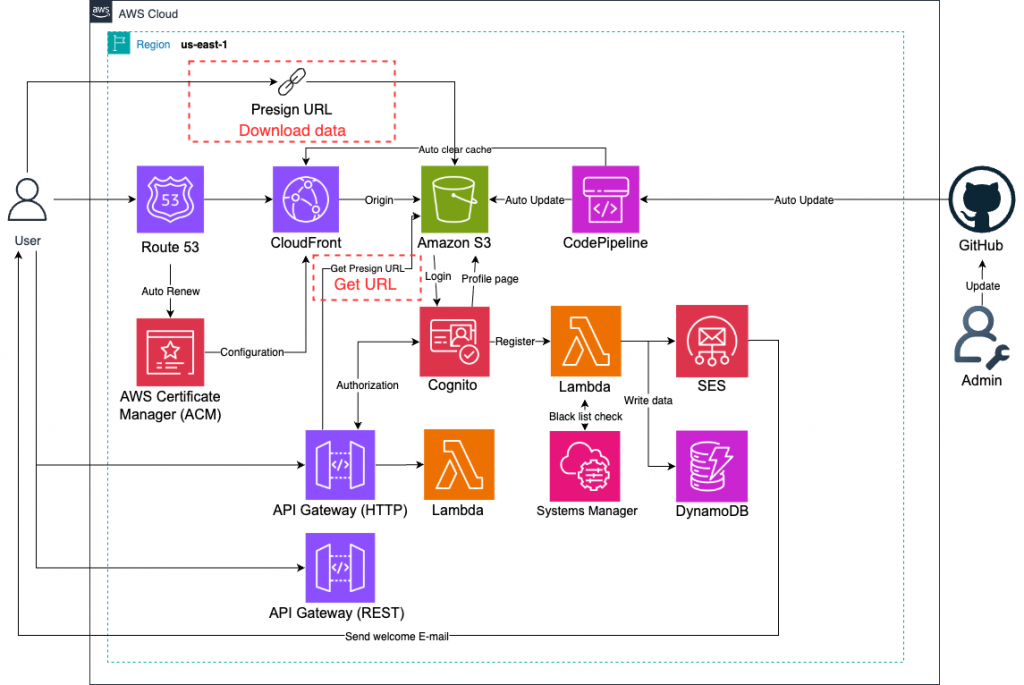
(1) Amazon S3:存放檔案,並啟用 Block Public Access,避免外部直接存取。
(2) AWS Lambda:產生下載用 Presigned URL,並回傳給前端。
(3) Amazon API Gateway:前端存取入口,透過授權驗證後才能請求下載連結。
(4) Amazon Cognito(選用):管控使用者身分,限制誰可以生成 Presigned URL。
(5) CloudWatch Logs:紀錄 Presigned URL 的生成與使用狀況。
(1) 設定 Presigned URL 短效期(通常 1~15 分鐘)。
(2) 避免將 URL 暴露於公開頁面,應透過登入驗證後才生成。
(3) 若需圖片預覽,可搭配 CloudFront + OAC,進一步強化安全性並提升效能。
(4) 搭配 CloudTrail 與 S3 Access Logs,追蹤誰存取過檔案。
(5) 若有安全要求,可在 Lambda 端增加授權判斷(例如使用者角色、檔案歸屬)。
進入「Lambda」頁面。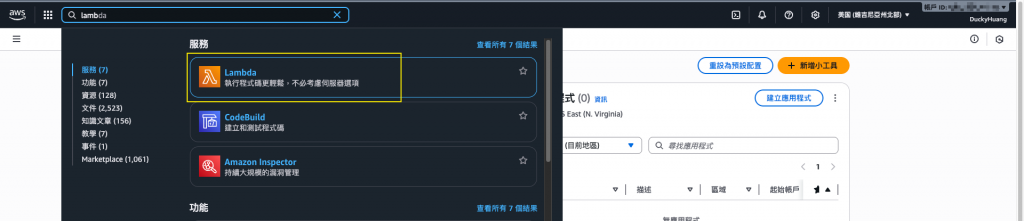
創建一個新的函數。
輸入函數名稱,並選擇編撰語言。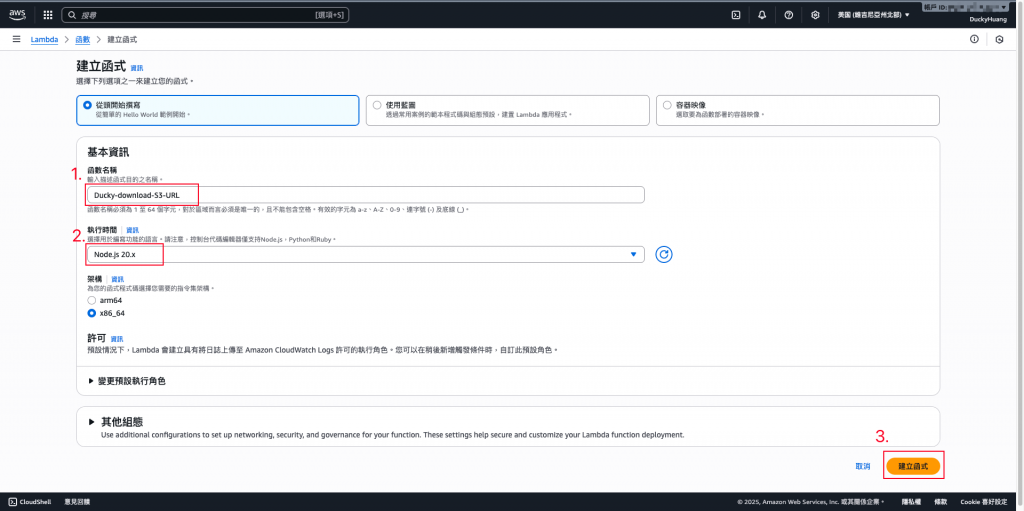
跳過建議畫面。
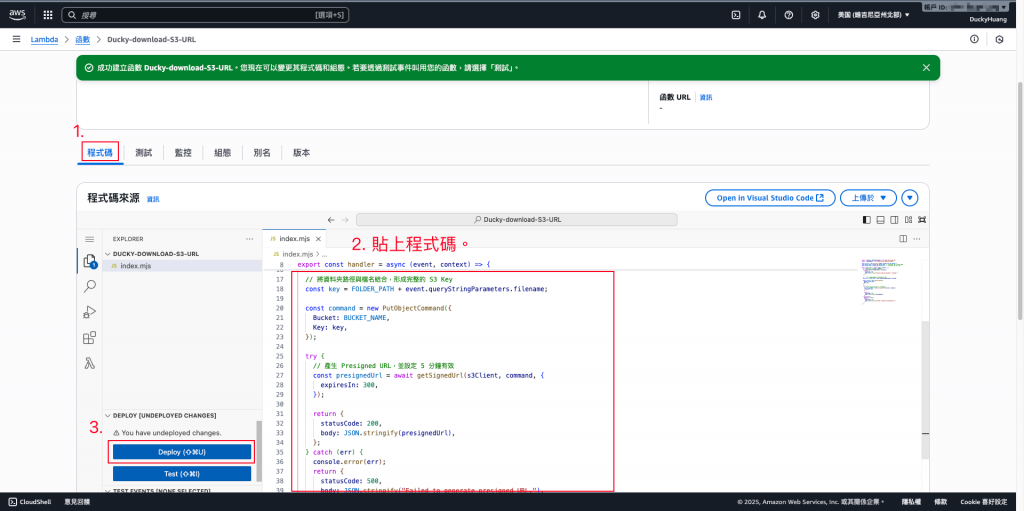
寫入程式碼,並部署。
程式碼範例:
import { S3Client, GetObjectCommand } from "@aws-sdk/client-s3";
import { getSignedUrl } from "@aws-sdk/s3-request-presigner";

const s3Client = new S3Client({ region: process.env.AWS_REGION });
const BUCKET_NAME = process.env.BUCKET_NAME; // 從環境變數讀取 S3 bucket 名稱
const FOLDER_PATH = process.env.FOLDER_PATH; // 從環境變數讀取資料夾路徑
const EXPIRES_IN = parseInt(process.env.EXPIRES_IN, 10) || 300; // 從環境變數讀取過期時效

export const handler = async (event, context) => {
  // 檢查是否缺少 'filename' 查詢參數
  if (!event.queryStringParameters?.filename) {
    return {
      statusCode: 400,
      body: JSON.stringify("Missing required parameter 'filename'"),
    };
  }

  // 將資料夾路徑與檔名結合,形成完整的 S3 Key
  const key = FOLDER_PATH + event.queryStringParameters.filename;

  const command = new GetObjectCommand({
    Bucket: BUCKET_NAME,
    Key: key,
  });

  try {
    // 產生 Presigned URL,並設定 5 分鐘有效
    const presignedUrl = await getSignedUrl(s3Client, command, {
      expiresIn: EXPIRES_IN,
    });

    return {
      statusCode: 200,
      body: JSON.stringify(presignedUrl),
    };
  } catch (err) {
    console.error(err);
    return {
      statusCode: 500,
      body: JSON.stringify("Failed to generate presigned URL."),
    };
  }
};
進入「組態」分頁,設定環境變數。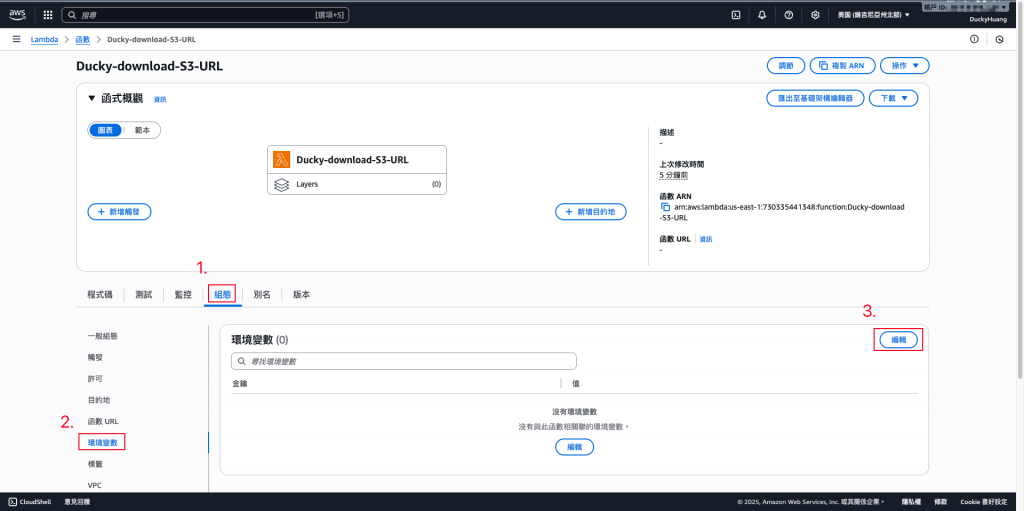
設定以下的Key及Value。
BUCKET_NAME:S3 bucket name
FOLDER_PATH:下載路徑
EXPIRES_IN:有效時限(秒)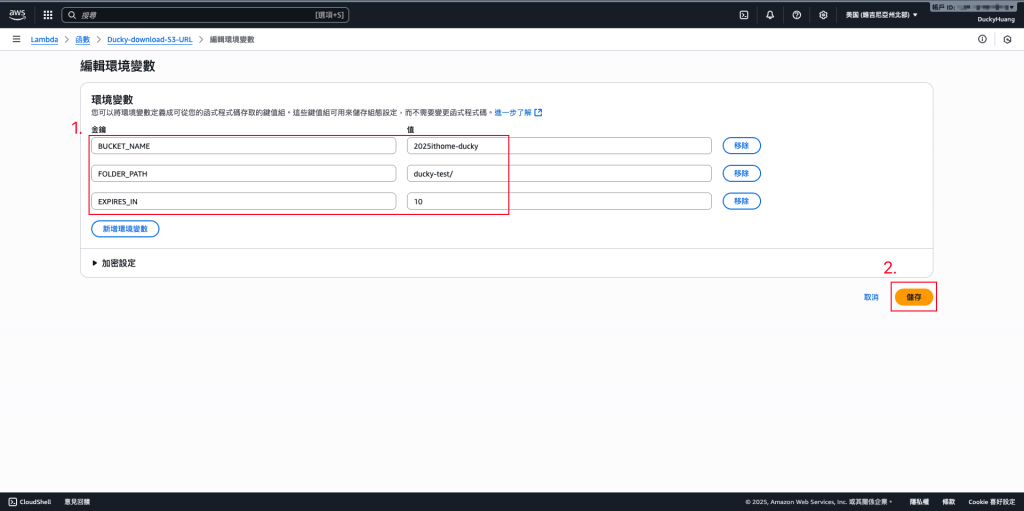
完成畫面。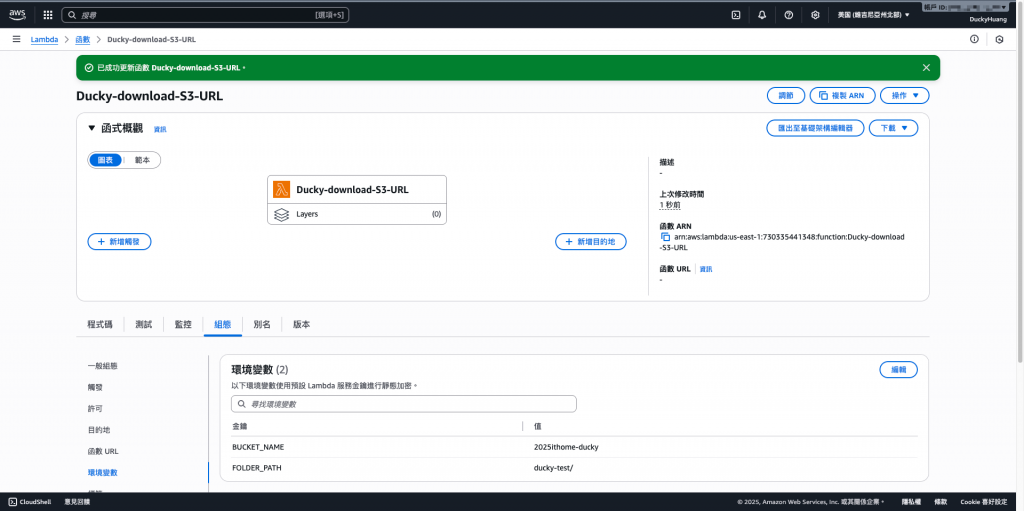
進入「IAM 」頁面。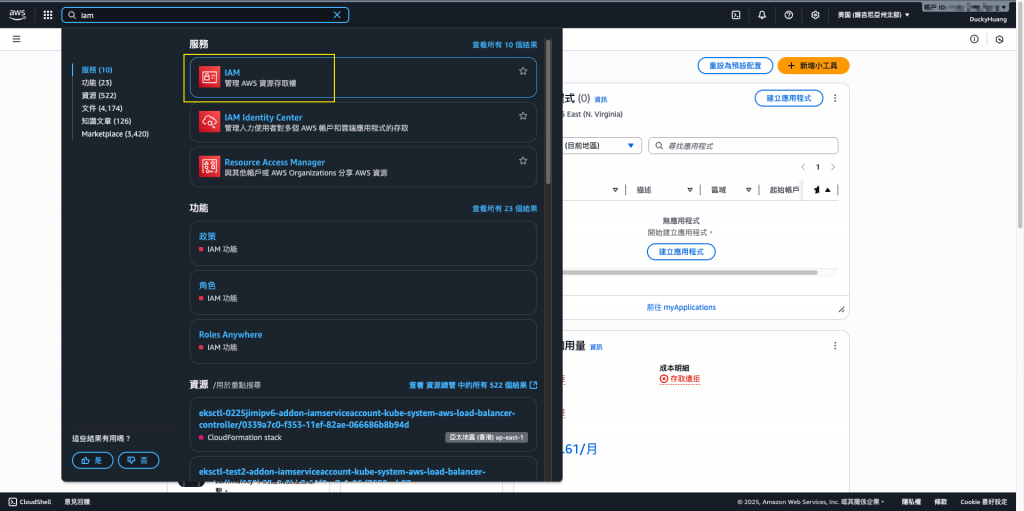
進入IAM role的頁面,點選該Lambda自動創建的IAM role。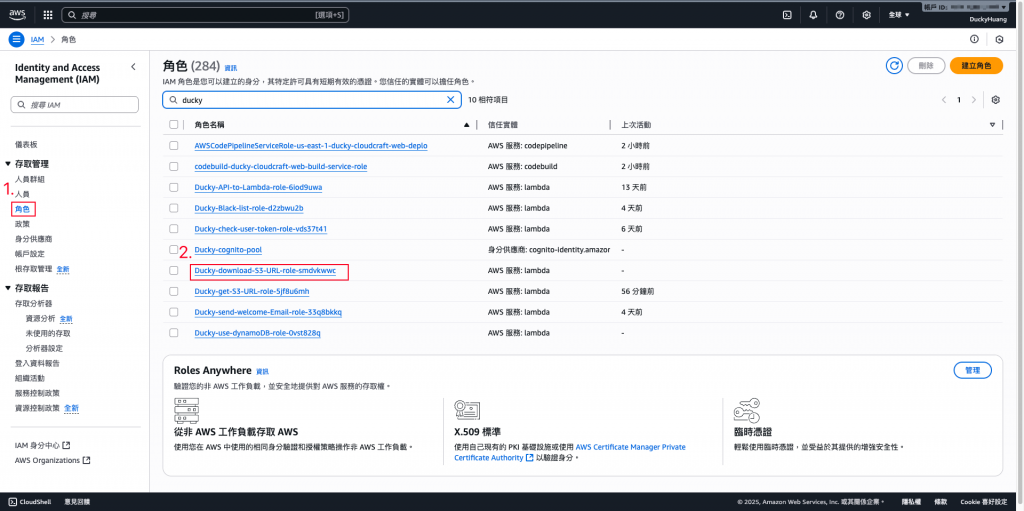
新增「許可政策」。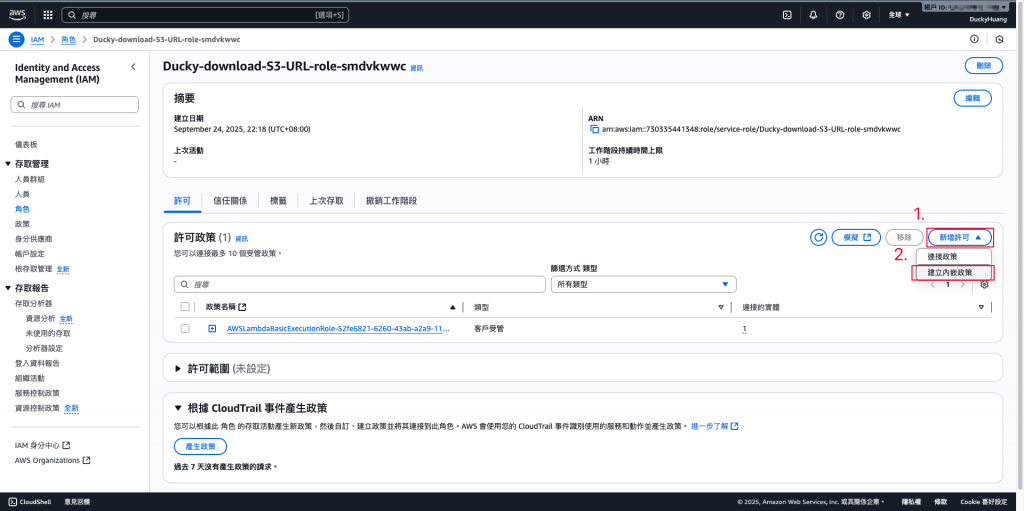
增加S3的「GetObject」權限。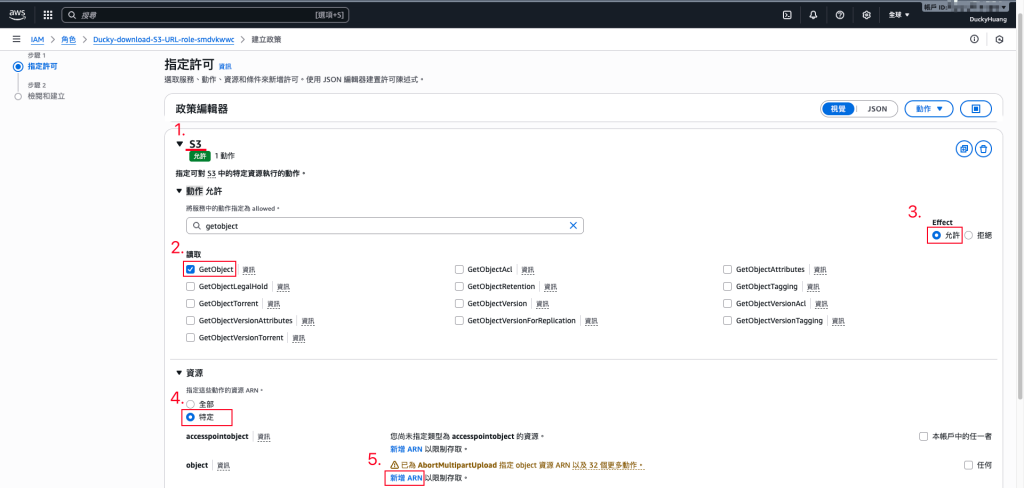
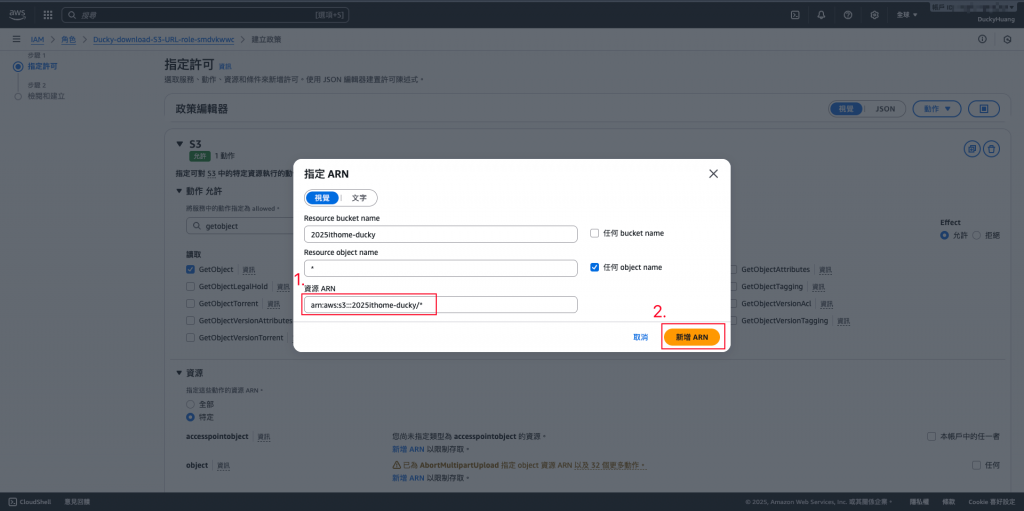
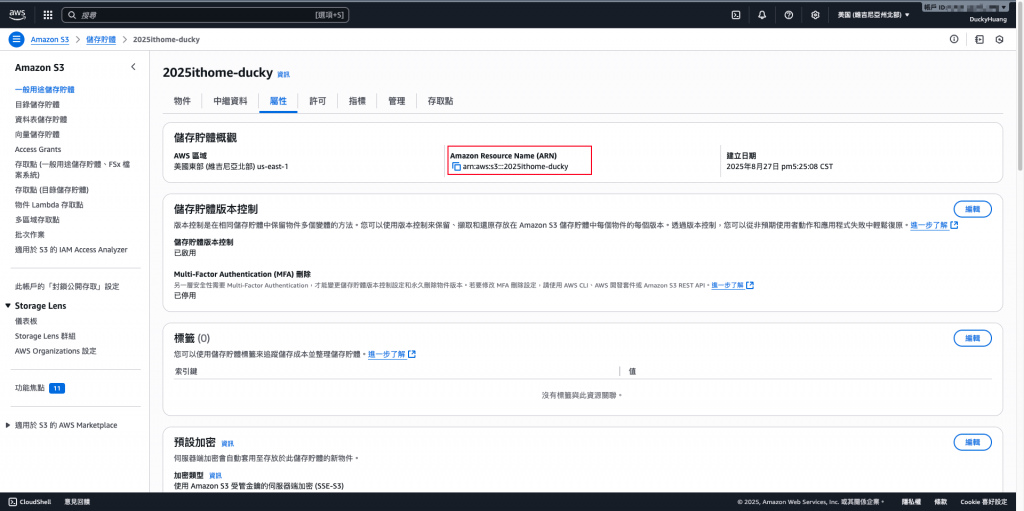
將授權調整為指定的S3。
設定完成後,點選下一步。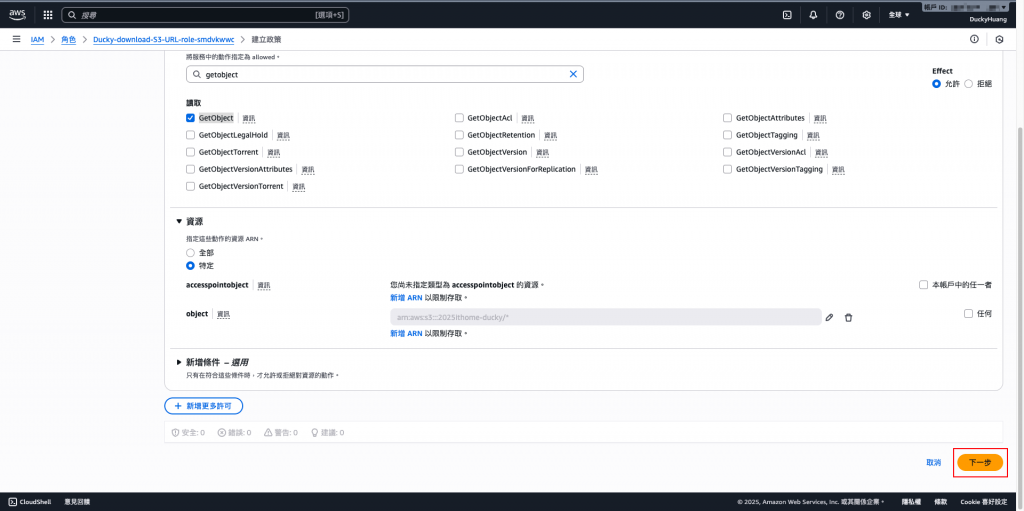
設定「許可政策」名稱。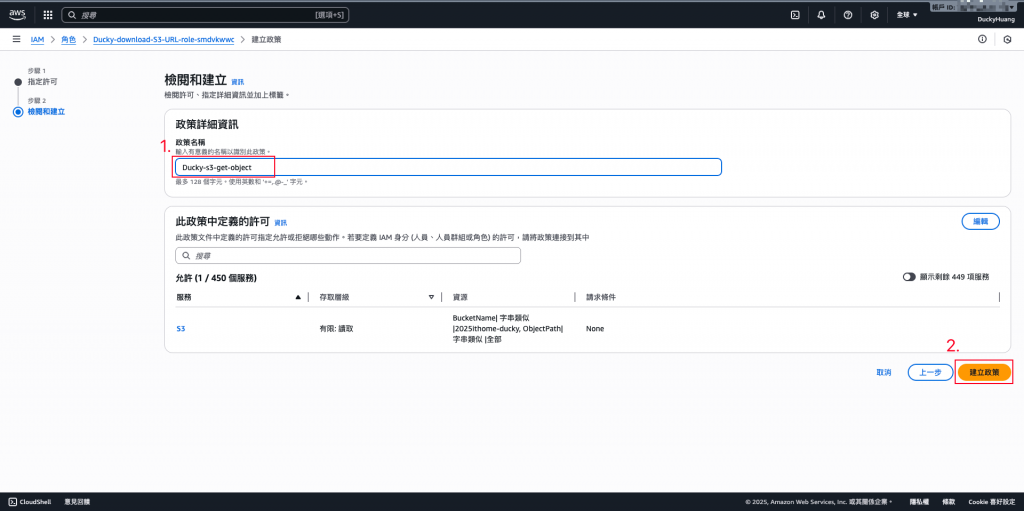
完成畫面。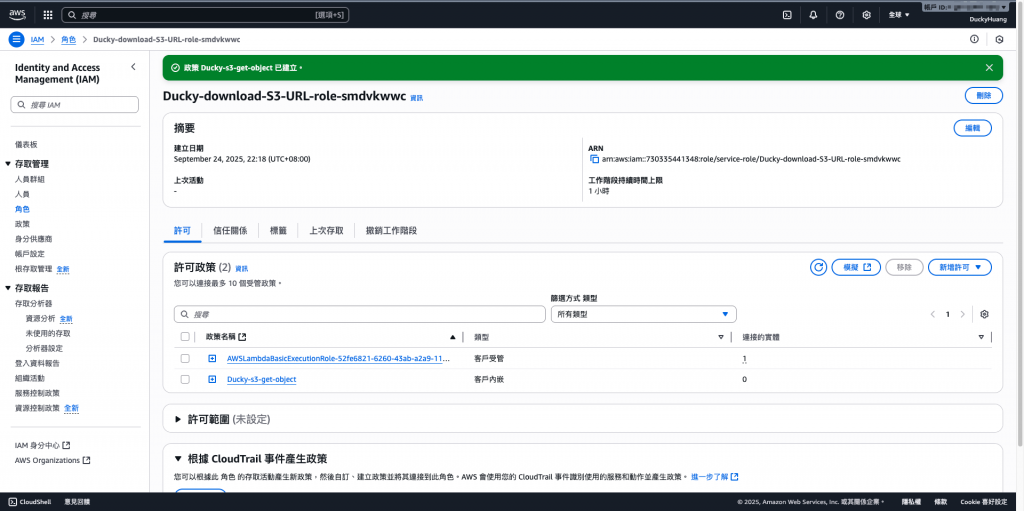
進入「API Gateway」服務頁面。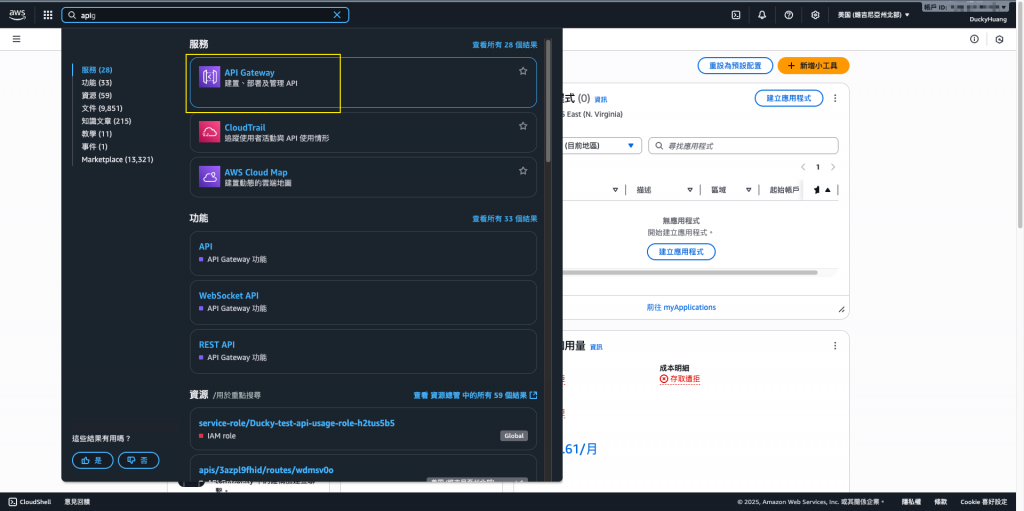
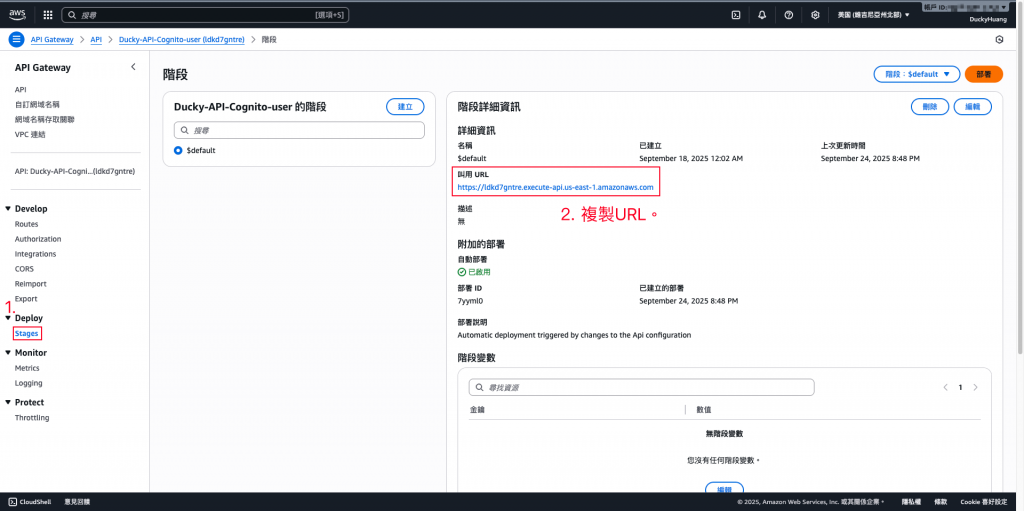
進入Day12創建的HTTP REST API Gateway。(主架構)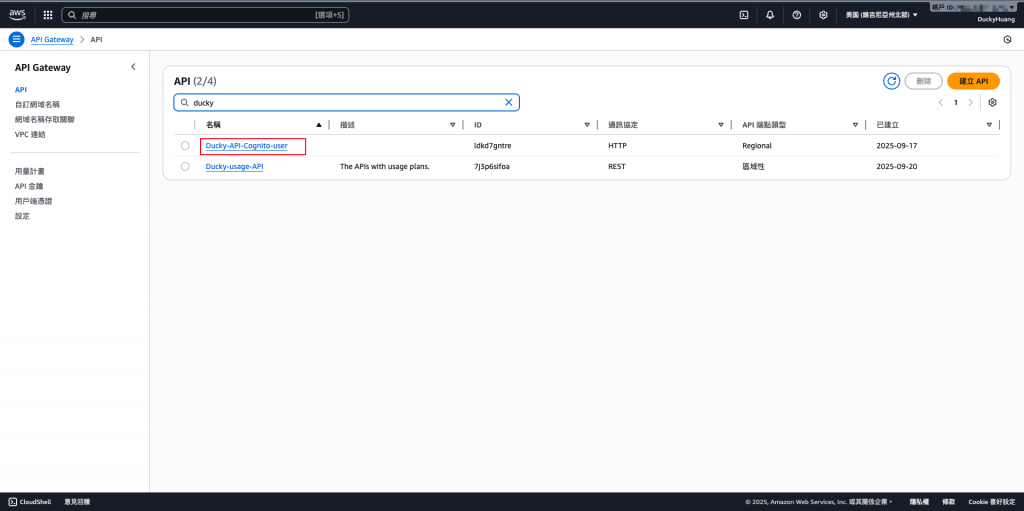
創建一個新的路由路徑。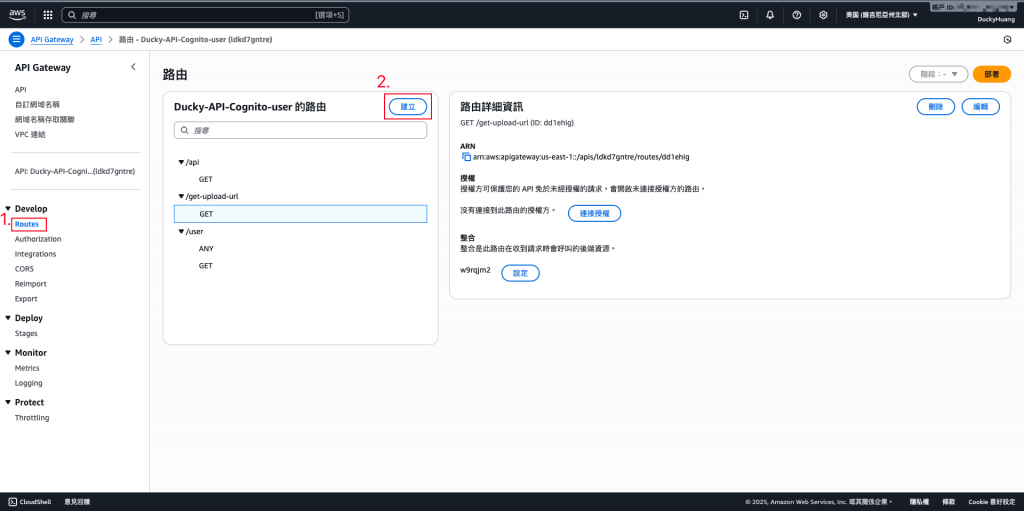
設定HTTP Method為「GET」,並自定義API路徑。(此次路徑設定為「/get-download-url」)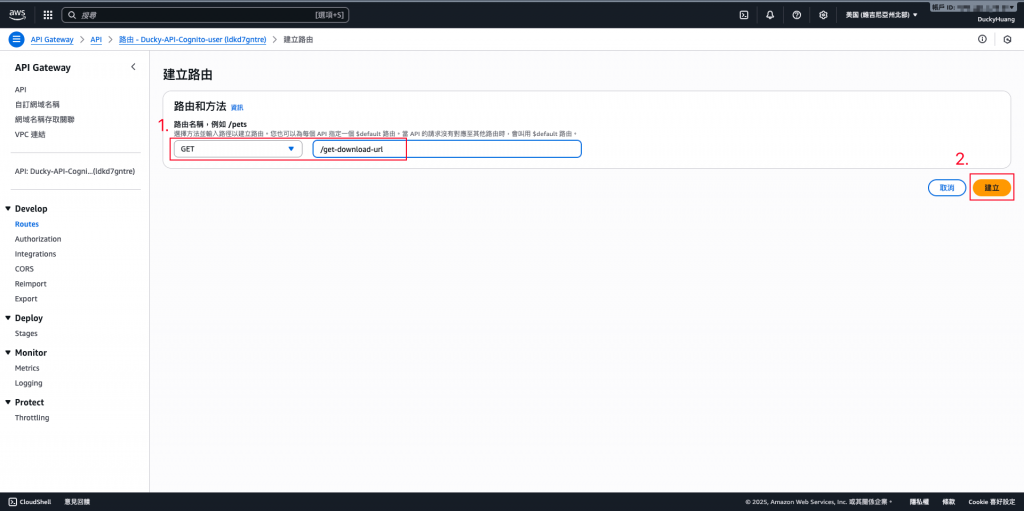
將路由整合新的應用。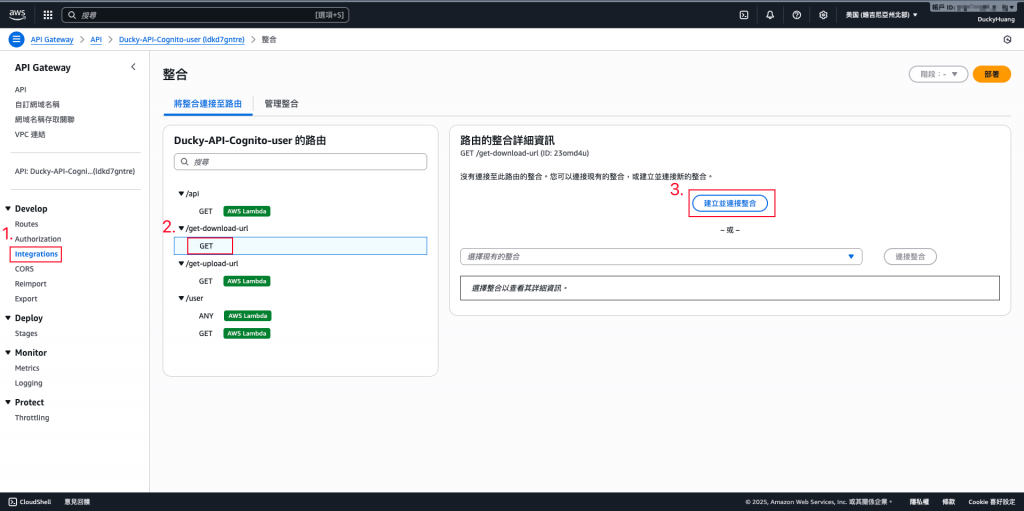
關聯剛剛創建的Lambda函數。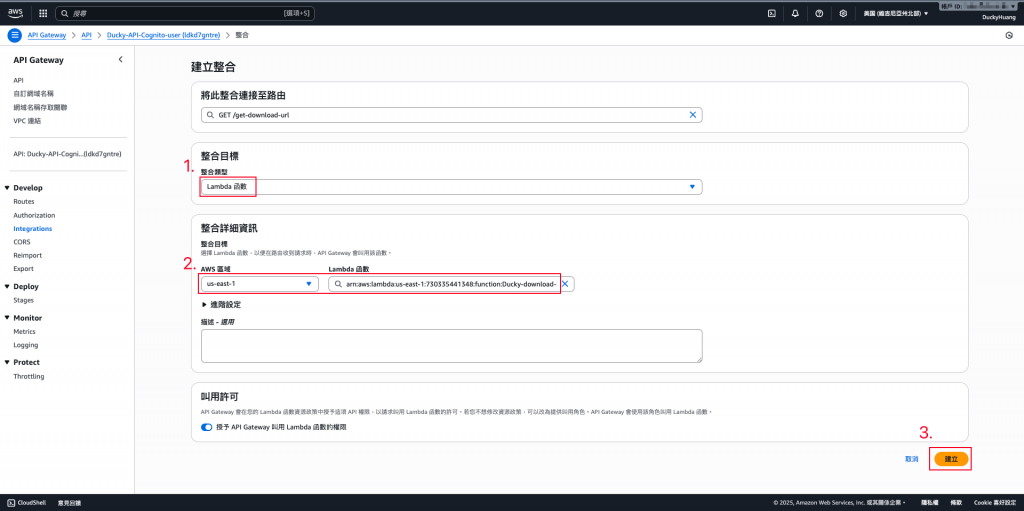
完成關聯。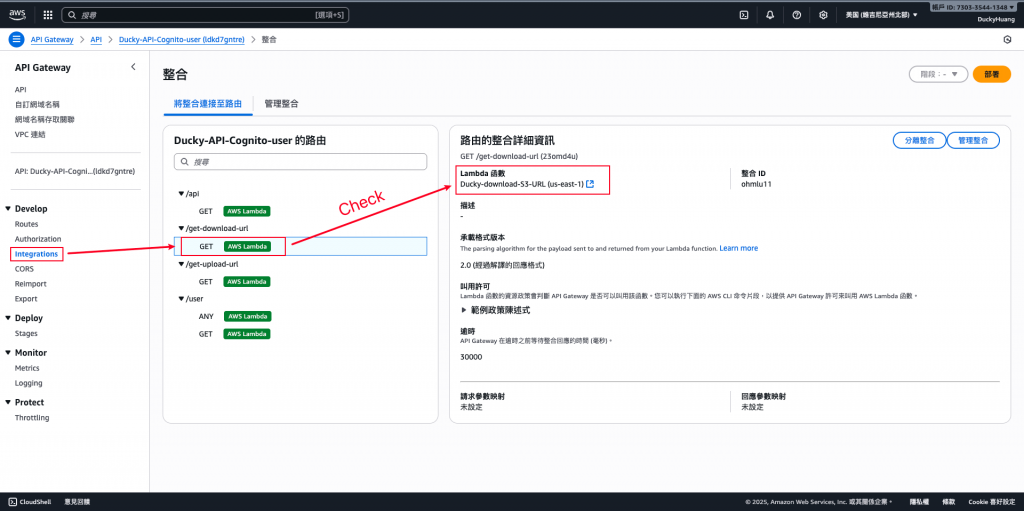
指令範例
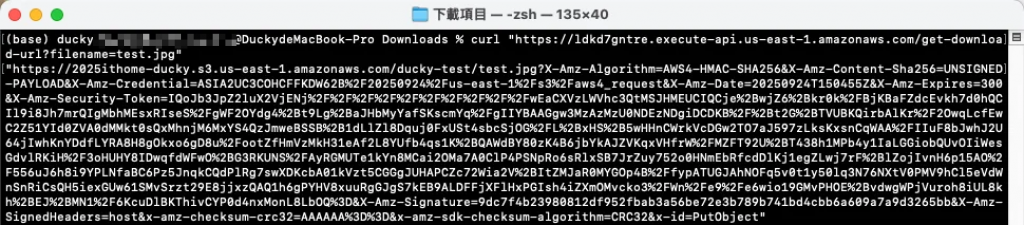
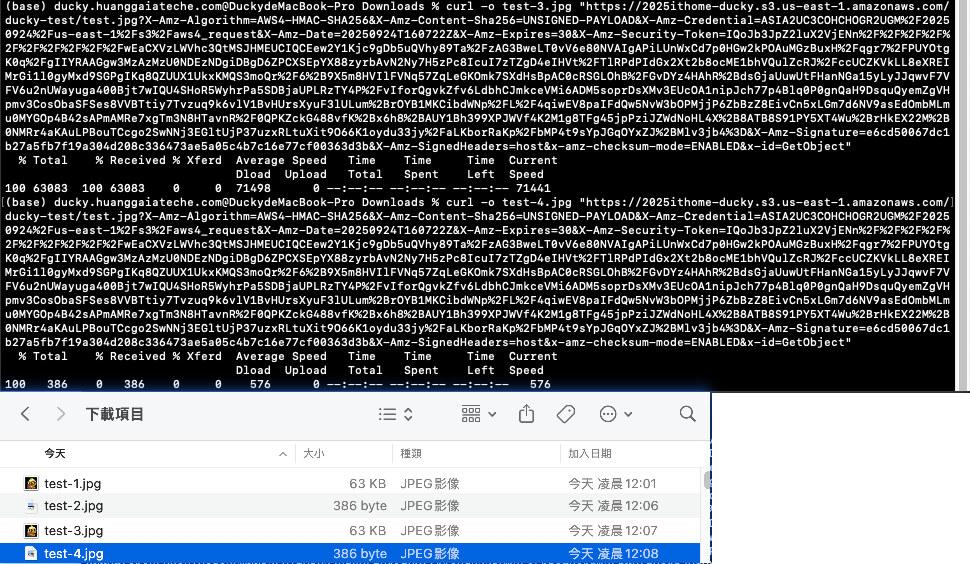
curl "<YOUR_API_GATEWAY_URL>/get-download-url?filename=<上傳後的檔案名稱>"
指令範例
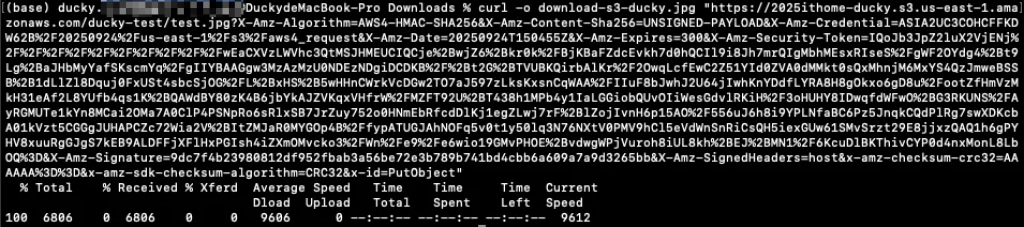
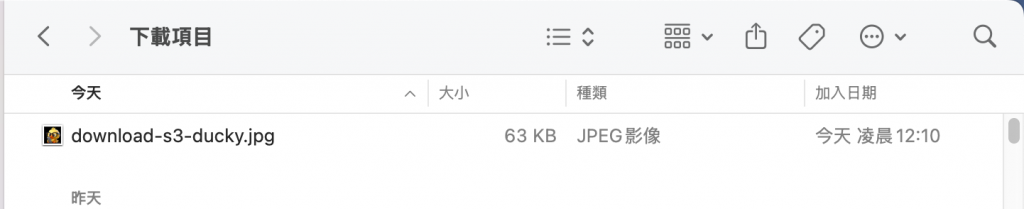
curl -o <存入本地端的檔案名稱.格式> "<YOUR_PRESIGNED_URL>"
本 Lab 示範如何透過 S3 Presigned URL 提供安全的檔案下載與預覽機制,解決了傳統 S3 公開存取的安全問題,同時避免 Proxy 造成的效能瓶頸。
這種方法非常適合應用在會員專屬檔案下載、報表存取、圖片預覽等場景,並能與 Cognito 或 CloudFront 搭配,進一步提升安全性與使用者體驗。
