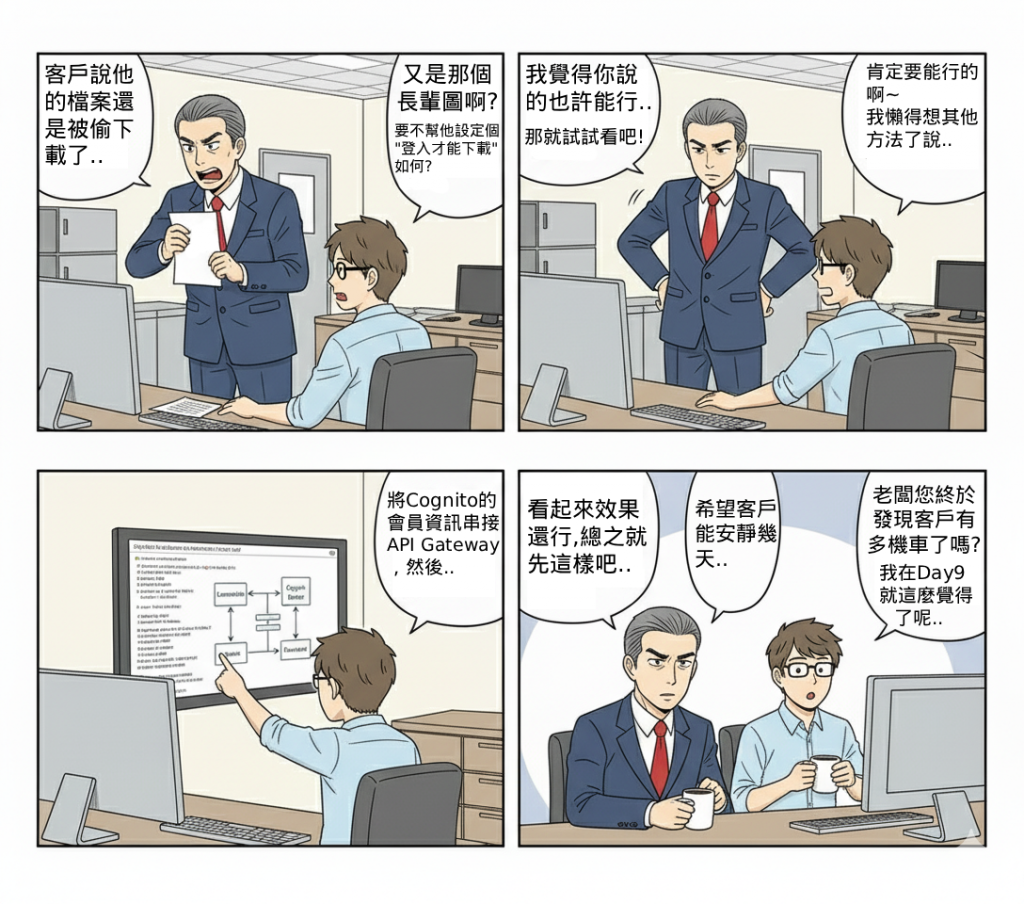
檔案分享是會員系統的核心需求之一,但如果直接公開 S3 檔案連結,將導致任何人都能存取,存在嚴重的安全風險。因此我們需要設計一套「限時連結」與「權限檢查」機制,確保只有符合資格的用戶,且僅在設定的有效時間內,才能下載或預覽檔案。
這個 Lab 解決了兩大痛點:
(1) 如何在伺服器端驗證使用者身分,並只針對有權限的人產生下載連結。
(2) 如何確保連結具備「限時」屬性,避免外流或長期可用。
在整體 Serverless 架構中,它扮演 檔案分享的安全閘道,結合 Cognito(身分驗證)、API Gateway(流量管理)、Lambda(邏輯處理)與 S3(檔案儲存),打造符合企業等級安全的分享機制。

進入「Lambda」服務頁面。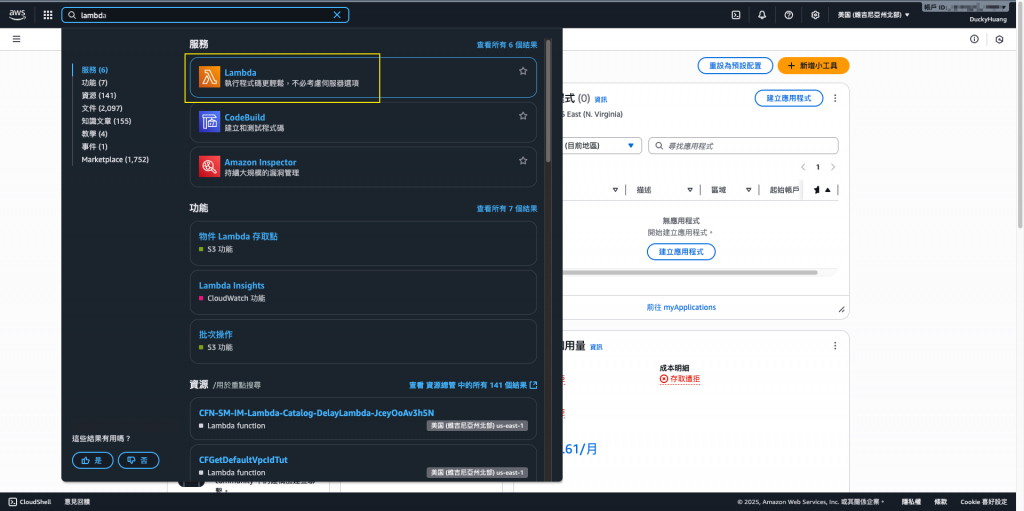
點選「創建函數」。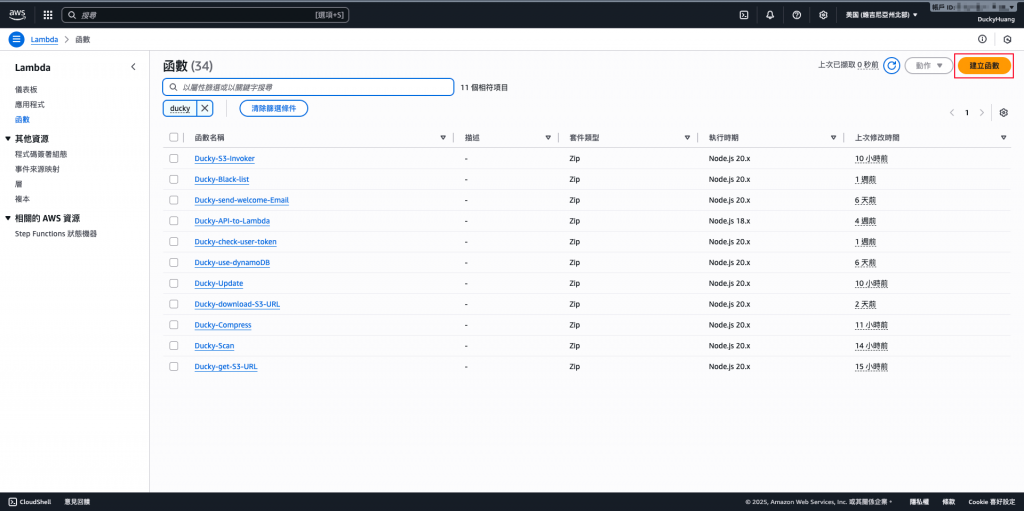
輸入函數名稱、選用指定的代碼編輯器、執行角色,並按下建立。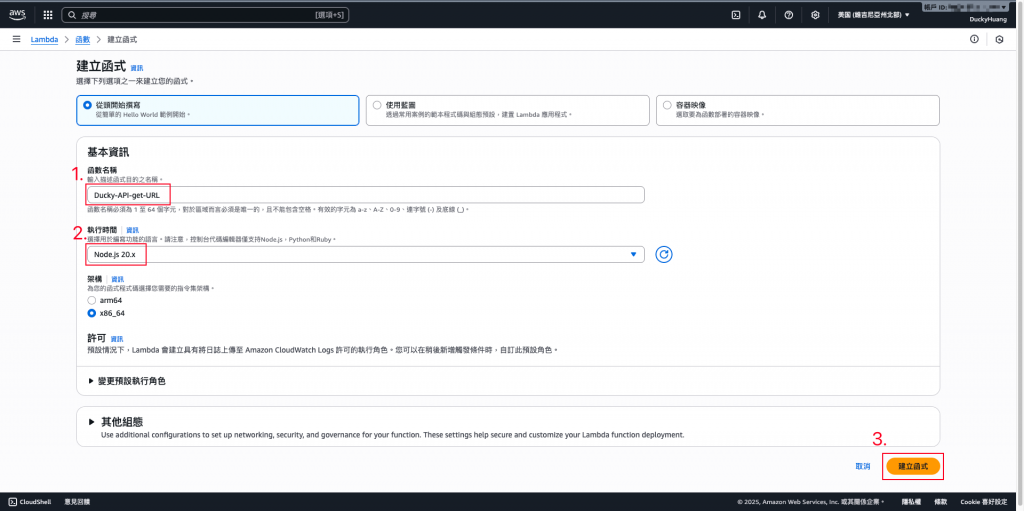
退出推薦的模板。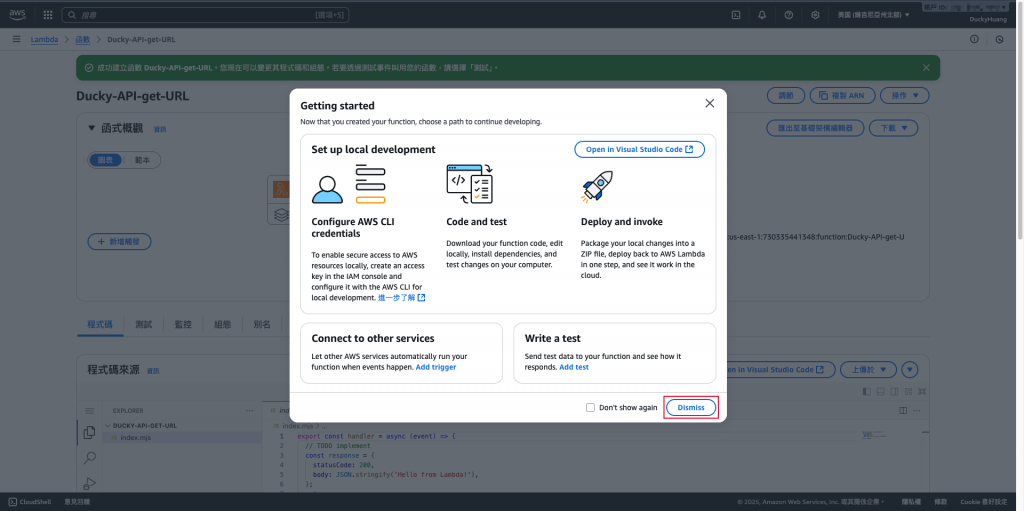
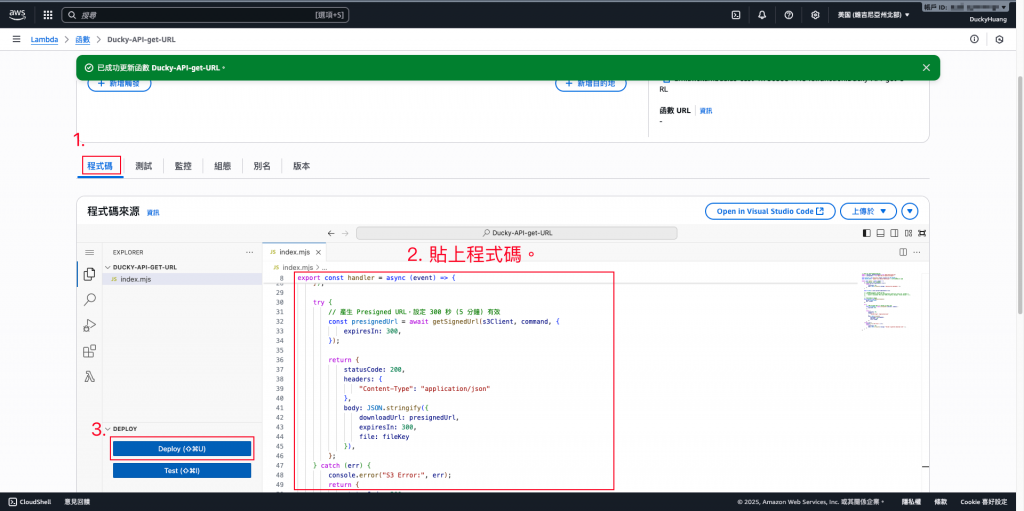
撰寫Lambda內容+部署。
程式碼範例
// index.mjs (generateDownloadLink)
import { S3Client, GetObjectCommand } from "@aws-sdk/client-s3";
import { getSignedUrl } from "@aws-sdk/s3-request-presigner";

const s3Client = new S3Client({ region: process.env.AWS_REGION });

// 🎯 從環境變數讀取 S3 儲存桶名稱
const BUCKET_NAME = process.env.DOWNLOAD_BUCKET;

// 🎯 新增環境變數:用於指定檔案儲存的根路徑 (例如 'member-files/')
const FILE_PREFIX_PATH = process.env.FILE_PREFIX_PATH || "";

if (!BUCKET_NAME) {
    throw new Error('Environment variable DOWNLOAD_BUCKET must be set.');
}

export const handler = async (event) => {
    // 檢查是否缺少 'file' 查詢參數
    if (!event.queryStringParameters?.file) {
        return {
            statusCode: 400,
            body: JSON.stringify({ message: "Missing file parameter." }),
        };
    }

    // 關鍵修正:將檔案路徑字首與使用者傳入的檔名結合
    // 確保只存取到 FILE_PREFIX_PATH 內的檔案
    const fileKey = FILE_PREFIX_PATH + event.queryStringParameters.file;

    // 🎯 技術重點:這裡應加入權限檢查邏輯 (保持不變)

    // 產生 GetObject 的指令
    const command = new GetObjectCommand({
        Bucket: BUCKET_NAME, // 使用環境變數的值
        Key: fileKey,        // 使用結合路徑後的 Key
    });

    try {
        // 產生 Presigned URL,設定 300 秒 (5 分鐘) 有效
        const presignedUrl = await getSignedUrl(s3Client, command, {
            expiresIn: 300,
        });

        return {
            statusCode: 200,
            headers: {
                "Content-Type": "application/json"
            },
            body: JSON.stringify({
                downloadUrl: presignedUrl,
                expiresIn: 300,
                file: fileKey
            }),
        };
    } catch (err) {
        console.error("S3 Error:", err);
        return {
            statusCode: 500,
            body: JSON.stringify({ message: "Failed to generate download link." }),
        };
    }
};
新增環境變數。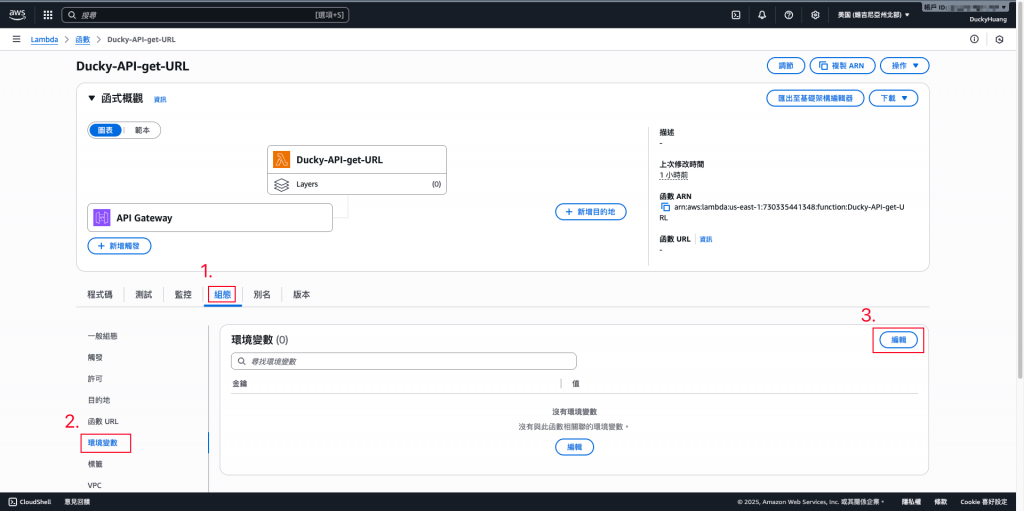
設定以下環境變數:
DOWNLOAD_BUCKET:2025ithome-ducky
FILE_PREFIX_PATH:ducky-test/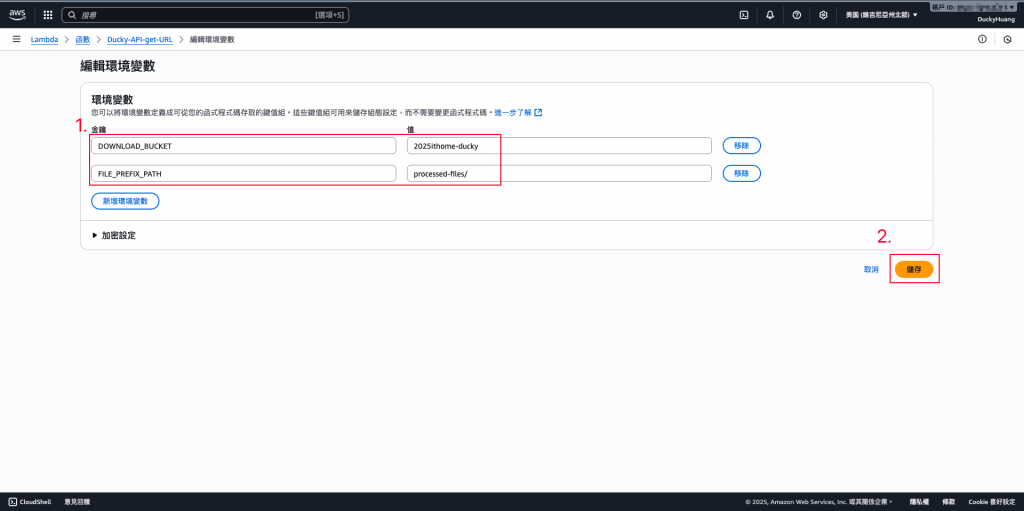
完成畫面。
進入「IAM」頁面。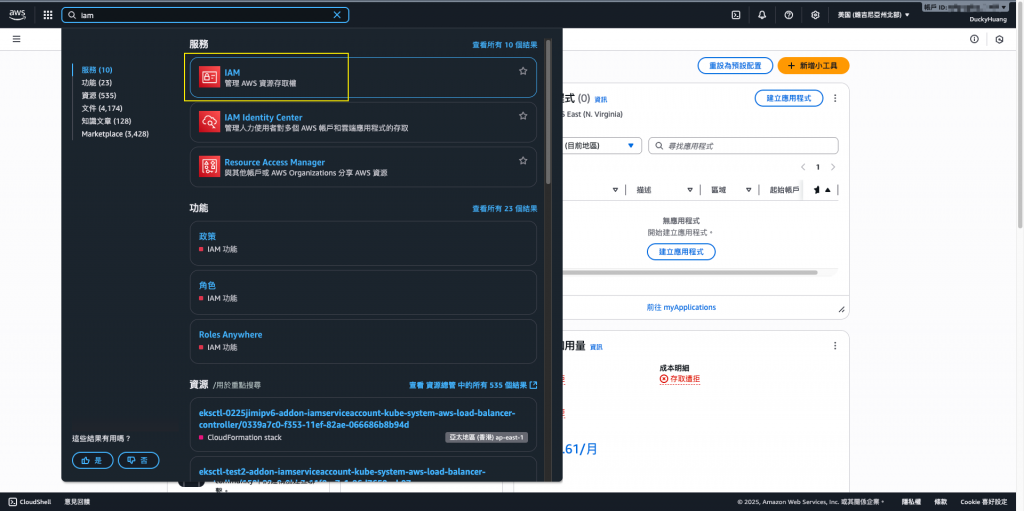
進入IAM role的頁面,點選該Lambda自動創建的IAM role。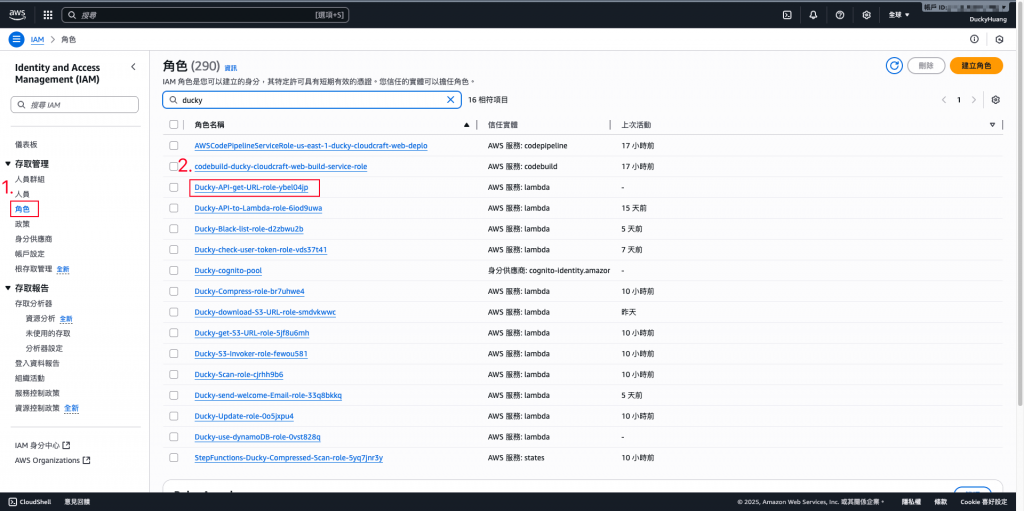
新增「許可政策」。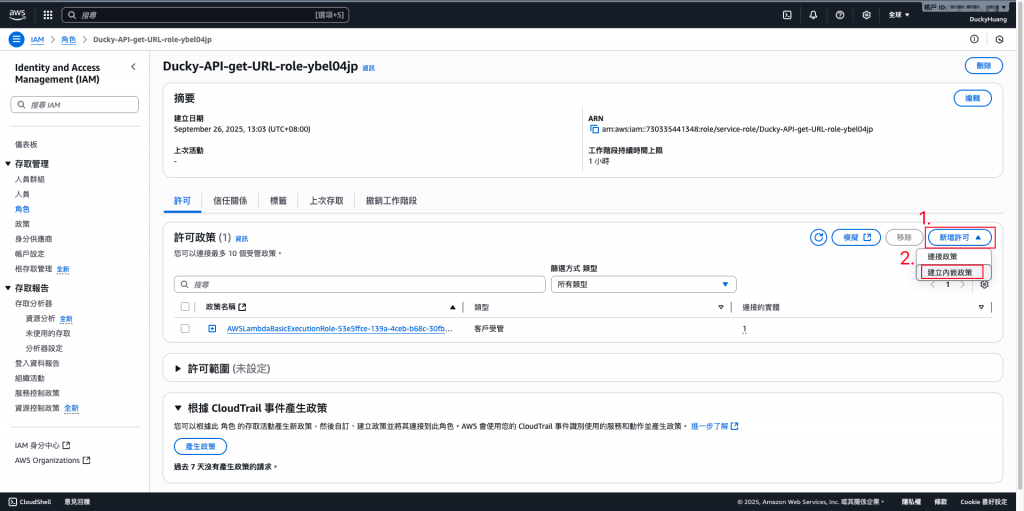
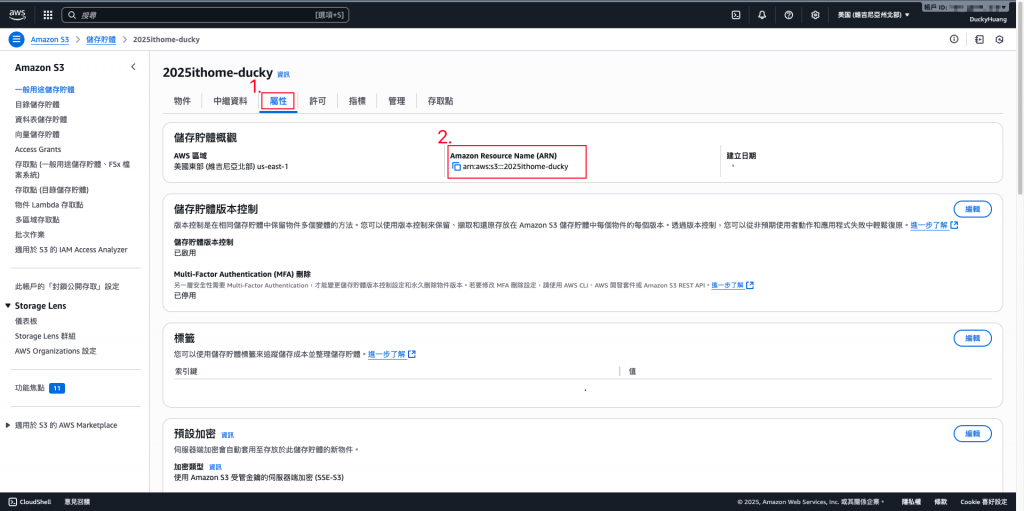
增加S3的「GetObject」權限,指定授權的資源ARN。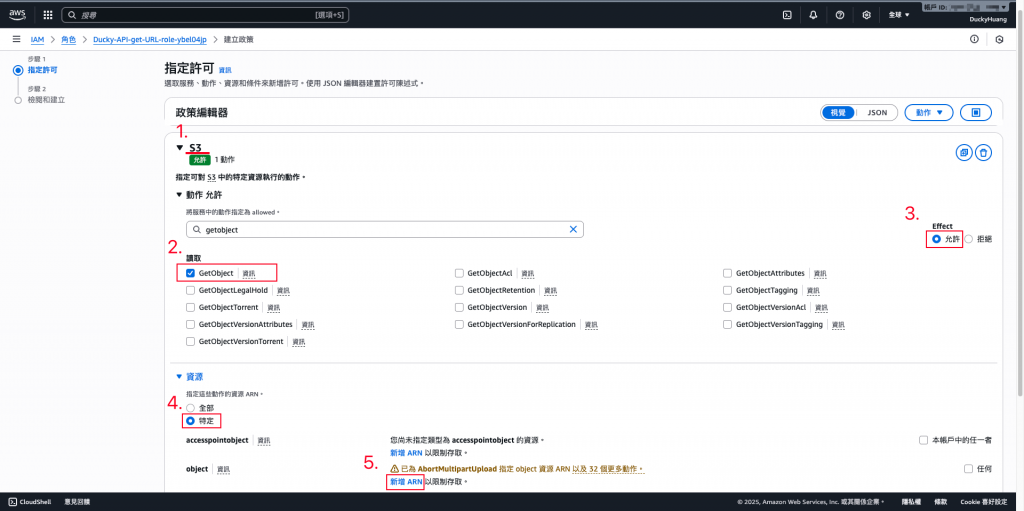
設定「許可政策」名稱。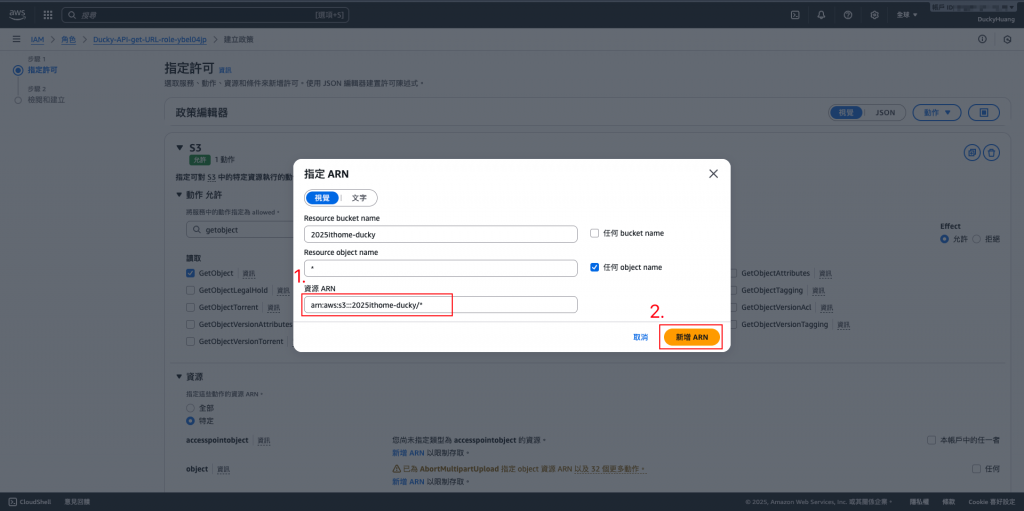
點選下一步。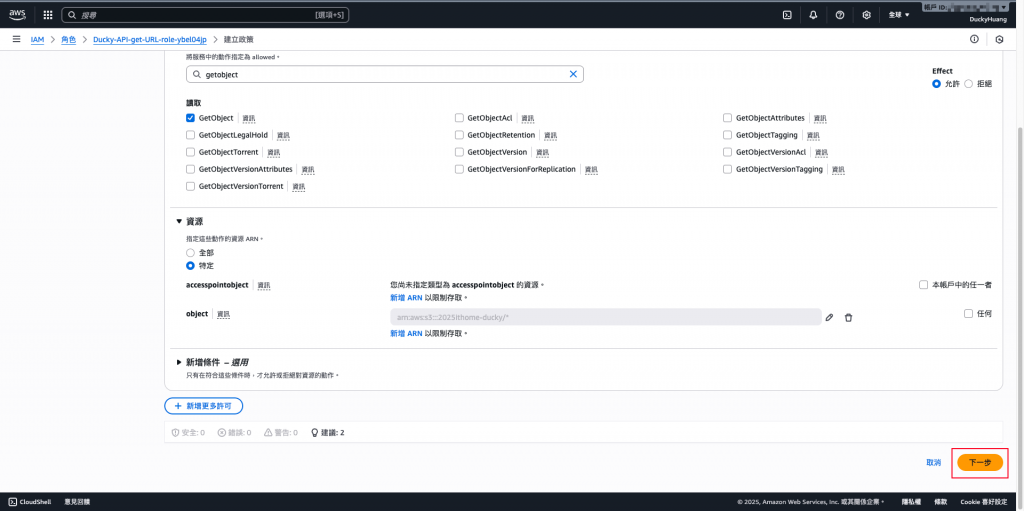
設定「許可政策」名稱。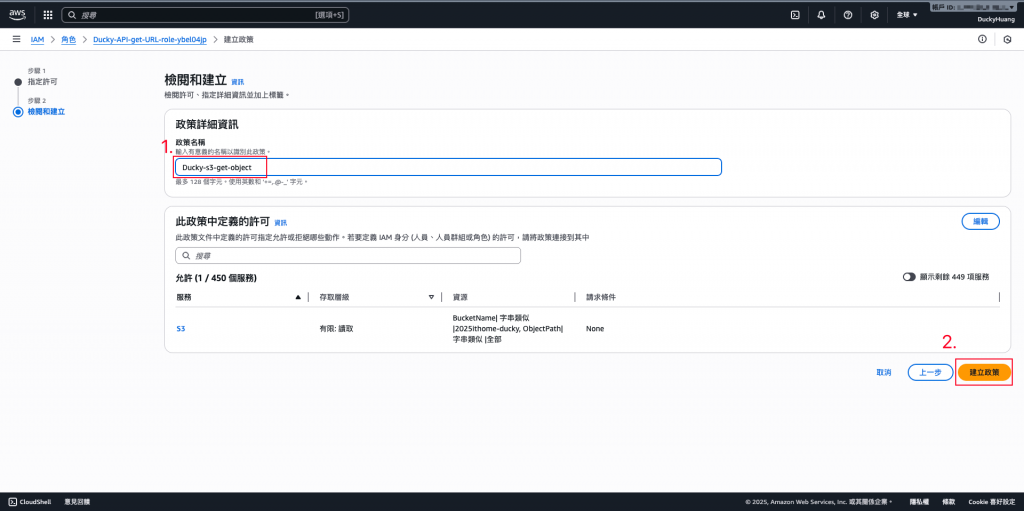
完成畫面。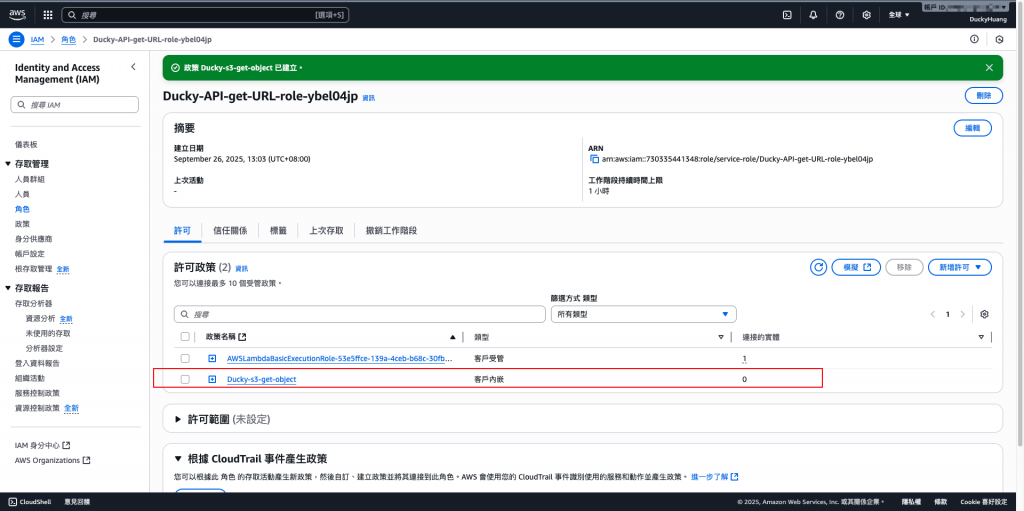
進入「API Gateway」服務頁面。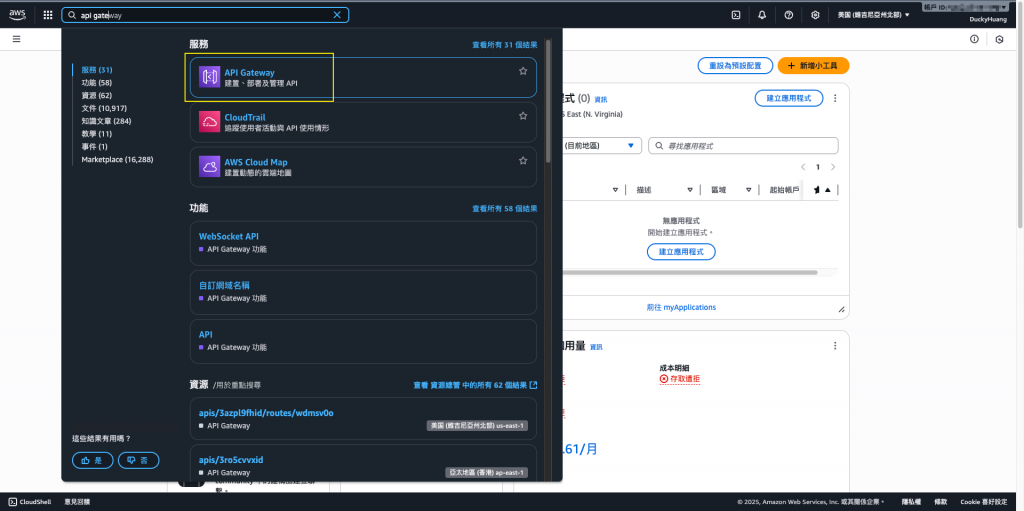
進入已創建的HTTP API Gateway。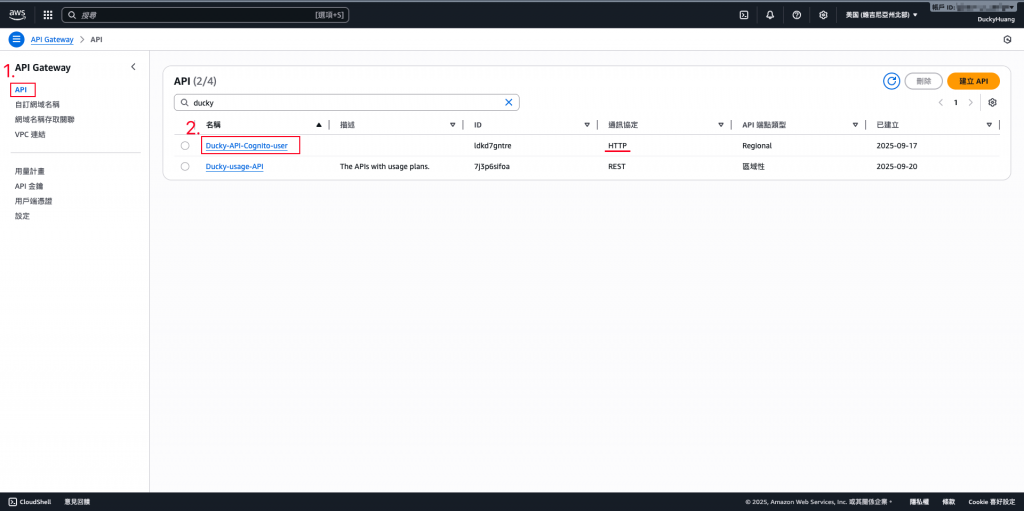
創建一個新的路由路徑。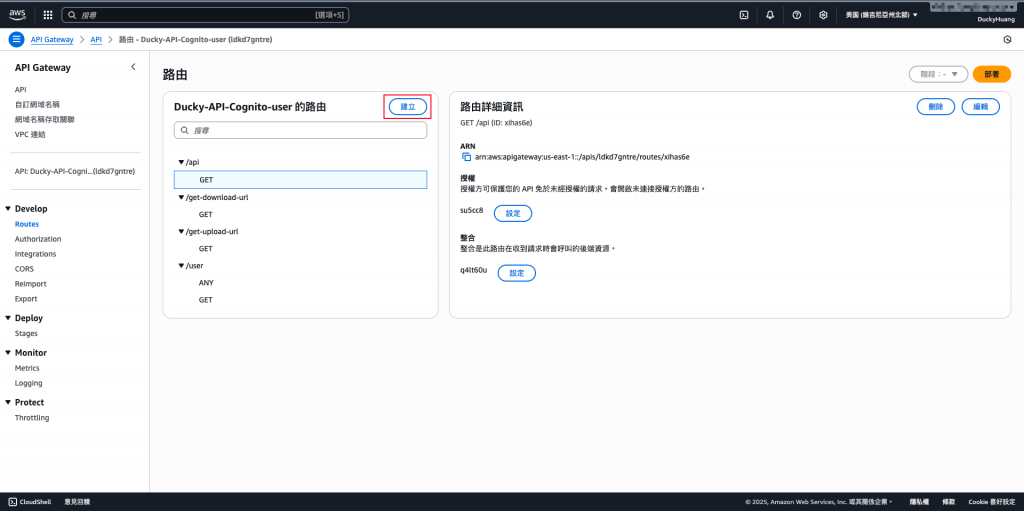
選用「GET」方式,並設定路徑。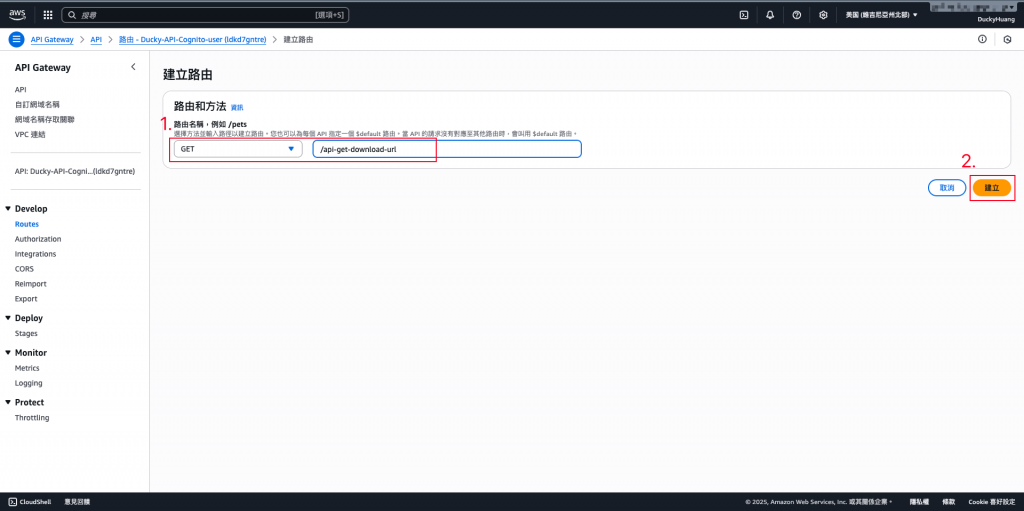
設定身份驗證。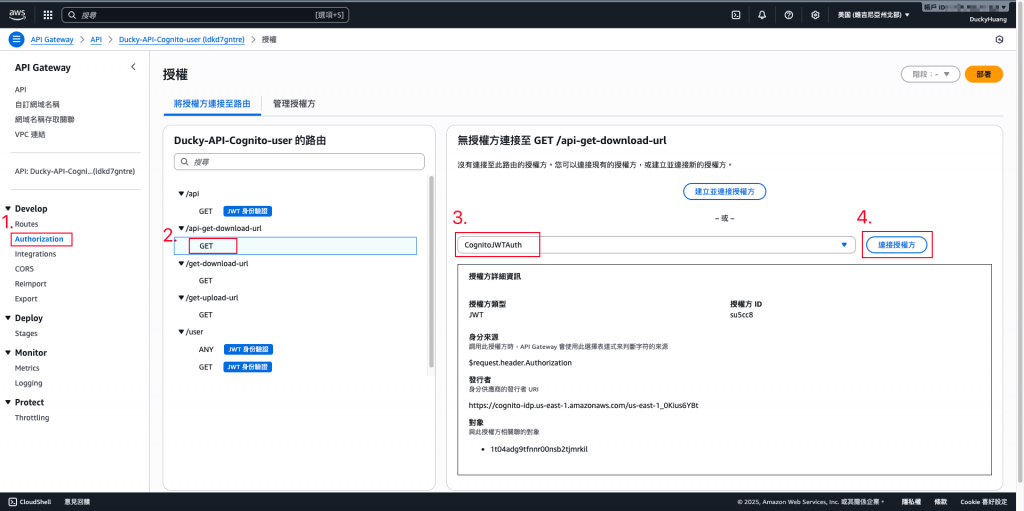
整合Lambda函數。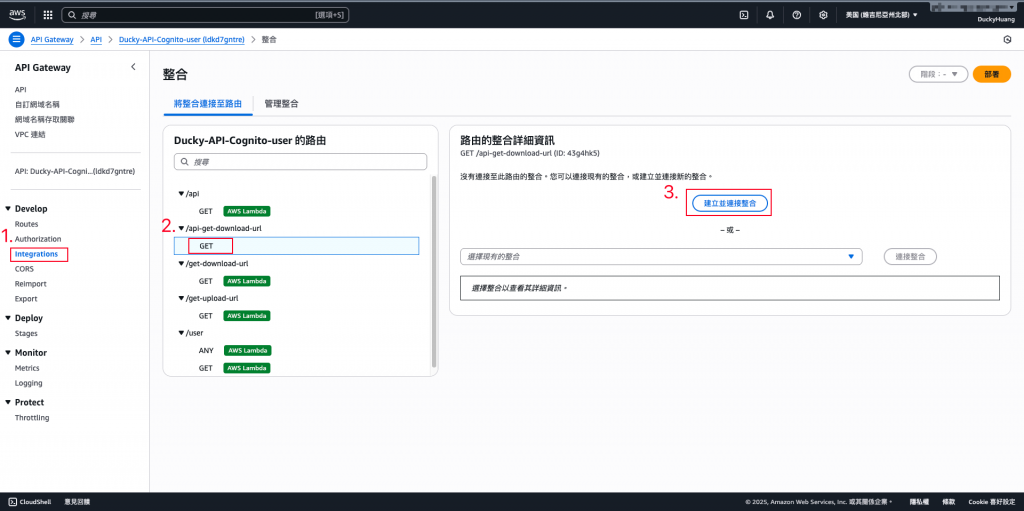
選擇剛剛創建的Lambda函數,並整合。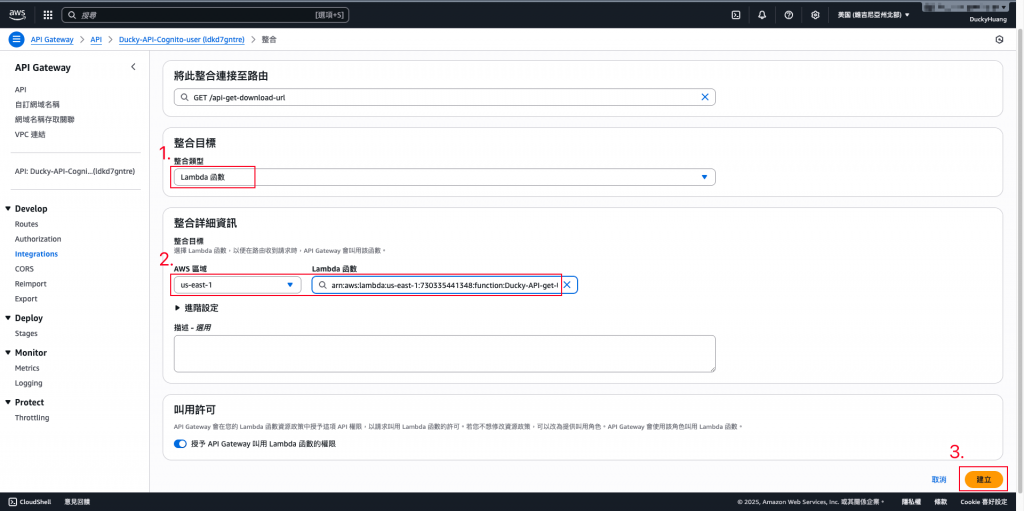
完成畫面。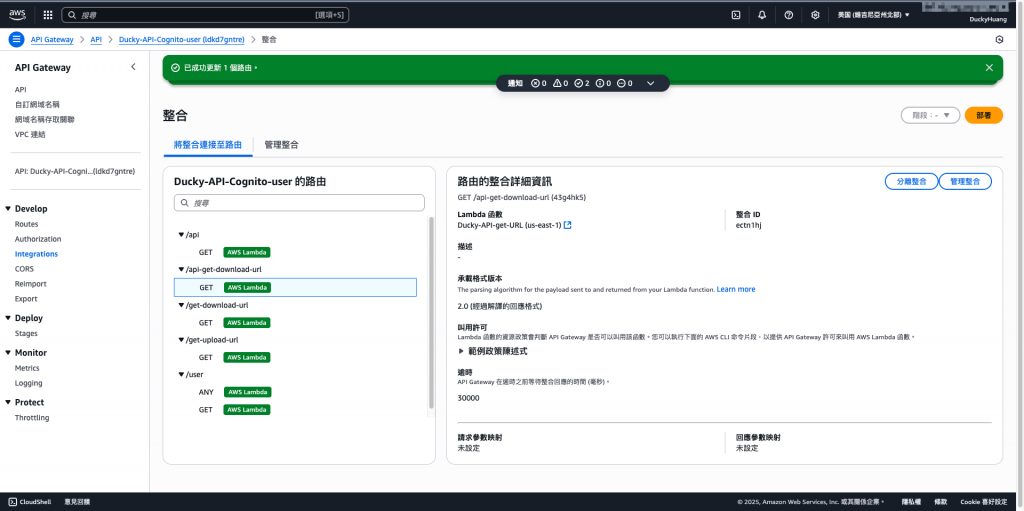
session。第一段
aws cognito-idp initiate-auth \
  --auth-flow USER_PASSWORD_AUTH \
  --client-id <Cognito_APP_CLIENT_ID> \
  --auth-parameters USERNAME=<username>,PASSWORD=<password>
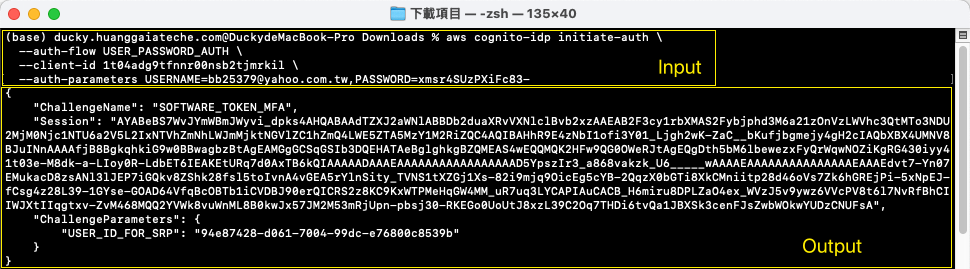
session向Cognito拿到對應的 IdToken 或 AccessToken。第二段
aws cognito-idp respond-to-auth-challenge \
  --client-id <Cognito_APP_CLIENT_ID> \
  --challenge-name SOFTWARE_TOKEN_MFA \
  --session <上一步回傳的Session> \
  --challenge-responses USERNAME=<username>,SOFTWARE_TOKEN_MFA_CODE=<六位數驗證碼>

第三段
# 假設您的 API Gateway 資源路徑是 /api-get-download-url
# 檔案名稱要比照S3上的名稱
curl -X GET -H "Authorization: Bearer YOUR_TOKEN" \
"https://ldkd7gntre.execute-api.us-east-1.amazonaws.com/prod/api-get-download-url?file=report.pdf"
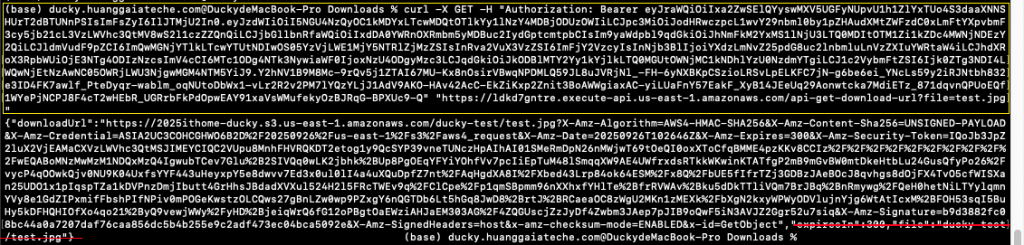
【補充】如果不帶Access Token,那將因「授權」被拒絕。
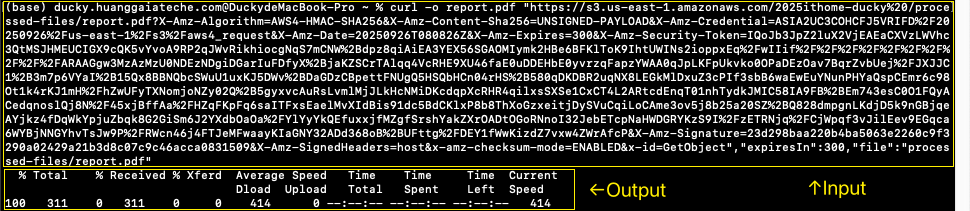
第四段
# 範例:使用 -o 參數將檔案下載並存為指定檔名 「test.jpg」
curl -o test.jpg "YOUR_DOWNLOAD_URL_HERE"

範例格式
# 範例:使用 -o 參數將檔案下載並存為 report.pdf
curl -o report.pdf "YOUR_DOWNLOAD_URL_HERE"


本篇實作了 檔案分享安全機制,結合 S3、Lambda、API Gateway 與 Cognito,讓系統可以安全地產生「限時連結」,並確保只有合法會員才能存取。此做法大幅降低了檔案外流風險,也同時兼顧了使用者體驗與企業等級安全性。

