
上一篇文章理解了 RAG 的基本概念後,接下來我們將以字幕檔實作 AI 課程問答這個題目,來深入理解整個 RAG 的流程與細節。
然後我們這篇文章主要先以最基本的Native RAG來進行實作。
我以陳縕儂教授的這部 Youtube 影片來當我們的範例,來實作 :
https://www.youtube.com/watch?v=5_AXlDHHrmM&t=5s
和 AI 工具人討論這堂課程的內容
備註: 陳縕儂教授的很多部影片很棒棒,讓我學到不少東西。
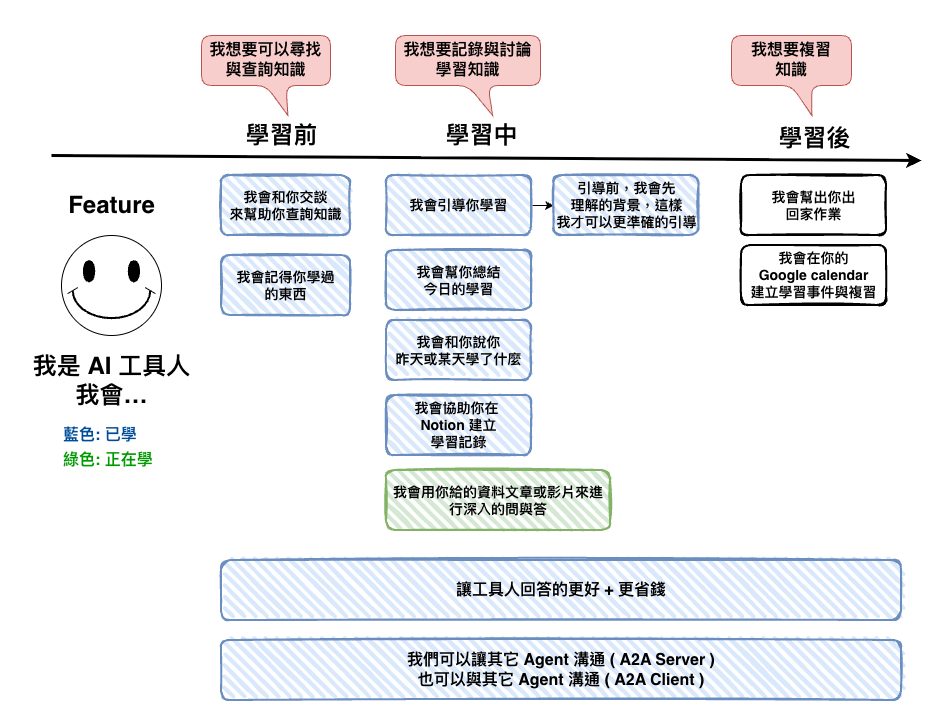
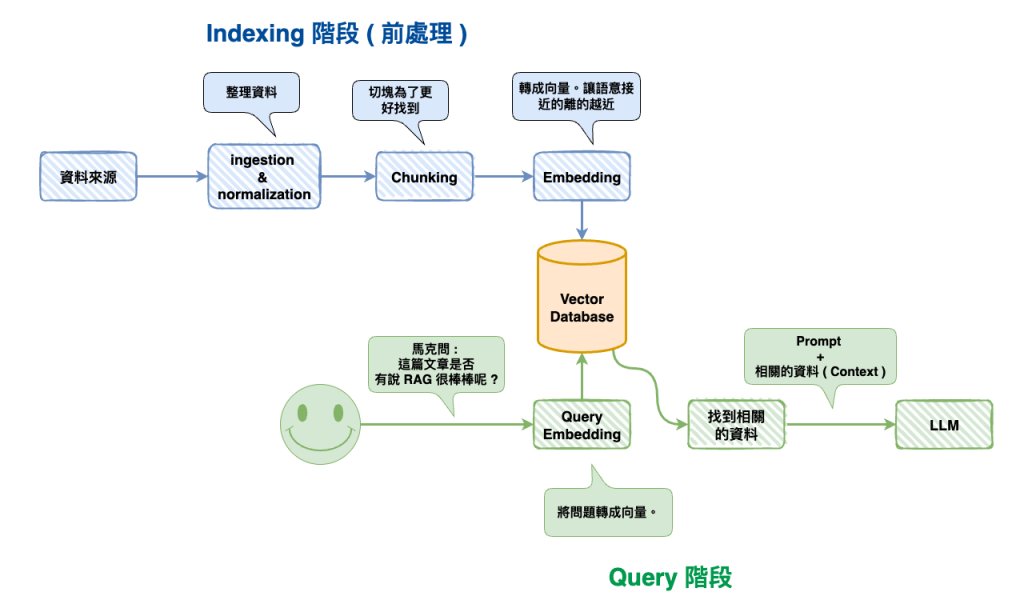
然後接來的整個流程就是昨天的這張圖,然後我們這裡會以 MongoDB Atlas 來當我們的 Vector Database。
正常來說要對影片下手通常第一優先一定是字幕檔,不會用影片,因為太大了,麻煩又或錢。
首先這個是我們的字幕檔的部份資料,然後現網路上很多地方可以直接傳 youtube 就可以取得到他的字幕檔,然後通常就是 vtt、srt 等,然後我們這個是 srt 檔,大概長的如下。
1
00:00:00,000 --> 00:00:02,000
好,各位同學大家好

2
00:00:02,000 --> 00:00:04,000
我們今天呢

3
00:00:04,000 --> 00:00:06,000
要講的是

4
00:00:06,000 --> 00:00:08,000
RAG就是

5
00:00:08,000 --> 00:00:10,000
Retrieval Augmented Generation
我們這個部份主要有三段處理 :
🤔 1. 文字正規化( Normalization )
這裡就是要正規化文字,主要就是如下 :
🤔 2. 合併片段 ( Chunking )
這裡主要處理的是語意斷裂的問題,例如你看我們第 2、3 段的『 我們今天呢 』與『 要講的是 』這兩段,它是不是合在一起,我們反而比較知道它的語意呢 ?
1
00:00:00,000 --> 00:00:02,000
好,各位同學大家好

2
00:00:02,000 --> 00:00:04,000
我們今天呢

3
00:00:04,000 --> 00:00:06,000
要講的是
正常情況下,有以下兩種方法來處理這一塊 :
然後等一下你看 code 時會有以下的參數,他們的解釋如下。
然後白話文就是,如果字幕片段太短 (少於 3 秒或 8 字)、或跟下一句幾乎連在一起(間隔不到 1 秒),就合併起來變成一段完整的話,目標抓 8-12 秒,最多不超過 20 秒。
這個在不使用 AI 的情況下,應該還算是個可以堪用的處理手法,我從 AI 這學到的。
備註: Chunking 事實上還有下面這些策略選擇,但這裡就先以簡單的版本
🤔 3. 結構化成 Json 為了好擴展
這個可以有助於幫助我們進行後面的處理,並且也比較好儲放到資料庫中。
🤔 這一部份的整段程式碼
import fs from "fs";

interface SRTSegment {
  index: number;
  startMs: number;
  endMs: number;
  durationMs: number;
  text: string;
}

interface ProcessedChunk {
  chunkId: string;
  startMs: number;
  endMs: number;
  durationMs: number;
  textRaw: string;
  textClean: string;
  lang: string;
}

class SRTProcessor {
  /**
   * 解析時間碼轉毫秒
   * "00:00:02,000" -> 2000
   */
  private static parseTimestamp(timestamp: string): number {
    const [time, ms] = timestamp.split(",");
    const [hours, minutes, seconds] = time.split(":").map(Number);
    return hours * 3600000 + minutes * 60000 + seconds * 1000 + Number(ms);
  }

  /**
   * 文字正規化 - 統一轉半型
   */
  private static normalizeText(text: string): string {
    return (
      text
        // 只 replace 需要轉換的字元 (更高效)
        .replace(/[!-~、 ]|[,。!?;:「」『』()【】《》]/g, (char) => {
          const code = char.charCodeAt(0);

          // 全型 ASCII (FF01-FF5E) 轉半型
          if (code >= 0xff01 && code <= 0xff5e) {
            return String.fromCharCode(code - 0xfee0);
          }

          // 有些字元不在 0xFF01-0xFF5E 範圍內! 需要手動轉換
          const map: Record<string, string> = {
            ",": ",",
            "。": ".",
            "!": "!",
            "?": "?",
            ";": ";",
            ":": ":",
            "「": '"',
            "」": '"',
            "『": "'",
            "』": "'",
            "(": "(",
            ")": ")",
            "【": "[",
            "】": "]",
            "《": "<",
            "》": ">",
            "、": ",",
            " ": " ",
          };

          return map[char] || char;
        })
        .replace(/\s+/g, "")
        .trim()
    );
  }

  /**
   * 備註: 這個可以不用有,但我想儲放一下
   * 估算 token 數(粗略:中文字數 + 英文單詞數)
   */
  private static estimateTokens(text: string): number {
    const chineseChars = (text.match(/[\u4e00-\u9fa5]/g) || []).length;
    const englishWords = (text.match(/[a-zA-Z]+/g) || []).length;
    return chineseChars + englishWords;
  }

  /**
   * 解析 SRT 文件
   */
  static parseSRT(srtContent: string): SRTSegment[] {
    const segments: SRTSegment[] = [];
    const blocks = srtContent.trim().split(/\n\s*\n/);

    for (const block of blocks) {
      const lines = block.trim().split("\n");
      if (lines.length < 3) continue;

      const index = parseInt(lines[0]);
      const [startStr, endStr] = lines[1].split(" --> ");
      const text = lines.slice(2).join("\n");

      const startMs = this.parseTimestamp(startStr);
      const endMs = this.parseTimestamp(endStr);

      segments.push({
        index,
        startMs,
        endMs,
        durationMs: endMs - startMs,
        text
      });
    }

    return segments;
  }

  /**
   * 合併片段
   */
  static mergeSegments(
    segments: SRTSegment[],
    options: {
      minDuration?: number; // 最小片段時長 (ms)
      minChars?: number; // 最小字數
      maxGap?: number; // 最大間隔 (ms)
      targetDuration?: number; // 目標時長 (ms)
      maxDuration?: number; // 最大時長 (ms)
    } = {}
  ): SRTSegment[] {
    const {
      minDuration = 3000,
      minChars = 8,
      maxGap = 700,
      targetDuration = 8500,
      maxDuration = 20000,
    } = options;

    const merged: SRTSegment[] = [];
    let current: SRTSegment | null = null;

    for (let i = 0; i < segments.length; i++) {
      const segment = segments[i];
      const nextSegment = segments[i + 1];

      if (!current) {
        current = { ...segment };
        continue;
      }

      // 計算間隔
      const gap = segment.startMs - current.endMs;
      const currentChars = current.text.length;
      const wouldBeDuration = segment.endMs - current.startMs;

      // 判斷是否應該合併
      const shouldMerge =
        (current.durationMs < minDuration ||
          currentChars < minChars ||
          gap <= maxGap) &&
        wouldBeDuration <= maxDuration;

      if (shouldMerge) {
        // 合併
        current.text += "\n" + segment.text;
        current.endMs = segment.endMs;
        current.durationMs = current.endMs - current.startMs;
      } else {
        // 儲存當前,開始新的
        merged.push(current);
        current = { ...segment };
      }

      // 如果已達目標時長且不是最後一段,考慮結束合併
      if (current.durationMs >= targetDuration && nextSegment) {
        const nextGap = nextSegment.startMs - current.endMs;
        if (nextGap > maxGap) {
          merged.push(current);
          current = null;
        }
      }
    }

    // 加入最後一段
    if (current) {
      merged.push(current);
    }

    return merged;
  }

  /**
   * 清理合併後的文本
   */
  private static cleanMergedText(text: string): string {
    return text
      .split("\n")
      .map((line) => line.trim())
      .filter((line) => line.length > 0)
      .join("、")
      .replace(/([^。!?])$/, "$1。"); // 句末補句號
  }

  /**
   * 完整處理流程
   */
  static process(
    srtContent: string,
    sectionPath?: string
  ): ProcessedChunk[] {
    // 1. 解析 SRT
    const segments = this.parseSRT(srtContent);

    // 2. 合併
    const merged = this.mergeSegments(segments);

    // 3. 生成最終結果
    return merged.map((segment, index) => {
      const textRaw = segment.text;
      const textClean = this.cleanMergedText(
        this.normalizeText(textRaw)
      );

      return {
        chunkId: `utt-${String(index + 1).padStart(4, "0")}`,
        startMs: segment.startMs,
        endMs: segment.endMs,
        durationMs: segment.durationMs,
        textRaw,
        textClean,
        lang: "zh"
      };
    });
  }
}

const srtContent = fs.readFileSync("./test.srt", "utf-8");
const processedChunks = SRTProcessor.process(srtContent, "30-21");
console.log(processedChunks);
🤔 1. 建立 mongodb atlas vector search idnex
https://www.mongodb.com/zh-cn/docs/atlas/atlas-vector-search/vector-search-type/#how-to-index-fields-for-vector-search
這個地方我主要是去 atlas ui 直接建立,它也可以寫程式碼,然後主要填寫欄位如下,其中重點是以下兩個欄位 :
{
  "fields": [
    {
      "type": "vector",
      "path": "embedding",
      "numDimensions": 1536,
      "similarity": "cosine|dotProduct|euclidean"
    }
  ]
}
🤔 2, 存進向量資料庫
我們這裡會使用 OpenAI 的 text-embedding-3-small 來當我們 embedding 模型,因為雖然不算是繁體中文最好,但應該是 CP 值比較平衡的。
然後這裡我們用 MongoDB Atlas 來當向量資料庫,主要的原因還是在於公司吧,我自已是還沒認真的和其它向量資料庫來比,但目前看起來評價與用起來還不錯,而且主要公司也有在用,所以才拿他來說說。
順到說一下,現在技術選型我事實上也蠻看重現有公司的技術體系,不太因為某個技術非常棒棒,就決定轉過去,因為還是要考慮維護與團隊的平衡,你自已想想每個資料庫都有自已的特色,如果真的用這個特色來決定用他,那會不會你做了 5 個需求,結果公司就用了 5 套資料庫呢 ? 大公司有專業的 SRE 就算了,小公司最後只會讓維護的人罵你髒話。
const client = new MongoClient(MONGODB_URI);
const collection = client.db(DATABASE_NAME).collection(COLLECTION_NAME);
const embeddings = new OpenAIEmbeddings({
  modelName: "text-embedding-3-small",
});
const vectorStore = new MongoDBAtlasVectorSearch(embeddings, {
  collection,
  indexName: VECTOR_INDEX_NAME,
  textKey: "text",
  embeddingKey: "embedding",
});

const indexing = async () => {
  const srtContent = fs.readFileSync("./test.srt", "utf-8");
  const processedChunks = SRTProcessor.process(srtContent, "30-21");
  for (const chunk of processedChunks) {
    await vectorStore.addDocuments([
      {
        pageContent: item.text_clean,
        metadata: item,
      },
    ]);
  }
};
好了以後應該會看到結果如下 :

我們以 hallucination 是什麼?來當情境來看看答案。
await query('hallucination 是什麼?');

const query = async (message: string) => {
  const retriever = vectorStore.asRetriever({
    k: 5,
  });
  const contexts = await retriever.invoke(message);

  const model = new ChatOpenAI({
    modelName: "gpt-5-mini",
  });
  const result = await model.invoke([
    {
      role: "system",
      content: `
        # Context: ${contexts
          .map((context) => {
            return JSON.stringify({
              content: context.pageContent,
              startAt: context.metadata.start_ms,
              endAt: context.metadata.end_ms,
            });
          })
          .join("\n")}

        # Additional & Limit:
            - 你只能根據 Context 回答相關的問題,並且說明答案的來源時間範圍
            - 時間範圍格式為 "MM:SS~MM:SS"
            - 限制在 100 個字以內
        `,
    },
    { role: "user", content: message },
  ]);

  console.log(result);
};
結果如下,然後我回去看了影片的位置的確是正確沒錯的。
AIMessage {
  "id": "chatcmpl-CNJmptJk0FdVTepLu7mK9GMyFBUX2",
  "content": "hallucination 是模型憑空編造或誇大事實的錯誤回答,例如虛構自己從 Stanford 畢業。來源:02:20~02:40",
  "additional_kwargs": {},
  "response_metadata": {
    "tokenUsage": {
      "promptTokens": 550,
      "completionTokens": 818,
      "totalTokens": 1368
    },
    "finish_reason": "stop",
    "model_name": "gpt-5-mini-2025-08-07"
  },
  "tool_calls": [],
  "invalid_tool_calls": [],
  "usage_metadata": {
    "output_tokens": 818,
    "input_tokens": 550,
    "total_tokens": 1368,
    "input_token_details": {
      "audio": 0,
      "cache_read": 0
    },
    "output_token_details": {
      "audio": 0,
      "reasoning": 768
    }
  }
}
這篇文章中我們實作了根據字幕來進行問與答的功能開發,但事實上最後的結果事實上有點主觀,我們也不能用這個一次的嘗試就說這個 RAG 很棒棒,之後會有篇文章來研究研究『 評估 』這一塊的東西。
然後接下來我們將要來研究Advanced RAG。
